Recall for a moment what our kitchen looked like just a couple weeks ago. We loved that dark teal with the glossy swirls for a handful of years, but it was just time for a change.

I laid out some more details about why we painted the walls white in this post, and it really brightened up the room sooooo much.

To be honest, when I painted the walls white, I wasn’t sure what the *#^& I was gonna do next. I really just wanted a blank slate to make decisions without the distraction of the dark teal.
- Paint the walls a different (lighter) color?
- Leave the walls and paint the cabinets?
- Paint both?
- Strip the cabinets down to the wood (NEVER) …(EVER) … (IN A MILLION YEARS would I take the time to strip kitchen cabinets) (so this was a hypothetical bullet point)
I usually don’t have a plan… I just go one step at a time, and make decisions as I go. I’ve said it before, and I’ll say it again: I WOULD MAKE A TERRIBLE INTERIOR DESIGNER.
But one thing I did know… I wanted the cabinets to extend up to the ceiling. You might remember awhile back I scribbled out a little sketch of what I wanted my ‘someday kitchen’ to look like.

If you take only ONE THING away from the entirety of my story/blog, let it be that someday isn’t EV-VER going to happen unless you make someday today. That’s my little motivational message for the day.
As you know I added a breakfast bar to the island, built two mudroom benches (one built-in and one on casters) and cubbies, That sort of leaves the cabinets. No?

Friends, let me just take this opportunity to proclaim that I MARRIED THE MOST WONDERFUL MAN. Not only is he capable/knowledgeable/skilled enough to do pretty much anything… he’s also willing. (even though he JUST built the cabinets in our ‘Laundry Suite‘ and more cabinets for the woodshop)

He’s also an amazing teacher… not that I can take credit for any of this genius.
")

While he was busy building custom cabinet doors, I removed all the existing doors, drawer faces, and hardware. Scrubbed them with warm soapy water, sanded them, and laid them out for painting. (take note of the blatantly obvious reason we will never have open shelving)

Are you ready to talk about paint color? You’re gonna hafta just stay with me on this one.

This is called ‘Lively Yellow; by Sherwin Williams. But it has a greenish tint to it… I would describe it as a mellow chartreuse. Don’t freak out yet!

I like that it’s a little bit obnoxious, and a lot AWESOME.

Depending on your computer monitor, this may be showing up just plain yellow. But in real life, it has a yellow/green tint… like a pale chartreuse.
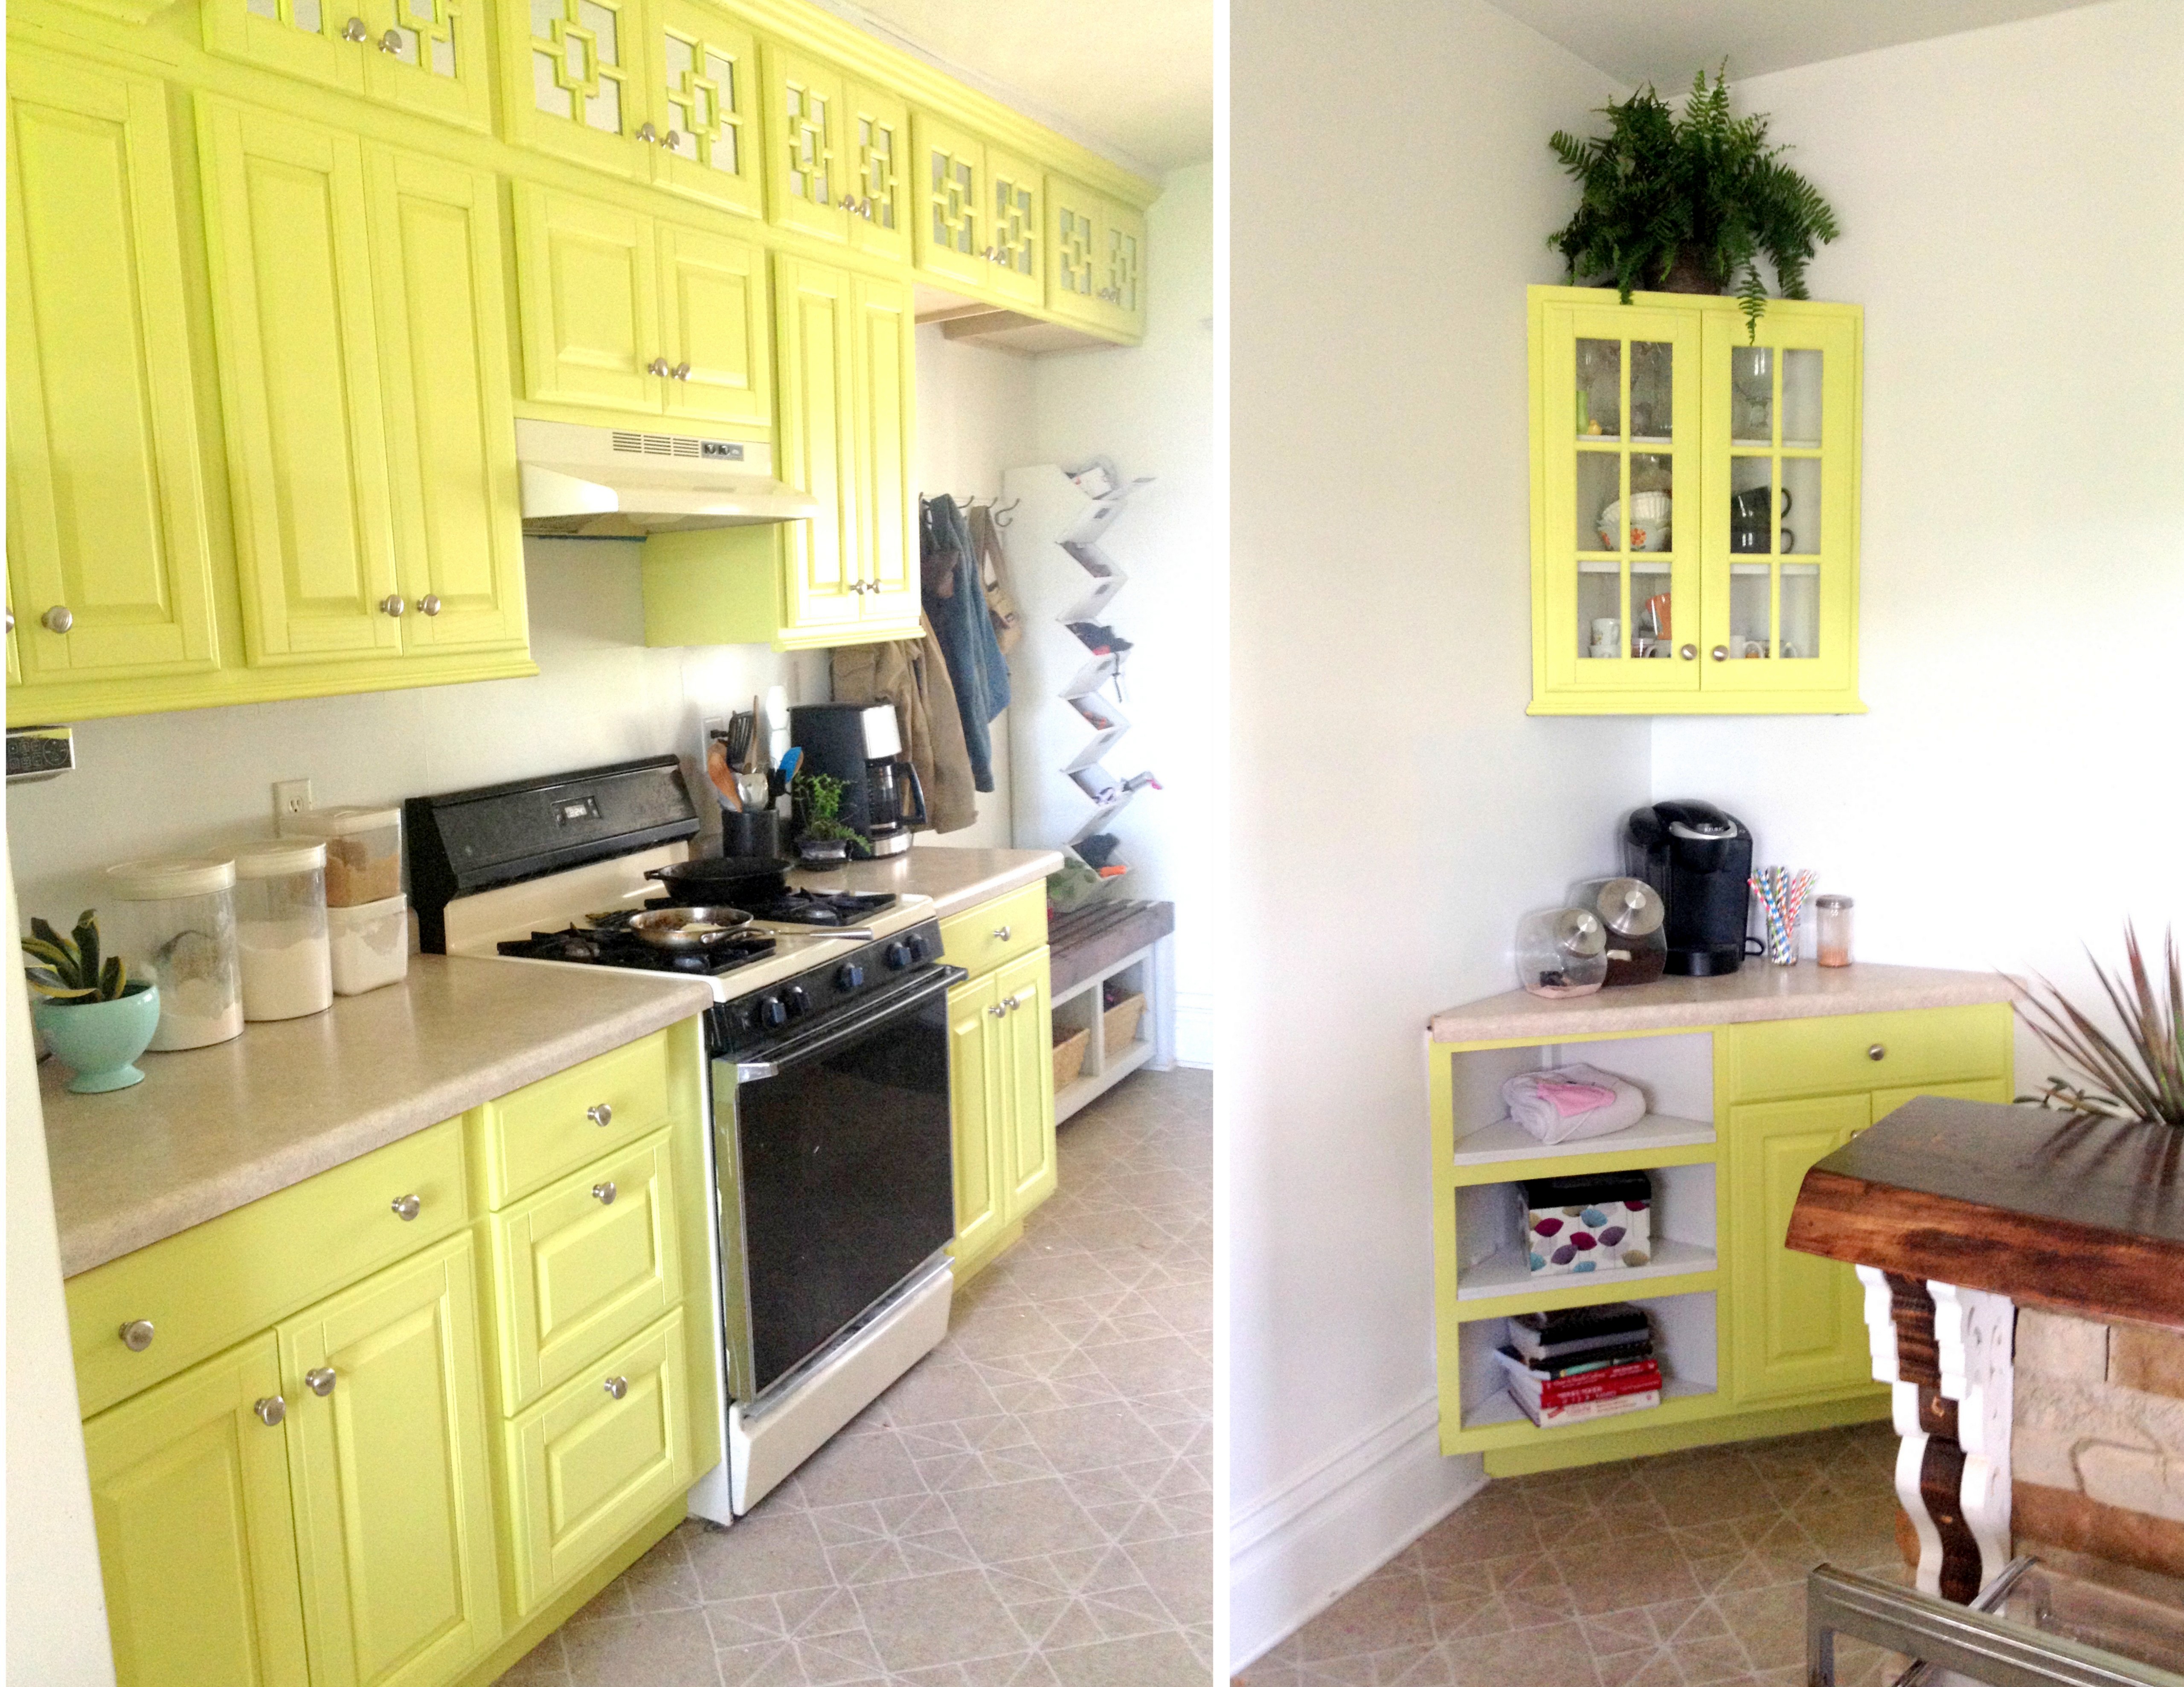
With the walls being white and the cabinets being bright… the whole room feels so light and happy. And the mirrors behind those top cabinet doors make the room feel bigger and reflect light too.

We’re in the process of saving our pennies for new appliances. Ain’t nobody got a few grand lying around. My ‘new’ cabinets are making want the new ones ASAP! Can you picture new stainless appliances in place of the off-white/black ones?
The funny thing is that this whole kitchen re-transformation started that day when I impulsively took a reciprocating saw to the island to give it a breakfast bar. Sometimes you just need to make a decision to be fearless and start somewhere!

Related:
-

We've been needing to update our coffee table situation in the living room for awhile…
-

I have a fun and easy building project for you! And while I do end…
-

Making a cutting board almost seems like a right of passage into the world of…
I’m about to grill you about your cabinets. 🙂 I’m going to attempt to build my own. My plan is also a routered shaker cabinet door, with a few of the doors with glass with colonial grids.
1. How did you adhere the inside trim pieces to the cabinet doors?
2. Is that hickory? And did the contrast between the hickory and the oak cabinets stand out when both were painted?
3. Did you inlay the mirrors or are they secured on the back?
4.. Do you know what the cost came to for each cabinet?
Could you tell me how much space you had from the top of your old cabinets to the ceiling?
Ours were about 14″ from the ceiling before we extended the cabinets. 🙂 Is that what you’re asking?
So I LOVE the cabinets and the color. So bold. So modern. Totally my style. What are your thoughts on the island? I almost think you could do something more modern or bold! For some reason I think black and white stripes. Interested to hear your long term idea?
Hehe thanks Sarah! I knew it would be a ‘controversial’ color… but I loved it, and it’s my kitchen RIGHT?! 🙂 I didn’t want it to look like every other kitchen.
Oh man, those are cool!
I love that this is so you, and Nick! Still following you even after everything.
Awww Becky! I miss you!
I love the cabinets! I’m interested to see what you do with the back-splash to possibly tie the chartreuse and stone from the island together. I’m sure it will be brilliant. Sounds like you have a plan for your pendant lighting, but check out what Macy did to create pendant lights here: http://minimotives.com/2013/08/07/pendant-lights-the-making-of/ Just a fun idea. Look forward to seeing it all come together.
You are such an inspiration! Your husband does wonderful woodwork. I love it! Thank you for sharing Beth & Nick!
The yellow looks fab with the stone on my monitor! The new color and the cabinet extensions took your kitchen straight into home decor magazine territory. Those mirrored doors with the handmade overlays are incredible. You two are so talented.
You’re super sweet Karen! Thank you! He’s got skillz, huh?!
I l-o-v-e the color of the cabinets, reminds me of Spain <3 Now I want a yellow kitchen too.
What I like best is that you’ve done something totally unique and not just copied the trends on Pinterest. I sometimes worry about what others will think of something in my home and then chastise myself for caring! Kudos to you for doing what YOU like and being different! (And not that it should matter, but I love the color.)
That colour is amazing! You always make such brave choices with colour and this looks beautiful!
I love this. I don’t think I would have picked that color for my kitchen but it looks great in yours.
I don’t think the chartreuse goes with the faux stone you have on the island; you have modern, bright cabinets paired with a warm, rustic island. The actual DIY you guys did looks well done, but I cannot get behind you on the paint color (if you have to give a disclaimer that it doesn’t look that bad, I’m not sure if you’re entirely on board either).
Hehe! That’s ok Elizabeth… to each their own! If you read my blog, you know my design decisions a pretty eclectic and off the wall. and I wouldn’t have it any other way. I said what I did because I knew it wouldn’t be everyone’s cup’o’tea, and I’m ok with that! I’m glad you could appreciate the craftsmanship that went into the cabinets even if you don’t love the color. 🙂
I’m not a fan of the color either, kinda of scares me. Lol. But I love that you are brave and total jealous your husband is so handy (and you too).
Can’t say I’m a fan of the color but everything else rocks!
You truly hit the jack pot when you won Nick, cha ching! However, you know what they say…behind every great man is an even greater woman. You two make an amazing team. Love the new cabinets and your selection of color. Vikki in VA
Thanks Vickki! I’m definitely keeping him! 😉
love!
Love it. It’s not boring and like 95% of all kitchens!
LOVE the bright color!
I love the cabinets!
My preference would be white, but I am afraid of color 😉
Love this!!!!