Mondayyyyyy!
Wait don’t leave! I’m only so chipper because I’ve had many MANY cups of coffee already. Cypress thinks it’s super fun to get a jumpstart on each day by ‘rising’ bright and early (AKA 4:30am… give or take 5 seconds). It’s not a huge deal because Nick and I are early risers anyway, but 4:30 is pushing it, dear friends.
But! The good news is that I have a fun new project that I finally finished and photographed. Oh yes that’s right… just because a project is ‘finished’ doesn’t mean that it can be posted for the world. It’ needs to be PHOTOGRAPHED. And in this case it meant cleaning the entire kitchen.

This post contains affiliate links.
I promised a couple months ago that I had devious plans to upgrade our pendant lights in the kitchen, and I’m fiiiinally able to deliver!
Here’s the story:
So we had these plain glass pendant lights (similar to these) above the island / breakfast bar. There’s nothing wrong with them, but they weren’t making a statement by any means.

I know what you’re thinking: ‘DOWN GIRL…YOUR CHARTREUSE CABINETS ARE STATEMENT ENOUGH!’
But I just wanted to find a way to bulk them up a bit and give them a little substance. I had an idea in my head and ordered a bunch of Oval 5×9” Embroidery Hoops to play with.

I had originally planned to find a way to affix the embroidery hoops horizontally staggered around the perimeter of the glass of the pendant, but I ended up scratching that idea because I didn’t want to glue anything directly to the glass.. for two reasons: 1) although the glass only gets slightly warm after the light being on for hours, I was worried that the warmth would compromise the integrity of whatever glue I used and the whole thing would fall apart. And 2) I like the idea of keeping the glass nice in case I decide to do another little makeover to them in the future!
So my next idea was to cut them all in half and play around with a few different ideas. I just eye’d it and cut them with the band saw.
")

I played around with a couple different ideas for placement for my hoop halves, but in the end I decided on a circular look similar to this West Elm Bentwood Pendant. (Only I wanted mine white since we have enough rustic and wooden elements in the kitchen already).
I needed two rings of wood for each pendant to affix the hoop halves to. I got all MacGyver and found a couple items in my kitchen that would work…one that’s slightly smaller than the circumference of the glass, and one that’s larger. Then traced them on a piece of poplar with a 1” thickness.

Then I cut the circles out with my Scroll Saw, and drilled a hole to string my blade through to cut out the inner circle.

At this point, it was time to paint everything white (I used this paint and primer in-one). But when I laid all the hoop halves out on their sides to paint, they would move around when I tried to spray paint them from the slight air flow that comes from the spray paint can. I was getting really frustrated, so I rigged up a board to use for weight, and stood up the hoop halves under the lip to hold them in place while I painted. It totally worked!

After the first coat dried, I flipped them (including the circles) and painted the other sides… and I’m ready for assembly! Using my Air Strike stapler, I popped each one in one at a time. And, you know me… I was just eyeing things to keep them straight across from each other. I’m nothing if not imperfect.


Then! Once I had one side of hoops attached, I flipped it and set the glass from my existing pendants in place. Then, I put the other wooden circle on top, and began affixing the opposite sides of the hoop halves!
")
I was pretty intimidated about the assembly of these pendants, but when I finally made myself just DO it, they went together easily, and turned out better than I expected! Win!

")
All that’s left is to pop these onto the pendants in the kitchen! This was a two-person job, because one of us needed to hold the pendant in place while the other screwed in the little metal thingies.

I love that they’re still lightweight, but they add a little personality and interest. They just seem to ‘fit’ better in my kitchen!
I know this tutorial seems super specific to go with our exact existing pendants, but you could apply this concept to make your own pendant or chandy from scratch too! In fact, I just saw a similar tutorial for this yesterday from my friend Tasha at Designer Trapped in a Lawyer’s Body! Great minds think alike!

And here they are in action at night!

There are still a handful of things we still want to do with our kitchen (namely update the appliances… we’re saving our pennies!), but I’m loving how it’s coming together! There have been some haters that have unkind things to say about my brightly colored cabinets and my design taste in general… but here’s what I have to say to these nay-sayers: ‘IT’S MY KITCHEN!’
I love to bring eclectic elements into my designs… combining modern, rustic, classic. It’s just my style! And I’m pretty confident about it, so I’m ok with you not loving the whole thing. My hope is that you will be inspired to pursue what YOU love instead of what Pinterest is telling you to love. That’s the takeaway here!
Group hugs!
Now… have you made any creative or unique design decisions that show your unique style? Did you end up loving it or hating it? OR are you at a crossroads trying to decide if you should pull the trigger on a bright color or unconventional design element? I SAY GO FOR IT! But you already knew that huh?

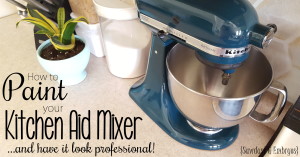
PS… check out my post on PAINTING your mixer! Who knew you could paint your small appliance?! It’s easier than you think!
I am 100% jealous of the ideas you come up with! They’re amazing, unique and really work! Just wondering, are u gonna set up a YouTube page, not that u need too, your directions are THE easiest to follow. You could reach WAY more people who are missing out and I think your personality would really translate and shine thru amazingly!! I’m planning to steal most of ur kitchen re/up-dos!
Hello. I just found your blog through Pinterest. I agree, it is your kitchen!!
Our house is 128 years old so I’m curious to follow you and see what all you remodel.
I love the eclectic and personalization… making it your own!
We remodeled my craft room and then I had all my family members sign their names on the ceiling in the joint compound while it was still wet. It is there permanently until someone decides to retexture the ceiling!!
People may think I’m nuts for it but it’s my favorite!
Good luck in your remodeling.
I love that! You should love your home and include personal touches, even if it isn’t trendy! <3
I just found your page today. One of my FB friends posted one of your photos on my page, and I was instantly in love! Did you and Nick design your entire kitchen? I’ve never seen one anything like it. Those dark brown shelves for holding stuff are great. But tell me this, you design queen, do you actually cook food in that kitchen? It truly looks as though it’s never seen a dirty pot or grease spill. Beautiful room. Just beautiful.
You are so sweet! THANK YOU! We’ve gotten a lot of negative comments for our ‘brave’ choices in color… especially with our kitchen cabinets. But we love it… and it’s our kitchen! I’m glad you love it too. <3
I LOVE ? bright colors!!!! I LOVE eclectic!!!! I LOVE your style, Beth!!!! I LOVE your kitchen!!!!! I would LOVE a kitchen like yours!!!! KEEP UP THE GOOD WORK!!!! 🙂
THANK YOU! 🙂
Have you considered extending your back splash pattern over into your “mud room” section? I think that would look nice. I love that you are a go getter!
Wahoo! I thought the very same thing!
Your kitchen is beautiful!! I love everything about it!
They look great! I’m very impressed you made them yourself!
Love them!
No hater here! LOVE it and you entire kitchen is amazing. What a fun place to be !
oooooooooooooh EXCELLENT I LIKEY!!!!
Well, I for one, love your kitchen! Going into that bright room would just make me, well, happy! (Even though it meant work going in there!) Amazing job on those lights – how do you come with your ideas??? Thanks for sharing!
LOVE how these turned out, Bethany! So smart to use them in conjunction with the pendant lights you already had. They look AWESOME!