• Home
  • About
  • Tutorials
  • Recipes
  • Furniture
  • Contact
    • Contact
    • Infertility
    • Disclosure
    • Privacy Policy
  • Shop
    • Facebook
    • Instagram
    • Pinterest

Reality Daydream

The Dream is Free, The Hustle Sold Separately

  • Home
  • About
  • Tutorials
  • Recipes
  • Furniture
  • Contact
    • Contact
    • Infertility
    • Disclosure
    • Privacy Policy
  • Shop

Wood Slice Pendant Light

September 25, 2023 by Bethany Sy

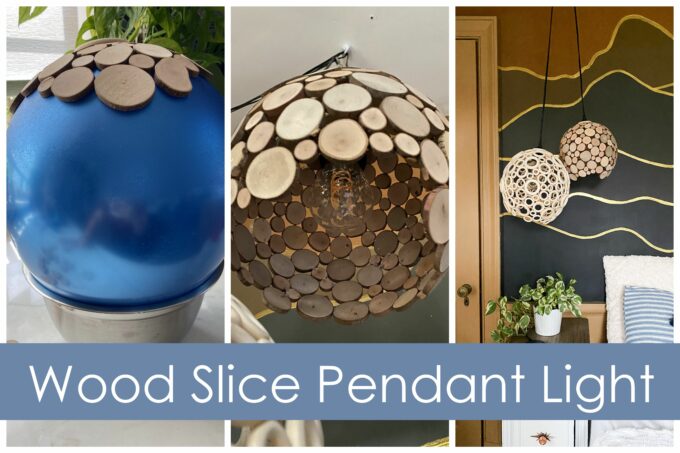
Hello hello again! I have another pendant light tutorial for you today, but this time using wood slices!!! Ever since I made this one with wooden rings, my mind has been spinning with different things to try. Who knew using a balloon s a form would be so magical?! What do you think about this wood slice pendant light?!

Wood Slice Pendant Light

Here are the supplies you need for this wood slice pendant light project:

  • Wood Slices (I bought 2 of this size and 1 of this size)
  • This light kit
  • Balloon
  • Wooden Ring (you only need one of these, so it might be cheaper to go to a craft store)
  • Instant Wood Adhesive
  • Spray Adhesive

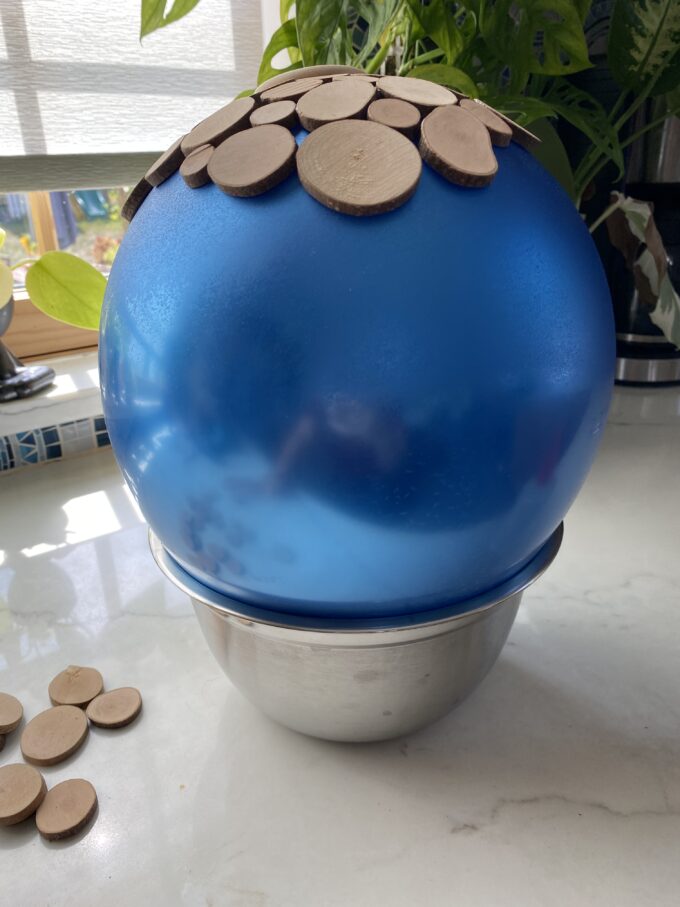
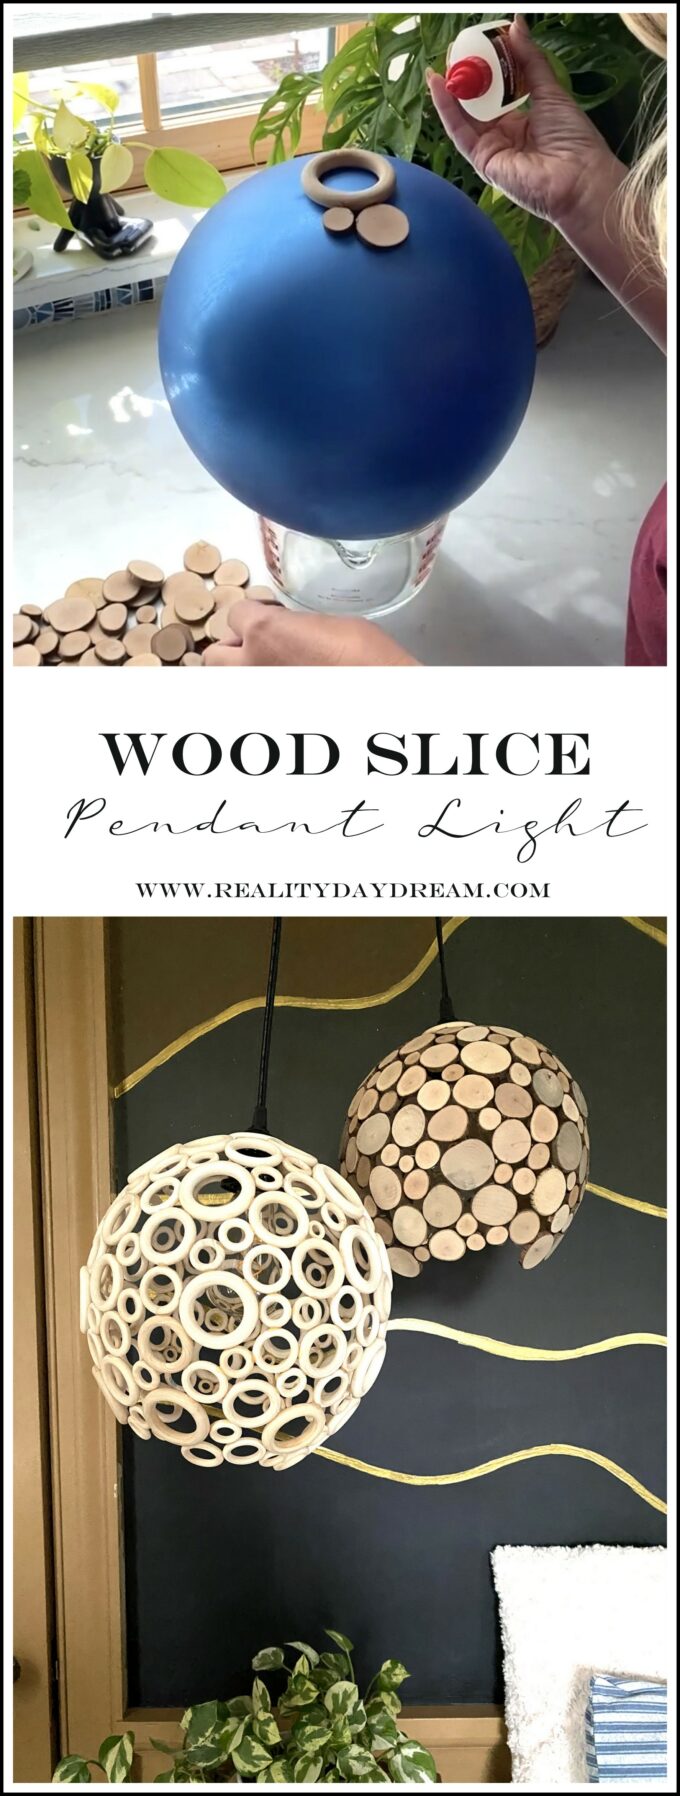
Go ahead and blow your balloon up as big as you want your pendant light. Then coat the top half with some spray adhesive. This will help keep the wood slices in place for the pendant light while the glue dries.

Blow up balloon to use as a form for wood slice pendant light

Find a bowl that’s slightly smaller than the diameter of your balloon to hold it in place while you’re working on this. You don’t want it rolling around on you!

Place your wooden ring as close to the top/center as you can. It doesn’t have to be perfect.

Start your wood slice pendant light with a wooden ring

Now we’re going to start gluing those wood slices around the wooden ring to make our pendant light!

glue on wood slices to the balloon to make your wood slice pendant light

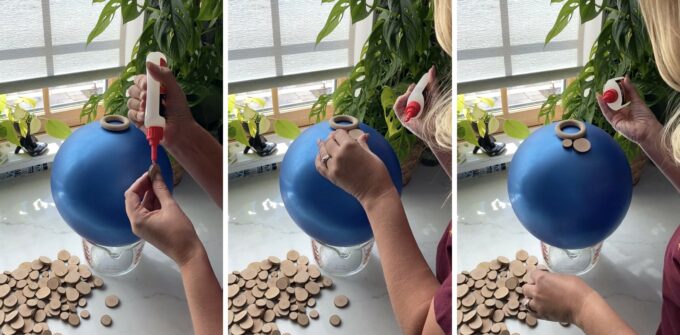
Keep making your way around and around.

Wood slice pendant light tutorial
Wood slices to make a pendant light with a balloon as a form

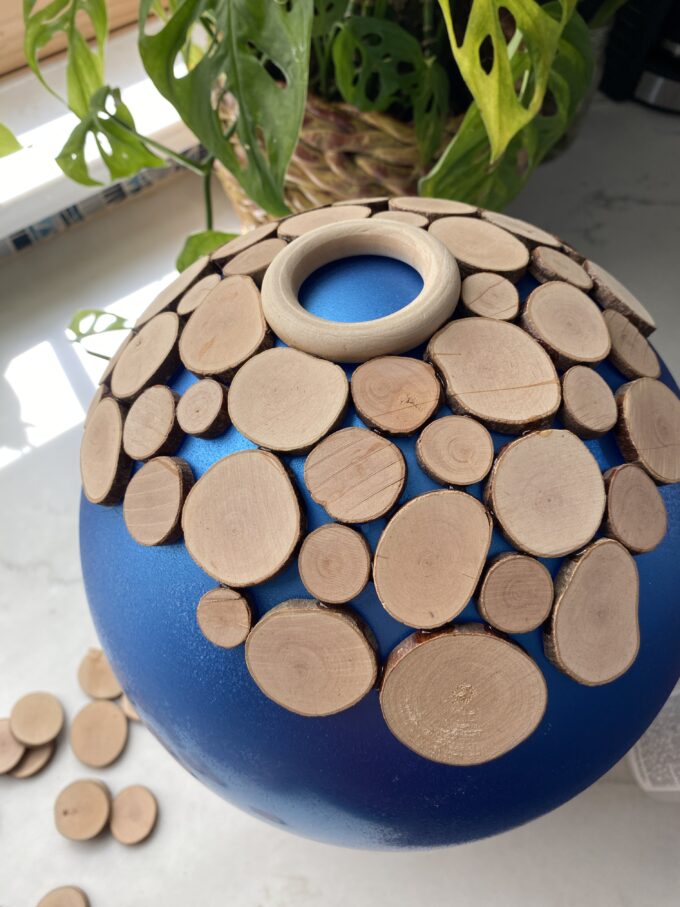
Eventually you’ll get to the point where the wood slices aren’t staying because they’re too vertical. Go ahead and flip your whole wood slice pendant light and balloon over so the wooden slices part of the balloon are resting on the bowl. This will allow you to keep going because the subsequent wooden slices you continue to add will be able to rest on previous ones while the glue dries.

Wood slice pendant light tutorial

Let it all dry a couple hours or overnight, then pop the balloon and pick off all the little balloon pieces that stick to the inside. There were a few that I struggled with and the blue was showing, so I dabbed it with a little tan (wood colored) paint to make it invisible. Worked like a charm! I’m starting to be able to picture this wood slice pendant light hanging with the other one already!

pop the balloon and you have a wood slice pendant light!

String your light kit through, and it’s the perfect size for your wood ring to rest on it. Then all you have to do is pop in a lightbulb, and your wood slice pendant light is ready to go!

make your own wood slice pendant light

Look how cute my new wood slice pendant light is next to the previous pendant light I made with wooden rings? I’m in love! Do I need a 3rd??

make these wood slice pendant lights using a balloon as a form!

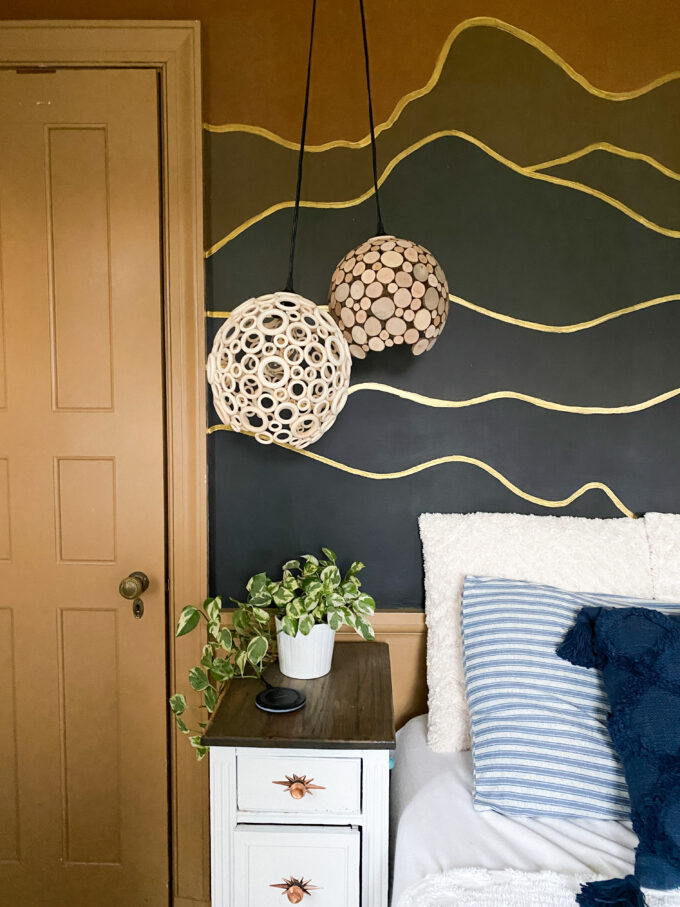
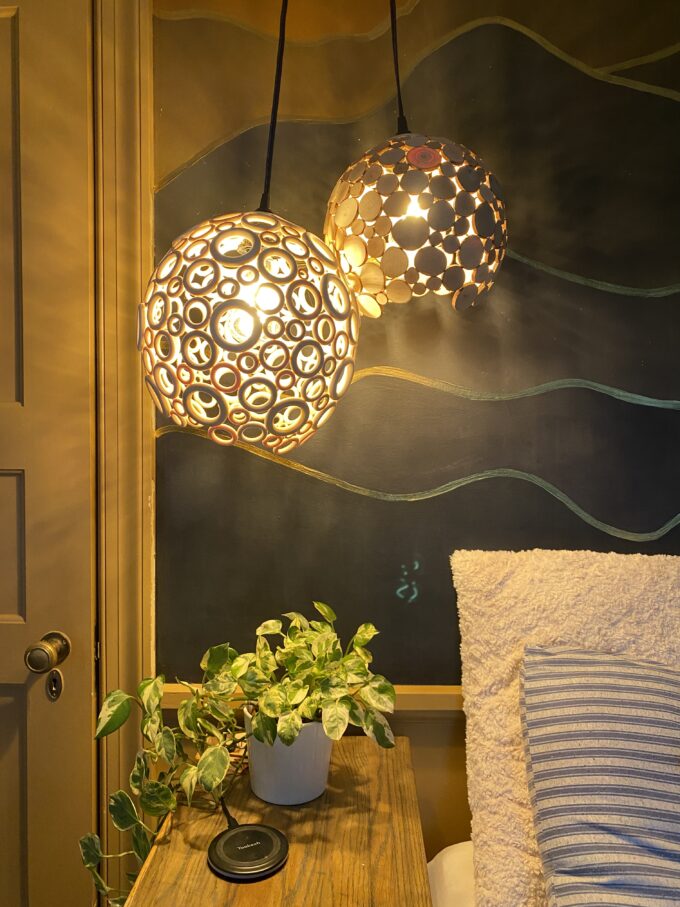
Check out how the look with the lights on at night. So moody!

wood slice pendant light all lit up at night

Is this wood slice pendant light project something you would try? Do you have any ideas for what my 3rd wooden pendant light should be made out of? My mom suggested scrabble tiles, and I love this idea. Stay tuned!

~Bethany

~~~~~~~~~~~~~~

PSSST! You might also love this other DIY pendant light project we did with embroidery hoops! And there are these too… would you call them pendant lights??

Thanks or pinning!

pinnable image for wood slice pendant light

Related:

  • Wooden Circle Pendant Light Tutorial

    I've had this idea to make a wooden circle pendant light using various sizes of…

  • How to Apply Wood Veneer

    If you follow us on the 'gram, you know I've been stripping the finish off…

  • Stripping an Old Stained Desk

    We love the original wood of our library, and wanted to find a desk that…

About Bethany Sy

Nick and Bethany Sy are the creative free-spirits behind DIY/Lifestyle blog, Reality Daydream. They recently purchased a historic mansion and have been documenting the ups and downs of renovation and making this home their own... all while sharing tips and tutorials along the way! When they found themselves in the trenches of infertility, they started a journey that would prove to be their most important DIY project ever, and have 3 beautiful girls to show for it. <3

« Mountain Mural Tutorial – with free template
A Moody Green Credenza Makeover »

Comments

  1. 1

    Maureen says

    September 30, 2023 at 3:46 am

    Bethany, what about the triangle shapes like Nick cut for that design where the triangles where stained different shadesxand the put together?

    Reply

Leave a Reply to Maureen Cancel reply

Your email address will not be published. Required fields are marked *

Recipe Rating


  • Facebook
  • Instagram
  • Pinterest
  • RSS
  • YouTube
We are Nick and Bethany! Welcome to our blog, Reality Daydream where we share our DIY adventures!
Click here for lots of art projects using only wood stain on furniture!!
Please feel free to share or pin my posts! You're welcome to use ONE of my images (no collages or pinnables) with a link back to the corresponding post. Please do not edit or crop that single image in any way. Improper use of my photos, ideas or words is a violation of copyright. Thank you!

Categories

Attention: Almost any do-it-yourself project involves risk of some sort. Your tools, materials, and skills will vary, as will the conditions at your project site. Reality Daydream has made every effort to be complete and accurate in the instructions of the plans on this website. Reality Daydream will not assume any responsibility or liability for damages or losses sustained or incurred in the course of your project or in the use of the item you create. Always follow the manufacturer’s operating instructions in the use of tools, check and follow your local building codes, and observe all commonly accepted safety precautions.


Copyright © 2025 · Modern Blogger Pro On Genesis Framework · Customizations by Sweet Theory Designs · Privacy Policy · Log in