It can be tricky stripping the cracks and crevices, but I’ll show you some new strategies in addition to the basics of stripping from our Stripping 101 course. Your tools are pretty much the same though.
(contains affiliate links)
- Hefty Scraper (we love this one)
- Simple wire brush
- Stripper (we’ve tried a LOT, and this one is the best. Hands down)
- Detail Stipper
- Chip brushes
- Rubber gloves
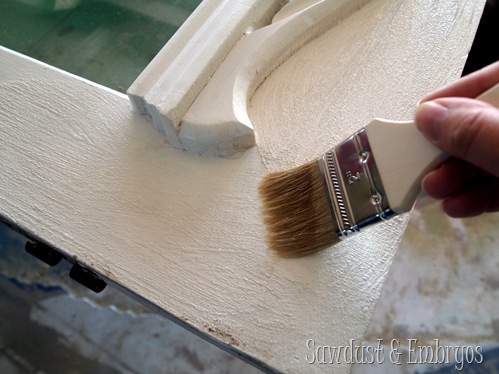
Slather on some stripper with a cheapo chip brush. You’ll almost instantly see the paint start bubbling up.
After a couple minutes, begin scraping with your hefty Purdy scraper to get the bulk of the paint off.
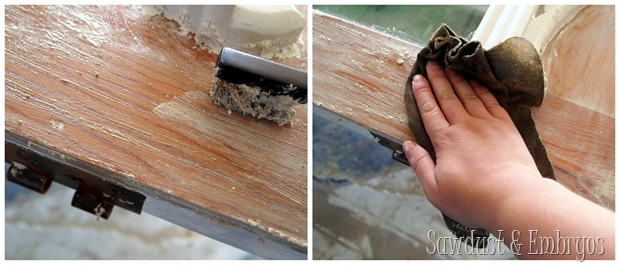
Repeat that step again, but this time after scraping, scrub it with your wire brush. This gets the paint out of the grain, loosening everything up. Then simply wipe away the goobers with a rag. At this point, your surface will be ready for sanding/staining.
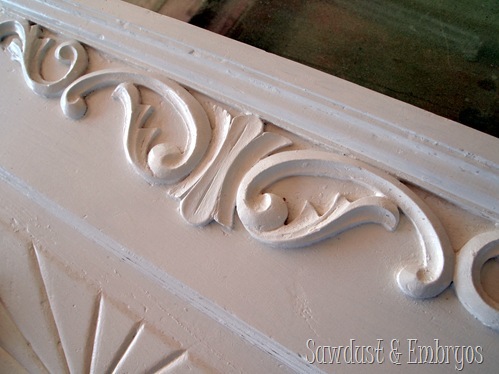
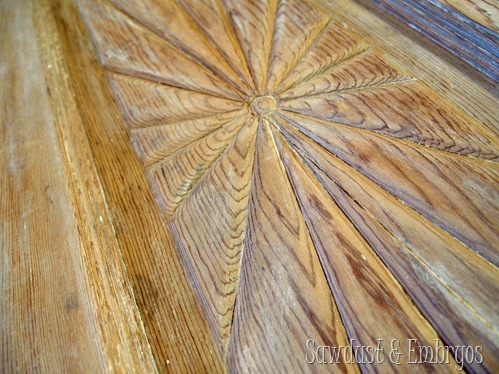
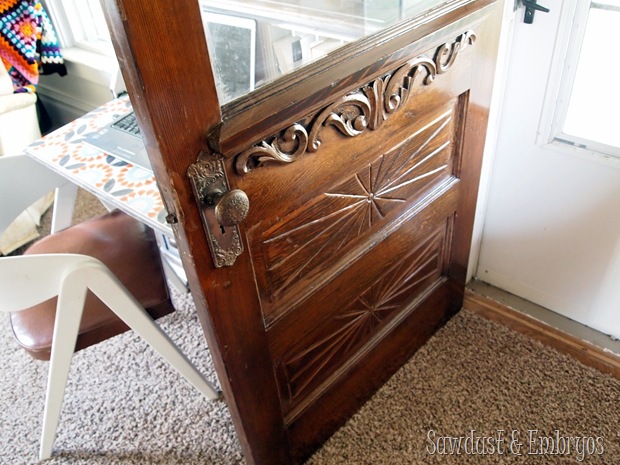
But this particular door has lots of gorgeous details… which is definitely a headache when it comes to stripping. But I love a good challenge. And I knew how amazing this would look, so I persevered!
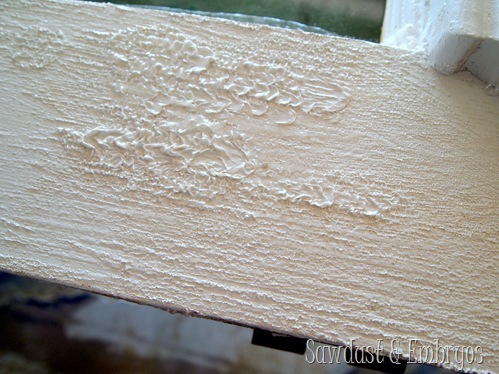
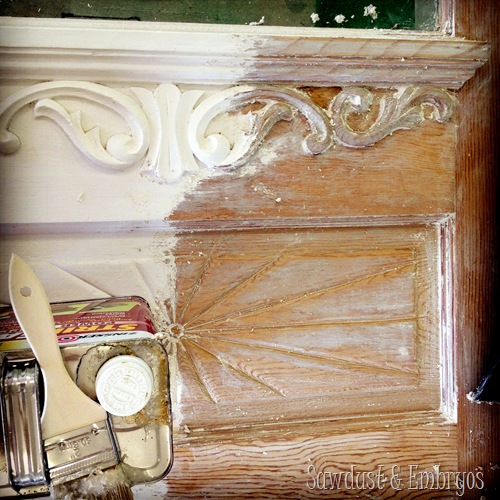
To start with, I used the same techniques as I did above to get the majority off… which left me with this hot mess:
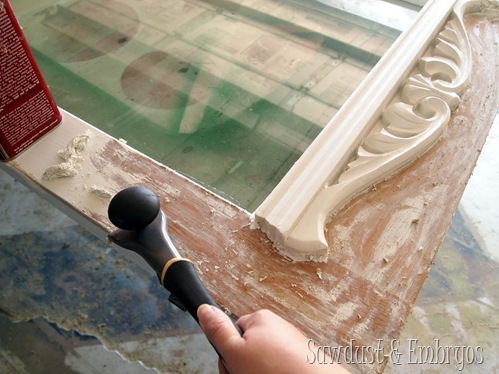
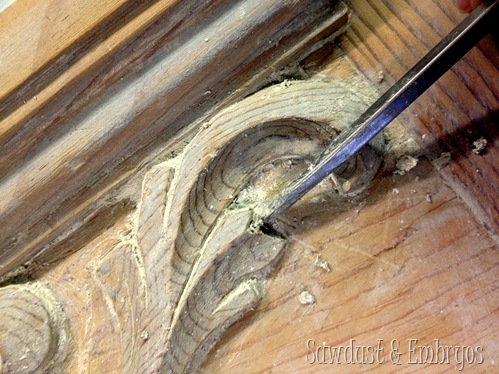
At this point, I applied some ‘Detail Stripper’ (Zinnser Detail Stripper) made specifically for stripping the cracks, and let it soak into all those nooks and crannies. The detail stripper is very watery, which is exactly what you want for all this detail. After about 20 minutes, I hit it with the wire brush real hard. Be careful about it spattering into your eyes… eye protection people! And the parts where the brush wouldn’t reach, I used a flat head screw driver.
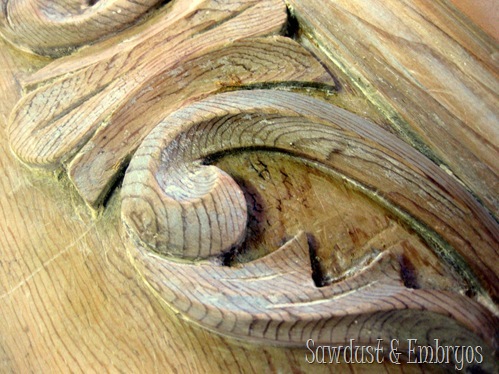
WARNING… this part is not fun. Some of that paint that’s deep in the cracks can be very stubborn. Get it the best you can, and then just be done. JUST.BE.DONE.
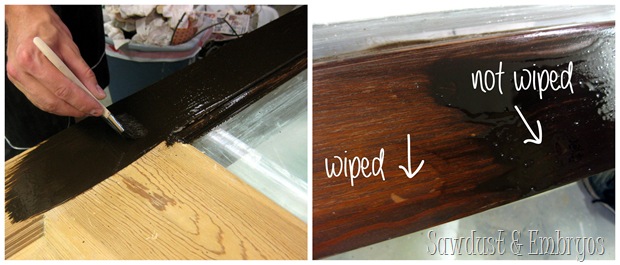
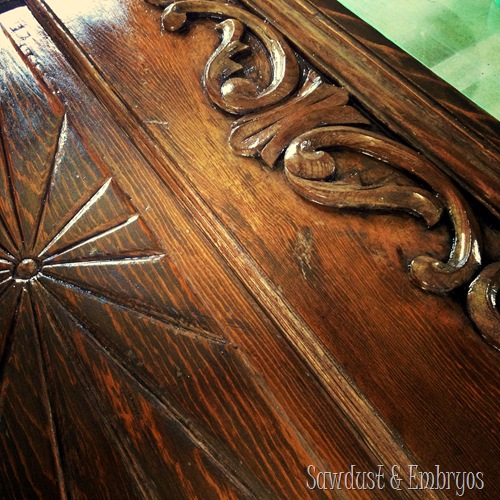
We sanded everything down with 220 grit until it was as smooth as you can possibly imagine, and then stained with Rustoleum Dark Walnut.
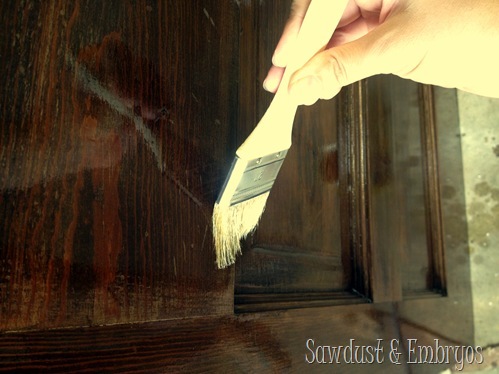
After wiping the stain off and letting it dry overnight, I polyed with an oil-based satin finish. When polying, I recommend using a more quality brush (unlike the one I’m using in the photo) because you don’t want little brush fibers left in your gorgeous finish. I knew better, but couldn’t find a nice brush… so I went with it and just picked out the fibers when they came off.
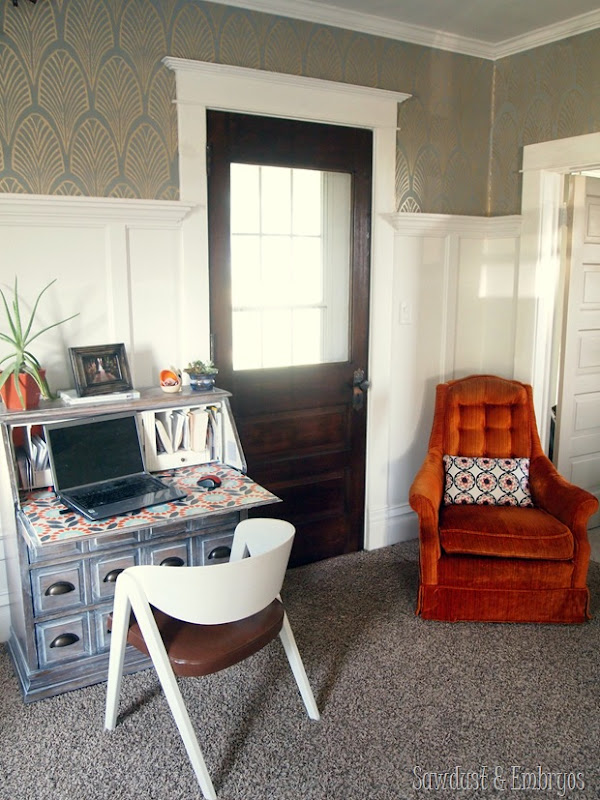
FINALLY this beauty is ready to put up!!!!!!! WHAT WHAT!
I am completely smitten-head-over-heels-in-LOVE with this look. UGH!
I’m a little bit sad that the side with all the details is on the outside, but it’s ok. Especially since this we often have it open in the summertime.
Things to note about the above photo:
- The patch of plywood on the floor is from when we removed the wall and still haven’t found a perfect match of wood to go with our 113-year-old original hardwoods.
- The maroon chairs were a craigslist find, and although they’re in pristine condition, I’m still toying with the idea of reupholstering them if I can get past my upholstery-intimidation-syndrome.
- We’re very close to purchasing a couch.
- We’re very close to making a decision on curtains.
So there you have it… my personal reflections on stripping detailed nooks and crannies for you to take and implement into your own stripping strategies. And the best part is that these strategies can be utilized for stripping ANYTHING… including furniture!
Luckily we only have two more interior doors on the main floor to tackle, and they don’t have all this detail so it should be a breeze!
Do you have any experience with stripping? (and I’m not talking about lap dances). Or tips you’d like to add? Do you like the look of interior doors being a different color than the trim? I DO!!!
(if you missed it, here’s our Stripping 101 post)



I am unable to find Zinder detail stripper in my area. Ore. City, Ore. where could O find it. I’ve been working on a heart-attack detailed antique door & sooo frustrated with paint n cracks
Unfortunately, I don’t think it’s sold anymore. I would look for CitriStrip.
Great detailed explination. Thanks.
I just went to look up the Zinsser Power Stripper that you mentioned, and it is discontinued 🙁 Any new suggestions??
It’s been a few years since I’ve stripped any furniture, so I’m not sure when the latest and greatest product is. I’m sure there are more current articles out there that would tell you some great info!
Hi and thank you for this tutorial. I have a need advice question. On your project above you have that wood decal thing (that curvy thing right below the window. completely new to this sorry) and I started a project that I’m to far into to turn back at this point. My doors on my chest of drawers have this same thing. I see you kept yours and painted over them. Mine are hideous and look terrible and I want to remove them. with out hurting myself with a hammer and chisel, how can I remove the wood embellishments?
Any help would be greatly appreciated
You can get tinny little pry-bars at your local home improvement store. I would use that and a hammer, and just gently tap it around all the edges until it starts lifting off.
Hiya! just wanted to ask why you used an oil based poly? I’m new to staining and sealing and was just wondering why you chose that type. Is there a specific reason behind it or was it all you had at the time(something that often dictates my decision, oh well, I love spontaneity!)?
The only reason I ever choose oil-based poly is simply because it’s more durable that water-based. But do remember that oil-based poly yellows over time, so if you’re sealing over white paint, you’ll definitely want to go with water-based. 🙂
Hi if you haven’t patched your floor yet you might be able to remove some pieces from a closet to use for patching
and later replace the closet floor with something else stain it and no one will ever notice !
I love your ideas great job with stripping tutorial love the blue cabinet next to the door awesome piece I have a temp solution for your lil patch of plywood floor stain it to match the wood floor and it won’t be so noticeable you might even forget about it lol!
Cute room but that rug has to go.
Just came in via Pinterest. I’ve visited you before and love your work.
Your door is fabulous and it’s hard to believe someone painted it in the first place, isn’t it?
Since this is an older post, I’m hoping you’ve since discovered Citristrip, since you could have done this in about 3 hours and it bubbles paint out of nooks and crannies. Plus, it’s not a flesh-eating chemical. I do my work in front of the TV, in my pajamas. Neutralize with water!
I hope you don’t mind me suggesting this. You’re so talented I hate to see you wasting time with 20th century, dangerous chemicals! 🙂
Thanks for always sharing.
This is so helpful! I wish I had read this before I started stripping my 1860 door and vestibule. So I tried ReadyStrip – an environmentally friendly stripper similar to citristrip. Let me tell you, after nearly three days of stripping and having gotten no where near where I need to be, I’m ready to switch to the serious stuff! I’ve probably got about 8 layers of paint and varnish to get through. But here’s what I need some advice about. The first layer of paint comes off easily but the layers of varnish come off in nightmare sticky gobs. I got a plastic bucket but the stuff is stuck to my tools, my gloves, my clothes, the floor where it dropped. The cleanup nearly put me in tears. How do I deal with this?? Also, should say that I’m working vertically.
Heat guns are very toxic and in many places illegal to use and with good reason. Old paint on antique doors or anything else for that matter has a very good chance of lead containing paint. Legal or not bad idea.
I just had to laugh when you were talking about the details, and said “JUST BE DONE”…oh how hard that is. I’ve been working on a buffet with details, and oh boy…at some point I just had to call it and say it was good enough. Wish I’d seen this post before, to remind me to not be so perfect about it!
I hear ya! Sometimes it’s sooooo hard to just make yourself STOP already! I’m sure your project turned out amazing. 🙂
Hi if you haven’t patched your floor yet you might be able to remove some pieces from a closet to use for patching
and later replace the closet floor with something else stain it and no one will ever notice !
That’s a great tip! We actually found similar boards at our home improvement store, and Sherwin Williams color-matched our existing floor stain to be an exact match. I didn’t even know SW did stain before that. 😉
HOLY COW! I hope you have a paint sprayer! Sounds gorgeous… I'm glad you have no regrets!
The hardware on this particular door wasn't previously painted, but one of the two other interior doors does have painted hardware, so we'll definitely be sure to share our findings! I've heard that letting it soak in water in an old crockpot overnight does the trick too… we'll see!
Steel wool! Great idea!
Your door looks amazing. I love the detail that just pops out now that the white paint is off of it. You did an excellent job! Stripping furniture is not easy work! However, I am going to hunt down both those products, Citristrip and Peel Away immediately! I have many pieces I want to do but have been putting off because I hate stripping furniture until it are done! Thank your blog readers for the tips!
We painted all 21 of our interior doors black. Love, love, love it.
I have to chime in with another magic product called Citristrip.
I'm stripping 15 antique doors. You know this means 1000 different kinds of layers of paints!
You put this stuff on thick — oh, did I mention no safety equipment necessary? No stink, no toxic mess, no horrors. Put it on thick. If you're outside and its windy, cover it with plastic wrap, wax paper, or in my case, cut up those zillions of plastic grocery bags and lay them over it. I do it barefoot and sometimes in my pajamas. Doesn't take the color out of my fabric.
Go to work. Go to sleep. Leave it ALONE. Even if it dries, the stain (which it removes with WATER and a kitchen scrubbie) or paint doesn't settle back down, it lays up in ribbons. Scrape it off. Into another plastic bag.
If you're detail stripping, put it on thicker, and when you're ready to take it off, be gentle, and use a tiny darning needle or the screw driver from an eyeglass repair cit. It pulls off in strips and stretchy chunks.
I have pictures of several layers coming off in sheets, then stain coming off like BBQ sauce. I'm down to amazing, bare wood on these doors. I've got 5 sitting in my front yard weathering naturally.
Did I mention I cleaned up the goop on my hands with [wait for it] more Citristrip? Like lotion.
I'd do ads for them if they asked — for free.
It's so fun, I did 3 kitchen cabinets and my mahogany front door and sideights at the same time. Now, I'm doing two doors at once. Ihear Soygel is even better, but that's not available in my area.
Oh – hot water and/or vinegar takes the paint off old hardware.
I don't know if anyone has ever mentioned this. I watched a show on tv they said you can strip paint off metal hinges and hardware by soaking them in hot water then putting them in ice water no need for chemicals. If you can try this so we know if it works or not.
That is beautiful! Don't you just love when you finish a project that you did yourself…It is the most satisfying feeling to me…The door is perfect…enjoy read about your projects….
And I'm going to get some of that peel away too!!!!!!!
I like to use steel wool after I've gotten the big stuff off. Go with the grain of course, and it helps get it extra clean. I'll usually either dab some stripper onto the wood or dip the steel wool directly into it and rub. Works well for smaller areas as well. Your door looks great!
oh that is so pretty!!!!
WHAT??????????? How did I not know about this?! I just did some googling and pulled this up… is this the right stuff?
http://www.dumondchemicals.com/home-peel-away-1.html
If so, I'm ordering some in bulk. 🙂
The front door looks INCREDIBLE! It looks so antique and historic. It matches your house perfectly. I'm glad you decided to stain it instead of paint it. I'm really happy that wood grains are making a come back 🙂 It's so rich looking. You did good, my friend!
Bethany … I absolutely LOVE reading your blog! So informative, funny and full of pictures to keep us going in the right direction and what to/not to look for. We moved into a 80 year old house that has every piece of beautiful trim painted about 30 times. (We got that number from the colors of the layers. Plus we had an old oil furnace that was converted from coal, and you know what kind of dust that leaves on everything!). Anyway to do all the stripping we used a product called PEEL AWAY. You paint it on about 1/8th to 1/4th of an inch thick, put this paper that comes with it over that and tuck it into all the nooks and crannies. Walk away for about 12 to 24 hours depending on the thickness. Peel off the paper (all the goo and paint comes off with it!) wipe it down with a vinegar water mixture to neutralize whatever is left on the object. Refinish! You can use this on glass, brick, wood, stone, concrete, almost anything you can think of. Here in the Portland, Oregon area … We can only find it at the main Miller Paint store. It is FANTASTIC for lack of a better word!
YAYAYAY! Send pics when you're done!
I agree with much of the intimidation stemming from fabric choice. You should give me your email and I'll send you some pics of the chairs from various angles so you can tell me what you think. There are definitely some unique upholstery challenges with these, so I'm not sure it's a good 'beginners' project for me… but if I had HELP! Maybe! We live near Marshalltown… too far?
Julie it's a stencil! And it's actually a medium gray with gold… but in certain lighting it definitely has a bluish tint. I'm glad you love it! If you want to read about the process here's the link!
https://realitydaydream.com/2013/02/operation-stencil-living-room-complete.html
I don't have any experience with stripping paint but you are doing an amazing job at transforming your home!
Absolutely stunning.
xoxo
Gorgeous door! But what I keep drooling over are the walls! Is that a stencil or wallpaper? I'm a sucker for blue, and the slightly shimmery gold hue is killing me.
hey! awesome! I have a gorgeous 113+ year old door too….painted on the inside, original stain on the outside. I LOVE any old door….yours is gorgeous! AND, I have totally suffered from upholstery-intimidation-syndrome! 🙂 But, once I got started, I realized there was nothing much to fear. I also realized much of my intimidation was not having the *perfect* fabric….as soon as I found what I really wanted, it was easy. All about staples, really. You'll do great at it! 🙂 P.S. I live south of Iowa City….I know you are in Iowa, but can't remember what part. I could totally come help if I'm close enough!
The door looks amazing! 🙂 Stripping and sanding all that is certainly no fun but its so beautiful when you're done! Totally jealous of your gorgeous door with all that pretty detail!
It looks awesome! I also love the look of wood doors with white trim, which is exactly why all our interior doors are going to be stained wood…with (you guessed it)…white trim! I love seeing actual examples though. It makes me know I've made the right choice!
-andi
wow! What a fantastic look. Your door is so detailed and beautiful.
Great job!
Kerri at HollyMuffin
OOOoohhh… it's SO pretty! Great job!