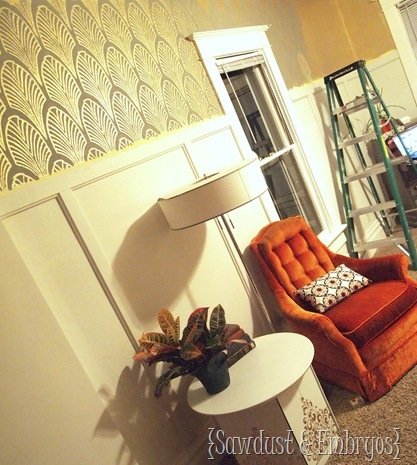
Greetings my posse! Are you so excited to see the progress that’s been occurring in the living room these days? If not, you SHOULD be, because it’s fabulous (said with the Orbit Gum lady’s accent).
Remember our little mood board?
And what the living room looked like previously?
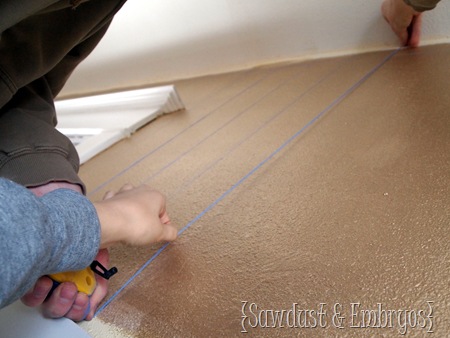
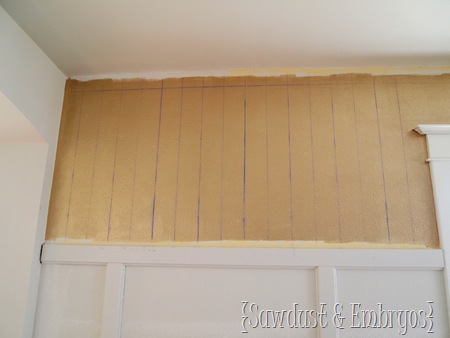
I should start by describing the process by which the stenciling ‘grid’ was laid out. Nick did some measuring and mathematics (which he’s skilled at from all the backsplash painting), and then we whipped out our chalk line. If you don’t have one of these, you should get one… they’re so FUN!
He held the string tight, and I snapped that baby like it was my j.o.b.
It’s the perfect way to make sure the stencil is applied evenly and awesomely straight without having pencil lines that need to be erased or painted over.
 |
 |
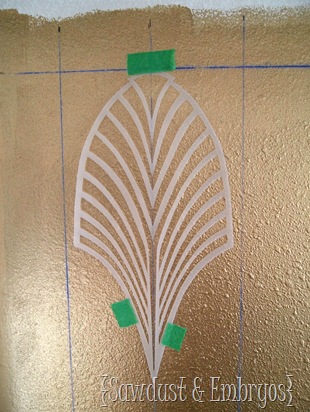
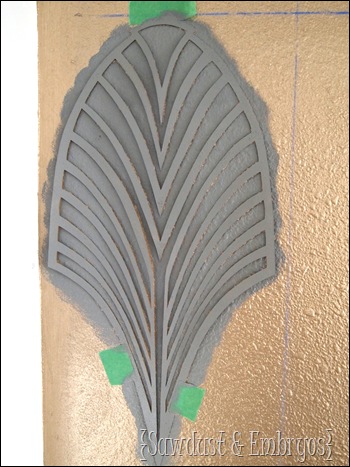
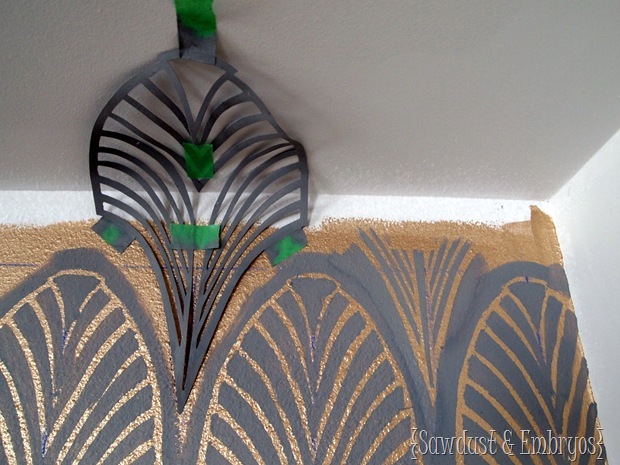
As you can see, I secured my stencil in place with a few pieces of tape. You can use stencil adhesive too… but I don’t like using that stuff. It’s smelly, and leaves a sticky film on your surface. BTW, I had this stencil custom made by Dana from Decals N Decor.
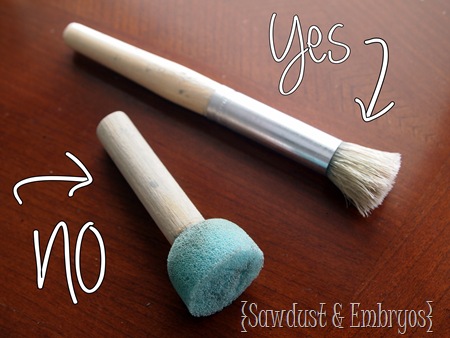
Embarrassingly, I painted the 1st of the three walls using a round foam brush. I’m not sure why I thought that was the best option… but it was taking FOREVER, and there was a lot of touch-up work because of paint-seepage.
Finally, I bought AN ACTUAL STENCIL BRUSH (genius right?!), and it made all the difference in the world. You’d think with all the stenciling projects I’ve done, I would be a pro at these things.
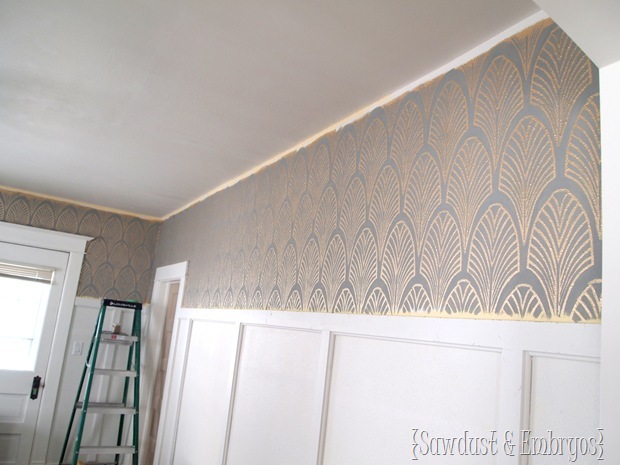
And I’m overjoyed to proclaim that: THE STENCILING IS FINISHED!!!
THREE… CHEERS, is all I have to say.
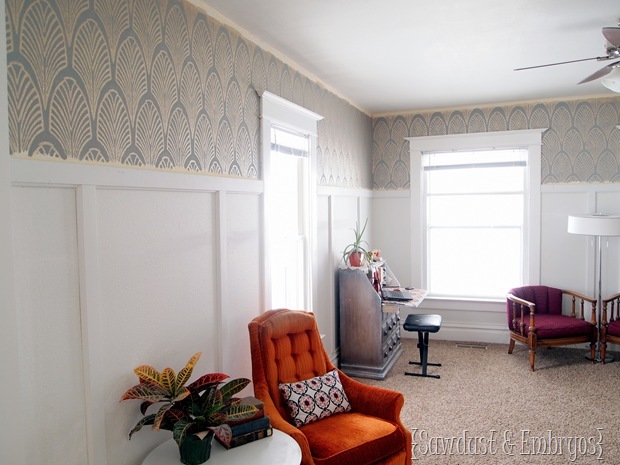
You may be noticing that there’s a sloppy line along the ceiling and above the board and batten. This is because We’ll be adding crown molding along the ceiling, as well as above the board and batten to serve as a little ‘shelf’ for frames and whathaveyou. UPDATE! Crown Molding Tutorial Here, and Crown Shelf Tutorial Here!!
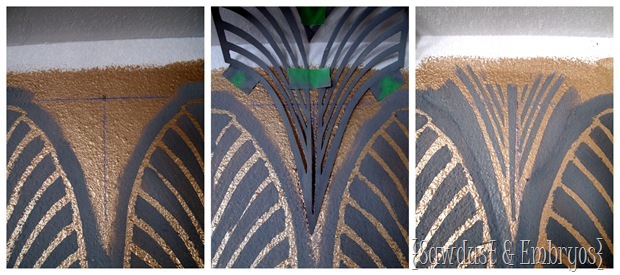
Here’s how I did the stenciling along the ceiling… (as you can see, my stencil has seen better days at this point)!
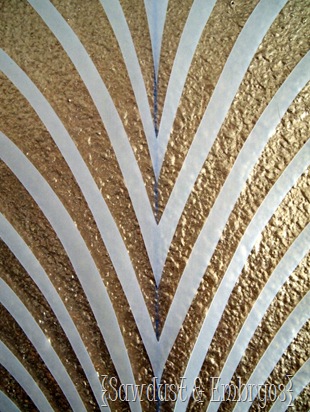
I love the contrast between the shimmery metallic gold, and the flat gray. It looks different in different lighting, and depending on the angle you’re looking at.
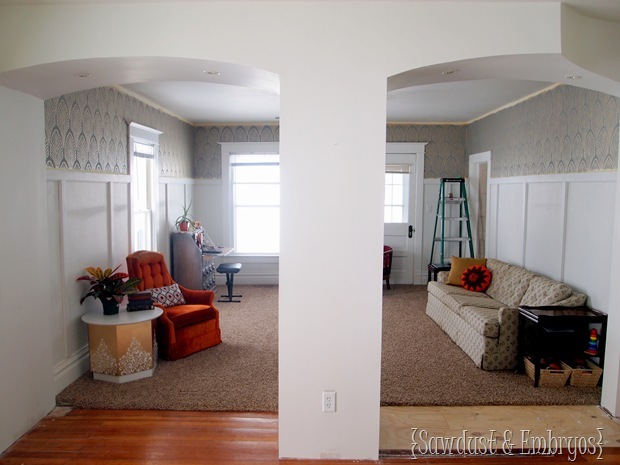
Here’s a shot that includes the arches.
The room is starting to come together in my mind. While Nick is working on the crown molding over the next week or so, I’ll be tackling curtains (which the room DESPERATELY needs)!
We’re also saving our pennies for a new couch! Because a couch is just one of those things that I don’t want to DIY. Did you just lose respect?
UPDATE! Check out the finished living room in this post!!
![above board and batten_thumb[4] above board and batten_thumb[4]](http://lh3.ggpht.com/-Ri6W72yd8Qc/US4_-lIuVEI/AAAAAAAAC1k/E8iGVXdQOjc/above%252520board%252520and%252520batten_thumb%25255B4%25255D_thumb%25255B5%25255D.jpg?imgmax=800)



Where might I find the original stencil?? I love it!
Hi Sara! My friend Dana has an industrial vinyl cutter that cuts stencils too! She cut this stencil for me and can easily cut one for you too, and her prices are super reasonable! Her email is dashoop@hotmail.com… Be sure to tell her I sent you, and send me pics when you’re done stenciling!
Beth – this is fantastic!! Did you make the stencil or purchase it? I’d love to do something similar in my dining room.
– stacey
Stacey, I didn’t make it… but I ordered the stencil blank on Amazon and had my girl Dana cut the stencil using her vinyl cutting machine. If you’re interested, her email is dashoop@hotmail.com. Send pics when you’re done!
Thanks Beth! I’m looking through what seems like 100 cricket cartridges to see if anything else speaks to me but if not I’ll definitely be contacting Dana!
Thank you for the advice Beth:)
Maude
Beauty job lady and germ! I stenciled my accent wall in my master and I know for a fact that this is like having dental surgery for a week…lol. It looks gorgeous!!
You did a fabulous job but I’m curious about one thing. Where did you start on the walls. What I mean by that is did you center the stencil between the left and the right and the floor and the ceiling??
Maude, we just started on the left, and worked our way around the entire room. When it’s an intricate repeated stencil like this, it ends up appearing much more like a texture. If you were doing LARGE damasks or something like that, it might make more sense to center it. Hope this helps!
what a huge difference! I love it 🙂
Wow! It looks so great! Just yesterday I bought fabric to make curtains. It’s a linen fabric, but it has shimmery gold strands weaved into it so it’s subtly gold. It would look so great in your room!
Ooh, ooh, ooh – it is so beautiful! I can’t believe you finished it already! It would have taken me a full year to accomplish something that great! Love it!
WOW! You living room looks so fantastic, you worked like a pro. I haven’t done any stenciling project yet cos I know it’s pretty tough.
But why are you using the brush instead of the sponge? any difference?
Ashleen
Ashleen, I’m not really sure why… but it made a HUGE difference. Something about the ‘blotting’ of the sponge brush must have influenced the major seepage problem I was having. With a brush, I didn’t have that issue at ALL. Live and learn, right?! 🙂
Saw your comment on Young House Love… this is AMAZING! Just had to say so. So very cool.
The job looks real pro, as usual. I have a question: Why did you paint the wall gold then stencil in grey as opposed to the other way around? I always thought that the predominant color went on first. And the reason I’m asking is that I KNOW there is a very valid reason that needs to be shared. Again, thanks for sharing.
Suzanne… this is a totally legit question. I was WONDERING if anyone would ask!! This might be hard to explain, but I’ll try!!
So the nature of a stencil is such that all the parts of the design need to connect with each other, or else the stencil would just be a pile of pieces. I wanted the wall to be gray and the design to be gold… and in order to accomplish this, we had to cut the stencil as a ‘reverse’ design and paint the gray around it.
If I had painted the wall gray (which made the most sense to ME TOO!) and used this stencil and painted gold, it would have ended up looking like a gold wall with gray leaves.
Is your mind blown? Am I making sense? SOMEBODY tell me this makes sense! 🙂
We had to create a REVERSE stencil, because the parts of the stencil wouldn’t connect and it would just be a pile of pieces of stencil material. Do you see what I’m saying?
Wow, I can tell I’m not explaining this very well.
Hilarious response, but you made complete sense to me. 🙂
Very clever, yes, you explained it well and did a beautiful job.
Love this! The metallic is awesome. I’m dying to stencil something – I just can’t decide what 🙂
This is GORGEOUS! I’d never have the patience to do this in my house…but maybe I’d pay someone to do it! 🙂 Nice work!
Wowsers – that looks awesome! It looks like fancy wallpaper! Great job!
It looks AMAZINGGGG!!! Great job on the stenciling – I know how much work it is!!! And juggling babies too – you are superwoman!
I’m just lucky the twins still take TWO NAPS! hehe…
I just saw you on YHL as well. Seriously, so impressive. I want to stencil my whole freaking house with metallic gold!
Just came from your link on YHL… the stenciling looks amazing! I am thinking I’m going to have to find a way to incorporate some metallic paint into my home.
It seriously looks amazing – good job!! I’m totally with you on the couch, we just bought a couch and loveseat with our tax return and it was totally worth it!!!
This is so glamorous. And, when you finally get tired of it (which will be in a long time) it’s so much easier to remove than wallpaper! Great job!
Absolutely amazing, so much work!
We bought a sectional from Home Reserve. It was kind of a DIY project 🙂
Wow, that looks amazing!
Ever looked into designing fabric or wrapping paper? You have such great ideas!
Laura, that’s such a complement! If a fabric company approached me about designing for them, I wouldn’t turn ’em down!! But I’m also happy just tinkering in my own home. 🙂
It’s coming together you guys! Looks great!!!!
I really love it, very nice job. You are a crazy woman. I actually re-did a couch once, it was not too bad and I learned a lot. Mary in NY
Love it. On the couch, I have to admit that I cannot picture you getting one that you can’t slipcover, however… I can’t see you not saving some option to personalize it/change it up…
stunning. your hard work has paid off! congratulations!
LOVE IT!!!!!!!!!!!!!!!
It is STUNNING! Wow! I’m glad you acknowledge how hard stenciling can be. When I stenciled our dining room, it took me a whole month to complete. And it was so much work. And so much washing of the stencil. And all these blogs are like “la la la stenciling is so great and easy and beautiful” And it IS beautiful and cheaper than wallpaper, but it takes a significant amount of work. So I can TOTALLY appreciate your lovely lovely lovely living room 🙂
Dude, let it be known that stenciling is a LOT of work. 🙂 I’m glad that you feel me…!