As you may have noticed, we’ve been making a lot of effort on upping our curb appeal this summer. It can be so easy to just focus on whatever the big renovation project is INDOORS at the moment, but we also want to take advantage of this gorgeous end-of-summer weather and make some small changes to the exterior of our house! They add up to feeling like BIG changes when it’s all said and done! (check out the other things we’ve done to help with curb appeal HERE)
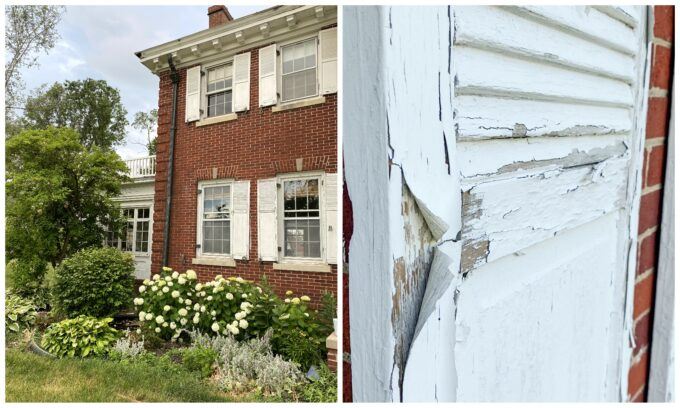
Our shutters have been an eyesore since we bought the house (and I suspect long before that). Peeling/chipping lead-based paint on every square inch of these bad boys. There’s even a shutter missing altogether.
*This post is sponsored by our friends at Fypon! Than you for supporting the fabulous brands that make Reality Daydream possible! This post contains affiliate links.*
We’re all about DIY, but there’s a time and a place for replacing instead of fixing, and we deemed this one of those times.
It was so fun seeing all the shutter products Fypon offers (not to mention all the other millwork, moulding and trim), but ultimately we wanted to honor the history of our home and choose shutters that are true to the time period and style of our home. So the choice was easy! We went with the Louvered Shutter with Center rail!

I love that you can choose the dimension(s) you need, and they come PRIMED so all you have to do is paint whatever color you desire! I don’t hate the white of the old shutters, but I love change… and black. So we went dark and painted these bad boys Tricorn Black by Sherwin Williams.
Using a paint gun (we use Fuji) allowed us to get a nice/smooth finish. We got pretty decent coverage with 1 coat, but went ahead and did a second coat just to make sure that the finish is nice and consistent. We used about a gallon and a half of paint.

How gorgeous are these? Let’s get them up on the house, shall we?!

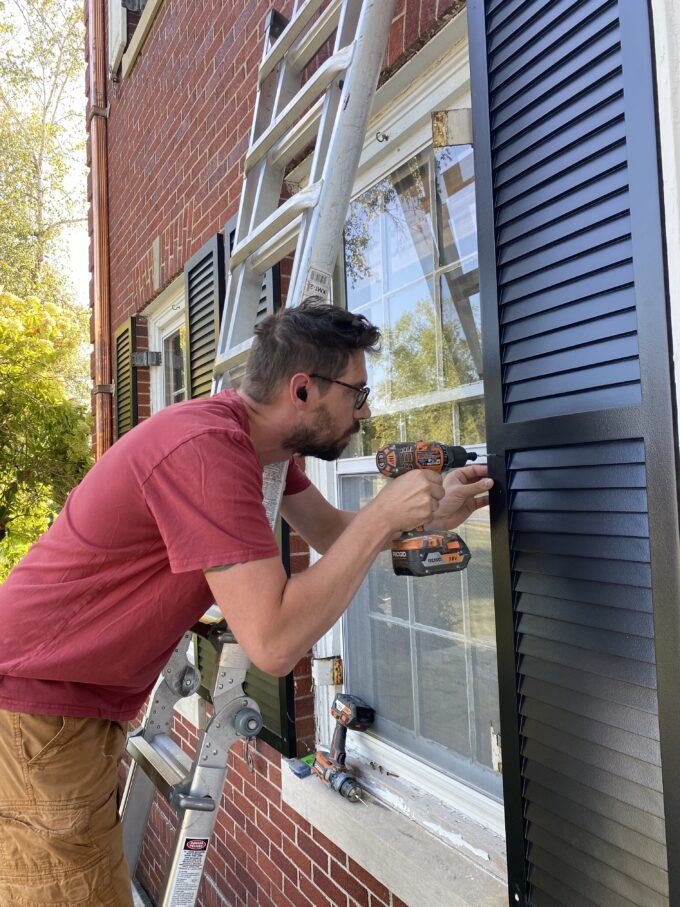
We noticed that our old shutters had a bit of space at the bottom, and we wanted to have that with the new shutters too. So we used a board as a spacer, and I held the shutter in place while Nick climbed up the ladder with the tools.

So we used a scrap piece of wood as a spacer, and I held the shutter in place while Nick climbed up the ladder with the tools.

There are different installation instructions for installing these shutters onto houses with vinyl siding, but today we’re just showing the process of installing them onto brick!
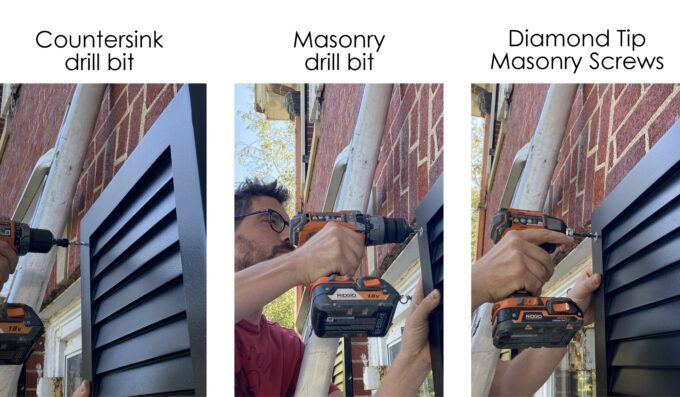
Nick used a countersink drill bit to drill a pilot hole in the shutter first (one in each of the four corners, and then two on the edges of the center rail). Then he used a masonry bit into the pre-drilled holes to drill all the way into the brick. And finally, screwed in these diamond tip masonry/concrete screws to finish things off!
The heads of the screws were blue, so they weren’t very visible unless you’re up close, but we still slapped some black caulk on each screw head and wiped it off with a putty knife.
First window is done!

I mean, look at this difference!

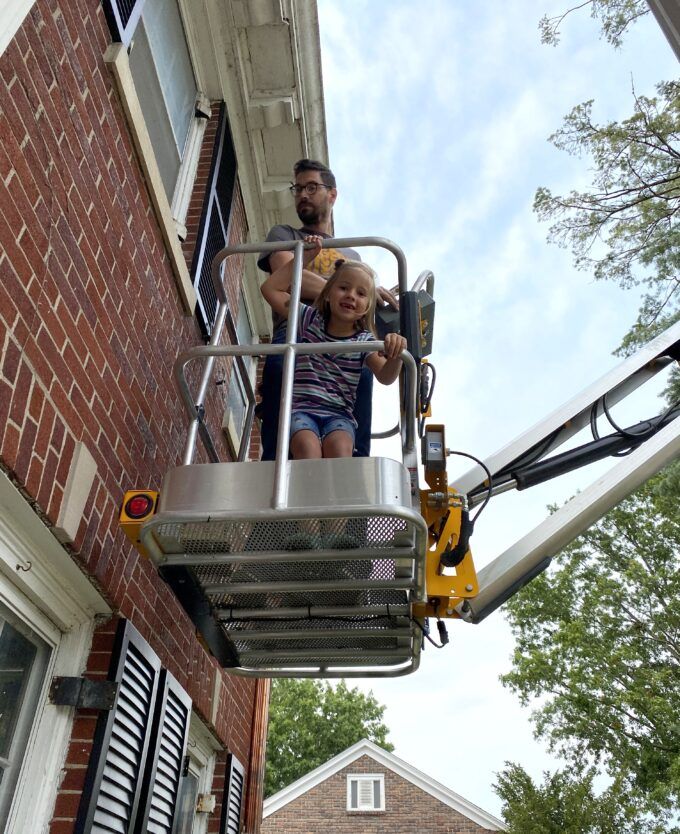
After finishing all four bottom windows, we realized a ladder wasn’t gonna cut it for the second floor windows. So we rented a lift from the local home rental place. Nick is having A BLAST right now. 😉

Little sister even got to go up in the lift and “help”.
We’re so incredibly happy with how these gorgeous shutters elevate the look of our exterior, while still being true to the era and architectural style of our home. And since Fypon crafts their shutters from durable polyurethane, they’re lightweight and easy to install… and moisture/insect resistant! They’re meant to last a lifetime, and WE’RE HERE FOR IT.
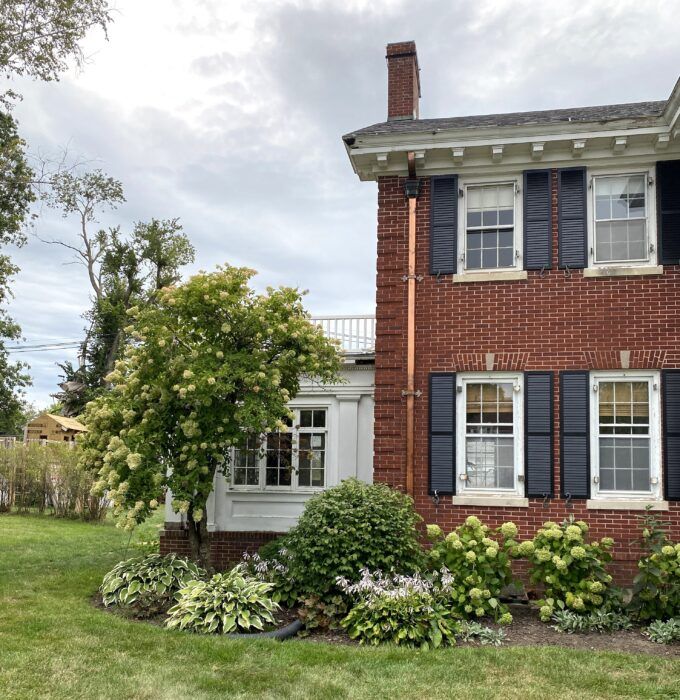
Can you believe the difference?!

Thanks for following along on this journey! And if you’re inspired enough to update the shutters on your house too, be sure to tag us on Instagram! (@RealityDaydream)
~Bethany
Related:
-

It never fails! Each spring, when the snow melts, we're always itching to get out…
-

We're always in awe of how spending a little extra time redefining our garden beds…
-

Hello there! Nick here! Earlier this spring, Beth and I needed to leave town for…
It sounds like a lot of tools are required to go through the entire installation. I need to order some shutters. My old shutters are broken.
Beautiful! A big job well done! And man… you got to use a lift…!!! 😉
Those look so great! What a difference!
Wow! What a difference I love it!
It looks great you guys!!
Beautiful! Any tips on where to find shutter hardware like those scroll brackets?
Beautiful Work
Gorgeous!!! Im also salivating at all the DIY stuff you can do with the old shutters. Love the new look.