My dad just informed me that it’s not called a vintage bar cart …it’s a metal rolling utility cart. Isn’t that precious? Those baby boomers.
It’s been a little over a year since both of my Grandma’s passed away, 3 weeks apart. It was a tough month for sure. And since then, I’ve been loving have some of my Grannies’ things around my house that bring me joy and remind me of them.
One of those things is this vintage bar cart from my Grandma Jean. (I sincerely wish I knew what she called this thing)

Those tiers may LOOK camouflage. But it’s actually a floral design with all the shades of avocado green you can dream up. And there’s a curious little outlet and cord on the side. My mom and I tried to think of ANY scenario where this would be necessary, or even convenient.

I’ve been embracing it’s ‘vintage charm’ for the past year, knowing eventually I would breathe new life into it. And I know my Grandma would give me an enthusiastic thumbs up about it.
And since I found the perfect place to put it in our attic, it was TIME to dress this girl up!
Vintage Bar Cart Makeover
First things first, I took this vintage bar cart apart Make sure to save all of the nuts and bolts in a plastic baggie and putting them somewhere you’ll remember! Then I hauled all the pieces out to the garage and primed with this stuff (this post contains affiliate links). I was so happy to have found primer that’s meant for metal and rust! Even though there’s a very minimal amount of rust on this sucka.

With spray primer and paint, it’s really important to pay attention to dry/recoat times on the instruction on the label. Don’t cut corners!
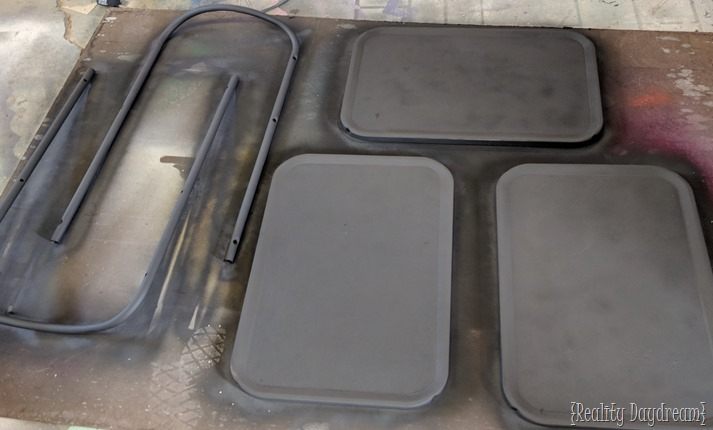
Once I had both sides of everything primed, I spray painted only the top/flat surface of the 3 tiers, and both sides of the handles/bars GOLD.

As you can see from the picture above, the gold went on pretty blotchy and I ended up having to do a lot more light coats than usual. But even if there’s still a bit of blotchiness left, it’s ok! You’ll see why in a sec.
Also, I taped off the wheels and painted the metal part gold.

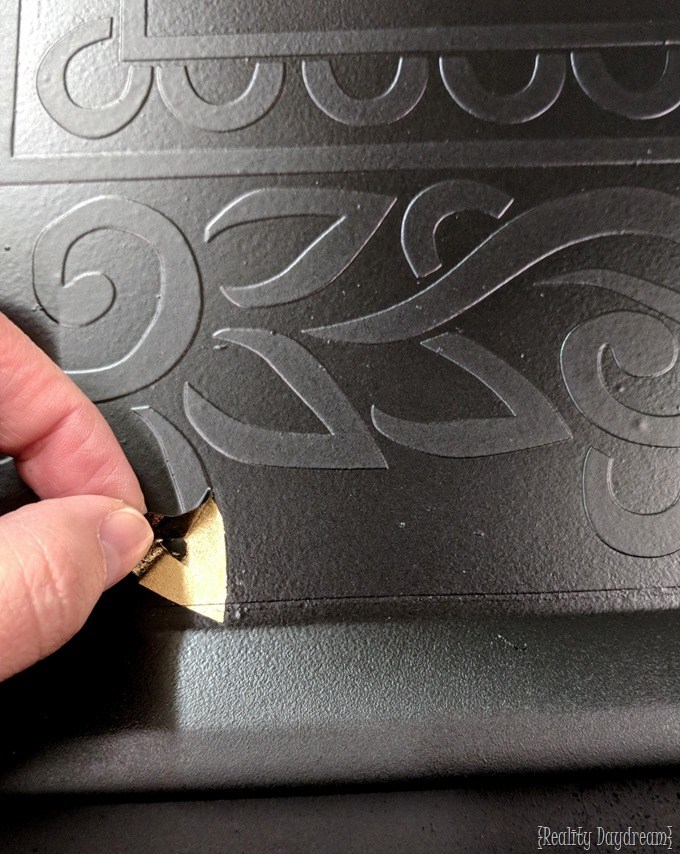
My friend Dana (the Vinyl Ninja) drew up this amazing swirly border for me to use as a vinyl stencil on each of the 3 tiers. If you’re not familiar with how to apply vinyl, see this post.

Then I painted it matte black.

It should probably be noted that you definitely want to do a ton of suuuuuper light misting coats until the matte black has fully covered the surface. If you spray it on too thick, you’ll be in more danger of having some spots where the paint seeps under the vinyl. I was pleasantly surprised with how crisp my lines were when I started peeling off the vinyl. I let the paint dry overnight before I started removing it.

It was important to me not to mess up the contrast of the flat black and the glossy metallic by sealing these, so I opted not to poly. But if you’re worried about durability for your vintage bar cart, I’d definitely seal it.

I gotta say, I had a lot of fun loading up this rolling bar cart with all kinds of fun stuff!

…including my other Grandma’s amazing orange vintage lamp!

A vintage bar cart is the perfect thing to put in this awkward corner of the attic across from the bar. #accessiblebooze

We’ve got a FULL REVEAL of the attic coming soon… like next week! So stay tuned!
~Bethany
~~~~~~~~~~~~~~~~~~~~~~
PSST! Be sure to check out our archives of unique furniture transformations! There’s so much inspiration to be had!
Thanks for pinning!


Hi! I found an old bar cart in my garage and I can’t wait to spruce mine up with a little inspiration from you. I was wondering if you did any sanding or cleaning of any of the parts before you primed it. You didn’t mention that in your tutorial and I getting ready to buy all of the things. Just wanted to make sure I shouldn’t buy sandpaper or anything like that.
If it has a glossy finish to it at all, I would sand it to give it a more ‘matte’ finish so the paint will stick to it. And yes, wipe ‘er down good and clean!
It’s fantastic & a wonderful way to way to treasure Grandma’s memory! Thank you for sharing; Happy Easter to you & your family!
I was thinking a coffee bar would be perfect. I remember my grandma having one of these, it was bright yellow!!!! Love the makeover, it is fabulous!
… or a toaster so that your husband can serve you bacon and eggs and juice and coffee in bed.
Love it,brings back a lot of good memories–your utility cart, my Mother had one, which I got when she passed away. They were used for roasters, etc., things you didn’t have room for on your counters, because, back in the day, kitchens didn’t have much counter space, not much at all. You did a great job on your ” bar cart”
Brenda Minamyer
Hi: Enjoyed your blog. I am 72 so I lived the era of the “Utility Cart”…. LOL….. They were used to put our large roasters on… that’s why they had the outlet and then with the birth of the microwave they became “Microwave Carts”…. Now they are being recycled into “Bar Carts” They are very functional and have evolved well with time. You did a beautiful job of refinishing!
Awwww Janet, I love knowing that! It all makes sense now! And I love hearing stories about how old pieces were used back in the good ol’ days. 🙂
I love that thing! I saw it and thought there was no way it would turn out; even you can’t make it look good. Boy, I was wrong! Damn it woman, isn’t there anything you can’t transform? Great job as always Beth!
Awww Renee, you’re too kind! <3
You need the outlet for your blender!
Ok that’s true. Or a coffee pot!