I’ve been itching to do another stained art piece using my Shading with Stain Technique. If you haven’t tried it yet, I’m warning you it’s addictive! I get emails all the time from readers sharing their work, and I’m BLOWN AWAY by the talent. Some of you are putting me to shame!
If you’ve been itching to try this technique for yourself, you can either check out my beginner’s tutorial, or tune in for my LIVE tutorial on Wednesday (3/6) morning at 9:30am on Facebook and Instagram! It’s going to be bomb! We’re @RealityDaydream in both places!

*This post is sponsored by our friends at Walnut Hollow. Thank you for supporting the brands that make Reality Daydream possible! This post contains affiliate links.*
I had pinned this gorgeous cluster of succulents awhile back, thinking that it would be so perfect for my Shading with Stain technique! Any flower that has lots of repetition and deep contrast is great candidate for this.
Sadly, I don’t know where the image came from, or what source to credit. If you’re planning to make something to sell, you should absolutely get permission from the photographer before ‘being inspired’ by their work. But since I’m not selling this, I feel comfortable using it for this demonstration and tutorial!
Supplies for Stained Box Project
- Walnut Hollow Wooden Box (they have lots of other sizes and shapes too!
- 220 grit sandpaper
- Printed design or template
- Charcoal
- Pencil
- Rubber gloves
- Wood stain (in a medium to dark brown shade)
- Black Unicorn Spit for shading
- Cotton cloth (I cut up an old undershirt)
- Polyurethane (oil-based)
I’m so incredibly excited to partner with Walnut Hollow on this project, because they have so many amazing products that inspire creativity! My favorite items are obviously their raw wood items like slabs of live edge, wood slices, and wooden boxes. But they also have supplies for wood burning, carving, leather branding, clock-making, etc! Be sure to snoop around their website and get your creative wheels turning!
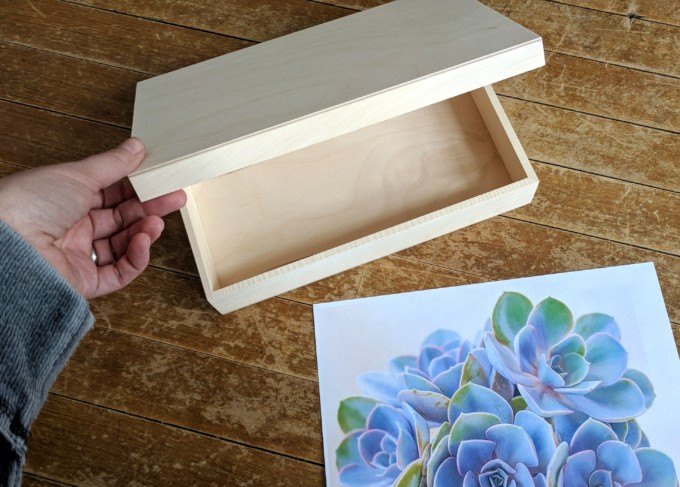
I chose this small wooden box that would be perfect for trinkets or jewelry. You’ll begin by deciding what position you want your floral (or whatever) design onto your wooden box. Then cut off the excess, and cut around the edges of the succulents or petals like so:

I have a really fun way of showing you how to transfer a design without using an overhead projector! First trace the outer edge of the ‘petals’ with a pencil.
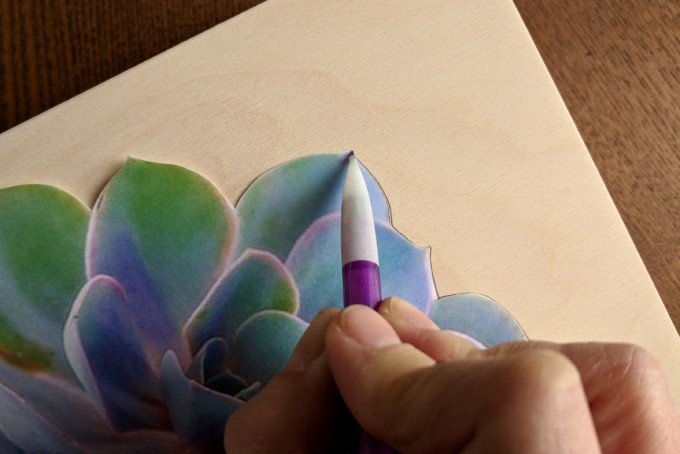
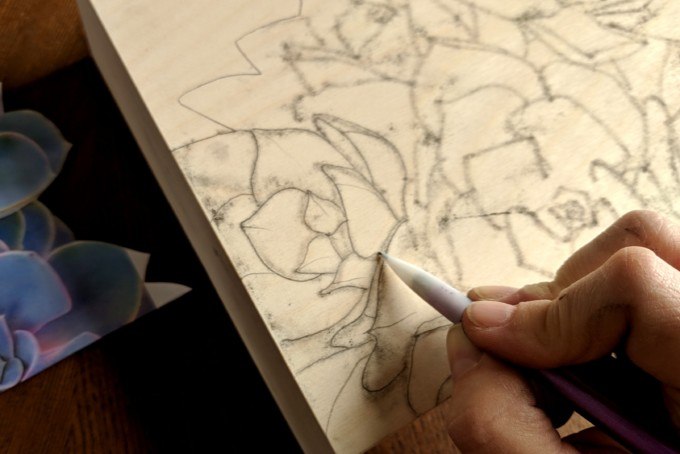
Flip your page so it’s upside down, and rub charcoal all over the back side until it’s completely covered. Then gently place it charcoal side down onto the wooden box in the place where you want your design. Use the eraser of your pencil to trace over all the edges of the petals. This transfers the charcoal to your wooden box!!

Since the charcoal will rub off and is pretty unstable, you want to trace over your charcoal markings with a pencil. Then wipe away the charcoal lines with a microfiber cloth.
We are ready for the FUN PART! Gather up your brown wood stain, Unicorn Spit, rubber gloves, and cotton cloth.

When you’re shading, you want to think about where the light is hitting the object. So typically the base of the petal is in a shadow, and it gets lighter as it goes out to the tip. For more complicated designs like this one, I rely heavily on the image I’m using for inspiration, and look closely at where the shadows are for each petal individually.
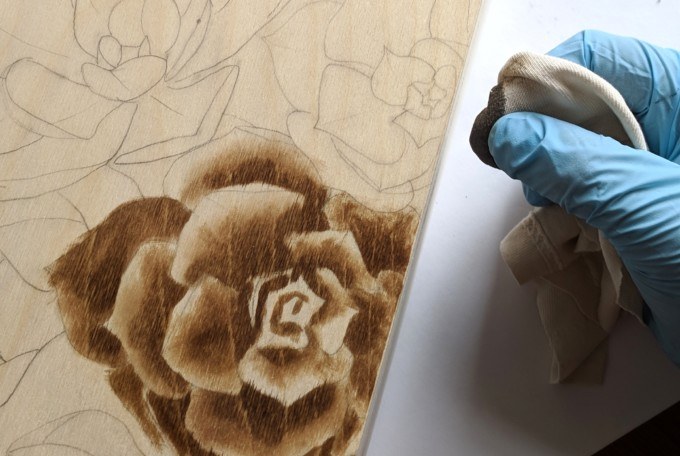
If this feels really advanced, be sure to check our our beginner’s tutorial to get some basics under your belt. I promise you, it’s easier than it looks.
Keep going, petal by petal! It helps to take a breather and stand back to look at your work every so often. Being so close to it can make it just seem globby and… not good. But check out the big picture from time to time! You can always go back and add deeper shadows wherever you feel you need them.
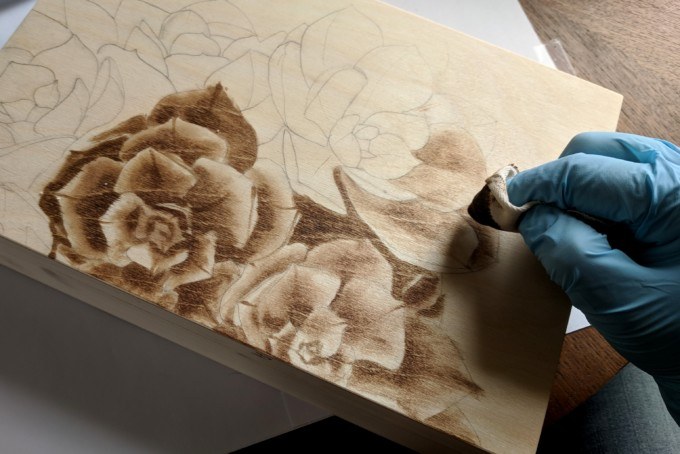

Once I finished with my ‘coat’ of the brown stain, I let it dry for several hours. Then it’s time to go in with the REAL dark shadows. This part is optional, but I think it’s what really makes it come to life. Do you see the difference?

Once I finished with the black, I let it dry for another couple hours before sealing.


Since I used Unicorn Spit on this piece, I have to seal with an oil-based sealer. Otherwise it will reactivate the properties in the black and it will start smearing. No bueno! I used this stuff to seal. Nice and shiny!!

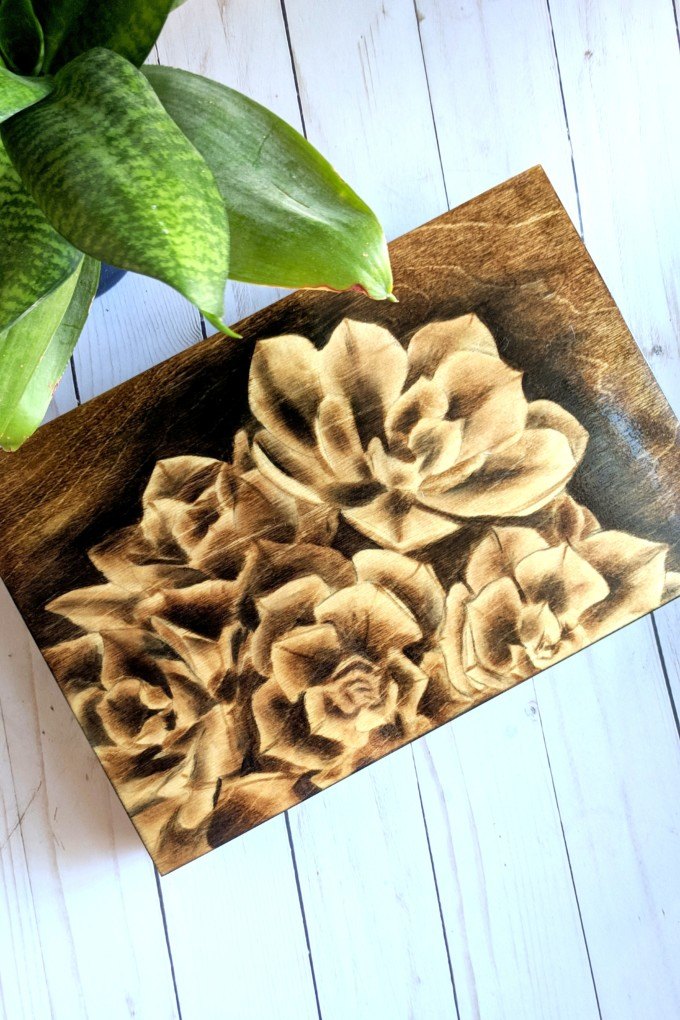
I’m going to GIVE AWAY this wooden box on Wednesday when I do my LIVE demonstration on Facebook and Instagram (you can watch in either place!), so be sure to set a reminder for Wednesday at 9:30am CST!!
~Bethany
~~~~~~~~~~~~~~~~~~~~~
Thank you for pinning!!


Stunning! I used to do a lot of this type of staining on wood, I’ll agree it’s addictive!
A quicker way to transfer is to use a sheet of carbon instead of charcoal. I’ve used black, gray and white depending on the stain. It’s faster and it comes off cleanly. Charcoal works just fine too 🙂
A note of caution regarding Unicorn Spit: it’s not light fast and will not only fade, but some colors change. I used black a lot when I was doing this technique and some of the pieces – about 5 years older I think – the black has turned purple. Just like a sharpie marker will. Orange turned muddy brown, bright pinks, fuchsia and purple also change to startling ugly shades 🙁
This has been almost universal. Didn’t seem to matter if the wood was prepped or not, or what it was sealed with; I used everything from varathane, polyurethane, epoxy resin, more.
It’s a shame but long term Unicorn Spit is not a reliable product. Thankfully there are so many other products that have stood the test of time!
🙂
I’m sad that you experienced this! I have several pieces that I painted with Unicorn Spit 5+ years ago, and haven’t noticed any color changes over the years, but I will keep an eye out for it. That makes me sad!
Very pretty 🙂
Breathtaking. Loved it.
This box is GORGEOUS!
I just received your email. So decided to look into what you do. Wow! You do such beautiful work. No I want to get a project going. I just do not know if I have a steady hand. Will start small. Also, will let you know how I do. Thank you for your tutorials. Laura
Laura, you’re SO SWEET! And I love that you’re going to give this technique a try! Let me know if you have any questions. And send me pics when you’re done! (beth@realitydaydream.com)