I discovered a new staining technique, and I’m so excited to show you! I used it on my branding for videos, and I’ve been itching to try it on something else more practical. I’m not really sure what to call this, so for lack of a better term, we’re going with ‘Reverse Staining Technique’.
*This post is sponsored by Frog Tape. Thank you for supporting the fabulous brands that make Reality Daydream possible! This post contains affiliate links.*
Supplies
- Wooden Item (can be a piece of furniture, wooden wall art, or anything! I’m using this wooden picture frame)
- Frog Tape
- Exacto Knife
- Polycrylic
- 220 grit sandpaper
- Cotton Rags
- Latex gloves
- Wood Stain (I used this stuff)

You can really do any design with this. I decided to go with a starburst pattern shooting out of one corner. But you could do stripes, plaid, or any pattern really!
We love how amazing Frog Tape adheres to the surface with it’s patented Paintblock Technology. They have tons of inspiration and painting tips you should check out too!
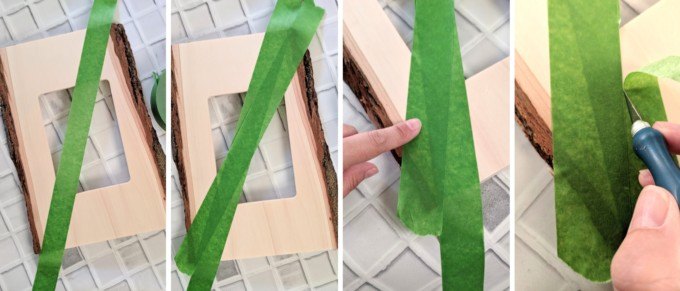
So this is what your first ‘burst’ will look like:

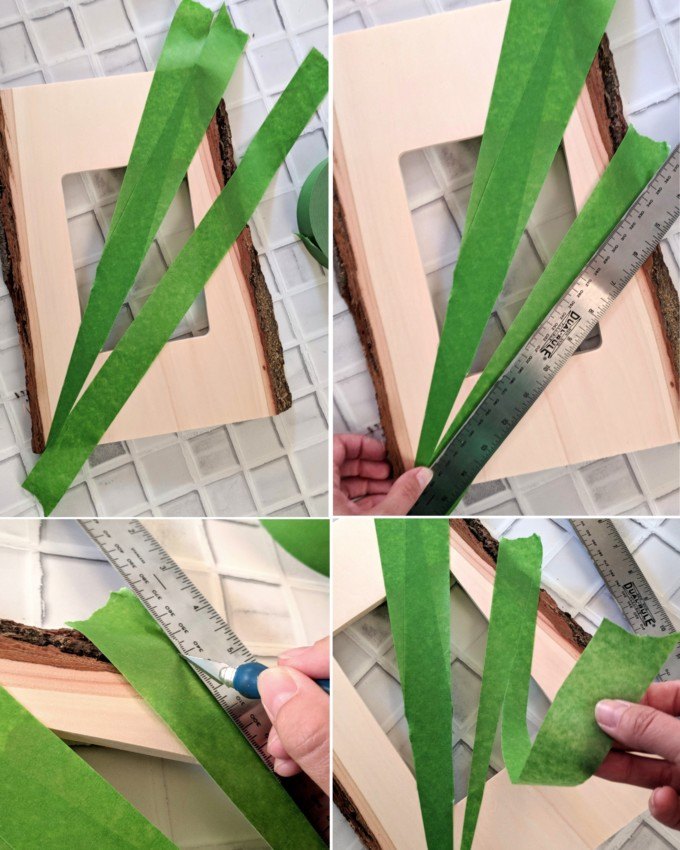
Continue adding more ‘bursts’ out from that first one, making them progressively smaller with each one. I used a metal ruler to help me cut straight lines with my Xacto knife. Just push gently though! You don’t want your blade to go all the way through the tape and into the wood!


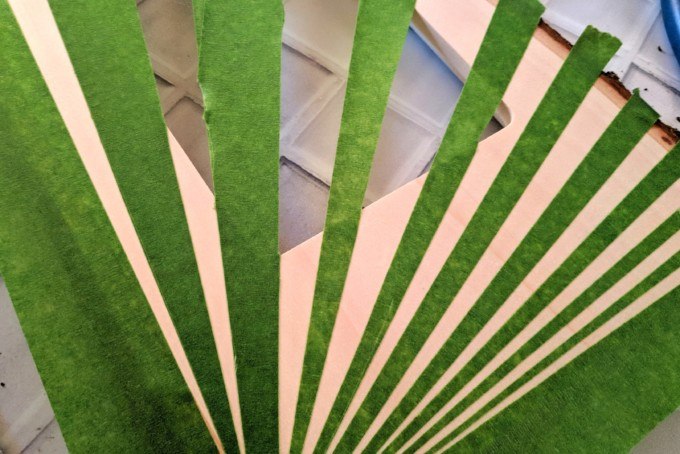
When you’re finished taping off your design, go back and press all the tape edges down tight. And now it’s time to poly! This time I used oil-based poly, and it didn’t work out as well as the last time. So I recommend using a water-based poly like this stuff.

After it’s dry, go ahead and remove your Frog Tape! You should see a very subtle design! Since I used oil based poly on this one, the design stands out a lot more than it does when you use water-based because the oil yellows the wood. Why did I do that?!

Put on your gloves and open a can of stain! The poly’d parts of the wood won’t accept the stain since the wood grain is sealed in those spots. So you’ll see your design really come to live as you wipe on and wipe off the stain!
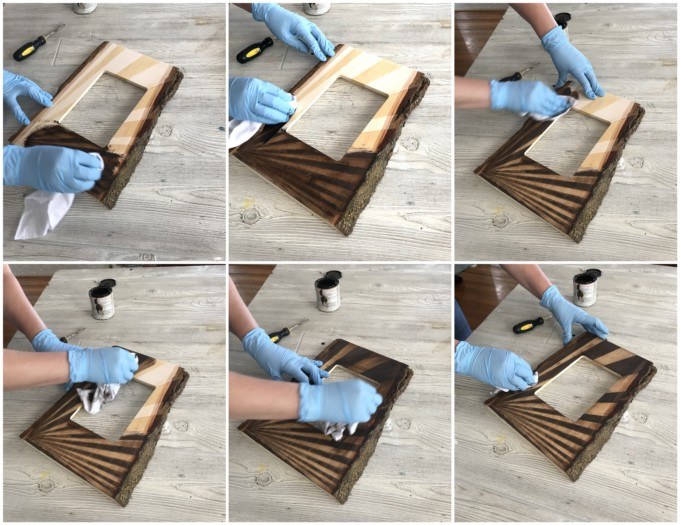
The staining is SO FUN because it comes to life before your eyes! I love the rugged organic look of it.

Here she is with a cute pic!

I’m totally into it on our picture ledge in the living room!

My mind is spinning with ideas for different ways to use this technique! What will YOU try it on?!
~Bethany
Thanks for pinning!

Related:
-

Nick and I have dabbled in epoxy here and there, but we've never done anything…
-

We're in the dog days of summer, and it seems like my kids are always…
-

If you love unique art and have absolutely nothing to do with your time, come…
Bethany, how about applying the water based poly first, and when dry, apply the oil based over the water based – would that prevent the yellowing?
I would think that should work!
I loved this technique so I tried this with water-based poly. Made my design, pur it on my wood, used the poly, let it dry, removed the tape, and then used a dark stain over it. The dark stain looks like it bled underneath the poly. Any ideas how to avoid that?
This is bound to happen a little because of the open wood grain. My best advice is to use the least amount of stain as possible when wiping it on, then come back and do additional coats of stain until it’s as dark as you want it to be. So sorry that happened!
That’s great! I will try that! Thank you so much!
Ashley, it’s great that you mentioned that because I thought that might happen. How about trying to ‘wipe’ the stain AWAY from the edge of the tape so there is a minimal amount of stain loading on the tape edge? I’m giving that a try when I get around to it.
What a terrific technique! That frame looks so good – thank you for sharing it with us!
I love it! its brilliant! you are so talented!