• Home
  • About
  • Tutorials
  • Recipes
  • Furniture
  • Contact
    • Contact
    • Infertility
    • Disclosure
    • Privacy Policy
  • Shop
    • Facebook
    • Instagram
    • Pinterest

Reality Daydream

The Dream is Free, The Hustle Sold Separately

  • Home
  • About
  • Tutorials
  • Recipes
  • Furniture
  • Contact
    • Contact
    • Infertility
    • Disclosure
    • Privacy Policy
  • Shop

Rainbow Jell-O Cups

March 6, 2013 by Bethany Sy

Hey! Its Meghan from Cupcakes with Sprinkles. I am always happy on the first Wednesday of the month cause I

 
I can’t believe its already March. Spring is on its way! I’m sure you’ve seen rainbow Jell-O cups around. Its very simple, but looks dramatic and awesome. I recently threw 2 of my kids a rainbow themed birthday party, these were part of the treats. There are lots of fun other rainbow party ideas on my blog so if you want more check it out here! Now, lets make some Jell-O!
So you’ll need 6 different colors of Jell-O and Cool Whip…


We are going to use the speed set method to make this Jell-O. So you need to boil 3/4 cup water…


Add in the gelatin and stir until dissolved…


Pour 1/2 cup of water into a separate measuring cup. Add enough ice to bring it up to the 1 1/4 cup line. Stir in the Jell-O/boiling water and stir until it starts to thicken and then remove any ice that hasn’t melted. Pour 1/3 of the Jell-O into a small bowl…


Pour the remaining Jell-O dividing evenly into separate cups and refrigerate for 30 minutes…


Mix a 1/3 of a cup of Cool Whip with the portion of the Jell-O you poured into the small bowl earlier…


Divide evenly between the cups of set Jell-O…


Repeat with the remaining Jell-O colors and your final product will be dramatic!
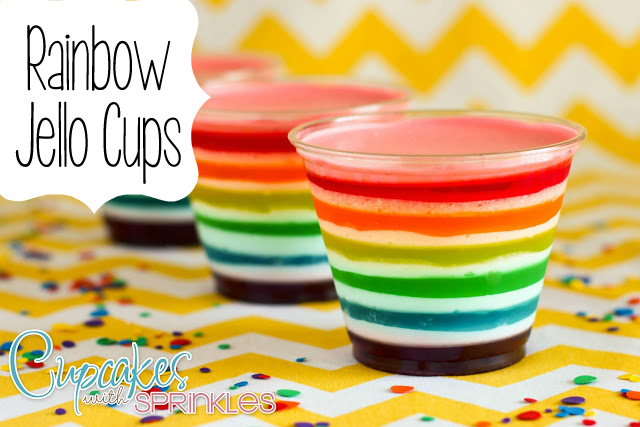
Rainbow Jello Cups {Sawdust and Embryos}

Rainbow Jell-O Cups
Recipe Source: Glorious Treats
get to be here!

Save Print
Rainbow Jell-O Cups
 
Ingredients
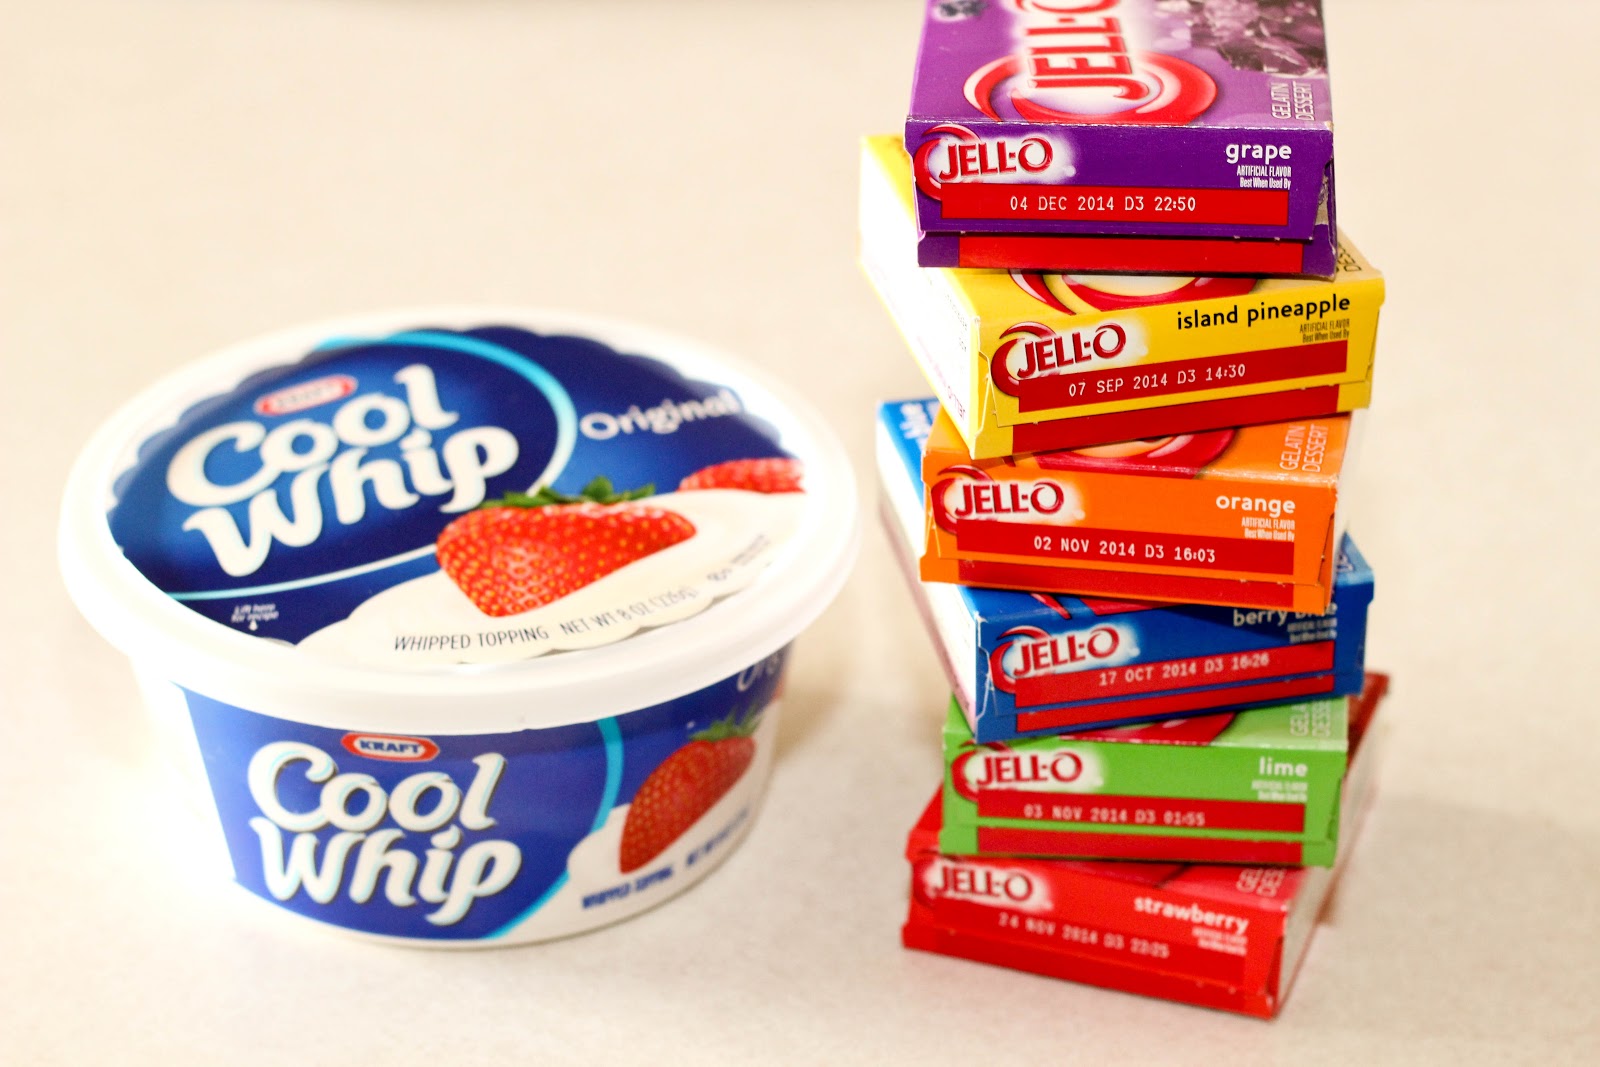
  • 6 – 3oz boxes of Jell-O in different colors
  • 1 large container Cool Whip
Instructions
  1. Prepare one package of Jell-O following the ‘speed set’ method, I started with purple. Pour ⅓ of the liquid into a small bowl. Divide the rest of the Jell-O between several cups. Refrigerate the cups for 30 minutes. Mix ⅓ cup of cool whip into the Jell-O in the small bowl. Divide between the cups of set Jell-O.Continue for each of the other 5 colors. Enjoy!
3.5.3226
 

Related:

  • Planting up the flower beds!

    Every spring, I have grand plans of having the most epic vegetable and flower gardens!…

  • Article Sven Review

    Howdy friends! We've been using and abusing our Sven Sofa and Armchair from Article for…

  • Spring Cleaning and Garage Organization

    Is it too early to call this spring cleaning? The truth is, we've been planning…

About Bethany Sy

Nick and Bethany Sy are the creative free-spirits behind DIY/Lifestyle blog, Reality Daydream. They recently purchased a historic mansion and have been documenting the ups and downs of renovation and making this home their own... all while sharing tips and tutorials along the way! When they found themselves in the trenches of infertility, they started a journey that would prove to be their most important DIY project ever, and have 3 beautiful girls to show for it. <3

« Painted Dresser for Little Girl’s Room!
20 Months »

Comments

  1. 4

    Sarah says

    March 31, 2014 at 7:39 am

    I tried making these and they did not turn out like yours. 🙁

    Reply
  2. 5

    Debbie Borthwick says

    March 13, 2013 at 4:12 pm

    I love the look of these! I think I’ll have to try this for our Easter dinner, the grandkids will love them!
    Debbie 🙂

    Reply
  3. 6

    Canna says

    March 11, 2013 at 8:55 pm

    only one comment? wow. I came on here hoping I would find my answers in the comment section, guess I’ll just have to ask myself. I decided to try this with my kids. Noah’s ark is one of my kids favorite Bible stories and one they know well, and the rainbow themed jello tied in so well we decided to try this. It is not turning out as nice as yours look. First of all, approx. how many cups of jello will this make? Second, do you refrigerate the cool whip mixture after you layer it before the next color as well? please get back to me, my blog is: howbigimblessed-canna.blogspot.com if you wanna just leave me a message there. Thanks so much!
    ~Canna

    Reply
  4. 7

    ade@fortheloveofpainting says

    March 6, 2013 at 2:43 pm

    Those look fun!

    Reply

Leave a Reply Cancel reply

Your email address will not be published. Required fields are marked *

Rate this recipe:  

  • Facebook
  • Instagram
  • Pinterest
  • RSS
  • YouTube
We are Nick and Bethany! Welcome to our blog, Reality Daydream where we share our DIY adventures!

realitydaydream

Still can’t get over these shelves. 😍 These Still can’t get over these shelves. 😍

These Aksel Radius Floating Shelves by @shelfology are the perfect finishing touch to this wall in our kitchen. 🙌

#gifted #shelfology #radshelfie #floatingshelf #akselradius
I needed an instant-gratification project today fo I needed an instant-gratification project today for my well-being, and this little wooden stand was so fun and fast!

Details and links to everything in this pic in Stories!
If ya just need a slab of wood, grab a cutting boa If ya just need a slab of wood, grab a cutting board when you’re at Target or Walmart! They’re made of hard wood!

I used this cutting board to experiment and make some prototypes for a large-scale piece of art I’m doing for our church. It’s got me EXCITED!

Follow along for that project- happening soooon!

@dapproducts @dremel @jet.woodworking
You’ve all seen the video, but here’s some sti You’ve all seen the video, but here’s some still shots of the kitchen wall in all its glory!! 

The Aksel Radius Floating Shelves by @shelfology were the perfect finishing touch! 

Should I do a house tour of our main floor this week?!?! 🙌🌿

#sponsored #floatingshelf #radshelfie
Load More Follow on Instagram
View of our entryway of our historic mansion that we're slowly renovating and making our own.
Click here for lots of art projects using only wood stain on furniture!!
Please feel free to share or pin my posts! You're welcome to use ONE of my images (no collages or pinnables) with a link back to the corresponding post. Please do not edit or crop that single image in any way. Improper use of my photos, ideas or words is a violation of copyright. Thank you!

Categories

Attention: Almost any do-it-yourself project involves risk of some sort. Your tools, materials, and skills will vary, as will the conditions at your project site. Reality Daydream has made every effort to be complete and accurate in the instructions of the plans on this website. Reality Daydream will not assume any responsibility or liability for damages or losses sustained or incurred in the course of your project or in the use of the item you create. Always follow the manufacturer’s operating instructions in the use of tools, check and follow your local building codes, and observe all commonly accepted safety precautions.


Copyright © 2023 · Modern Blogger Pro On Genesis Framework · Customizations by Sweet Theory Designs · Privacy Policy · Log in