My friend Lindsey and I have been actual besties since 3rd grade. She lived two blocks from me when we were growing up, and we were together ALL.THE.TIME. I couldn’t find any pictures from when we were kiddos, but I found this sufficiently embarrassing photo of us getting ready for prom in the 90’s.
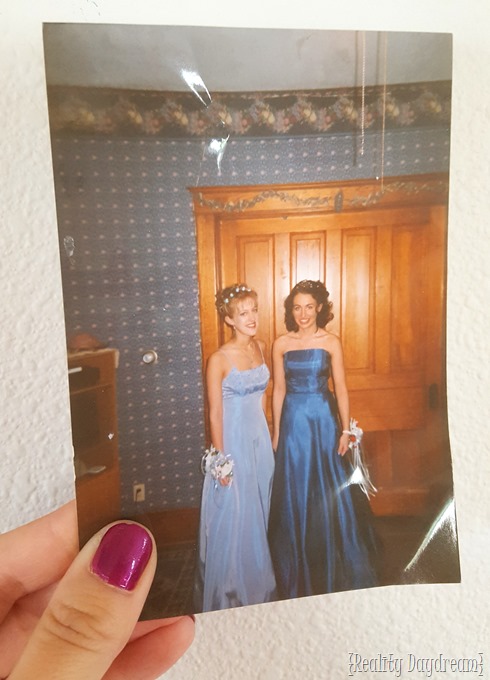
I see that you were distracted by my mom’s floral wallpaper and fruit swag border? You might be devastated to learn that she’s since removed the wallpaper and painted it a ‘safe’ beige.
We never dreamed that 25 years later, we would both have our very own set of twin girls. My twins are 5, and Lindsey gave birth to her twins a couple weeks ago, and I can’t even.

Photography by Jennifer Black
I’ve made wooden name plaques with my scroll saw before (you can see ones I made for the twins in this post), but when Lindsey suggested we put an ‘arrow’ through it… I thought BRILLIANT.
SUPPLIES for Wooden Arrow Name Plaques
(this post contains affiliate links)
- Slab of hardwood (in the dimensions of your choice)
- Chalk Marker
- Drill
- Scroll Saw
- Wood Glue
- Roundover Router Bit
- Paint
- Orbital Sander
- Stain
- 1″x10” pine board
- 1/4 plywood for substrate
- AirStrike or other nail/staple gun
- Hefty Picture hanger
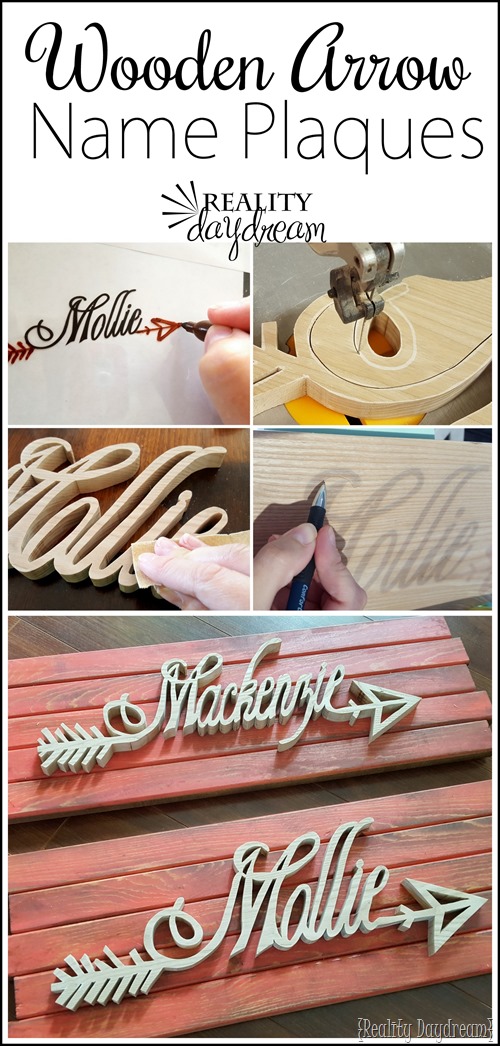
The first thing I did was print out the name onto a transparency. The font I used is called ‘Champagne’. But you could use any scripty font!

I used a piece of cardstock to draw out from the edges of the name to create my straight ‘arrow. Notice how I have it lined up along the bottom of the text rather than the middle. It’s just the look I was going for, but you can do whatever you want!

Then I roughly sketched what I wanted the front and back of my arrow to look like using a sharpie.

Next, I found me some hard wood to cut these names out of. I think I ended up using oak or alder. The reason you want hardwood is so that it’s stronger given the delicacy of the lettering once cut out.
I used my old-school overhead projector to project the transparency onto my wood. If you don’t have a projector, you could use this method.

I started tracing with a mechanical pencil, but the wood grain was so open, my graphite kept catching in the grooves and was making it very difficult to make smooth lines, so I ended up switching to use a chalk marker. It worked SO much better, and we even easier to see!

There were certain letters that weren’t “attached”, so I just drew little lines to bring them together… because this needs to be a solid piece with every letter connecting.
The arrow was a little wonky, and I knew I could do better. So I folded a notecard in half and cut it with a scissors to make an arrow head approx the size I wanted. Then I lined up the center of it to the arrow head I had drawn with the chalk marker, and re-traced it to be straight, even, and symmetrical. SO much better!

Time to cut ‘er out!
I tried to make things easier by cutting all the ‘bulk’ off the edges with our band saw. That part is totally optional. But what’s NOT optional is drilling holes in all the inner parts of the letters. Use a drill bit that’s at least big enough to fit the scroll saw blade through.

Then cut away! I’ve put in HUNDREDS of hours on the scroll saw, and I find it so relaxing and FUN! This is the one I use and it’s A.M.A.Z.I.N.G. But if you’re looking for a more mid-range (read: less expensive) then this one is also great quality and handles well! Whatever you do, don’t buy a scroll saw in the $100-$200 range. You’ll regret it for sure.
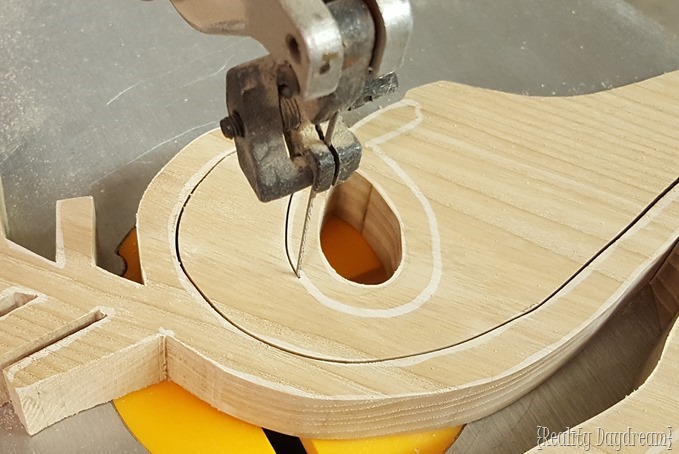
I find it easiest to cut out all the ‘inner’ holes first… before things start getting delicate. And in some cases, I’ll leave pieces of wood in narrow ‘crevices’ to keep it strong and stable while I continue cutting. I’ve learned the hard way so you don’t have to!

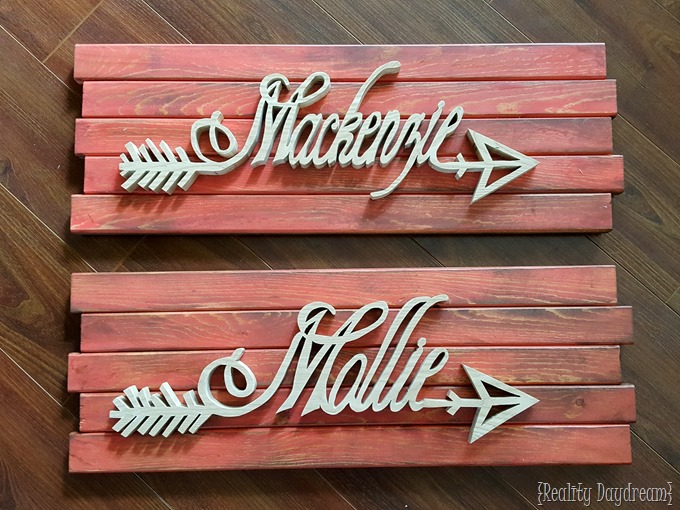
As you can see above, I made the longer name ‘Mackenzie’ slightly smaller so that they would be the exact same length. Then I sanded them lightly on front and back with 220 grit.

Next, I ripped down a 1×10 pine board to make 5 strips… roughly 2” wide. Using a roundover router bit, I rounded off two of the edges on each board.

I used the same technique I used in this post to make new wood look old… only using coral tint instead of blues! Here’s a video of the process.
So I painted the wood coral, then sanded it down with my orbital sander, then stained!

I cut a substrate from a piece of 1/4” plywood to be just smaller than the dimensions of the wood strips together, and then glued and brad-nailed it into place with my AirStrike.

Slop on some glue to the back side of the name, and pressed it into place on the ‘barn boards’… making sure it centered from side to side as well as up and down. You can adjust it after pressing into place, so don’t sweat getting it right the first time. Once you have it where you want it and you’ve wiped of any excess glue that may have oozed out, plop some heavy items on top to hold it snug while it dries. I used some quarts of paint!

I let these dry overnight, and they’re DONE! Truthfully, I haven’t put the hangers on the back yet, but we use these hangers because they’re super hefty! We don’t want these suckers falling. Especially if they hang them over the baby crib(s)!

Lindsey’s amazing photographer Jennifer Black used these for the twins’ newborn pics! SO CUTE!

I love how personalized these name plaques are, and that you can customize them by using a different font, or staining/ painting differently, etc! No two will be the same! And it would make for an awesome handmade gift idea!
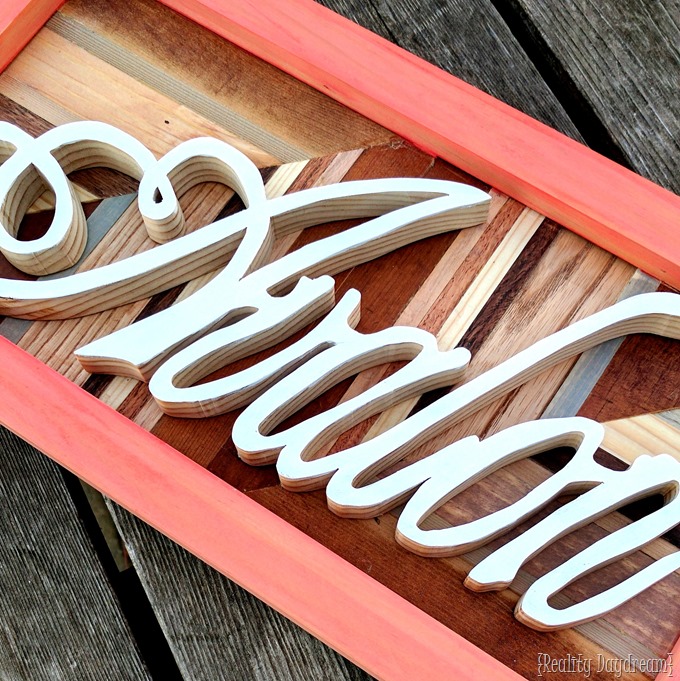
UPDATE! I recently made one of these name plaques for another friend that had a little girl, and I used scrap wood for the background to add interest instead of the arrows! The sky is the limit with different ways to modify these!

I hope you enjoyed this tutorial! Be sure to check out all our other tutorials here! And projects that are specific to scroll saw here! And as always, DEFINITELY TAG ME when you try one of our tutorials! It makes my day! @RealityDaydream on Facebook, Instagram, and Pinterest!
~Bethany
~~~~~~~~~~~~~~~~~~~~~~~~~~
Thanks for pinning! <3


i really like this projects! looks amazing! you are a great friend 🙂
as a virgin scroll sawer….like i got one for mother’s day and haven’t really used it yet!! any suggestions for my first project?
these are super cute btw 🙂
I would just get it out and start cutting on some scrap pieces of wood. Draw some shapes with a pencil and cut them out for practice! Once you get the feel for it, you should be able to tackle just about any of the scroll saw projects on me-blog!
https://realitydaydream.com/category/scroll-saw/
Beth! These are so precious! What a very lucky friend you have. Wish I had one for each of my grandkids to hang in a grouping but alas, my woodworking skills are sorely lacking.