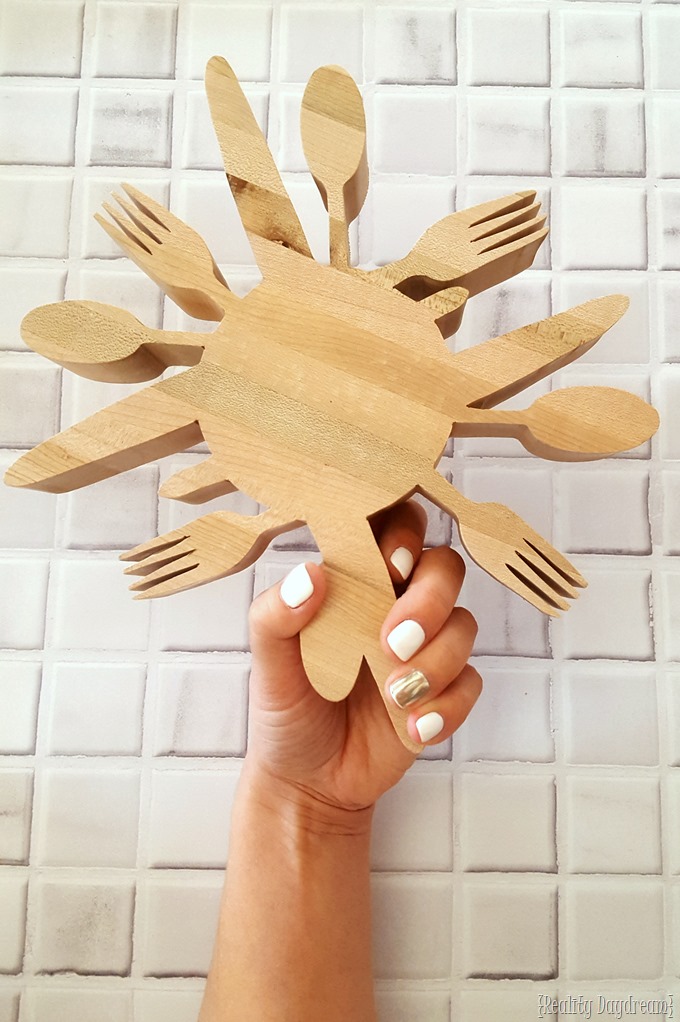
My friend Dana comes over once a week to hang out with us. She’s my bestie! Sometimes we cook together, sometimes we watch Survivor, sometimes we make adult beverages, and sometimes we get all crafty and creative! Aren’t those THE BEST FRIENDSHIPS?!
One such day that Dana was here, she brought over this hunk’o’wood that had once been a butcher block cutting board. It was a little on the small side for being a functional cutting board, so we had fun shooting the wind and bouncing ideas of how we could repurpose it!

*This post contains affiliate links*
It was extra special for Dana to repurpose this butting board, because it belonged to her Mother who unexpectedly passed away 2 years ago. And it almost felt like we were honoring her memory by giving it new life!
Wooden ‘Utensil’ Trivet
- 12”x12” slab of wood (or leftover butcher block!)
- Utensil design cut from vinyl (you could make your own with your Silhouette or order it here)
- Scroll saw
We settled on the idea of making it a ‘trivet’ (you know, one of those things you put a hot pan on?), and Dana designed this fun design that looks almost like a burst of forks, spoons, and knives!

She used her vinyl-cutting software to merge all the ‘utensil components’, and then cut it with her giant/industrial vinyl cutter to be the perfect dimensions to fit on the cutting board. (you could order this same design from her vinyl decals Etsy shop, or just check out all her other designs.
If you order from Dana, you can omit the next few steps (including the transfer paper part) because she does all this work for you. But we like the ‘weeding’ part. Especially the girls! They helped me peel out all the parts in the center.

Once we had all the inner pieces picked off, I placed it face down onto the sticky side of some transfer paper and pressed it down and smoothed it out. Then Peel off the thicker backing and press the whole sticky thing onto the wooden slab… making sure that it’s centered on the wood. Then peel back the transfer paper, and your decal stencil is securely in place!


I thought about tracing this image with a pencil and then peeling off the vinyl, but then I decided it would be even easier to leave it on and cut it with my scroll saw! But first, I flipped it upside down and used an Xacto knife to trim off the excess vinyl that was overlapping the edges.

Then I started scrolling away on my trusty scroll saw! If you read my recent post about the Name Plaques, you know that I’m undecided about how I feel about my current scroll saw. This is the one I use and it’s A.M.A.Z.I.N.G. But if you’re looking for a more mid-range (read: less expensive) then this one is also great quality and handles well! Whatever you do, don’t buy a scroll saw in the $100-$200 range. You’ll regret it for sure.
Scroll away y’all! If you’re new to the scroll saw, check out my Beginners Scroll Saw Tutorial.

Once you got the bulk of it cut out, come back in and cut out those little crevices that you left.

Now just clean up the edges with some 220 grit sandpaper, and this little guy is ready to use!


I know Dana will use and cherish this wooden ‘utensil’ trivet for years, and always think of her mama! Thank you for giving me the honor of making this Dana!

I just realized this would also make a super fun clock for the kitchen too! Just throwing ideas out there!
Also, I’m thinking this would be a great handmade gift idea for Christmas!
~Bethany
~~~~~~~~~~~~~~~~~
Be sure to check out all my other tutorials using the scroll saw by clicking here or on the image below!
Thanks for pinning! <3


awe… thank you for the shout out & mom’s trivet! Love it!!! Thank you soo much!
<3 <3