*UPDATE!* Click here to see the final nursery reveal!!!
Annnnd, we’re back to the nursery:
I literally spent about 3 months vigilantly seeking craigslist for a perfect dresser for the nursery changing table. We had such great success with finding the crib and rocking chair that I thought it would be easier than this. My expectations were even relatively low. Here’s the mandatory criteria:
~ must be a long and low dresser (between 31 and 37 inches high)
~ must be dirt cheap
~ must be raised off the ground slightly so my toes will fit underneath
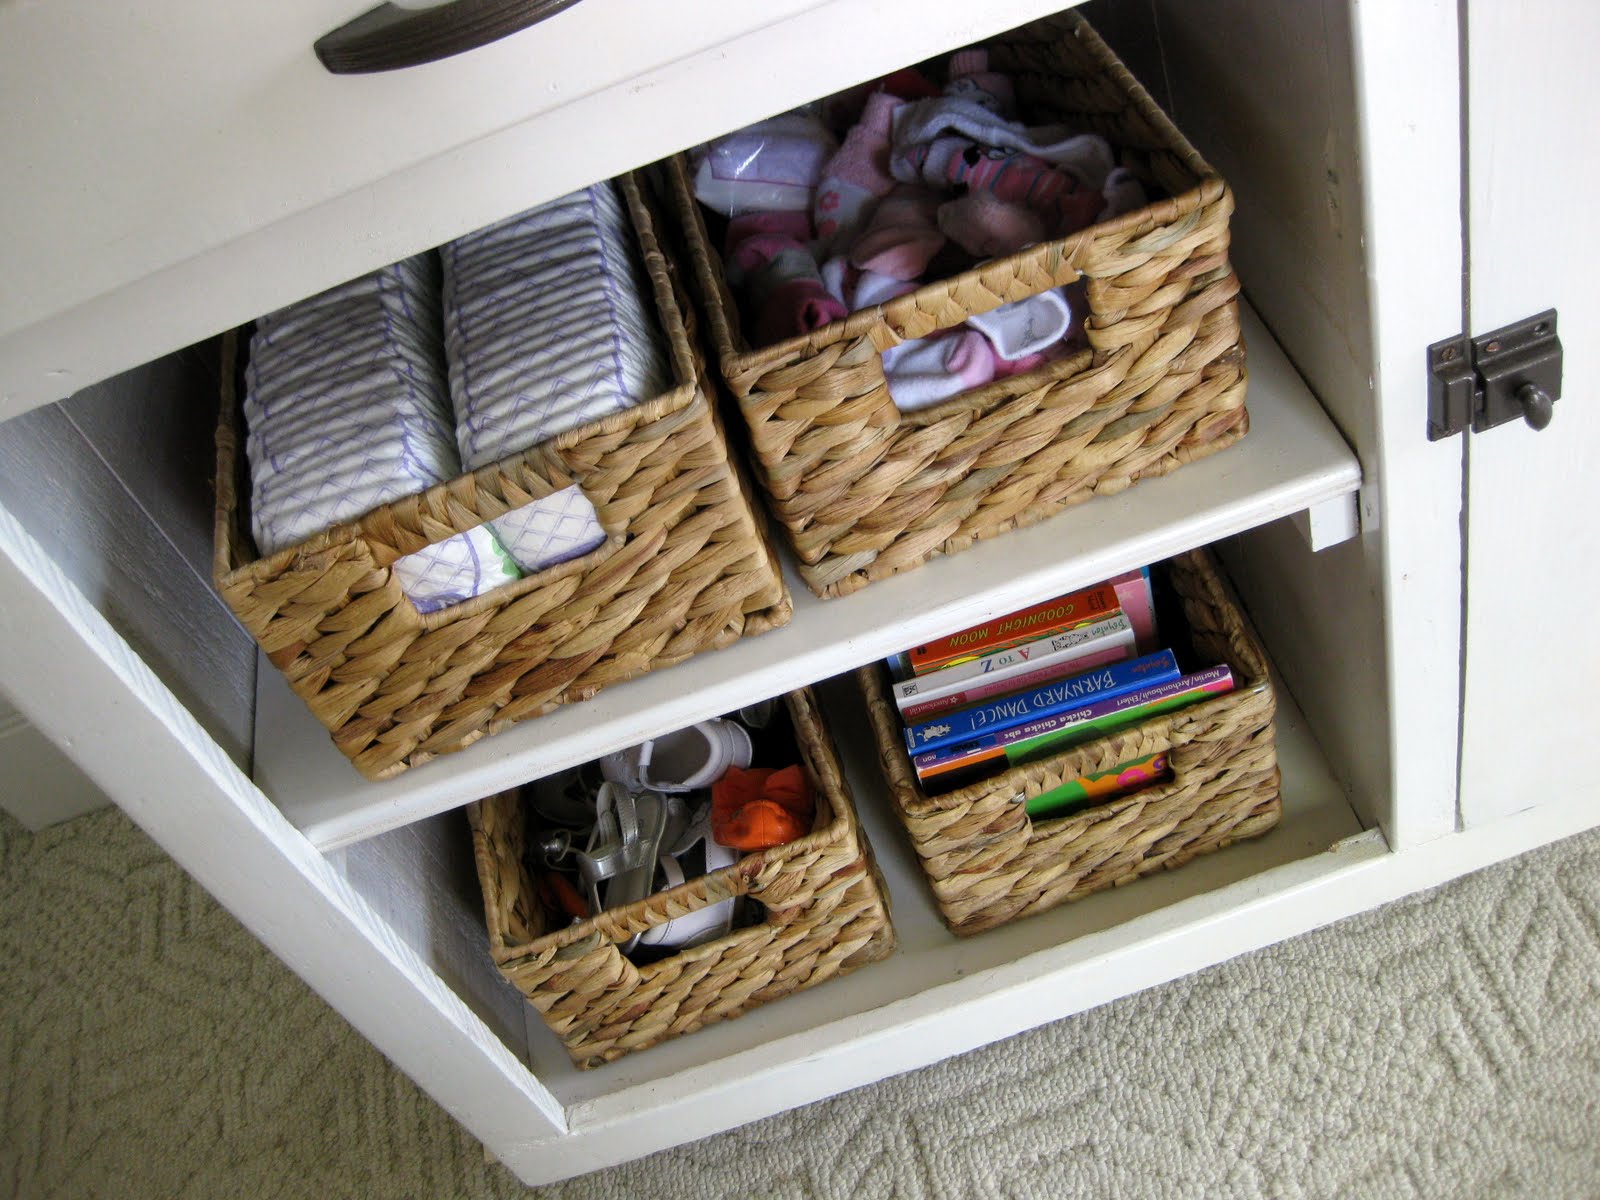
~ must have lots of storage
IS THAT TOO MUCH TO ASK? Well during my baby shower, my loving husband and 5 brothers went to my Grandma’s farm to goof around and waste time while us ladies discussed nipple cream and consistencies of poo. Upon their return, Nick announced that he had found our baby changing table!!! In my Grandma’s BARN. And was told that it fit all my criteria! *cough* especially ‘DIRT cheap! …emphasis on dirt.
…Ok, I like antiques… no big deal, right?
Feast your eyes:


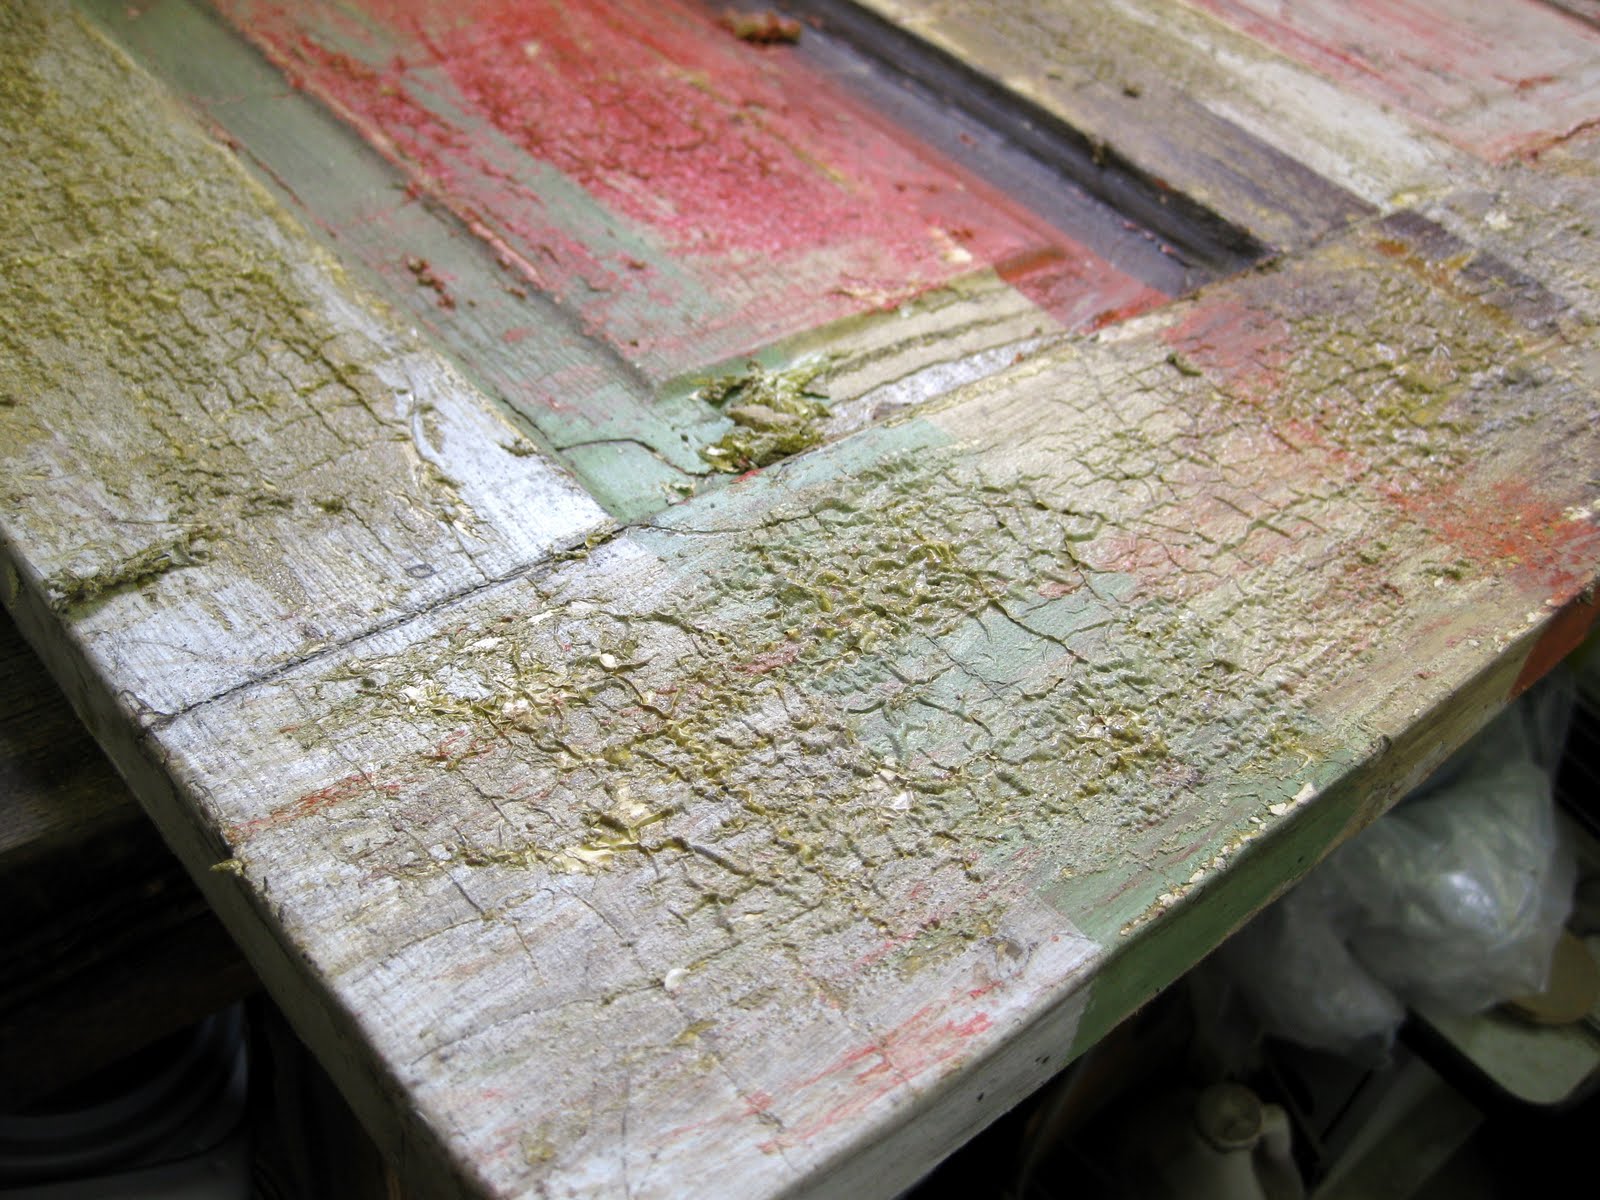
Do you see how much I trust the vision of my life partner? Usually I’m the one that can see the diamond in the rough (heck, I married HIM!) but this piece of spider infested, cat feces covered cabinetry from an unknown era did not have me jumping up and down. Honestly, the very thought of jumping up and down makes my cervix weep.
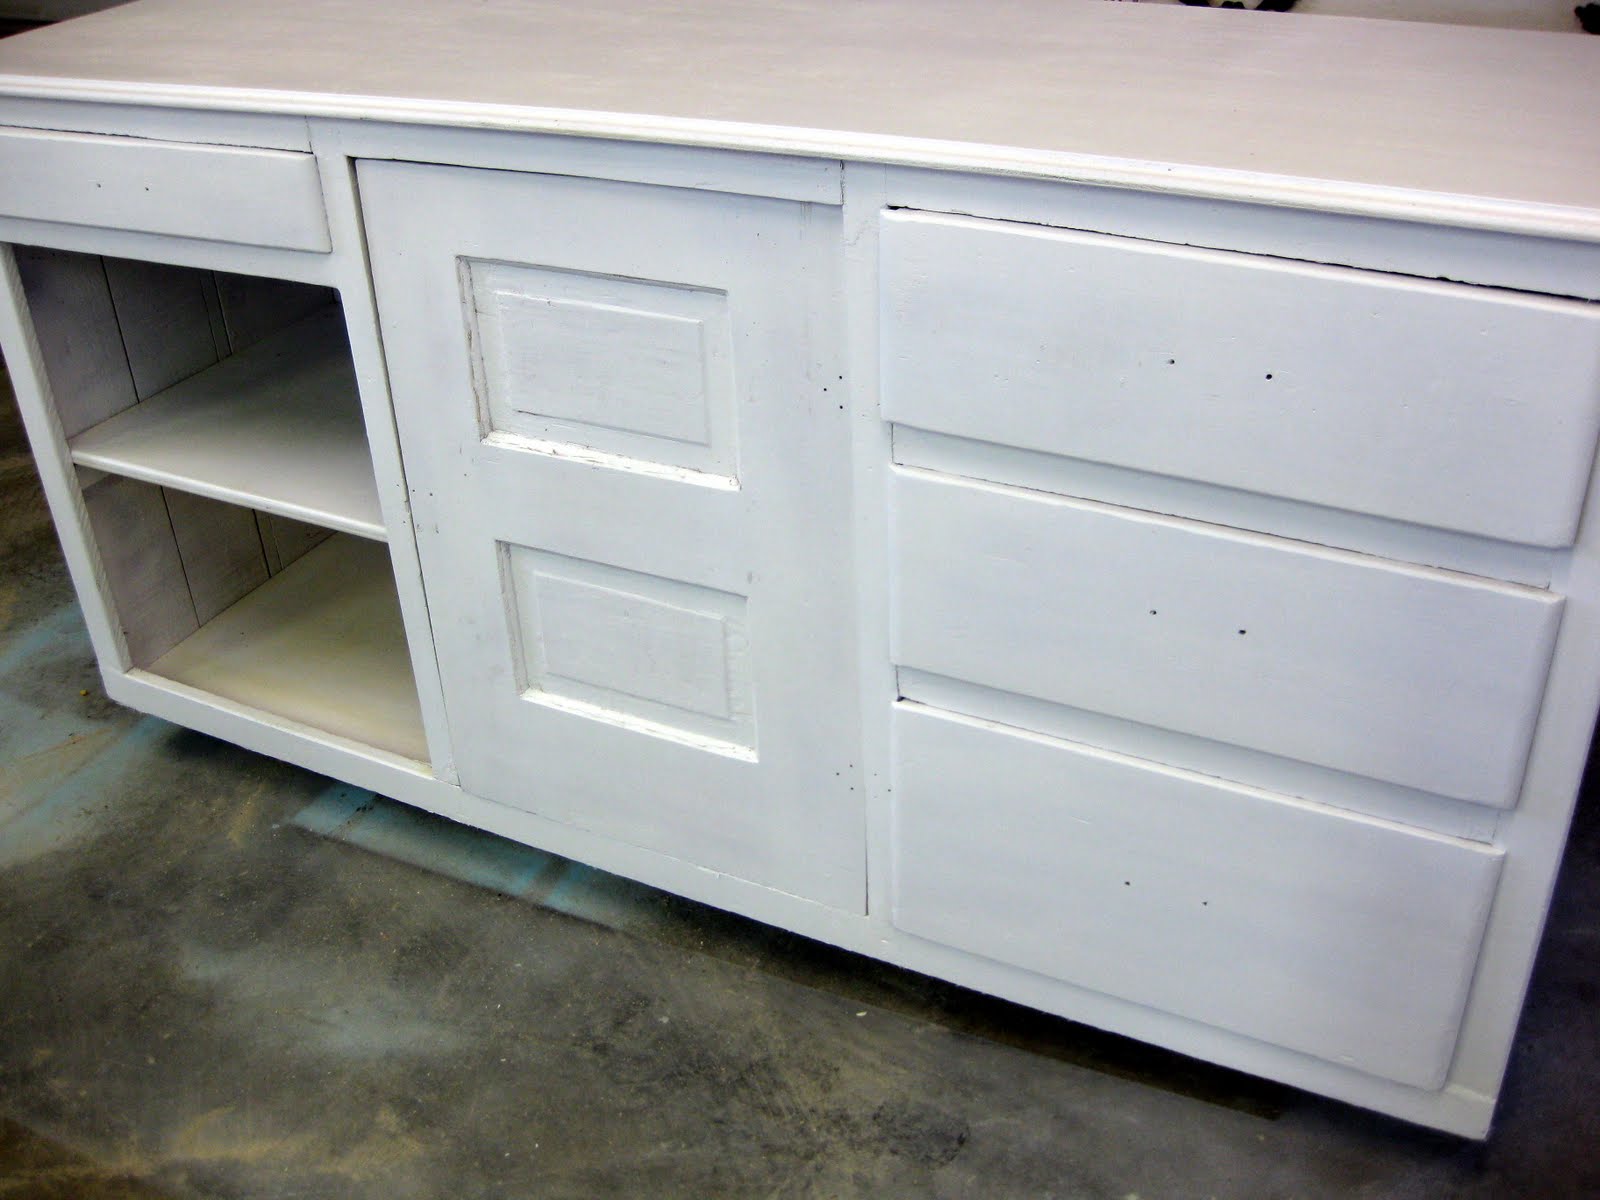
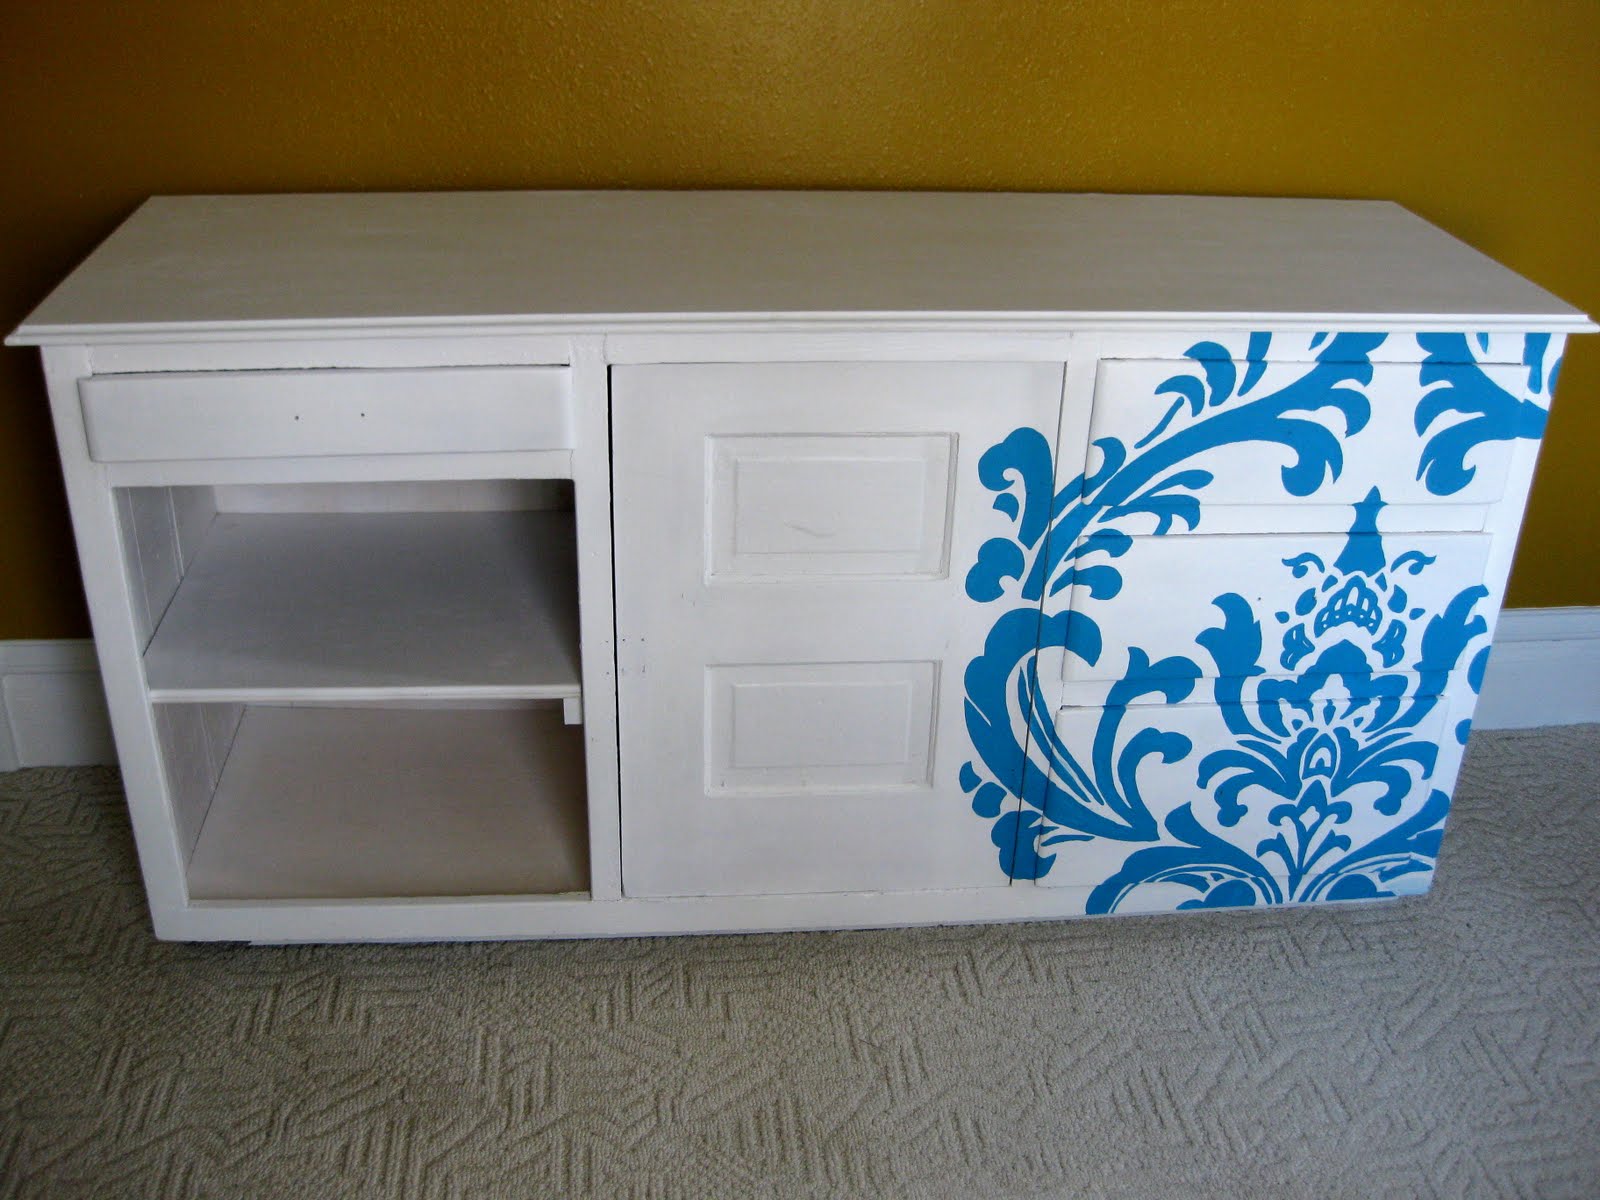
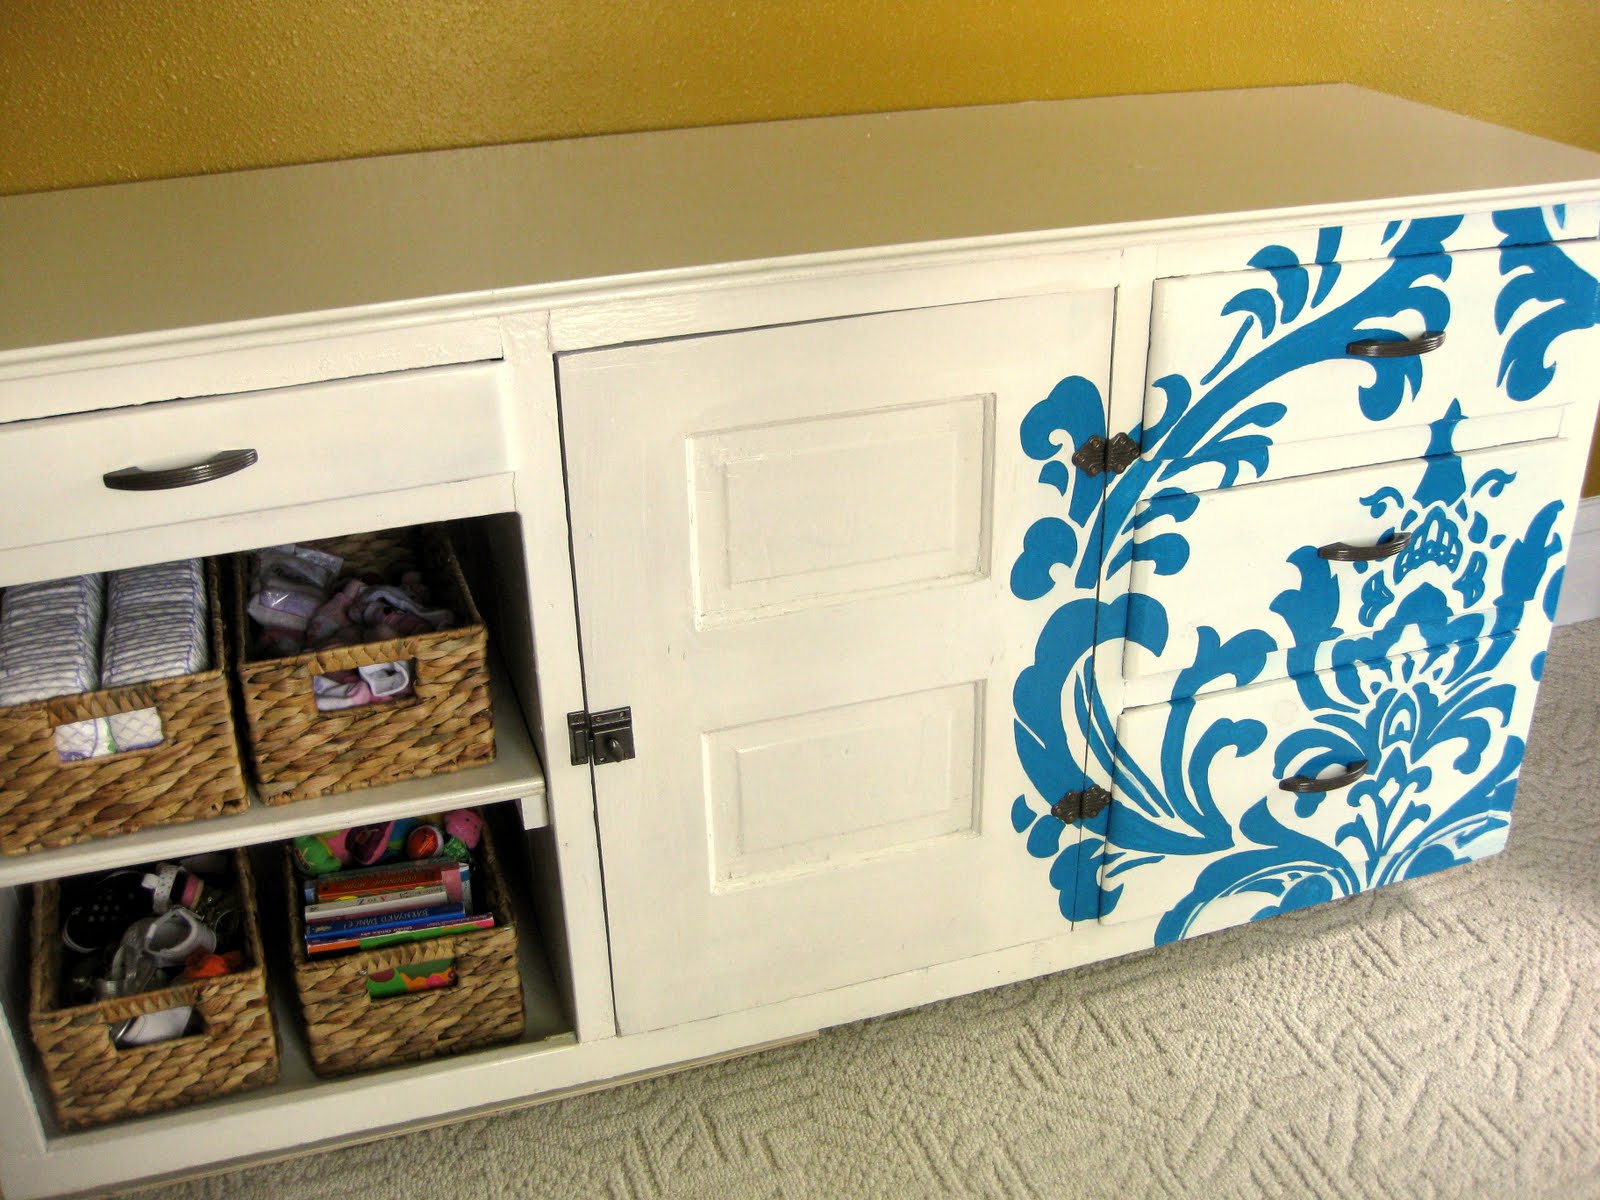
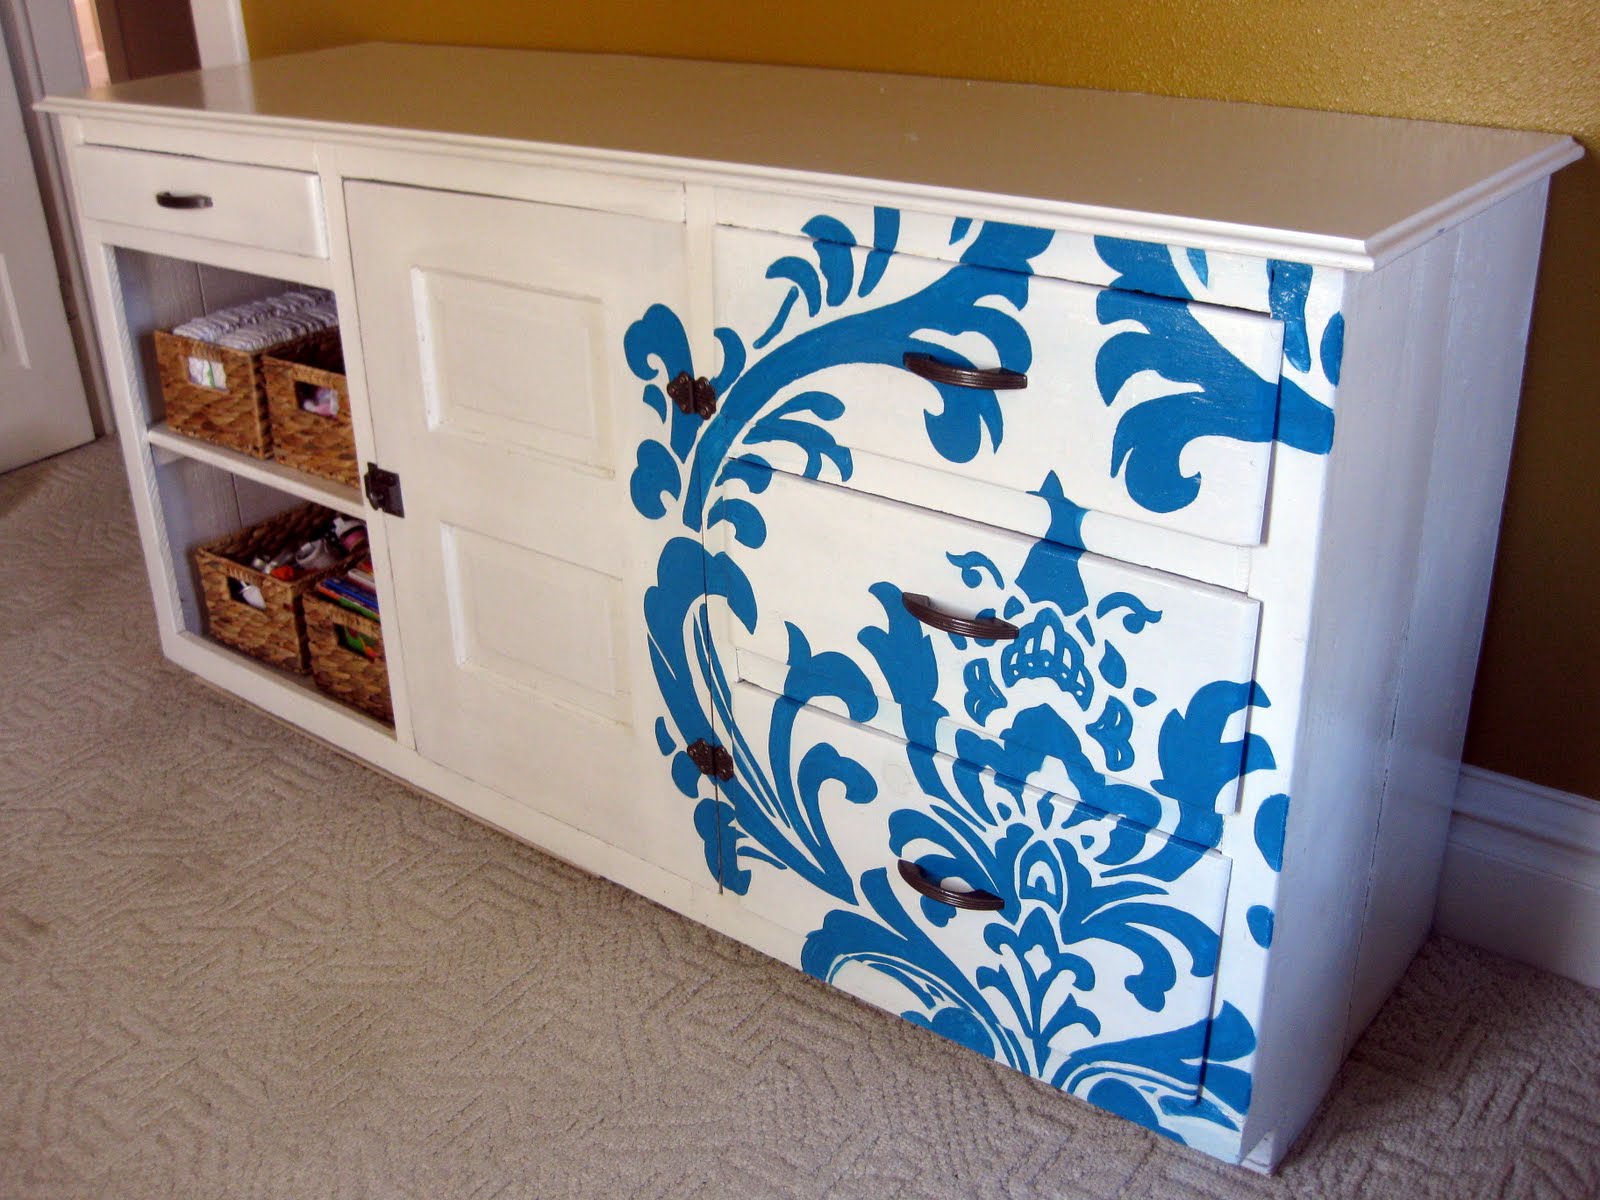
This could easily become the longest post in the history of our blog, so I’ll keep the text to a minimum and let the pics speak for themselves… now that we’ve identified which is the front and which is the back of this beastly disaster.
Also, please take note that this was our fastest furniture restoration/makeover to date (5 days from start to finish). And for obvious reasons, the most dramatic before and after yet!
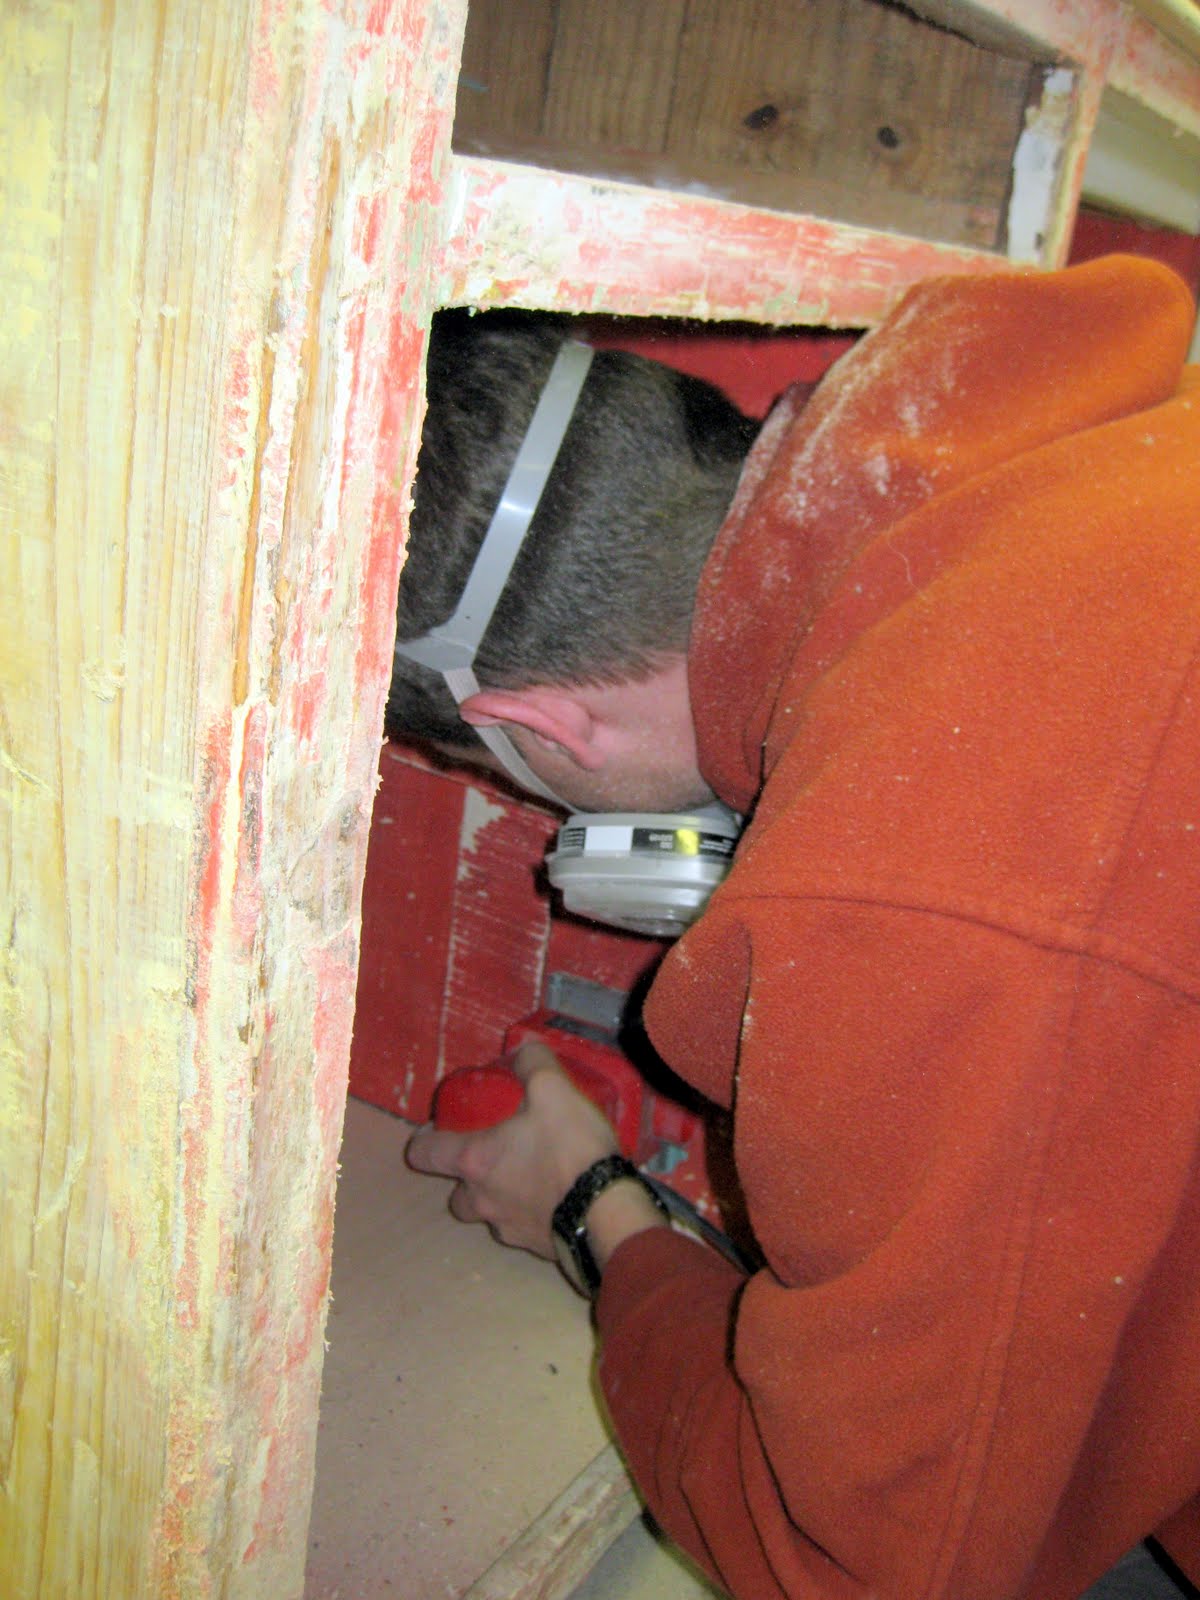
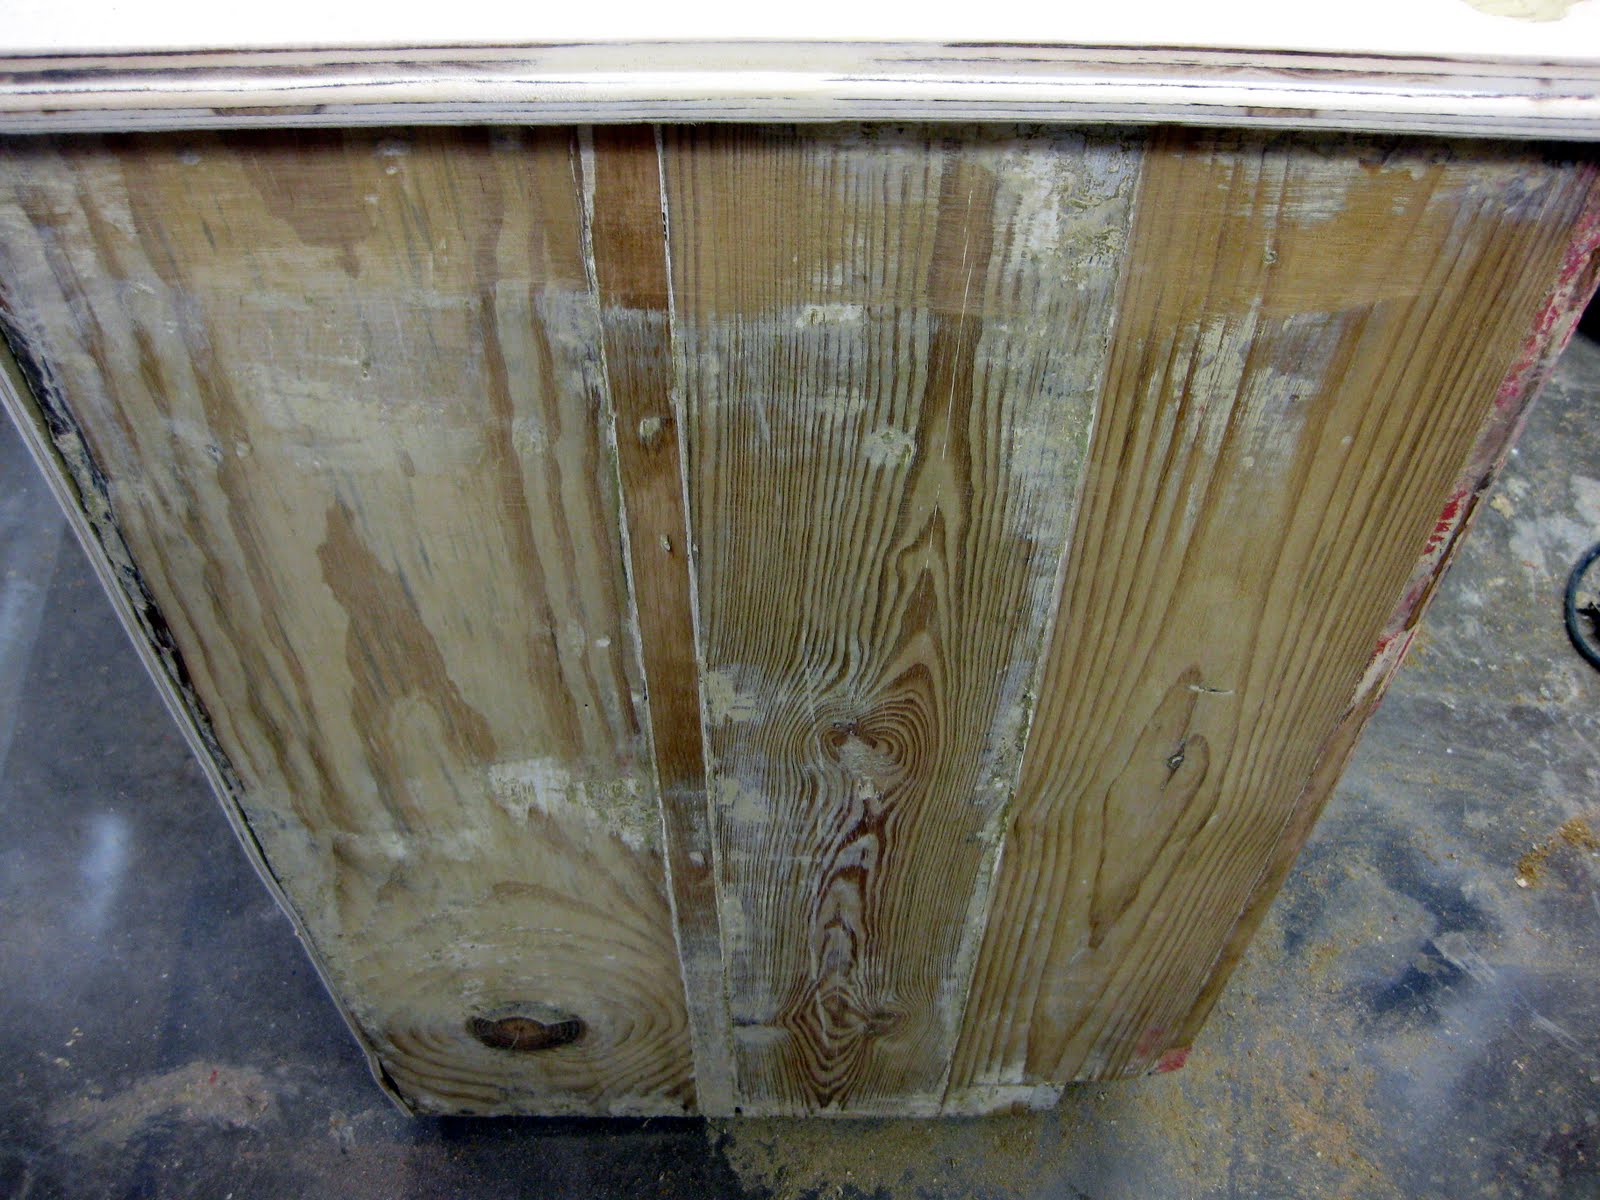
It all starts with paint stripper. There will be NO lead-based paint in my girls nursery!


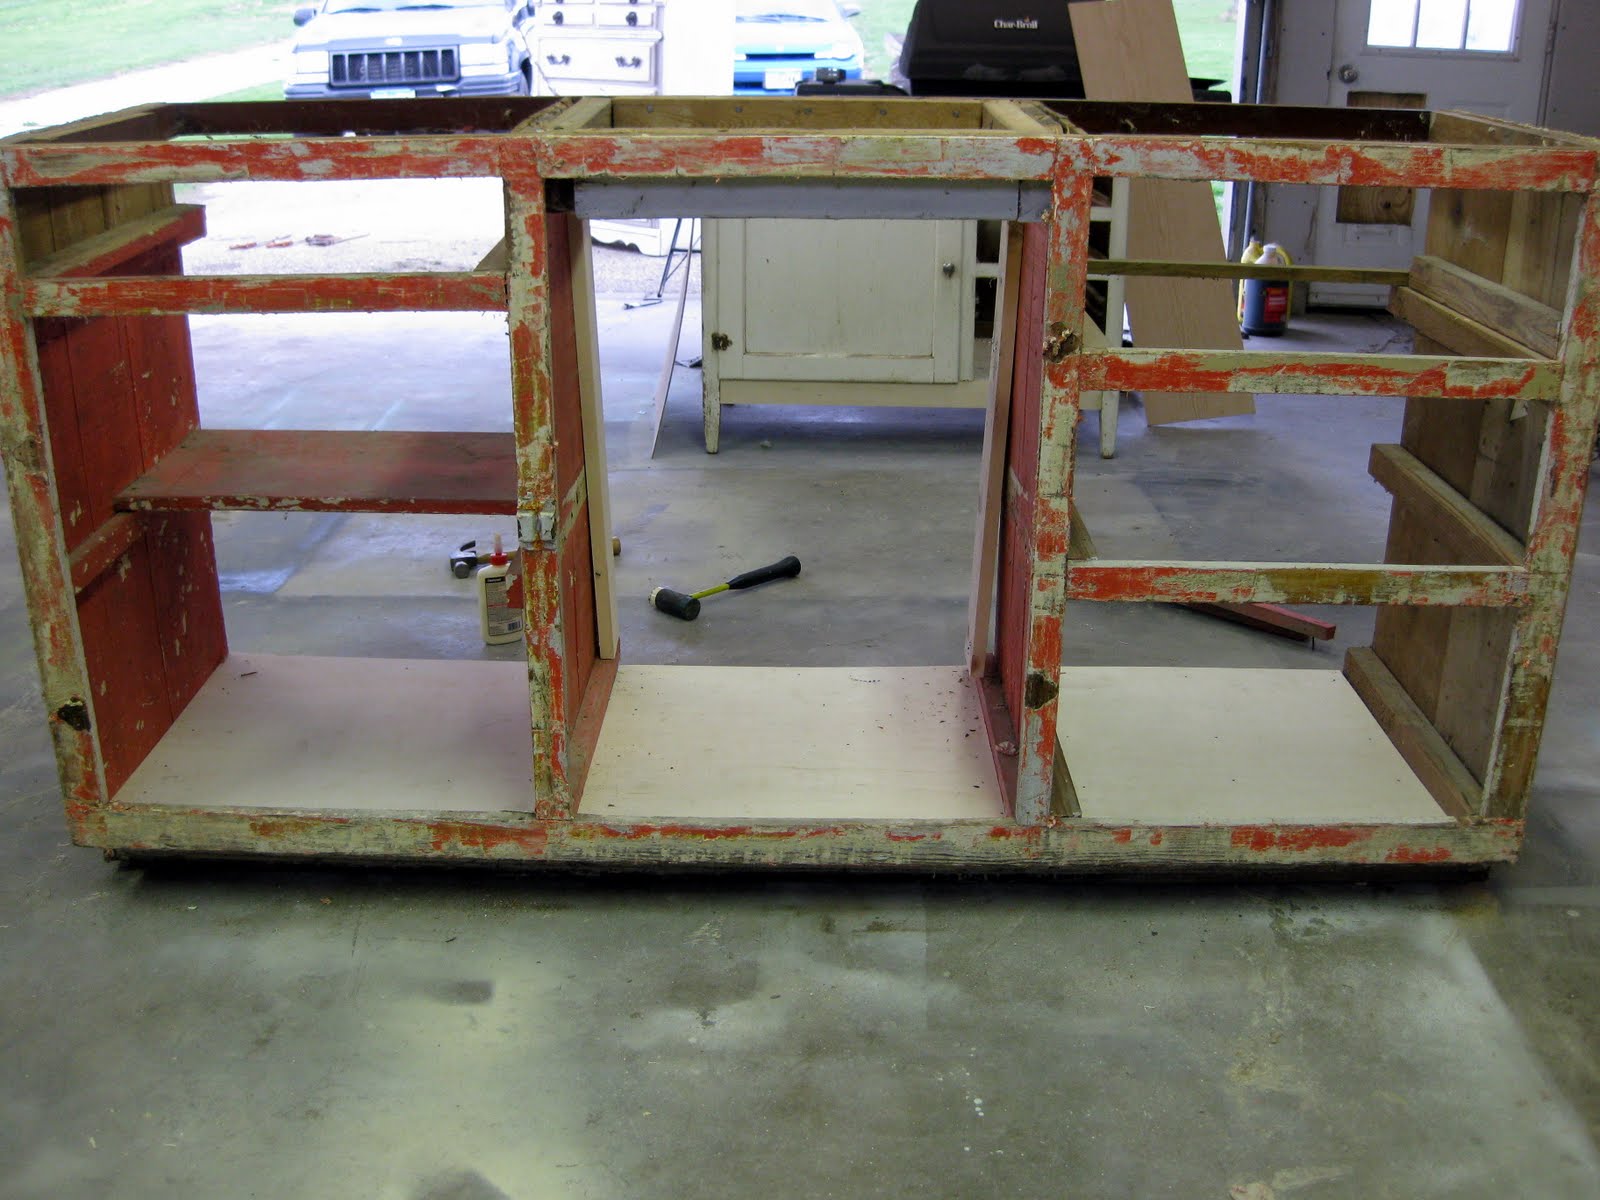
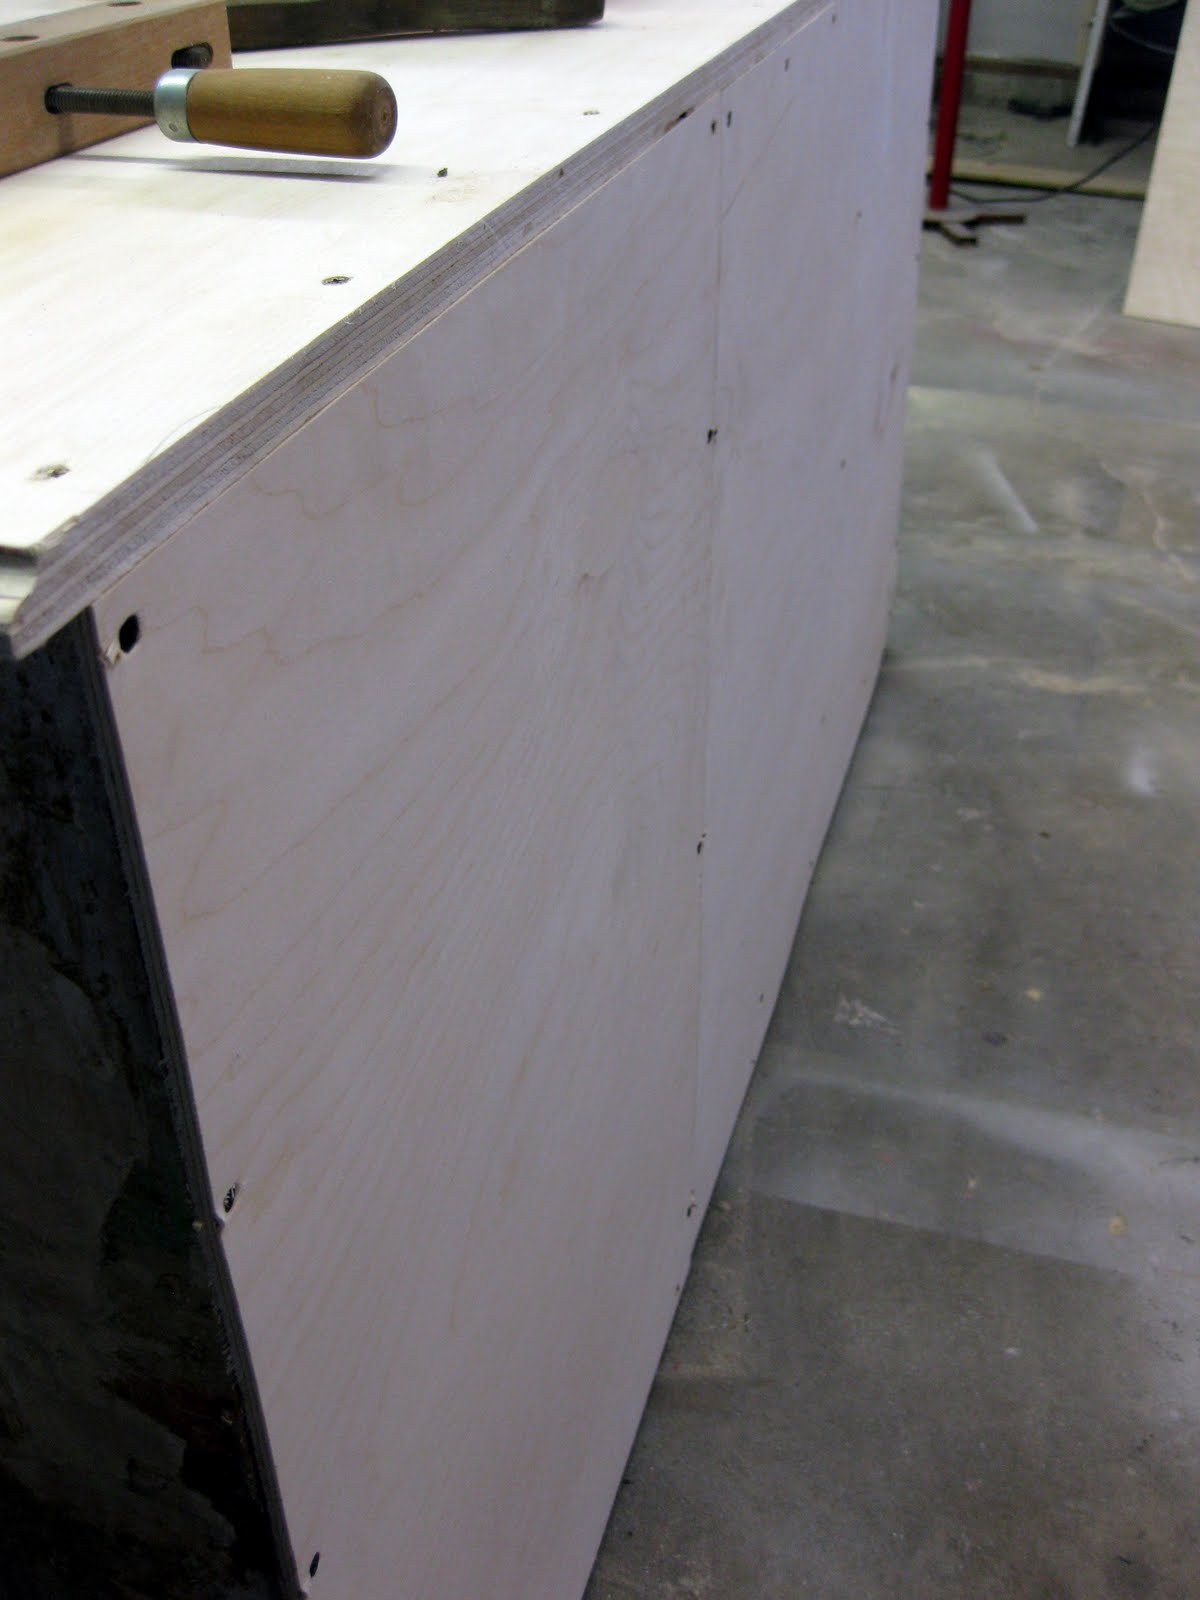
Next, the man-boy cut pieces of wood to reinforce the bottom.


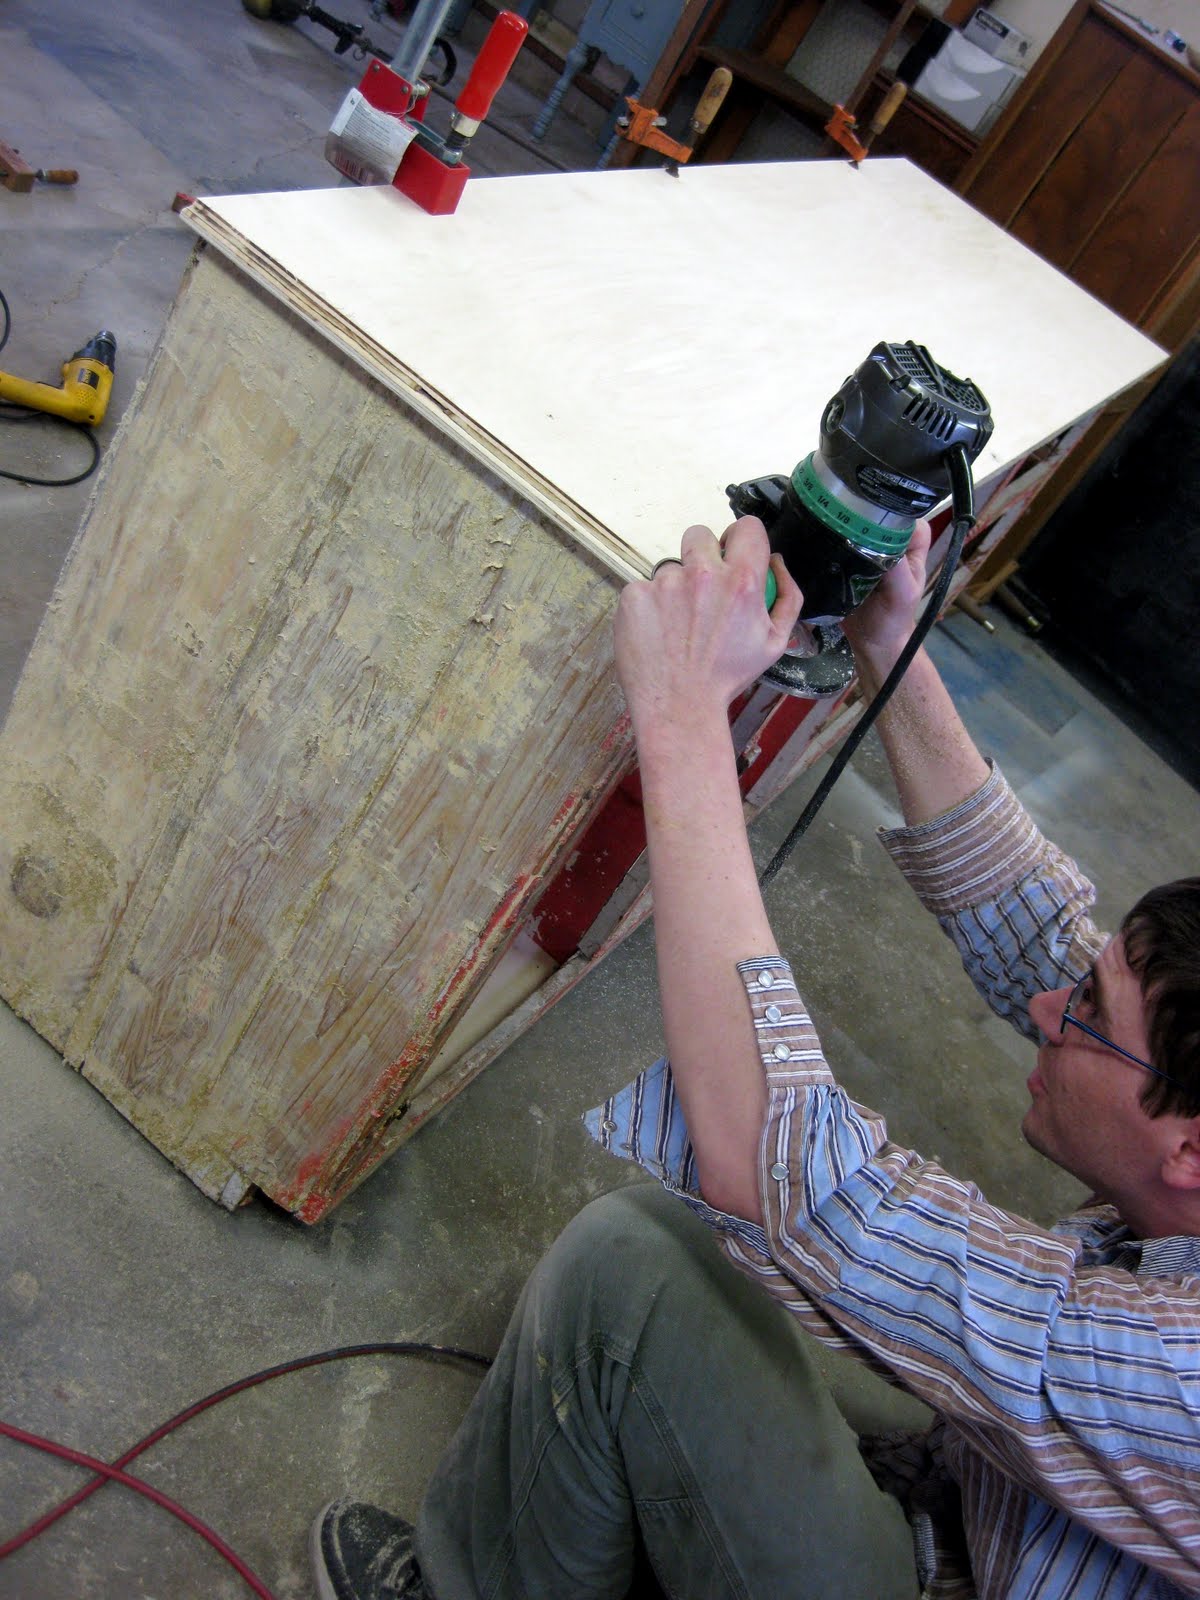
Annnnd… the top.

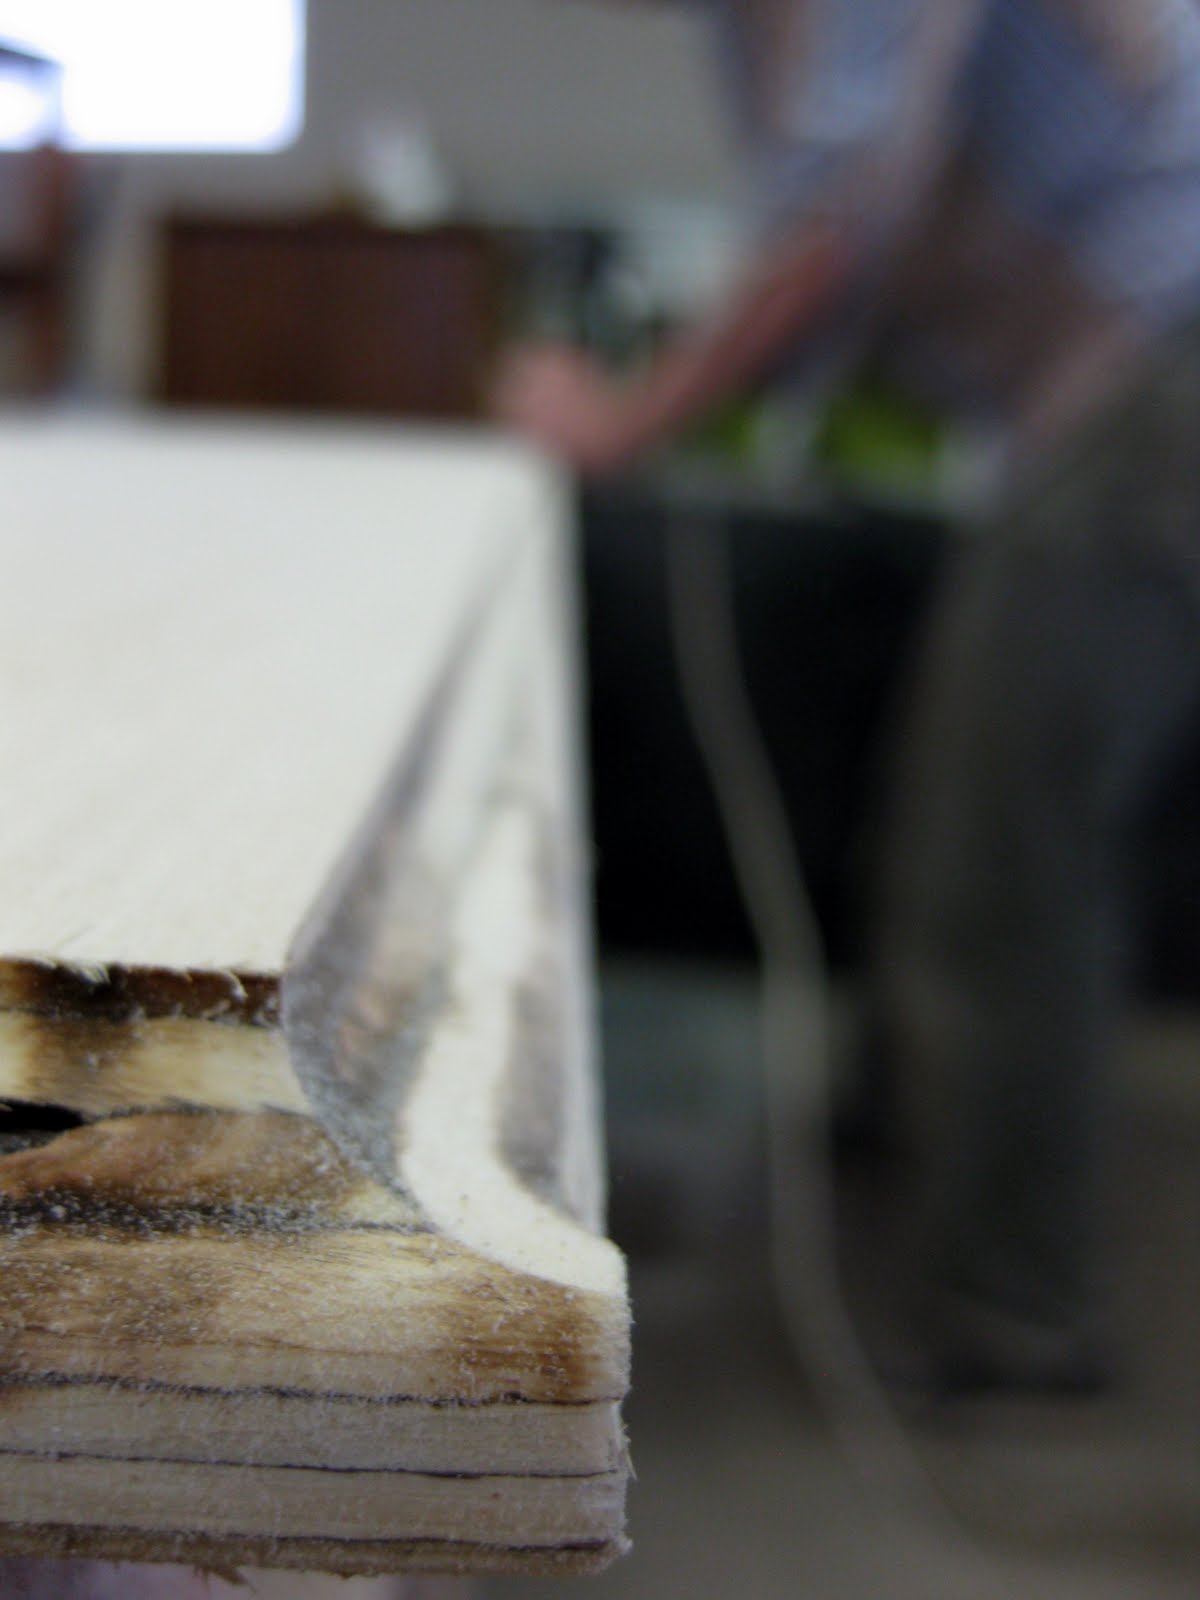
Annnnd the back…


Related:
-

We've been needing to update our coffee table situation in the living room for awhile…
-

Hey friends! I recently shuffled some things around in my studio, and it really got…
-

We love the original wood of our library, and wanted to find a desk that…
WOW! You guys do beautiful work.
what??? That’s crazy how beautiful the dresser came out! and the projector idea? BRILLIANT!!!!
How do the drawers work? I always have problems with getting them to open and close smoothly without having them rebuilt.
It’s such an old/heavy piece that the drawers don’t pull out super smooth, but good enough. They don’t get stuck or anything. Every so often when they start getting tight and squeaky, we’ll take them out and rub a bar of soap on the part that rubs. This seems to really help!
Where did you get the projector you used?
The projector is super old and came from a church or an old school or something. They make them super digital these days. Sometimes you can find the old school ones at your local library to rent out for free. Hope this helps!
You two make such a great team…!!! Can I borrow your husband…lol just kidding, I mean the vision you two see in items is ,amazing…!! Great job on this baby changing table…Love it…!!
Fantastica transformation. I’ll take the idea.
I love recreating the rough pieces! How satisfying!
This is great! Very creative. Although I would have liked to see the other door hung to complete the piece.
thank you for the info.! I am soo excited to try the projector. my bedroom furniture looks exactly like your friends dresser you transformed. I cannot wait to try the wood putty. I appreciate you sharing your skills. – Mindy
Many libraries will often lend them out for free! It’s worth calling around. 🙂
I love the pattern, color! where can I rent a projector?
hi beth & nic,
thanks for this tutorial!
i used your post to link it up with my inspiration-post from today.
you can check it out:
http://samtundsahne.blogspot.de/2012/10/die-farbe-gelb-roy-und-ich-und-das.html
hope u don´t mind…
looking forward your reply!
greetings from germany
nancy
Brilliant! Thank you. I’ve got a ‘shabby’ dresser sitting in my entryway just begging for some paint. Haven’t found the right inspiration until now! I can’t wait to get the paint on the dresser and transform it into something ‘chic’.
I am very drawn to this design. My neighbor just put a cruddy old kitchen cabinet set on their front lawn, and I’m visualizing what I could do to it for my entry. After seeing what you did, I am inspired to transform that cabinet into something amazing! Thank you!!!!
THANK YOU! We love it too! 🙂
And YES, you can just print right onto a transparency. There’s a glossy side and a rough side, and you’ll want to print so the ink goes on the rough side. There are different transparencies for ink jet and laser printers, so make sure you buy the right ones for your printer!
Good luck! 🙂
Everything about this is wonderful! Seriously. It’s sentimental, its functional, its economical, its trendy, ITS PERFECT!
On a side note, you can just send a regular transparency through the copier? The ink sticks?
Awesome job! Will continue to drag home my tooo shabby & not too chic objects and transform them.
So beautiful!!!!
Absolutely beautiful! I came across your blog while blog hopping and ta-dah! What an awesome before and after project and super neat that it was in your Granny’s farm!
Blessings & Aloha!
I have been out of the blog loop, but my most recent post shows our younger daughter’s wedding and how a huge, “found” , old 12 pane window was hauled up to the wedding and used as a table seating chart. (a very last minute decision to have a table seating chart! lol) If you get a chance to stop by and take a peek, please let me know you were there by commenting. (although something is acting up and comments are hit and miss with being able to be left, for some reason). So nice to meet you!
Hi Hillary! Up until recently, we’ve used spray primer (Kilz) and spray paint (mostly Krylon). We seal using brush-on poly. HOWEVER… we just recently purchased a paint gun, and have been playing around with it. It should save us a lot of money being able to use buckets of paint instead of having to purchase individual cans of spray paint. That stuff adds up! 🙂 Good luck with your dresser project! Send us pics when you’re done!!
so I just found your blog and I absolutely love it. I found a old dresser in the trash the other week and am going fix it up for my girls nursery. I really like the stencil idea and may do that. I do have a question. Do you use spray paint, for priming, painting and sealing, or do you buy the buckets? Which is eaiser and better to use for furniture.
thanks emily! we love it too! the acrylic paint is still holding up well. we sealed it with a clear coat of Polycrylic (which is a water-based urethane). if you do something fun, send us pics!! 🙂
I’ve seen your dresser before, and just came from All Things Thrifty. I LOVE your dressers! I’m doing something similar to your girls’ dresser for my daughters room, and was just wondering if you did a top coat of any kind and how the acrylic paint is holding up. I love your whole nursery!
I saw this on pinterest and thought it was awesome! Laughed all the way through the blog, so much so my DH was wondering what was going on. Beautiful wood made into a great nursery changing table.
What a great idea! I even have some fabric with this exact print on it. Adorable changing table and so neat that it came from your grandma!
love THIS!
I’m in awe – congrats on a great job!
FABULOUS! I love the transformation.
Incredible! What an inspiration!
IU found your blog through pinterest as well and I have to tell you that I am absolutely amazed!!
You both did an amazing job, I am definitely a new follower of your blog 😉
I too found you via Pinterest. I’m on at least your 5th project this morning, as I’m trying to recover from 4 days of DIY around here ( painting, etc). I think you’ve really got something here! I love the sentimentality of things repurposed. I definitely know it brings you closer as a couple. Strengthens your bond, so to speak. Not only do you have a beautiful piece from Grandma’s barn, you’ve got a handy man around the house who has insight, vision and a desire to do for you!!! Trust me love. Their not all that way! I think you’ve got yourself a beautiful family and I really look forward to being inspired by your projects in the future! TFS!
WHOA!!! That’s incredible. You rock (found you through a pin on Pinterest).
Please make sure you are woking lead-safe. Might want to get a blood lead test to make sure your dust containment was effective. http://www.aclppp.org for more info about lead-safe work practices. LOVE the dresser!
Beautiful transformation! Love the way it came out! Your hubby is so handy too!
You are lucky your hubby did all that work. Very sweet, wonderful vision. Love the stencil and I think you should set up the cam on a tri-pod for pics of you in action. lol
Oh-my-oh-my-oh-my…this is utterly INCREDIBLE!!!
That is probably the most amazing before and after that I’ve ever seen in my life!
Wow! I love the addition of the damask, such a nice touch. I lost my projector a few years ago, looks like I need to reinvest in one and get creative!
Oh. My. This is incredible! Nice work!
It’s amazing! well done
Great Job!
This is so unique and absolutely beautiful! You both did a wonderful job.
Truly fantastic!
Greetings
What a makeover… just fabulous..visiting from Better After.
Wow! This turned out so beautiful! Greta job! I’m jealous, makes me want another little one so I can make one…lol
I love that you have taken such a junky piece and made it absolutely amazing!
Oh my goodness this is absolutely beautiful! I love your creative mind!!! I am so excited for your growing family! 🙂
WOW! I have you in my google reader and haven’t been very good at reading blogs lately but I am so happy I stopped by! This transformation is beautiful! I love the theme you chose in the room and the crib is just gorgeous! I had a crib just like your before we moved and got rid of it. I always wanted to paint it black and my hubby teased me I painted everything black. It all looks so incredible. Congrats again and best wishes for the coming months!
secretly… I loved the initial piece.
most importantly… I love the piece better than when I first saw it.
Holy cow! I can’t believe my eyes- absolutely amazing. You two are going to make it big someday! You are beyond belief!I think if I saw you in public, I would get your autograph!
You are right, I am a SUCKER for before and afters! Thanks for sharing this with me. You guys rock.
Absolutely amazing. I am speechless. It looks so good. I honestly think someone needs to contact TLC for you guys and you guys need your own reality show! You guys rock!
You guys are AWESOME! Wow!
totally Amazing…. My computer died yesterday while I was trying to get to the end of the post to see the final product (I got to see the end, but it died right as I saw the final pic) I was just too impatient to take a break to get the cord LOL.
anyway, I absolutely love it… way to be very wifish and support your husband… even when you think he’s lost his mind… it’s the hard thing to do!
you know Beth, you really should marry that guy.
lol
Cynthia
This is insane. INSANE! Oh. My. Word. I can’t believe this transformation. By far, the best re-do I’ve ever seen. The way you guys see “the diamond in the rough” is just amazing. You are so gifted.
OMG!!! IT IS AWESOME GREAT JOB 🙂
phenomenal! way to continue raising the bar for yourselves 🙂
seriously? You guys are amazing. Can I move into the nursery? Better yet, I’ll just hire you guys to demo my house…petes, I love it.
Nice finishing touches Beth! Anytime you want us to come over so we can watch our husbands lift heavy things up your steps, just let me know 🙂 It looks awesome!
Holy Crap Is That Awesome! I am so impressed with Nick and your ability to see beyond junk and turn it into treasure! Beautiful!
wow! that is fabulous! i love the asymmetry, and the damask! love it!
Where to start?!!
Nick – Incredible handy work!! You did a great job helping the antique find it’s re-purpose! How did you ever see the potential?!
Beth – Way to be patient and trust your husband! I had the same initial reaction when Nate told me he wanted to build a crib from broken and recalled bits. Great job with the paint as well!
Fantastic finished product 🙂 Love it!
LOVE LOVE LOVE!!! That is the most awesome changing table EVER!
I LOVE it! I am so inspired!
Wow what a transformation. Never would have had that vision!
I am stunned! What a transformation!
Wow!!! I would never in a million years thought something so pretty could come from something so ugly! I am truly impressed! Just gorgeous!
WOW!!! Those results are IMPRESSIVE!
You guys never fail to impress me. Wish I had your “visions” of furniture! Amazing. The girls will love it!