Sometimes when I’m out and about shopping with a friend (or my toddler), I’ll see something I love but could TOTALLY make myself. For example, I saw these little tables that are nesting tables shaped like leaves at IKEA! I loved them. But I felt like the price tag was steep… almost laughable. And not only that, I knew I could make them even better.
I’m sure you know what happens next. ![]()
 *This post is sponsored by Purebond. Thank you for supporting the fabulous brands that make Reality Daydream possible! This post contains affiliate links.*
Leaf-Shaped Nesting Tables Tutorial
- Purebond Plywood
- Roll of brown craft paper
- Edge Banding
- Edge Banding Trimmer
- Scroll Saw or Jigsaw
- Circular Saw
- Random Orbital Sander
- Wood Glue
- Kreg Jig
- Kreg Screws
- These furniture legs
Knowing I wanted this nesting tables project to be pretty inexpensive (but still durable with pretty wood grain), we went with our trusty Purebond plywood in oak! We had taken our minivan (rather than the truck) to The Home Depot to get wood with the whole clan in tow, so we were very grateful that they were willing to rip the sheet of plywood down into 4ths for us so it would fit in our van.
Nesting Table Templates
Now that we’ve acquired the wood, it’s time to figure out shape and dimensions we want for these nesting tables! I thought about winging it, but that often doesn’t end well. So I decided to take a roll of brown paper up to the attic and cut some templates so I could make sure they’re truly the size I want for the space. I’m so glad I did this! I ended up making them bigger than I expected! And this is also where I decided to make 3 leaf-shaped nesting tables rather than just two (like IKEA sells) so that this ‘nest of tables’ would serve as a longer area and act as a coffee table for our extremely long vintage sectional.
Once I was happy with the size and shape of my templates, I cut out a small leaf and drew some lines to show you the direction I wanted the wood grain to go in order for it to look even more like a leaf! This would help me visualize when I go to trace the templates onto the wood.
Trace Templates
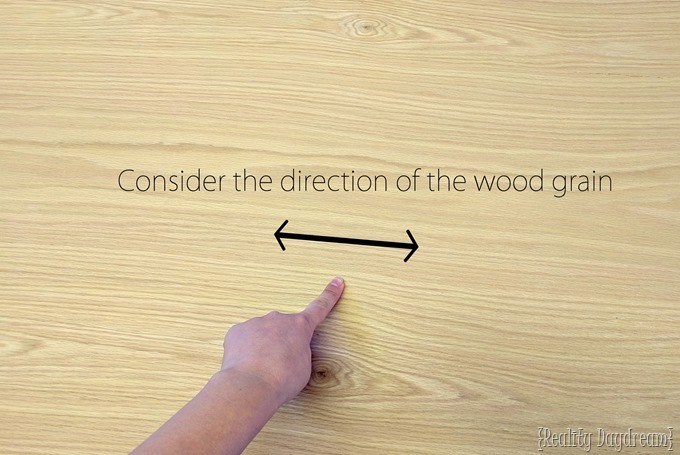
Finally, it’s time to head out to the garage to begin tracing them onto my sheets of Purebond plywood! Now we look at the direction of the wood grain. Stay with me on this. It truly isn’t as complicated to JUST DO IT as it is to watch me show you.
Lay your template onto the wood, and lay a pencil on it’s side to help you visualize which direction the wood grain should be going on that part of the leaf. Then adjust the template until the wood grain is going the same direction as the pencil.
Once you have your template laid out appropriately with the direction of the wood grain, trace with a pencil around just that half of the leaf. And use a yard stick or straight boards to connect the two edges with a straight line.
I traced with a Sharpie so you could see it well in this pic. Note the direction of the wood grain!
Before we trace the next half of the leaf, we want to stand back and think about which direction we want the wood grain to be facing for this side.
Cut the straight line with your circular saw, and cut the curved line with a scroll saw or jigsaw.
Your ‘straight lines’ from your circular saw might not be a ‘straight’ as you had hoped. Know how I know? Hehe! I ended up having to do a bit of sanding to make the leaves fit together with nary but a crack. But it doesn’t have to be too perfect. Hello wood putty!
Nesting Table Assembly
We need to drill some pocket holes! I can’t tell you how handy this little tool is.
Glue and screw!
Edge Banding
While we love the durability of plywood, we don’t want that layered edge to show. So in order to give it the illusion of being a solid board, we’re going to apply edge banding! This comes in a roll, and is actual wood that’s been cut in thin strips and has an adhesive on one side that is activated with heat.
Iron on the edge banding with your iron on the Cotton setting, then use a block of wood to rub and press it into place while the adhesive is cooling.
See the difference between the side that has edge banding and the one that doesn’t?
You can easily slice off the excess with this handy trimming tool!
Finishing
Time to stain! You can go with any shade of stain you want. I wanted these to have that ‘chestnut brown’ color that all the mid century furniture seems to have. So I went with this stain. The color turned out exactly the way I wanted it to!
Adding Legs
Let’s slap some legs on these, shall we? We ordered these furniture legs, and modified them a bit by removing the threaded thing with some pliers, cutting them to the size we wanted. For us, we wanted the tallest leaf table to be no taller than 18”. So we cut those (3) at 17”, and then the next (3) legs at 15”, and the final (3) at 13”.
I stained the legs to match the tables, and we installed them by simply screwing in the leg plate where we wanted it on the back.
Y’all, I’m SO STINKIN HAPPY with how these turned out. I love that they’ve got a mid century vibe and they’re unique! A conversation starter for sure. And given my love for plants, I think the leaf-theme of these nesting tables is pretty appropriate for this attic space!
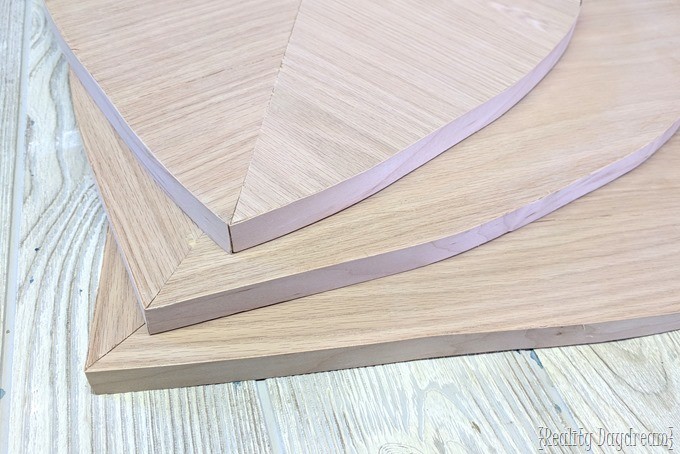
And I soooooo love how the woodgrain truly looks like the veins of a leaf!
I think these leaf-shaped modern nest of tables are quite possibly my favorite project in the attic so far. And given the fact that WE’RE ALMOST DONE with this space, they might just hold onto that title indefinitely!
As always, if you give this project a try (or if it inspires you to try something similar!) be sure to tag me in your pics! We’re @RealityDaydream pretty much everywhere (Facebook, Instagram, and Pinterest). And if you don’t already, be sure to sign up for our mailing list so you don’t miss a single post!
Have an inspired day! <3
~Bethany
~~~~~~~~~~~~~~~~~~~~~~~~~~~~~~~
Thanks for pinning!


your house must look awesome with all your DIYs!
You blow me away with your ingenius builds! I love tropical/beach things and would so love to make these but with a monstera leaf shape. Thanks for the inspiration!
OMG the Monstera leaf shape would be AMAZING! I’m putting that on my to-do list. 😉 If you make yours first, send me pics 😉
Ongoing, these nesting tables are fabulous. I would love to own a set of tables exactly like THS. You rocked with this project.
Love these! Really nice job! The wood you used has such nice veining in it and matches your doors so well!! At first glance, I thought it looked as though you painted veins on it! Thank goodness you didn’t!
I LOVE these! Do you mind sharing the cost you incurred to create them? Thanks for sharing!
Gorgeous!!
These are AWESOME!!! And Kreg Jigs are so handy!!! DId you know the dude that invented them was from Iowa also?! Can’t wait to see the full upstairs reveal!!
Yes I did know that, and I’ve met him! We <3 their products. Makes building SO MUCH EASIER!
These are amazing!!! I love them and need to see them in our room..haha…totally sending to Mr. Man right now 🙂
I like yours better! and you’re right, that price tag for only 2 of them is laughable!!