• Home
  • About
  • Tutorials
  • Recipes
  • Furniture
  • Contact
    • Contact
    • Infertility
    • Disclosure
    • Privacy Policy
  • Shop
    • Facebook
    • Instagram
    • Pinterest

Reality Daydream

The Dream is Free, The Hustle Sold Separately

  • Home
  • About
  • Tutorials
  • Recipes
  • Furniture
  • Contact
    • Contact
    • Infertility
    • Disclosure
    • Privacy Policy
  • Shop

How to Blow out Easter Eggs with kids!

March 14, 2018 by Bethany Sy

I have to say, figuring out how to blow out Easter eggs with kids wasn’t something I looked forward to tackling this spring. But knowing that it would be a fun tradition and a BLAST for the kids, we decided to go for it!

I learned a few tips along the way that I’ll share with you, and we even did a Facebook LIVE (video below) sharing the process so you can see how it all goes down and know what to expect when you’re navigating learning how to blow out Easter eggs with kids. It’s not without some egg casualties (on my part, NOT the kids LOL!). It’s actually fun!

How to Blow out Easter Eggs WITH KIDS!

Supplies for blowing out Easter Eggs

  • Eggs!
  • Thumb Tack
  • Long sewing needle
  • Bowl
  • Antibacterial all-purpose spray

Step 1 – BE A CHILL PARENT

Taking this journey learning how to blow out Easter Eggs with your kid is almost DEFINITELY not going to go smoothly or as planned. There will be cracked eggs. There will be a mess. But if you’re able to  let go of your up-tight control-freak tendencies, this will be fun for you and the kiddos!


Step 2 – Wash your eggs!

Your and your kids are going to have your mouths on these egg shells. Let’s make sure they’re clean and nobody gets sick! I threw them in a bowl, squirted in some dish soap, and filled it with water. Then just gently wiped each of them with my hands in the water. Then drain out the water and you’re ready to go!

Step 3 – Poke a hole!

If your kids are still little (like under 10), I wouldn’t let them attempt this part. But if you’re a super chill parent and don’t mind lots of broken eggs and potential needle pokes to the finger, you should go for it!

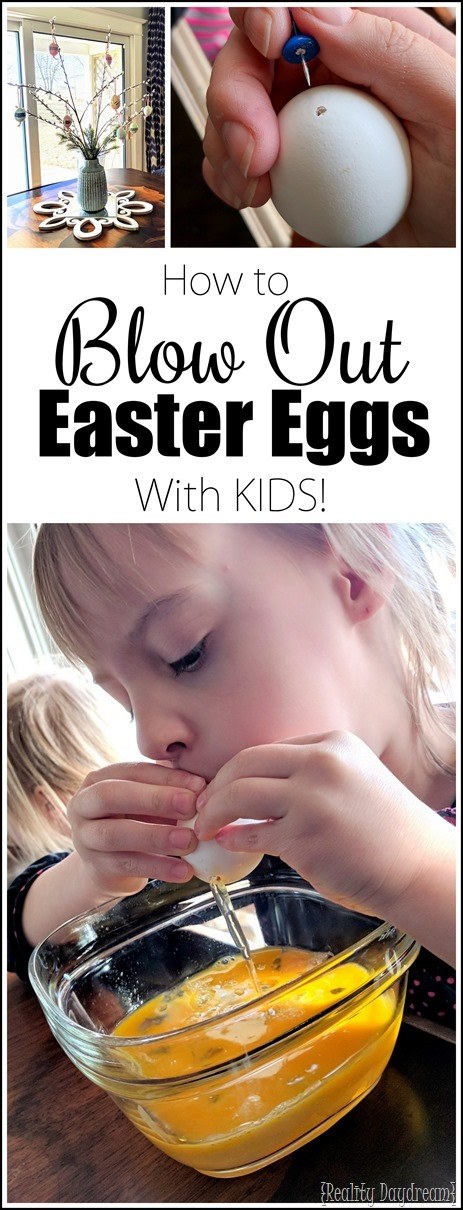
I used a thumb tack and gently poked a small hole in one end, then flipped ‘er over and poked several small holes close together until I had a larger hole for all the sloppy egg to come out of. Then, take a longer needle and stick it in the hole to pop the yolk. This will make it easier to blog out the egg!

*TIP* …you could put some scotch tape on the ends before you poke your holes to help prevent cracking. I learned this from someone that was watching our Facebook LIVE! I did it both ways with success, so just do what works best for you!

Tutorial on how to blog out Easter Eggs WITH KIDS! {Reality Daydream}

Step 4 – BLOW!

Gently pass the egg to your child, and instruct them to blow through the small hole, leaning over a bowl to catch all the eggy sloppiness! My girls are 6, and they blew out about a dozen eggs, and didn’t break a single one! CHAMPS!

How to blow out Easter eggs with kids {Reality Daydream}

Step 5 – Let dry

Leave your eggs to sit for a bit and let the innards of the egg dry out so you don’t have raw egg oozing on you when you’re decorating! After they had some time to dry, I sprayed them with some all-purpose cleaner and wiped them clean with a microfiber cloth. And we’re ready to decorate!

Step 6 – Decorate!

How to blow out easter eggs with kids and decorate for the easter tree! {Reality Daydream}

This is not a tutorial on decorating Easter Eggs, so I’m gonna let you use your own creativity here. We just brushed on some watercolor paint, and added some pretty washy tape. I used a long plastic needle to put a thin ribbon through the holes to hang these from out Easter Tree! Which is just a bunch of fake pussy willows in a vase.

How to blow out Easter Eggs with kids - it's fun! {Reality Daydream}

How to blow out Easter Eggs with kids and make an Easter Egg tree! {Reality Daydream}

My kids were inexplicably obsessed with this Easter craft, and announced that they want to blow out Easter Eggs every year! OKAY THEN! Eggs are cheap, and thumb tacks are plentiful. Let’s do it sisters!

This video below takes you along for the ride of our egg-blowing adventures! Like I said, it was filmed as a Facebook LIVE and is very raw and un-edited. Real life folks!  (psst… if you’re reading this post in a reader like Feedly or Bloglovin, you may need to click on the post to see the video below)

And while you’re in the Easter-with-kids mood, try out this fun Easter craft below! It’s fun for all ages!

Thanks for pinning!

Tips (and a video!) for how to blow out Easter Eggs with KIDS! {Reality Daydream}


Related:

  • Kids Travel Activity Clipboard Box

    I got a brilliant idea to make my girls a little something for Christmas (totally…

  • Kids' Tiny Closet Makeover

    Our daughter has been living with a very small closet that isn't conducive to her…

  • Squashing Kids' Nighttime Fears

    For about 6 months now, our youngest (Cypress - 7) has been struggling with overwhelming…

About Bethany Sy

Nick and Bethany Sy are the creative free-spirits behind DIY/Lifestyle blog, Reality Daydream. They recently purchased a historic mansion and have been documenting the ups and downs of renovation and making this home their own... all while sharing tips and tutorials along the way! When they found themselves in the trenches of infertility, they started a journey that would prove to be their most important DIY project ever, and have 3 beautiful girls to show for it. <3

« Leaf-Shaped Modern Nesting Tables
DIY Home Bar »

Comments

  1. 1

    Maureen says

    March 15, 2018 at 12:58 pm

    Bethany,

    This is so great! I have blown some eggs for Easter also and have a couple of tips if you are interested. You can use a baby snot sucker thingy to blow out the egg so you don’t have to use your mouth. I picked this one up from Martha Stewart and it does work. Once the holes are picked in the shell, use a long needle or a skewer to break up the yolk and it makes it even easier to get the egg blown out of the shell. And lastly, coat the eggs, inside and out with Mod Podge and the egg shell become strong and won’t break as easily when storing. Use a medicine syringe to put the Mod Podge in the shell and swirl around. Let excess drain into a cup like you did for your Christmas ornaments and once dry the shell is a lot tougher. Personally I haven’t tried the Mod Podge but read it online and the blogger showed the difference between the treated and untreated egg. Next time I blow out some eggs I plan on coating them as well as coloring. Love to see you make all these great memories with your girls.

    Maureen

    Reply
    • 2

      Bethany Sy says

      March 15, 2018 at 2:46 pm

      I love this Maureen! Thank you for these tips!

      Reply

Leave a Reply Cancel reply

Your email address will not be published. Required fields are marked *

  • Facebook
  • Instagram
  • Pinterest
  • RSS
  • YouTube
We are Nick and Bethany! Welcome to our blog, Reality Daydream where we share our DIY adventures!

realitydaydream

Still can’t get over these shelves. 😍 These Still can’t get over these shelves. 😍

These Aksel Radius Floating Shelves by @shelfology are the perfect finishing touch to this wall in our kitchen. 🙌

#gifted #shelfology #radshelfie #floatingshelf #akselradius
I needed an instant-gratification project today fo I needed an instant-gratification project today for my well-being, and this little wooden stand was so fun and fast!

Details and links to everything in this pic in Stories!
If ya just need a slab of wood, grab a cutting boa If ya just need a slab of wood, grab a cutting board when you’re at Target or Walmart! They’re made of hard wood!

I used this cutting board to experiment and make some prototypes for a large-scale piece of art I’m doing for our church. It’s got me EXCITED!

Follow along for that project- happening soooon!

@dapproducts @dremel @jet.woodworking
You’ve all seen the video, but here’s some sti You’ve all seen the video, but here’s some still shots of the kitchen wall in all its glory!! 

The Aksel Radius Floating Shelves by @shelfology were the perfect finishing touch! 

Should I do a house tour of our main floor this week?!?! 🙌🌿

#sponsored #floatingshelf #radshelfie
Load More Follow on Instagram
View of our entryway of our historic mansion that we're slowly renovating and making our own.
Click here for lots of art projects using only wood stain on furniture!!
Please feel free to share or pin my posts! You're welcome to use ONE of my images (no collages or pinnables) with a link back to the corresponding post. Please do not edit or crop that single image in any way. Improper use of my photos, ideas or words is a violation of copyright. Thank you!

Categories

Attention: Almost any do-it-yourself project involves risk of some sort. Your tools, materials, and skills will vary, as will the conditions at your project site. Reality Daydream has made every effort to be complete and accurate in the instructions of the plans on this website. Reality Daydream will not assume any responsibility or liability for damages or losses sustained or incurred in the course of your project or in the use of the item you create. Always follow the manufacturer’s operating instructions in the use of tools, check and follow your local building codes, and observe all commonly accepted safety precautions.


Copyright © 2023 · Modern Blogger Pro On Genesis Framework · Customizations by Sweet Theory Designs · Privacy Policy · Log in