Ok so here’s the thing.
Nick’s been known to be a little annoyed with all the various things I ask him to help me with (understandably so). There are basic homeowner/maintenance–type things that I wouldn’t even think about that totally need done in addition to all my measly requests.
That’s why I love it when I find a project that I know I can pull off unassisted. This keeps me occupied while Nick is installing gutters… and prevents him from strangling losing his cool with my neediness.
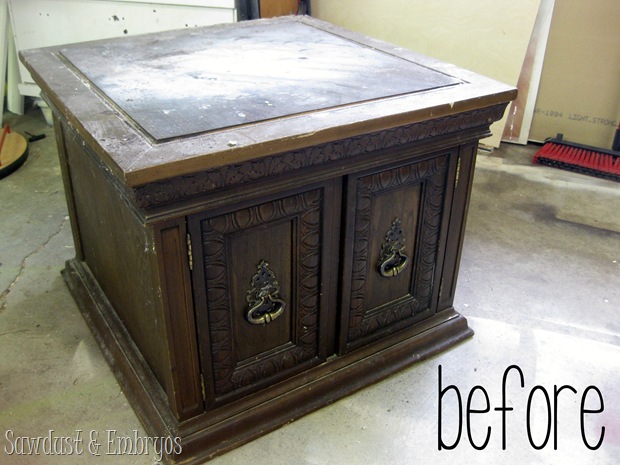
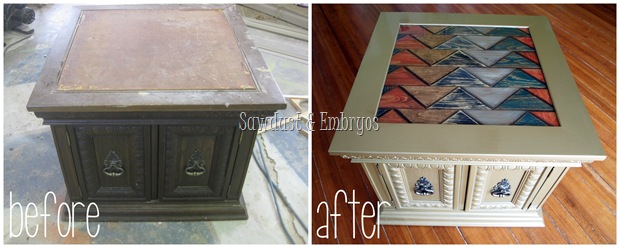
So you can imagine my delight when I found this giant end table at a garage sale for TWO BUCKS!
This post contains affiliate links.
I knew I could slap some paint on this baby, and maybe do some glazing and feel all fulfilled and stuff. No need for him to build anything, or reinforce anything. Score!
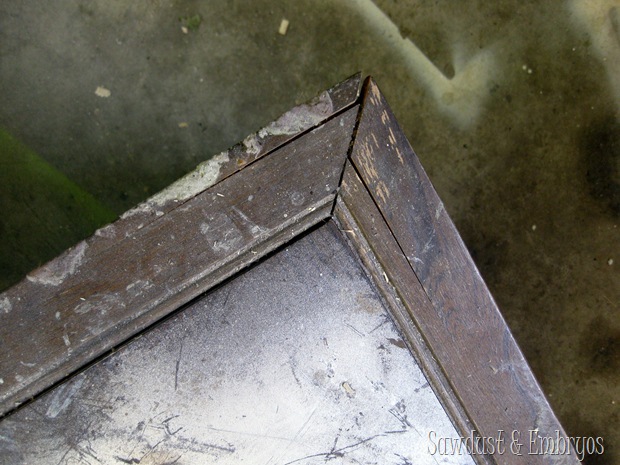
But let’s talk about the corners on the top surface.
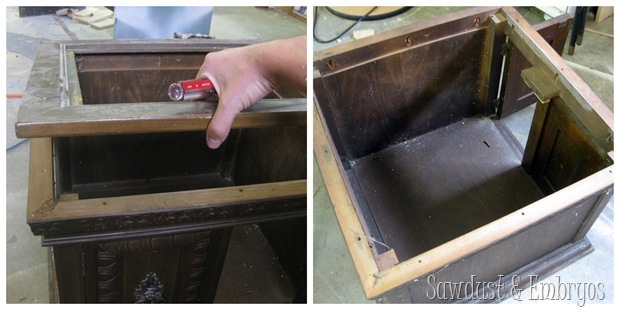
Ok yeah… there’s some gaping issues. Nothing a little wood-putty can’t fix, right? WRONG! Nick insisted that it needed a brand new top surface (OF COURSE HE DID!). Picture me weeping and pulling out handfuls of hair. Nevermind please don’t.
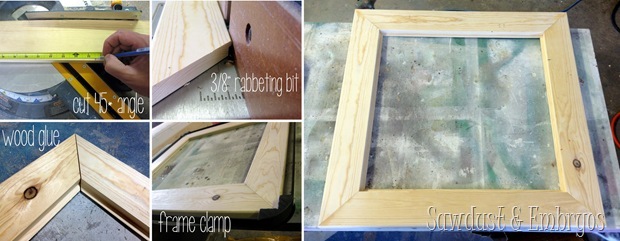
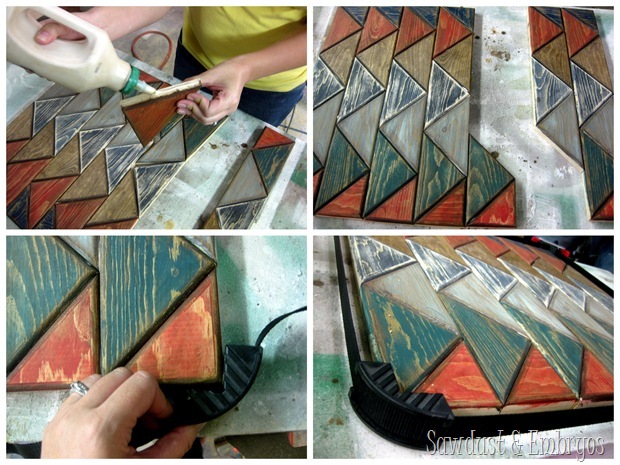
He built a frame as a border for the top, using 1/4’s. After measuring and cutting each board at a 45 degree angle, he routed a little lip on the underside, and glued/clamped using a picture frame clamp.
We bounced ideas off each other on what to do with the inner part of the ‘framed’ surface. It seemed too predictable to just put a sheet of plywood in and call it a day. Plus that would be way too simple. WAY.
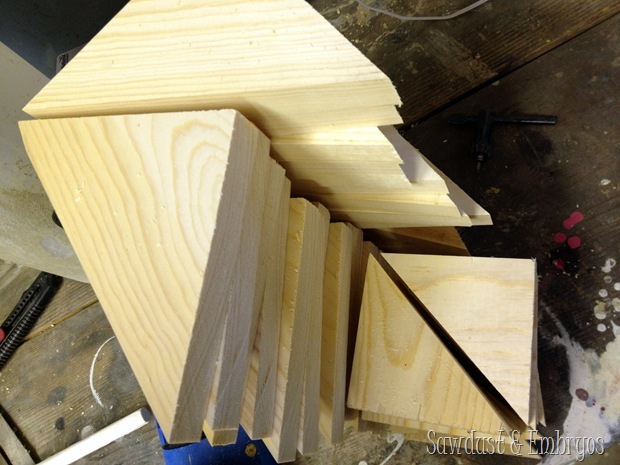
We had a leftover 1/4 board, and decided to cut it into triangles. Stay with me!
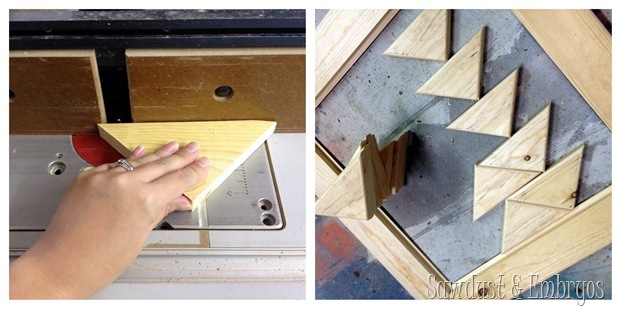
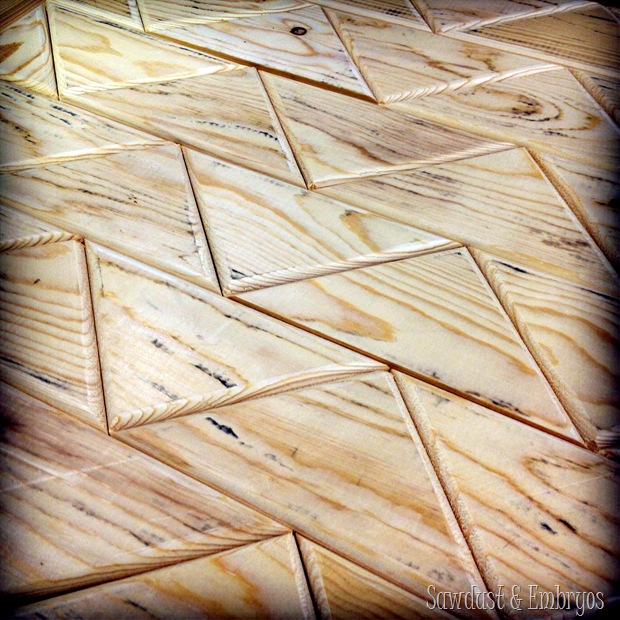
Then I routed all the edges so they would be rounded and smooth, and began laying them out in a pattern!
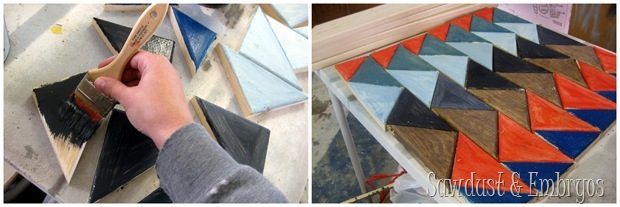
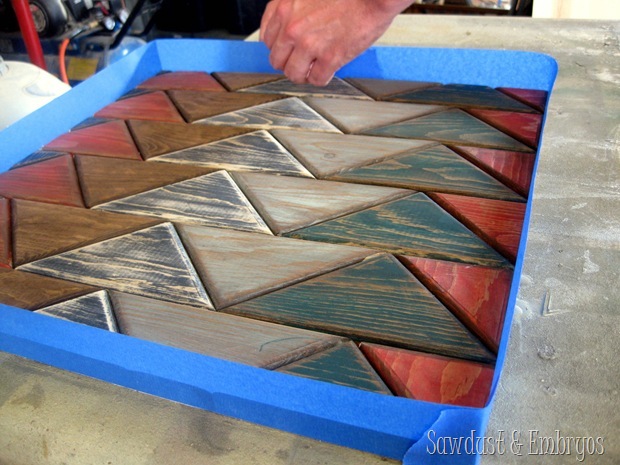
Then, using random paint colors from our stash, I painted groupings of triangles to create this pattern: The color choices were TRULY random. And I decided to do a row of simply stained wood too.
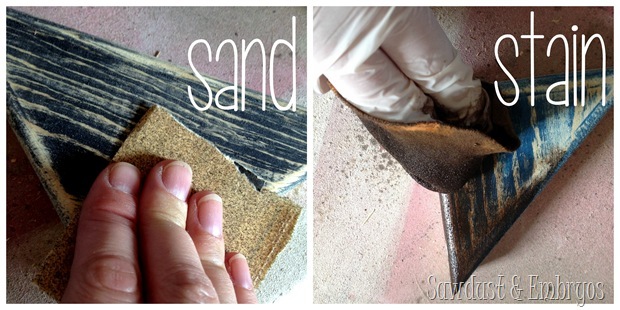
Using the same technique as our DIY Barnboard Tutorial, I sanded and stained each triangle. to make them appear tattered and full of character. I love how the woodgrain pops!
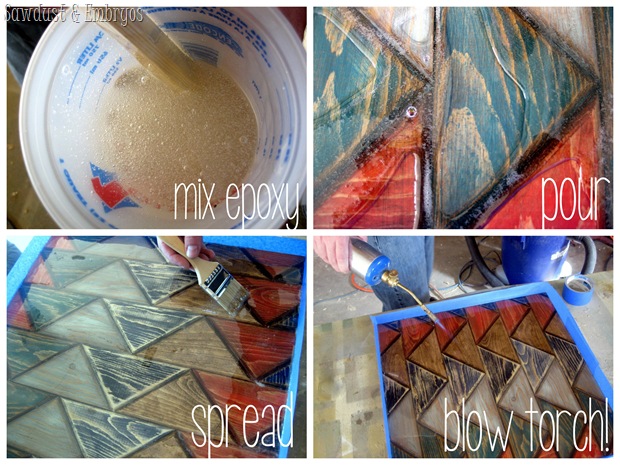
Before securing this bad boy to the ‘frame’, we decided to pour epoxy on top so it would have a thick/smooth glassy surface. We taped around the edges and the entire bottom (because there WILL be dripping!) and poured on the epoxy! (we use Envirotex epoxy, but you can use any brand… just be sure to follow the instructions TO THE LETTER!)
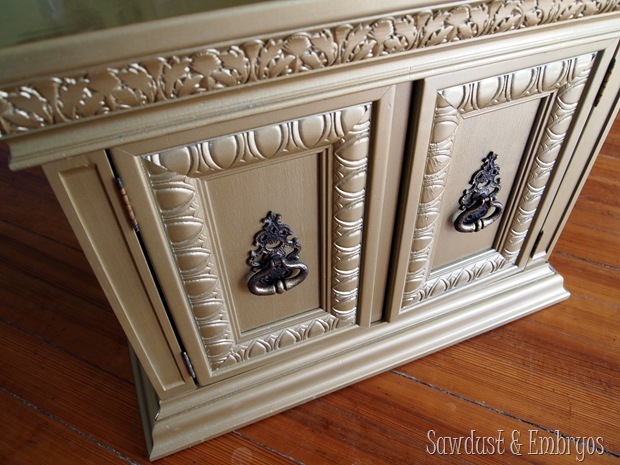
I sanded, primed, and painted the base gold (this stuff), including the newly built ‘frame’ for the top surface. I liked it so much I decided against glazing. Plus I wanted the top surface to truly be the star of this piece. And right now, that original hardware is a close second!
Nick secured the triangle insert to the frame with screws, and then screwed down the entire top surface to the end table from the inside… and then we stepped back to marvel.
I know there were a lot of elements that went into this piece, but I wanted to show you our process to spark your creativity. Maybe you’ll have an idea that stems from this project that turns out to be even more awesome!
Sorry for getting a little long-winded on ya today… I just wanted to make sure I didn’t leave anything out!




Great job oh my God that top is amaizing!
I’ve never epoxy’d, but I’d love to do it on a barn door to make a table top. You have to blow torch it?
Yes the blow torch removes all the tiny bubbles in the epoxy. It’s fun actually!
Goodness sake — I’ve been working all evening in my garage on what is probably the OTHER pair to this end table. I’m making mine into a dog bed but that top was killing me — *what* to do with it other than just paint it something else, or glaze it . . . don’t know that I can do what you’ve done here but I love yours! Nice work! What a beauty! (as your work almost always is . . . ) 🙂
LOVE LOVE LOVE IT!!!!! IT’S SOOOOO COOL!!!!
I think I need to find a thesaurus to come up with more words to say how AWESOME this is!!!
Like the idea, but not a fan of the colors you chose. Better luck next time!
OMG! This is absolutely STUNNING and the idea of using triangles was inspired! Love it!
Judi in the UK
Awesome design! I have to know though…what’s with the blowtorch?
Good question! Whenever dealing with epoxy, there are always TONS of tiny bubbles. The best way to get rid of them is with a blow torch. The heat causes the bubbles to expand and pop immediately. It’s super fun! 🙂
Good to know! Thanks.
One more question if you don’t mind…what’s the difference in using epoxy versus using poly to seal the top? Is it just for durability, or was it b/c all the nooks & crannies the routed triangles made in the top would have meant a long and tedious process to get the same result with poly, or was it something else completely?
Please come live with me. And fix all my crap that I can’t fix on my own. I’ll pay you in gratitude. And Starbucks. Thanks.
If you lived closer we’d have a deal! You’d have to throw in free child care tho. 🙂
I’m with Katy. Just come live with me and fix all my crap. I hate doing that stuff. Better bring Nick along. He’s pretty handy with all that woodworking stuff. Oh, and while you’re at it, bring my grandkids! 🙂
Oh WOW! I have never seen anything like this! It is really beautiful but edgy. In the beginning, I had no idea where you were going with the triangles but you really pulled it together! Truly a one of a kind piece.
Ack! Love it! So fun! I’m totally inspired now… and I haven’t been for quite some time so THANK YOU! Can’t wait to see what you do next! Love the new site too… 🙂
Thanks Sabrina! You’re so sweet!
Wowie! That’s awesome!
Love the colors! And the technique! Also I got this update on Bloglovin’! Things seem to be working again! Yay
Yaaaaaaaaaaaay!
Beautiful job 🙂
OOOOOH! How sexy is that?! I dig anything that involves a blow torch. It’s rustic and tribal all at the same time. Your sense of design is so inspiring. I always know that whatever I see here I won’t see anywhere else!
TRIBAL! I was trying to think of that word the whole time I wrote this excessively long post. 🙂 Some writer I am. Thx for jogging my memory!
Guys, I love your blog and the furniture you create. It’s awesome to the point my 4-years old demands to see “more furniture pictures” and makes me go (again and again!) through the gallery on you blog.
And I LOVE this particular piece.
That being said, it feels you are not doing justice to the pieces in the photographs. The angles are a little off and it’s hard to see the furniture in all it’s glory.
I found a few links when I was trying to sell my mid-century stuff on craigslist and eBay. Maybe you already know about them, but just in case.
http://www.ehow.com/how_6392235_photograph-furniture.html
http://ana-white.com/2011/03/how-take-photos-furniture
Hope I’m not overstepping, but I really write it because I love what you do and believe your gorgeous work deserves the best presentation.
Hi Marina! Thanks for the tips! The biggest problem for us is that we don’t have a good room to shoot pics. The dining room is our best bet because of all the natural light. And we struggle not to get our other furniture in the background and such. Are you mostly speaking of the ‘after’ pics? Or the process shots too? We acknowledge that our photo-taking skills were horrendous in the early days of the blog, and I cringe when I go back and look through some of those first furniture pieces.
Love this!!! Are you selling this?
Yes we are! Email us for dimensions and price! Sawdustandembryos@gmail.com
I love the gold
oh I LOVE it! the triangles are perfect.