• Home
  • About
  • Tutorials
  • Recipes
  • Furniture
  • Contact
    • Contact
    • Infertility
    • Disclosure
    • Privacy Policy
  • Shop
    • Facebook
    • Instagram
    • Pinterest

Reality Daydream

The Dream is Free, The Hustle Sold Separately

  • Home
  • About
  • Tutorials
  • Recipes
  • Furniture
  • Contact
    • Contact
    • Infertility
    • Disclosure
    • Privacy Policy
  • Shop

Easy Pie Crust Recipe

September 4, 2013 by Bethany Sy

This EASY Pie Crust Recipe is a winner every time! And it only requires just 3 ingredients!
Oh hey! It Meghan and I’m back!! I am so excited about this months post! Today I want to make something that used to intimidated me for years. This EASY pie crust! And just in time for Thanksgiving!
Its so simple, just follow each step and you will have the most flaky easy pie crust that will impress your guest when you can finally say, ‘yes I did make the crust!’

EASY Pie Crust Recipe

Step 1

We only need 3 things for this easy pie crust! Plus water… haha!

We are going to put the flour, shortening, and salt, in a bowl and blend with a fork…
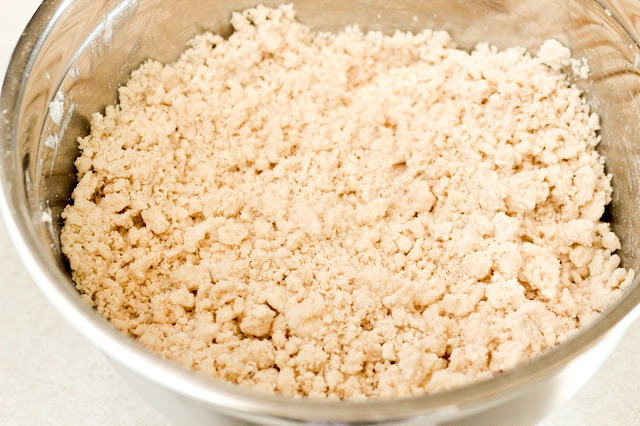
Step 2

Until it looks like this…

Step 3

In a small container with a lid combine 6 Tablespoons flour and 1/2 cup water and shake until combined…
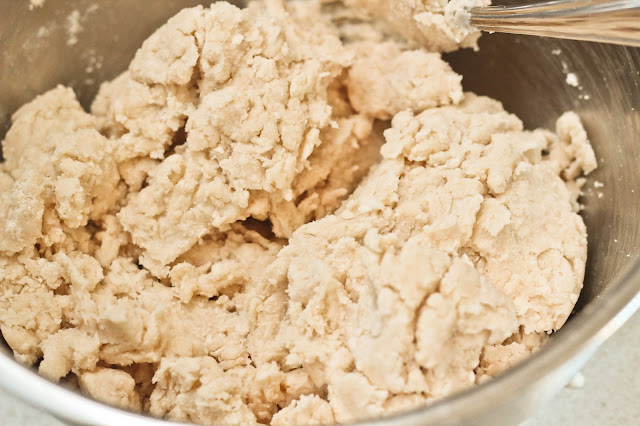
Step 4

Pour onto the shortening mixture and gently combine. Be GENTLE. The more you work the dough the tougher it gets…
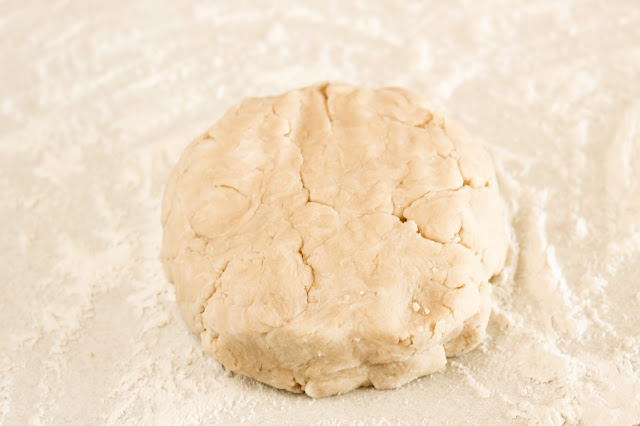
Step 5

Form into a ball and lay on a floured surface…

Step 6

Cut your easy pie crust dough into 4 pieces. You will have enough dough for the top and bottom of 2 pies. Take one of the quarters and roll it into a ball and then flatten it with your palm. Flour the top and start rolling from the middle, turning a quarter turn with each roll.  

Step 7

Don’t hesitate to sprinkle your surface or the top of your dough with more flour so it doesn’t stick. When it is about 12 inches in diameter place the dough over the rolling pin and lay onto your pie dish…

For one easy pie crust cut and crimp the edges and and poke holes in the bottom with a fork. Bake at 400 degrees for 12-15 minutes, or until the edges are golden brown.  

Optional:

For a double crust, put in the filling before cutting the edge of the bottom crust. Water you fingers and wet the edge of the bottom crust slightly. Place on the top crust, cut the extra and crimp the dough all the way around. Make steam holes in the top, sprinkle with sugar, and bake at 375 degrees on a metal cookie sheet(it helps to cook the bottom crust), for 50-60 minutes. The crust should be slightly browned and the filling should be bubbling through the steam holes.

Recipe for Easy Pie Crust

Save Print
Easy Pie Crust Tutorial
 
Ingredients
  • 2½ cups All-Purpose Flour
  • 1⅓ cups Shortening
  • 1½ teaspoons Salt
  • ½ cup Water
  • 6 Tablespoons All-Purpose Flour
Instructions
  1. Combine the 2½ cups flour, shortening, and salt, in a bowl and blend with a fork until it forms pea sized crumbs. In a small container with a lid combine 6 Tablespoons flour and ½ cup water and shake until combined.
  2. Pour onto the shortening mixture and gently combine. Be GENTLE. The more you work the dough the tougher it gets. Form into a ball and lay on a floured surface.
  3. Cut into 4 pieces. You will have enough dough for the top and bottom of 2 pies. Take one of the quarters and roll it into a ball and then flatten it with your palm. Flour the top and start rolling from the middle, turning a quarter turn with each roll.
  4. Don’t hesitate to sprinkle your surface or the top of your dough with more flour so it doesn’t stick. When it is about 12 inches in diameter place the dough over the rolling pin and lay onto your pie dish.
  5. For one pie crust cut and crimp the edges and and poke holes in the bottom with a fork. Bake at 400 degrees for 12-15 minutes, or until the edges are golden brown.
  6. For a double crust, put in the filling before cutting the edge of the bottom crust. Water you fingers and wet the edge of the bottom crust slightly. Place on the top crust, cut the extra and crimp the dough all the way around. Make steam holes in the top, sprinkle with sugar, and bake at 375 degrees on a metal cookie sheet(it helps to cook the bottom crust), for 50-60 minutes. The crust should be slightly browned and the filling should be bubbling through the steam holes.
3.5.3226
Recipe Source: Mary G.

Related:

  • EASY One-Bowl Pumpkin Muffins

    I occasionally talk about our love for our whole grain Pumpkin Oat Muffins (that can…

  • Easy Ombré Cutting Board

    Making a cutting board almost seems like a right of passage into the world of…

  • DIY Rice Pack / Heat Packs - EASY Sewing Tutorial!

    It's been awhile since I've done a sewing project, and as weird as it sounds,…

About Bethany Sy

Nick and Bethany Sy are the creative free-spirits behind DIY/Lifestyle blog, Reality Daydream. They recently purchased a historic mansion and have been documenting the ups and downs of renovation and making this home their own... all while sharing tips and tutorials along the way! When they found themselves in the trenches of infertility, they started a journey that would prove to be their most important DIY project ever, and have 3 beautiful girls to show for it. <3

« Short and SWEET!
‘House Divided’ Broken Bracket Sign »

Comments

  1. 8

    Eileen says

    October 3, 2022 at 8:39 pm

    PSA: Please don’t use crisco as shortening! Crisco is horrible and is not something that should be put in food. Research it! Please use some other shortening.. Your body will thank you.

    Reply
  2. 9

    Mary says

    March 4, 2014 at 11:59 am

    When you freeze it do you freeze after you roll our into pie dish? Before or after you bake it? Or either?

    Reply
    • 10

      Meghan says

      March 4, 2014 at 12:35 pm

      I would leave it in a dough ball to put in the freezer and roll it out when you’re ready to bake your pie.

      Reply
  3. 11

    Denise says

    October 13, 2013 at 7:43 am

    What a great recipe!! Can I freeze what I don’t use, and for how long? Thank you!

    Reply
    • 12

      Meghan says

      January 8, 2014 at 10:38 am

      Sorry its taken me SO long to reply! I froze mine for 4 months and it worked great. But I probably wouldn’t leave it more than 6 months.

      Reply
  4. 13

    KayleneP @ The Links Site says

    September 25, 2013 at 5:27 am

    I usually just buy my pie crusts too but this recipe looks so easy! Going to give this a try next time I need a pie crust.

    Reply
  5. 14

    Beth @ Sawdust and Embryos says

    September 4, 2013 at 11:19 am

    MEEEEE TOO! And this looks simple enough that even *I* can do it!

    Reply
  6. 15

    Kenz @ Interiors By Kenz says

    September 4, 2013 at 10:16 am

    Mmmm. I need pie. Like, NOW!

    Reply

Leave a Reply Cancel reply

Your email address will not be published. Required fields are marked *

Rate this recipe:  

  • Facebook
  • Instagram
  • Pinterest
  • RSS
  • YouTube
We are Nick and Bethany! Welcome to our blog, Reality Daydream where we share our DIY adventures!

realitydaydream

Still can’t get over these shelves. 😍 These Still can’t get over these shelves. 😍

These Aksel Radius Floating Shelves by @shelfology are the perfect finishing touch to this wall in our kitchen. 🙌

#gifted #shelfology #radshelfie #floatingshelf #akselradius
I needed an instant-gratification project today fo I needed an instant-gratification project today for my well-being, and this little wooden stand was so fun and fast!

Details and links to everything in this pic in Stories!
If ya just need a slab of wood, grab a cutting boa If ya just need a slab of wood, grab a cutting board when you’re at Target or Walmart! They’re made of hard wood!

I used this cutting board to experiment and make some prototypes for a large-scale piece of art I’m doing for our church. It’s got me EXCITED!

Follow along for that project- happening soooon!

@dapproducts @dremel @jet.woodworking
You’ve all seen the video, but here’s some sti You’ve all seen the video, but here’s some still shots of the kitchen wall in all its glory!! 

The Aksel Radius Floating Shelves by @shelfology were the perfect finishing touch! 

Should I do a house tour of our main floor this week?!?! 🙌🌿

#sponsored #floatingshelf #radshelfie
Load More Follow on Instagram
View of our entryway of our historic mansion that we're slowly renovating and making our own.
Click here for lots of art projects using only wood stain on furniture!!
Please feel free to share or pin my posts! You're welcome to use ONE of my images (no collages or pinnables) with a link back to the corresponding post. Please do not edit or crop that single image in any way. Improper use of my photos, ideas or words is a violation of copyright. Thank you!

Categories

Attention: Almost any do-it-yourself project involves risk of some sort. Your tools, materials, and skills will vary, as will the conditions at your project site. Reality Daydream has made every effort to be complete and accurate in the instructions of the plans on this website. Reality Daydream will not assume any responsibility or liability for damages or losses sustained or incurred in the course of your project or in the use of the item you create. Always follow the manufacturer’s operating instructions in the use of tools, check and follow your local building codes, and observe all commonly accepted safety precautions.


Copyright © 2023 · Modern Blogger Pro On Genesis Framework · Customizations by Sweet Theory Designs · Privacy Policy · Log in