• Home
  • About
  • Tutorials
  • Recipes
  • Furniture
  • Contact
    • Contact
    • Infertility
    • Disclosure
    • Privacy Policy
  • Shop
    • Facebook
    • Instagram
    • Pinterest

Reality Daydream

The Dream is Free, The Hustle Sold Separately

  • Home
  • About
  • Tutorials
  • Recipes
  • Furniture
  • Contact
    • Contact
    • Infertility
    • Disclosure
    • Privacy Policy
  • Shop

DIY ~ Little Orange End Table

April 19, 2012 by Bethany Sy

Brenda brought us this little end table that she snagged at a garage sale. I bet you won’t overlook your average homely-looking end table after this post. It’s amazing what a little POP of color can do!

photo (1)

Below is the room she plans to put this end table in. Brenda’s a girl after my own heart with all those orange accents!! Additionally… am I the only one yearning to own an ottoman like that one? Don’t Lie!

photo

Her only request is that the end table somewhat coordinate with the white/orange end table she bought from us a few years ago. This guy is going in that same room!

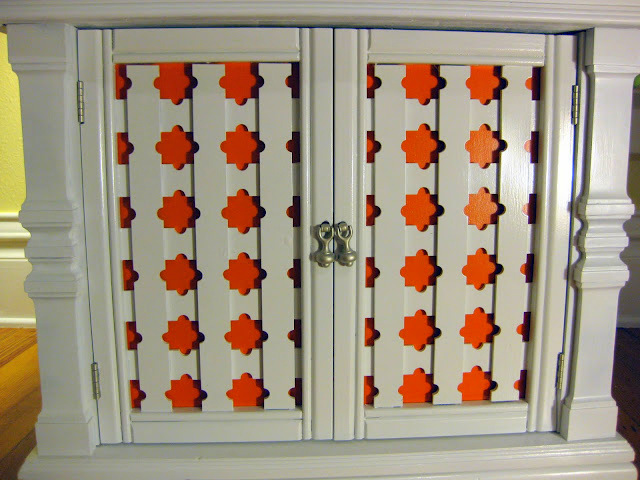
Noooooooo problem! What could be more fun than making two dramatically different end tables look like a funky matching pair?

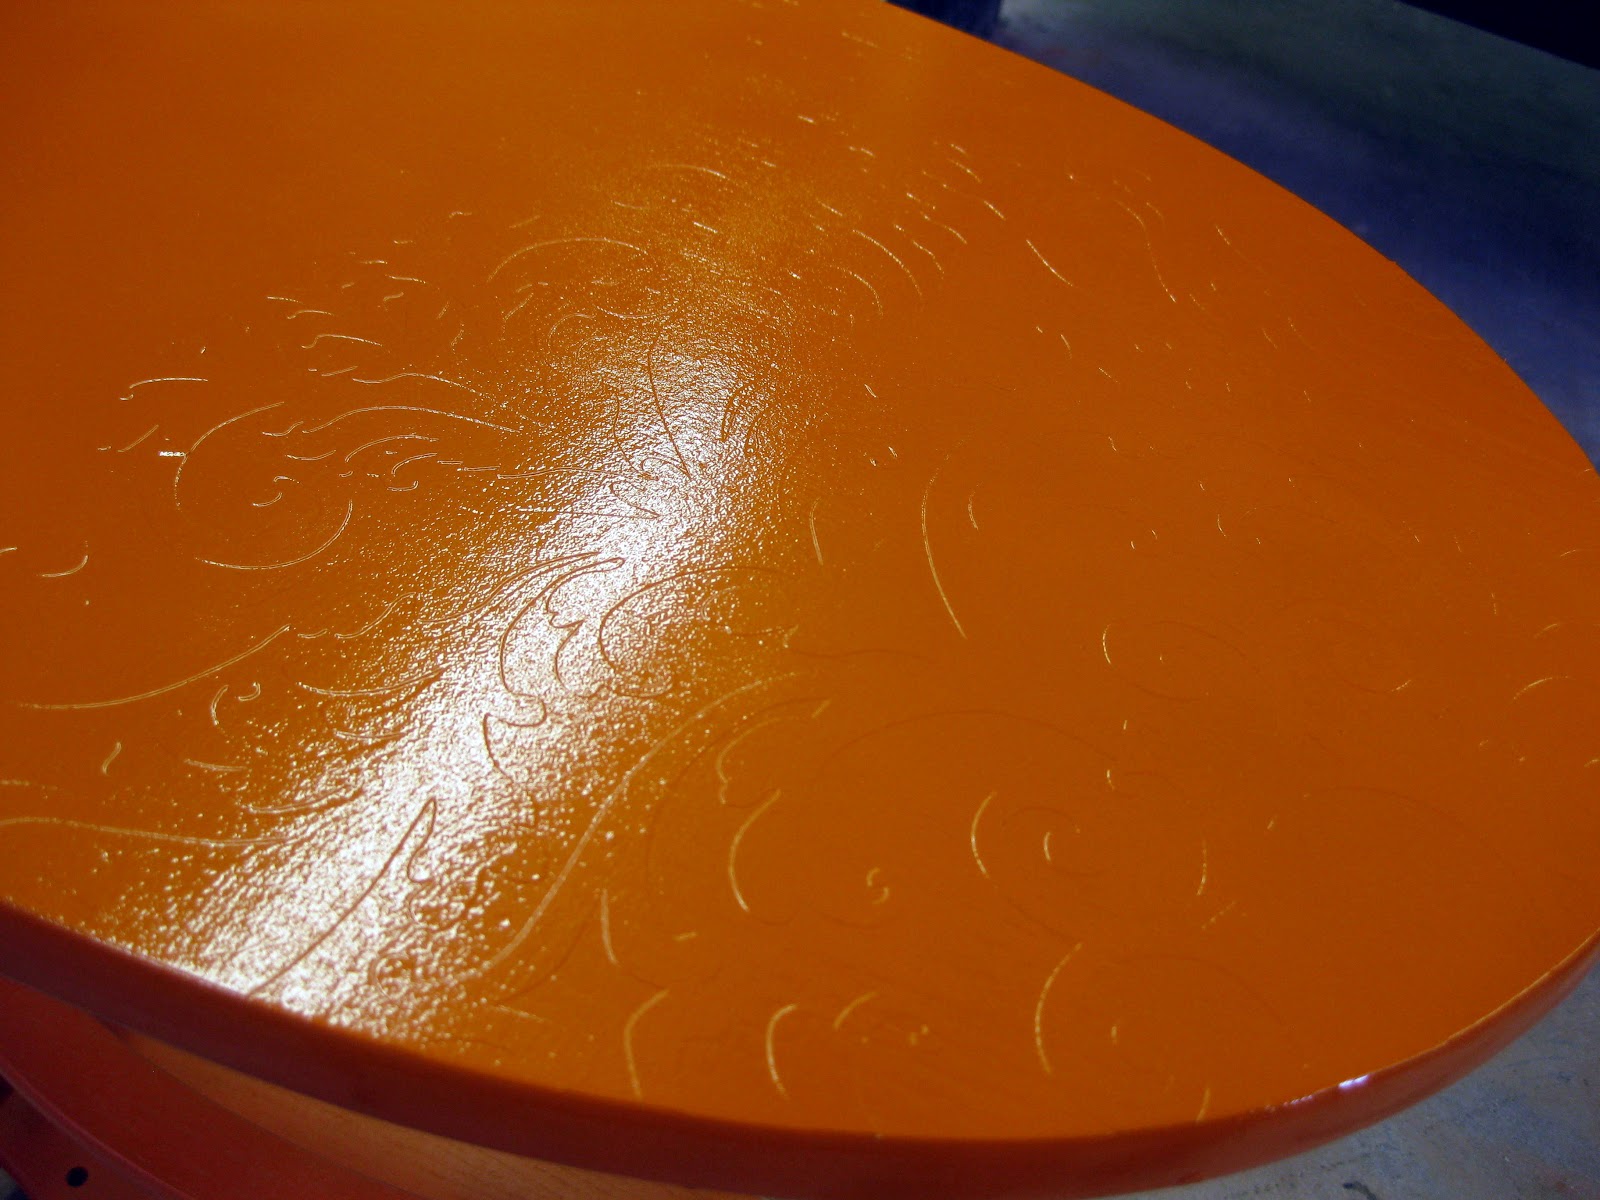
First we did this: (the orange color looks a little dark in some of the photos. it’s the EXACT same orange as the above end table).

P4153493

Certainly you know we didn’t stop there. Our girl Dana cut us another vinyl to do our thing on the surface of this little gem.

P4153496
P4153497
P4153501
P4153509

Then we coated it with water-based poly and let that dry for one hour. Then we primed, waited another hour, and finally sprayed it bright orange! The key to this application is to remove the vinyl immediately after painting, while the paint is still wet. Otherwise the vinyl will pull up the paint in places. Which is no bueno!

If you don’t like getting your finders icky, consider wearing gloves? Yep.

IMG_3169
IMG_3168

There’s just something about asymmetrical designs that I really dig, like this and this. Maybe it’s just a phase. But I feel like it gives things some extra visual interest.

P4183643

I’m thinkin’ this little stinker will look pretty rad in Brenda’s family room.

P4183644

P4183646
Hope you love it Brenda!

orange end table

Related:

  • Coffee Table / Lego Table

    We've been needing to update our coffee table situation in the living room for awhile…

  • DIY fabric-wrapped bulletin boards
    DIY Fabric-Covered Bulletin Tutorial

    My kids are getting to the age where they want to tape pictures, cards, notes...…

  • DIY Rice Pack / Heat Packs - EASY Sewing Tutorial!

    It's been awhile since I've done a sewing project, and as weird as it sounds,…

About Bethany Sy

Nick and Bethany Sy are the creative free-spirits behind DIY/Lifestyle blog, Reality Daydream. They recently purchased a historic mansion and have been documenting the ups and downs of renovation and making this home their own... all while sharing tips and tutorials along the way! When they found themselves in the trenches of infertility, they started a journey that would prove to be their most important DIY project ever, and have 3 beautiful girls to show for it. <3

« Audrey Hepburn Jewelry Armoire
Foolery in the Orange Chair »

Comments

  1. 16

    Moushumi Mitra says

    March 21, 2019 at 11:17 am

    Loved each and every piece of yours !!! can you tell me how can i make the stencils . also what kind of paint should i use …

    Reply
  2. 17

    Carri says

    February 13, 2014 at 7:44 am

    Beautiful work!!! Just wondering where you get your stencils from or do you design them yourself?

    Reply
    • 18

      Bethany @ Sawdust and Embryos says

      February 13, 2014 at 10:21 am

      Carrie, sometimes we design them, and sometimes we just find a stock photo or Google Image.

      Reply
  3. 19

    Tammy says

    January 8, 2014 at 12:20 pm

    I have the same exact table now I plan on doing the same thing…. I love your page. I just found it today Jan 8, 2014. Now I can’t get off if it. You two are FANTABOLOUS….!!!!!!
    I haven’t gotten through all of your pages yet but do you two make a living at this stuff..If not you definatley should … !!!

    Reply
  4. 20

    MindySchaper says

    February 18, 2013 at 4:10 am

    So pretty!

    Reply
  5. 21

    Bethany says

    May 11, 2012 at 12:50 pm

    Yep! We used Rustoleum bright orange paint!

    Reply
  6. 22

    Anonymous says

    May 11, 2012 at 12:47 pm

    Hey Beth, I was just wondering what color/brand of spray paint you used for this. I am loving it! and it would look awesome in our nursery.

    Stephenie

    Reply
  7. 23

    Brittney says

    April 26, 2012 at 10:13 pm

    To be honest I am doing a “case” of the black table that you stained, stenciled, painted. I have a table almosed identical and I fell in love with what you did with yours 🙂 Thank you for her info I plan to email her soon 🙂

    Thank you soooooo much for your blog, it has inspired me to take on my own diy projects 😀

    Reply
  8. 24

    Erin Hall says

    April 24, 2012 at 4:00 pm

    This is amazing! I love the idea so much. I have to re do a table top and I think I am going to be looking into something like this for it. Great idea. Pinned it for future reference.

    Reply
  9. 25

    Bethany says

    April 24, 2012 at 12:50 pm

    Hi Brittney! Dana’s working on getting a website up and running. But till then, her email address is dashoop@hotmail.com… she’s amazing! Send us pics of your project when you’re done!

    Reply
  10. 26

    Brittney says

    April 23, 2012 at 6:49 pm

    way too cool!!! does your girl Dana have a site? I am having a hard time finding stenciled vinyl other than car decals 🙂

    Reply
  11. 27

    Jaybea20 says

    April 22, 2012 at 2:52 am

    That’s amazing! Believe it or not, I have that EXACT end table from several years ago. My daughter adopted it as her nightstand, but I would LOVE to try the stencil idea on it when we move to our new house in July. 🙂

    Reply
  12. 28

    Anonymous says

    April 20, 2012 at 2:28 pm

    You folks are good! I love this, Mary in NY

    Reply
  13. 29

    Renee' says

    April 20, 2012 at 1:39 pm

    Love it and love the color! It is AWESOME!

    Reply
  14. 30

    Brenda says

    April 20, 2012 at 4:00 am

    Love! It’s perfect!

    Reply
  15. 31

    Nathalie says

    April 20, 2012 at 3:57 am

    LOVE this. So clever.

    Reply

Leave a Reply Cancel reply

Your email address will not be published. Required fields are marked *

Recipe Rating


  • Facebook
  • Instagram
  • Pinterest
  • RSS
  • YouTube
We are Nick and Bethany! Welcome to our blog, Reality Daydream where we share our DIY adventures!
Click here for lots of art projects using only wood stain on furniture!!
Please feel free to share or pin my posts! You're welcome to use ONE of my images (no collages or pinnables) with a link back to the corresponding post. Please do not edit or crop that single image in any way. Improper use of my photos, ideas or words is a violation of copyright. Thank you!

Categories

Attention: Almost any do-it-yourself project involves risk of some sort. Your tools, materials, and skills will vary, as will the conditions at your project site. Reality Daydream has made every effort to be complete and accurate in the instructions of the plans on this website. Reality Daydream will not assume any responsibility or liability for damages or losses sustained or incurred in the course of your project or in the use of the item you create. Always follow the manufacturer’s operating instructions in the use of tools, check and follow your local building codes, and observe all commonly accepted safety precautions.


Copyright © 2025 · Modern Blogger Pro On Genesis Framework · Customizations by Sweet Theory Designs · Privacy Policy · Log in