Good Tuesday to you! How’s your eternal winter treating you? Did you catch that Frozen reference?
I think when I posted about our epic comforter fail in our bedroom, it reminded me how neglected that room has been since then… and I’ve found myself adding little things to warm it up!
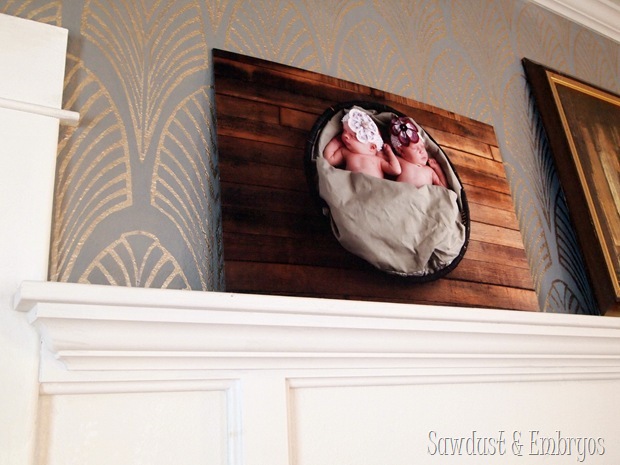
We had this foam-core print of the girls from their newborn photoshoot with the fabulous Molly Long, and have had intentions of framing it and putting it in our bedroom for quite some time now.
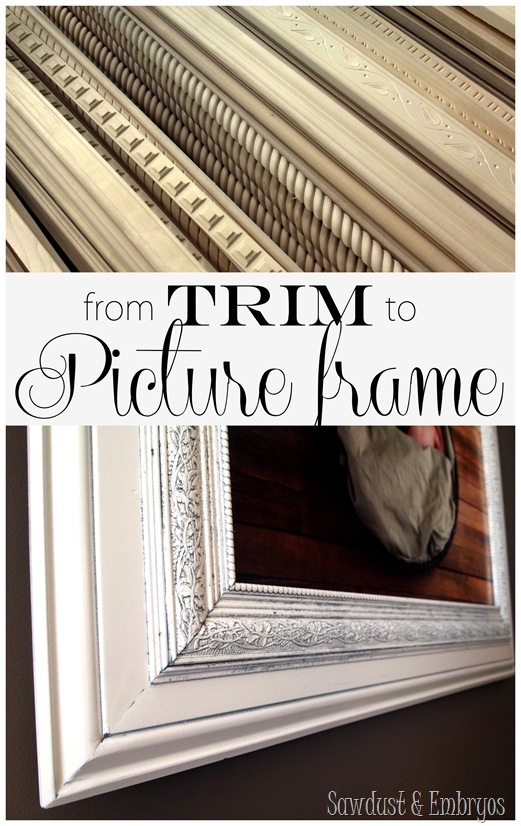
So last weekend, we decided to quit procrastinating and just build one already! It’s not your standard dimensions for purchasing a frame… plus, why purchase a frame when you can make one?!
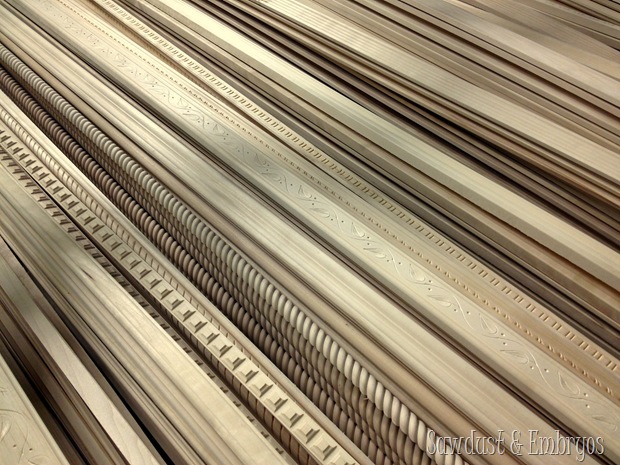
We dragged our sorry-selves out in the cold to take a little gander at the trim section at Lowes. Sweet SWEET trim.
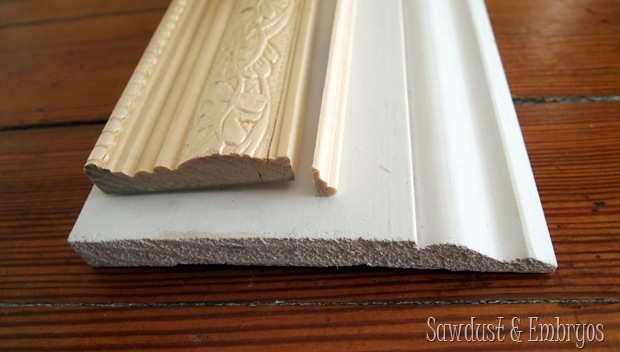
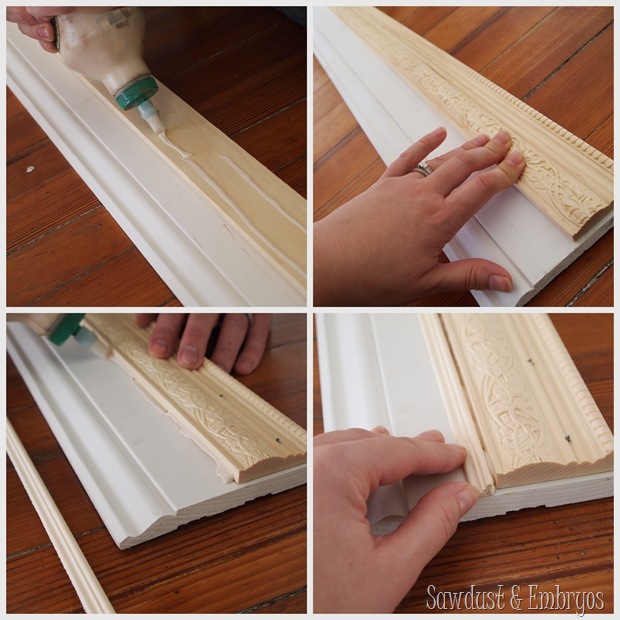
After trying out a few different combos, we came home with these pieces.
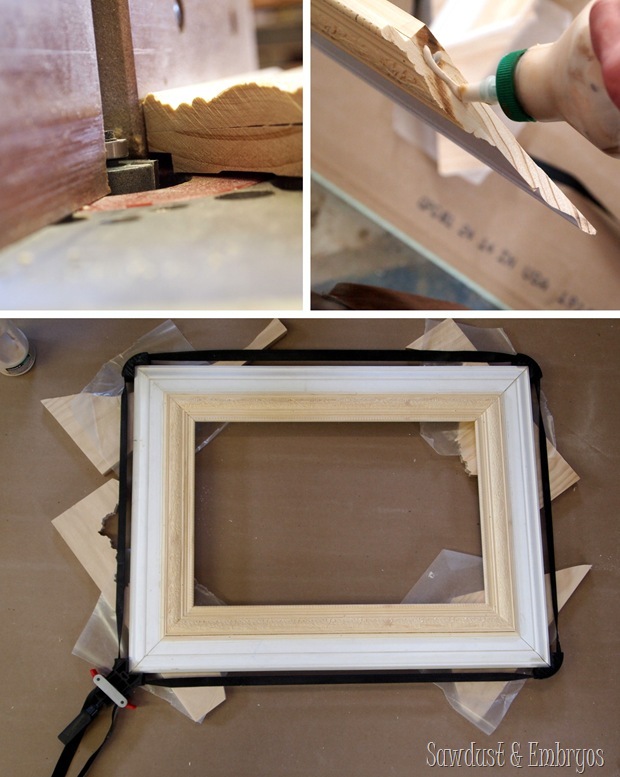
To start out we needed to glue the trim pieces together the way we wanted them.
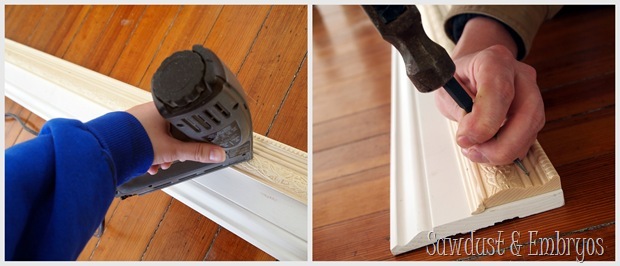
Then, to really reinforce things, we put in a couple brad-nails here and there, and punched ‘em in deep with a nail set.
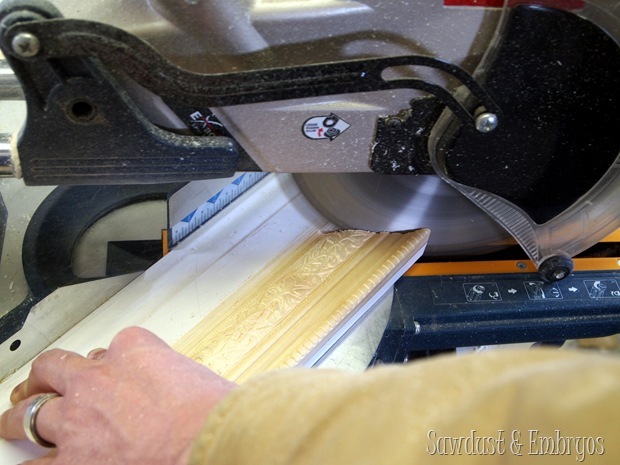
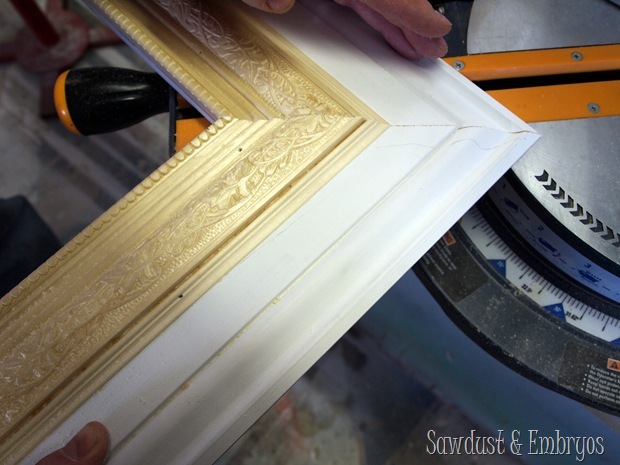
Using our compound miter saw, we cut at 45 degree angles for our corners.
We routed the edges using a 3/8 x 1/2” Rabbeting bit so the picture could sit down into the frame a bit. Then all that’s left is to glue and clamp (using a Picture Frame Clamp).
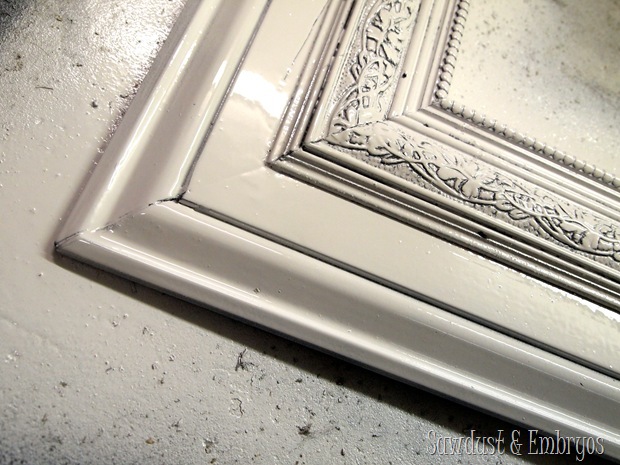
After letting it dry overnight, I removed the clamp, primed, and painted white! Then I glazed (using my glazing tutorial here).
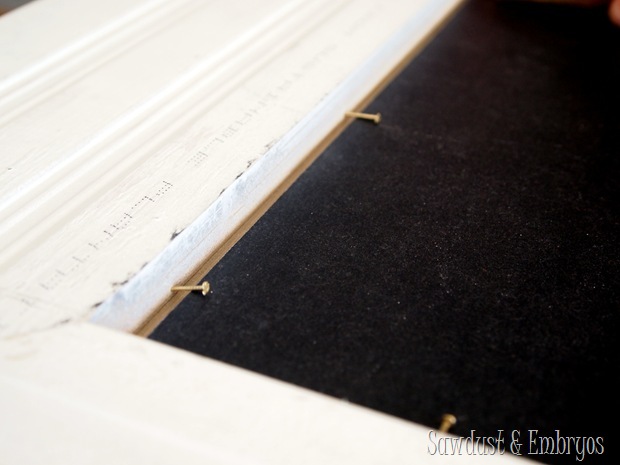
You could get a custom piece of glass cut to size at your local glass shop for pretty cheap, but we opted not to since our photo was already mounted on foam-core. So we popped it in the frame a secured it by tapping in some little 1/2” brad nails along the inside lip.
We installed a Hangman Picture Hanger on the back for easy (and SUPER stable) hanging.
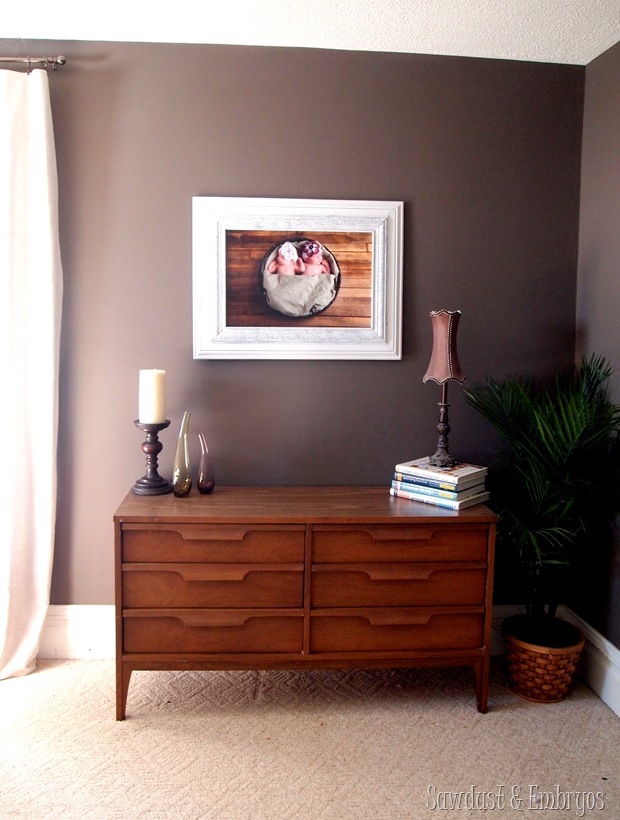
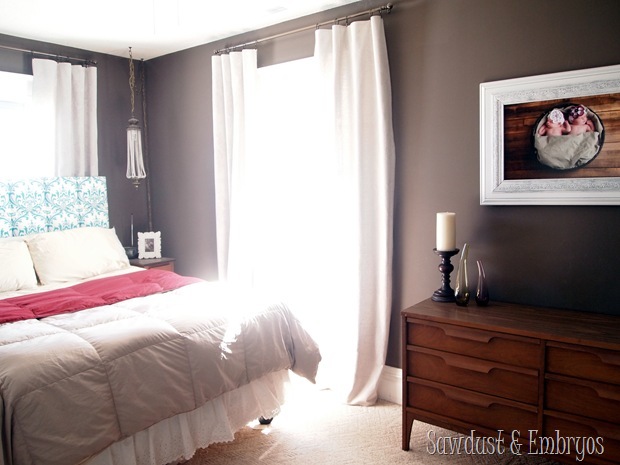
And here’s a shot of our whole room for perspective. I even made my bed for you… despite having such a boring comforter (teehee!). Sorry about how washed out the rest of the room is in this pic.
I love how many possibilities there are with all the unique and gorgeous trim pieces there are available these days. I’m sure we’ll be making more frames for our gallery wall now that we discovered this little trick!
Have an inspired day!
Disclosure! we’re SUPER HONORED to have been chosen as a “Lowes Creator”, and were provided with a Lowes gift card to help with the cost of supplies… but as always, all ideas, thoughts and opinions are 100% our own. Because that’s how we roll yo.
You can also sign up to receive a free Creative Ideas Magazine, which is loaded with inspiration! There’s also a magazine app so you can have inspiration on the go!



Hi, love the content. Just checking, is that base board or pine casing being used? Thanks!
Where did you buy the wood supplies to make the frame
Do you by chance make frames and sell them? Just like the one you put together above. I am very interested…
Thanks,
Angelito
Sorry, we don’t sell any of our projects.
did you paint the frame black first
No, the reason it looks that way is because I glazed it with a dark technique glaze after painting it white. Does that make sense?
Hi Bethany! Do you remember the name of your bedroom wall color?? I love it!
Hey Natasha! The paint is by Pittsburgh Paints, and the color is called ‘Oswego Tea’. It’s such a deep moody color!
https://realitydaydream.com/its-about-time-2/
It looks perfect. The pink throw is picked up by the rosy skin tones.
How sturdy did your frame turn out? I’m looking for a way to hang a large pane of glass and wondered if framing it with trim might work. Would you trust it?
It’s very sturdy for our purposes, but if you’re planning to have glass in it, I would use biscuit joinery on the corners, as well as have some sort of backing on the entire frame. Hope this helps! Let us know if you have any other questions!
Fantastic project for which I’ll be copying! Question: Did you find that grey and gold Manhattan wall paper stateside, and if you did, where? I found it on a UK website but am thinking I’d rather just create a stencil for it instead of paying the UK prices.
Hey Rachel… great minds think alike! We totally used a stencil to make it look like that wallpaper! I have a friend that makes stencils. You can message her through her Etsy shop… here’s the link!
https://www.etsy.com/shop/decalsNdecor
9 months later… hahaha… I absolutely will. I’m in love with this design. I’ve even considered taking Adobe Photoshop classes to learn how to make these designs professionally. 🙂 I think I noticed your wall a stencil afterwards and was like, “Sneaky gal!” hahahaha…
Where did you get your foam board print? I really want to order one, but don’t know which options to pick! thanks!
We got this print directly through our photographer, so I’m not sure what to tell you. I’m sure sites like Mpix would have something like this. Sorry I’m not more help!
You always amaze me. Your white frame looks stunning on your brown wall. Pinning this idea!
This is so beautiful. I LOVE the finished look of it. I should make a frame for one of Evelyn’s newborn photos.
Ahhh!!!! This is PERFECT! THANK YOU THANK YOU for posting this!! I went to Africa on a missions trip two summers ago, and purchased the most gorgeous painting on canvas. It’s a very odd size, so getting it custom framed was going to cost me a FORTUNE. It’s been in my closet waiting to make it’s grand appearance now for TWO whole years. This is BEYOND perfect! Ack! Now I can’t wait to go look at the trim section of Lowe’s!! =)
Gorgeous! Having worked at a frame shop, I could hazard a guess at what that would have set you back–Great job! FYI, for those who do opt for glass, make sure there is air between the picture and the glass. Use matt board to create a border, or slide a narrow sliver of trim in at the edges. If there is no space, the two can seal together and get stuck. And then ruin the photo.
Gorgeous job! You guys never cease to amaze me with your talent! I wish you could have classes to teach we novices in person. It tends to sink in my brain better if I am doing while I am learning. Again, very, very, very nice!
Such a gorgeous frame! Well done! Thanks for sharing.
Great frame! But my favorite part of it is what you used it for. What a lovely way to show off your daughters.
Thanks Suzanne… this is my favorite picture of all time! They were soooo tiny. 🙂
Very pretty frame and beautiful picture.
Thanks for this tutorial! I’ve always wanted to do this, now i’ll know where to go for instructions when I finally get around to it. And, you are a master glazer! I’m too scared to give that a try at this point.
This is so cute! Gash, I wish I had a router…and a picture frame clamp… and some chocolate right now.. I’ve been planning on doing this technique, but framing my bathroom mirror instead of a picture. Thanks for the tips! This turned out just lovely 🙂
Sam, Nick just had the idea that if you don’t have a router, you could just overlap the trim in such a way that it automatically makes a little groove for the picture instead of having to route it. Just a thought! Then all you’d need is the picture frame clamp!
GOOOOORRRRRGEOUS!!! WOW!!! I see the 3 pieces of trim board… I really do.. but when they’re assembled.. I can’t tell they were trim boards- talk about shock & awe – a big WOWZA THAT’S COOL!
Nice! how much did all that trim set u back? 🙂 I wish I had all those tools you’re using!!
Lori, we probably spent about $45 on the trim. I can’t imagine how much it would be at a framing shop!
At my framing shop, this frame would be about $15 to $20. I wonder why framing is so expensive in the U.S.
Also, Bethany–though I love the projects you do, I often get frustrated reading them. Although I grew up in central Iowa, now I live in a small apartment in a big crowded city far away, and find that many of your projects are ones that require a garage (or a farmyard!). Even small projects often require tools that don’t easily find a home in a city apartment. I wonder if you might consider a series or something focusing on things that can be done in small spaces. I wonder what wonderful creative ideas your talent might devise for those of us who don’t have the space for your other projects. A challenge, no?
Love it. Seriously. xo
Cindy! Will we see you at SNAP!?
Oh SNAP!, no. 🙁 Haven??
We’ll be at Haven too… see you there! 🙂
That is awesome! My hubby made me some homemade frames out of reclaimed wood last month for my birthday. I will have to post a pic on your FB site and share it with you. Thanks for the mention of the picture frame clamp…I see one of those in my husband’s future!!
Sweet Jennifer! Show me pics! YES the picture frame clamp comes in VERY handy! 🙂