We’re back at it with baby crafts! But unlike this footprint baby craft, this one didn’t require active participation from our twinfants. And to change things up a bit, I’m going to show you the finished product first so you don’t have to scroll through this long post to see them all finished if you don’t really care about the process by which we made them!
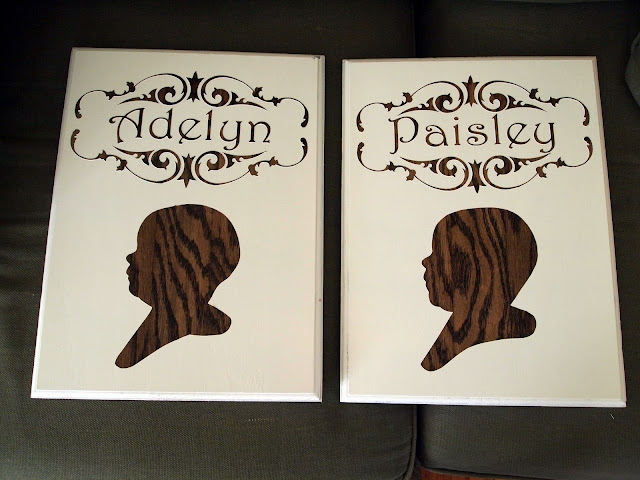
I give you… our profile plaques of our sweet babies!

Isn’t it incredible how different their head-shapes are? And their noses are totally different too… so weird!
Ok, so let’s get to business and discuss how we made these suckers! We started out with a plank of oak wood (because we love the grain of oak!) and cut each piece 11.5′ x 15″. You can use any dimensions you want!

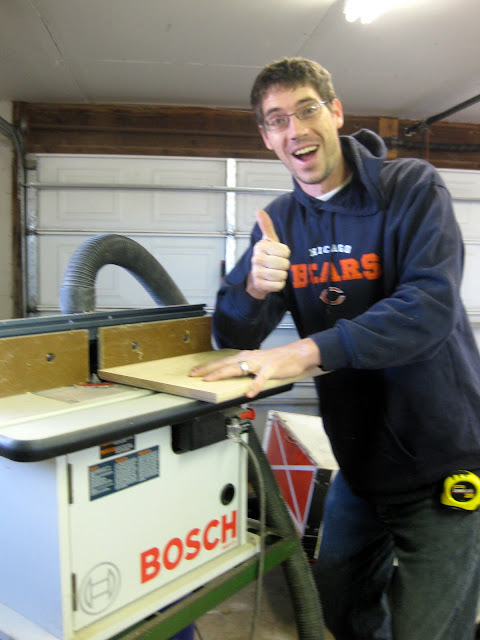
Then Nick used his router to make the edges decorative and finished-looking. As you can tell, he’s very enthusiastic about this project!

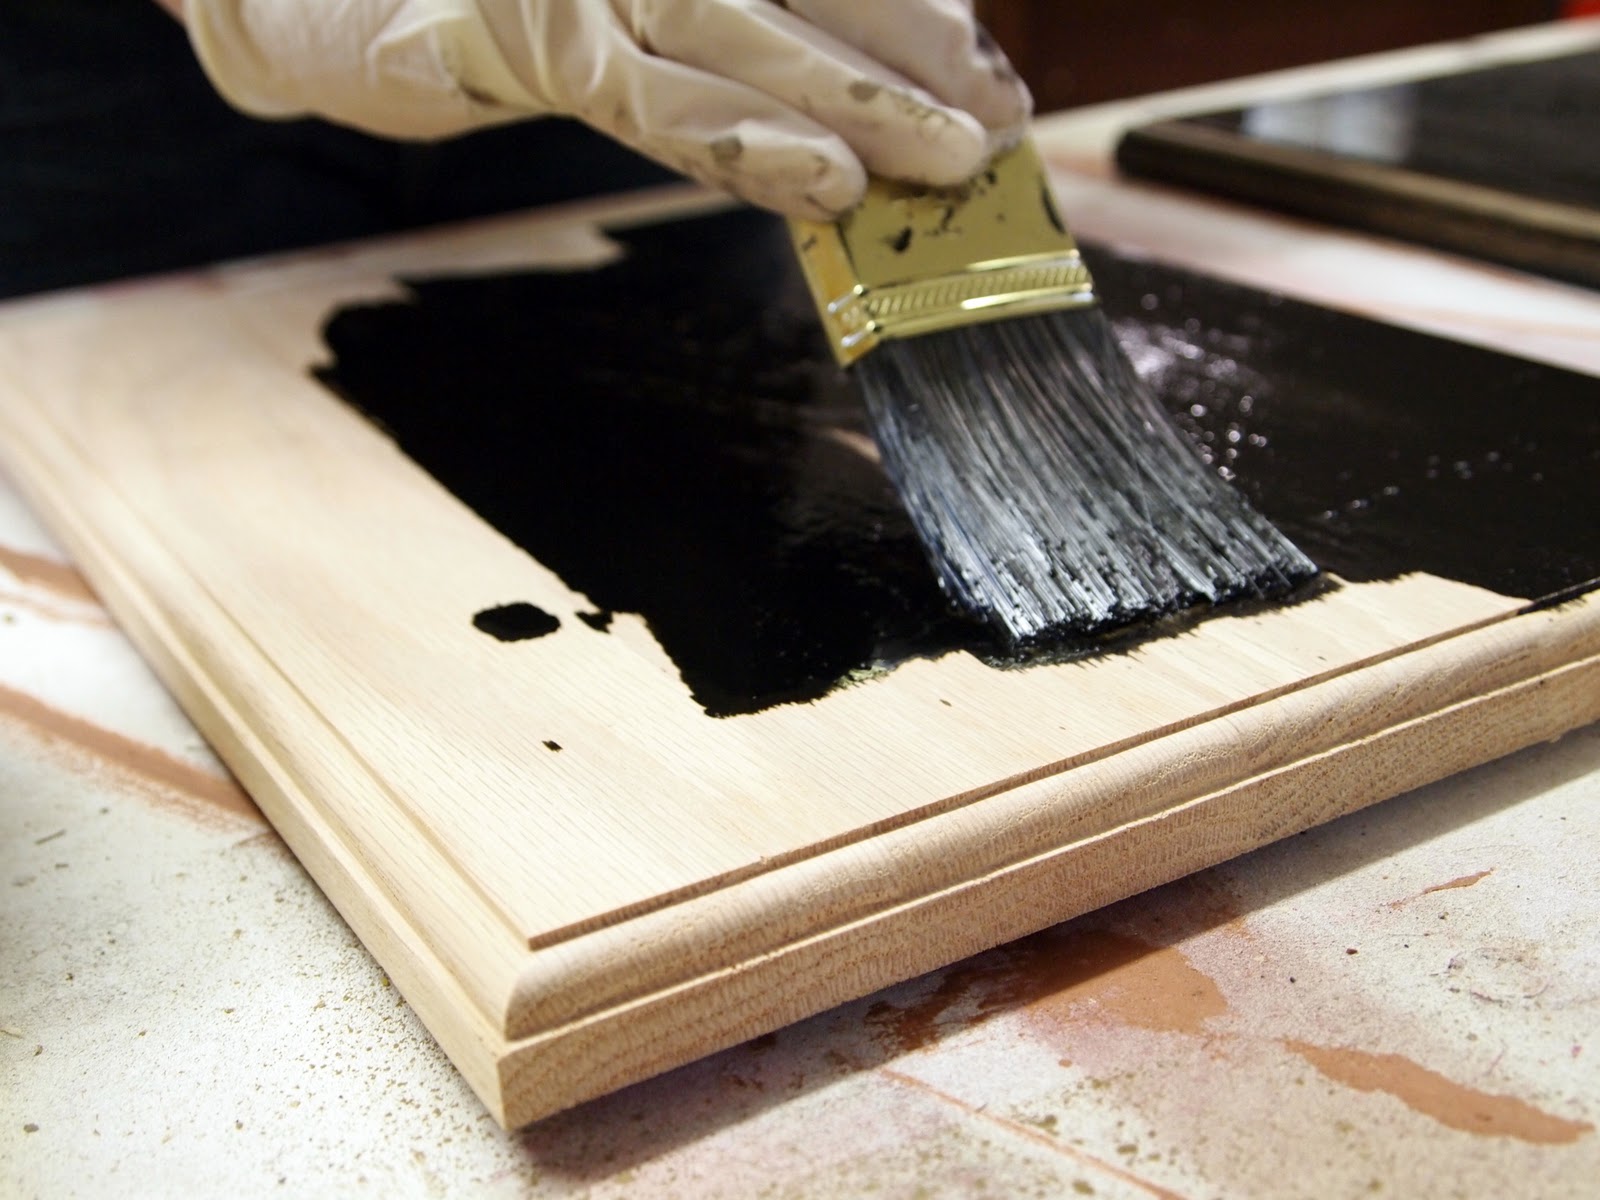
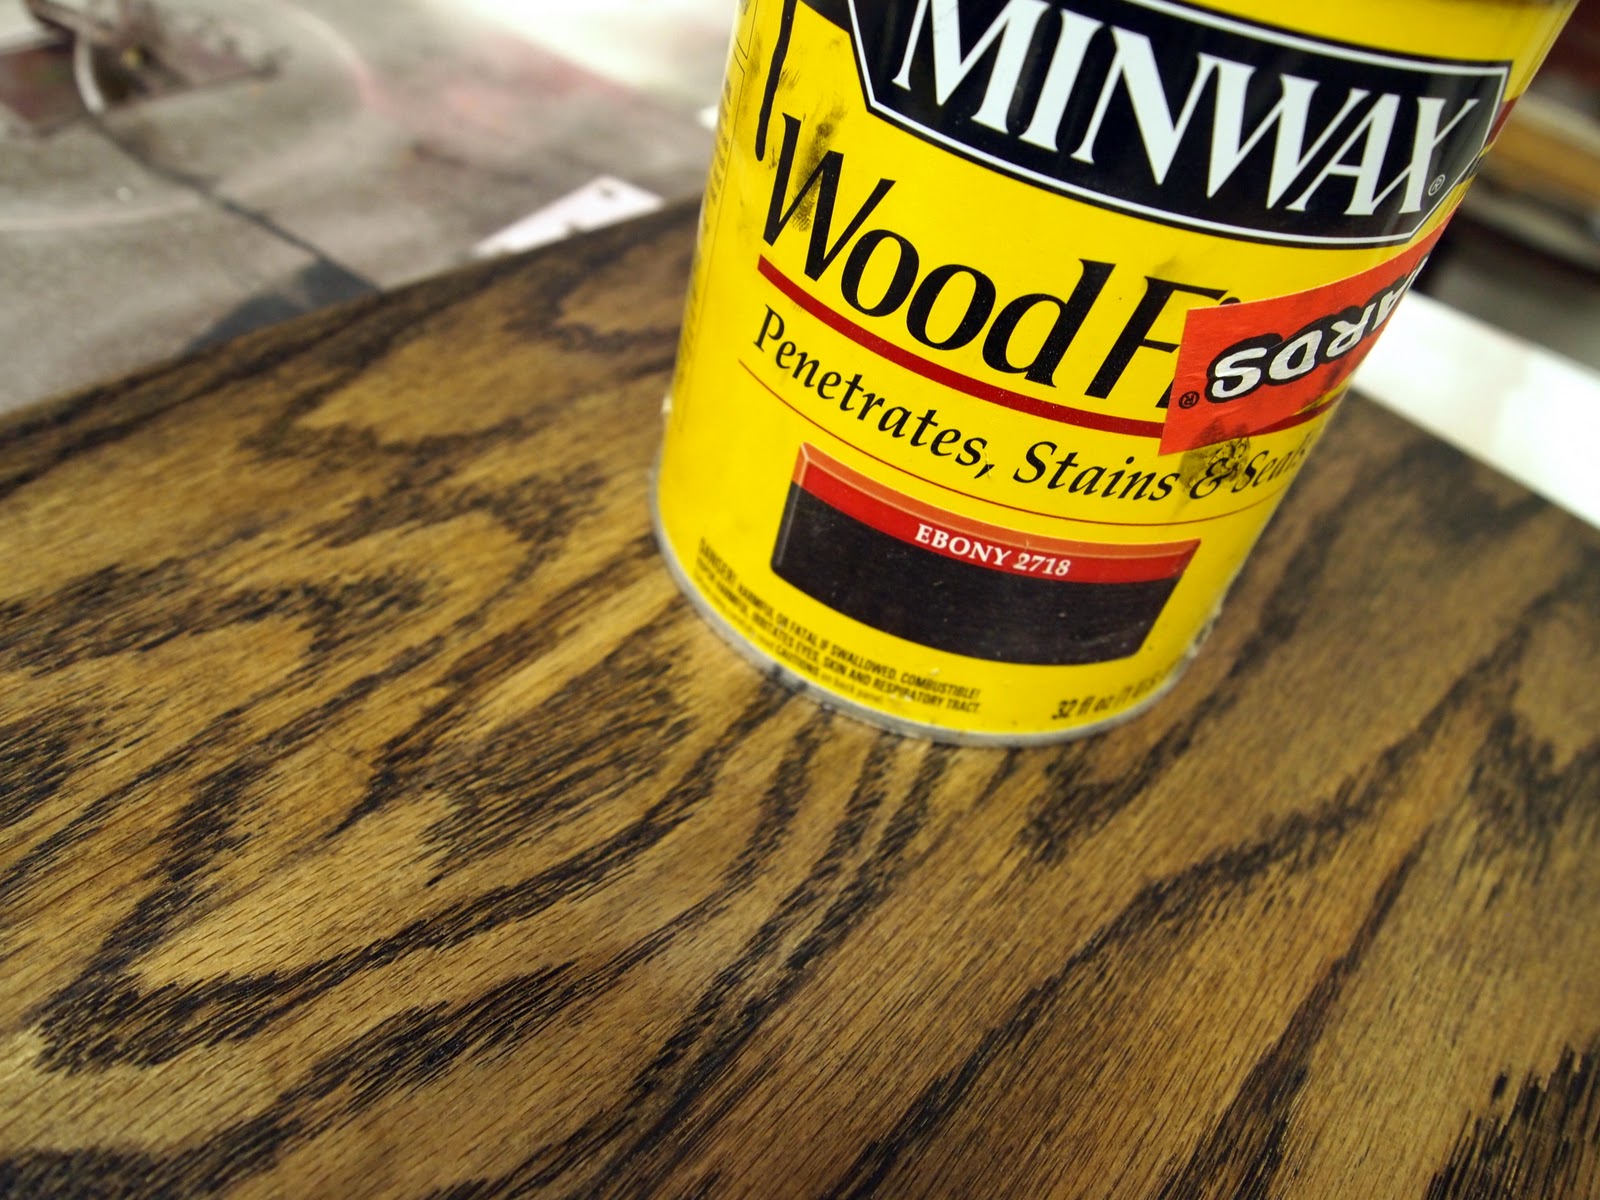
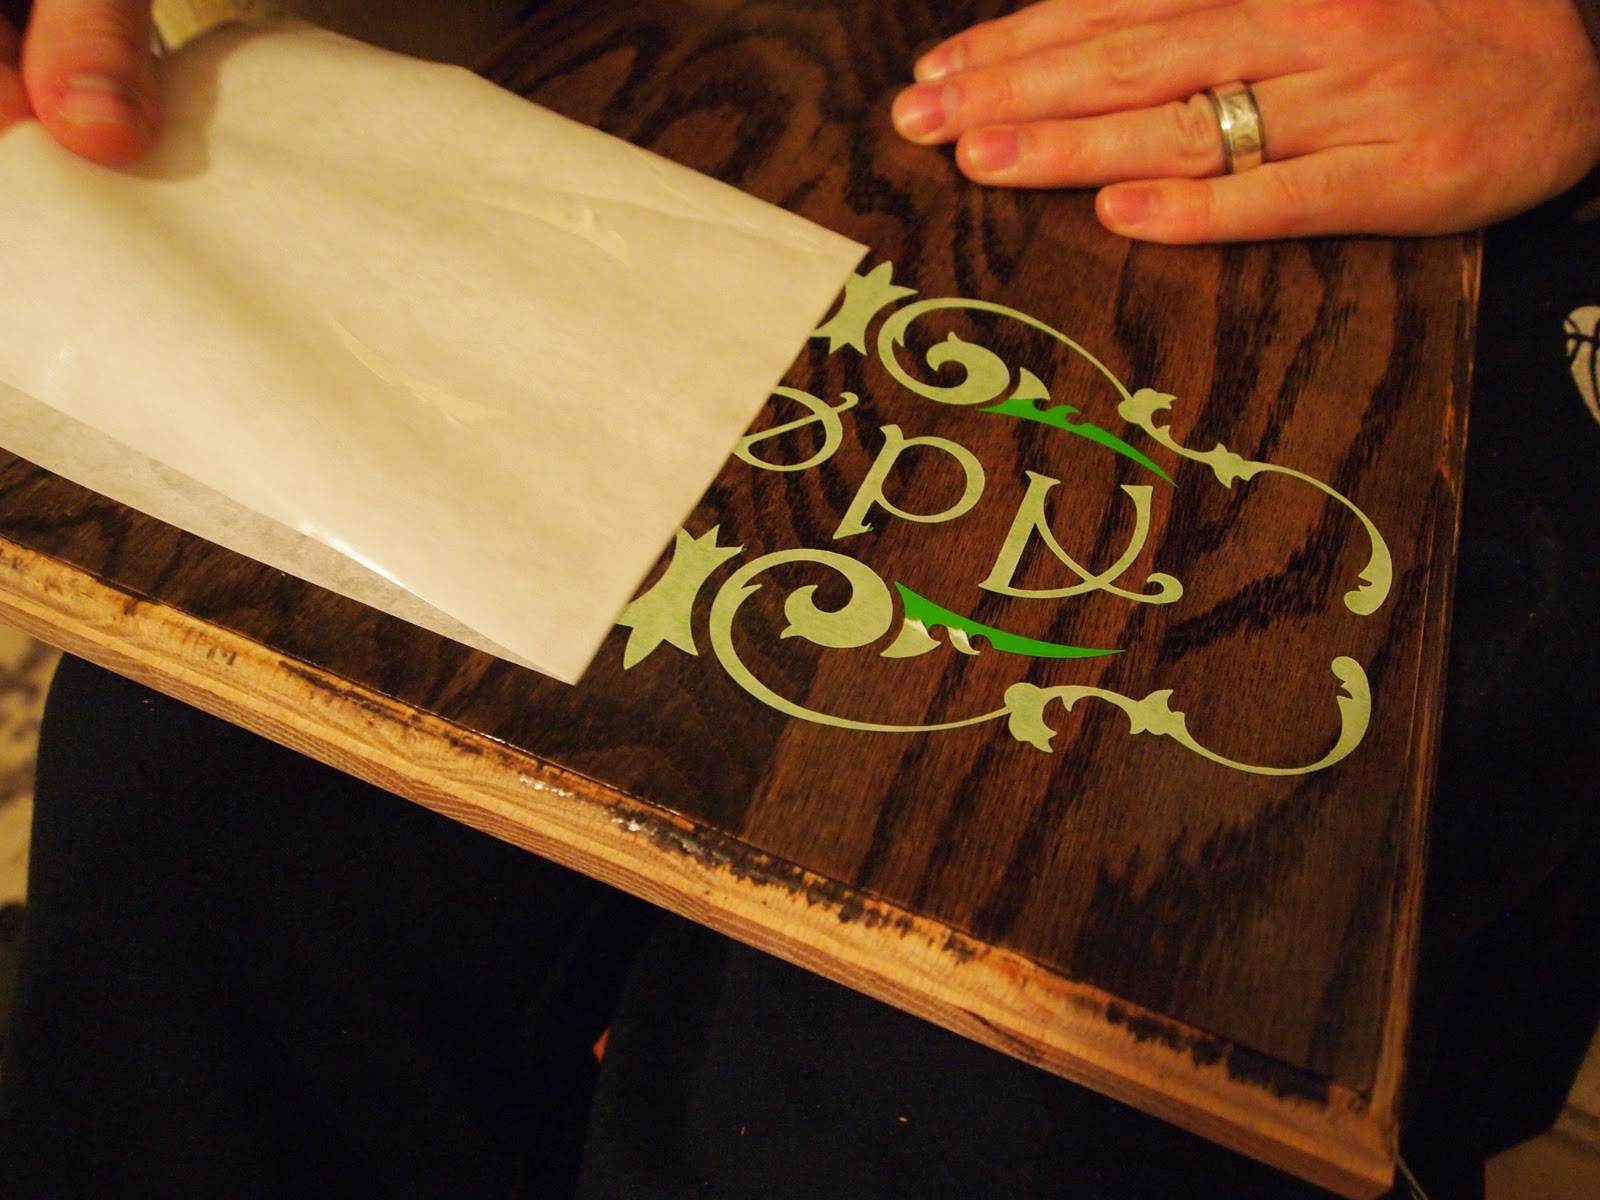
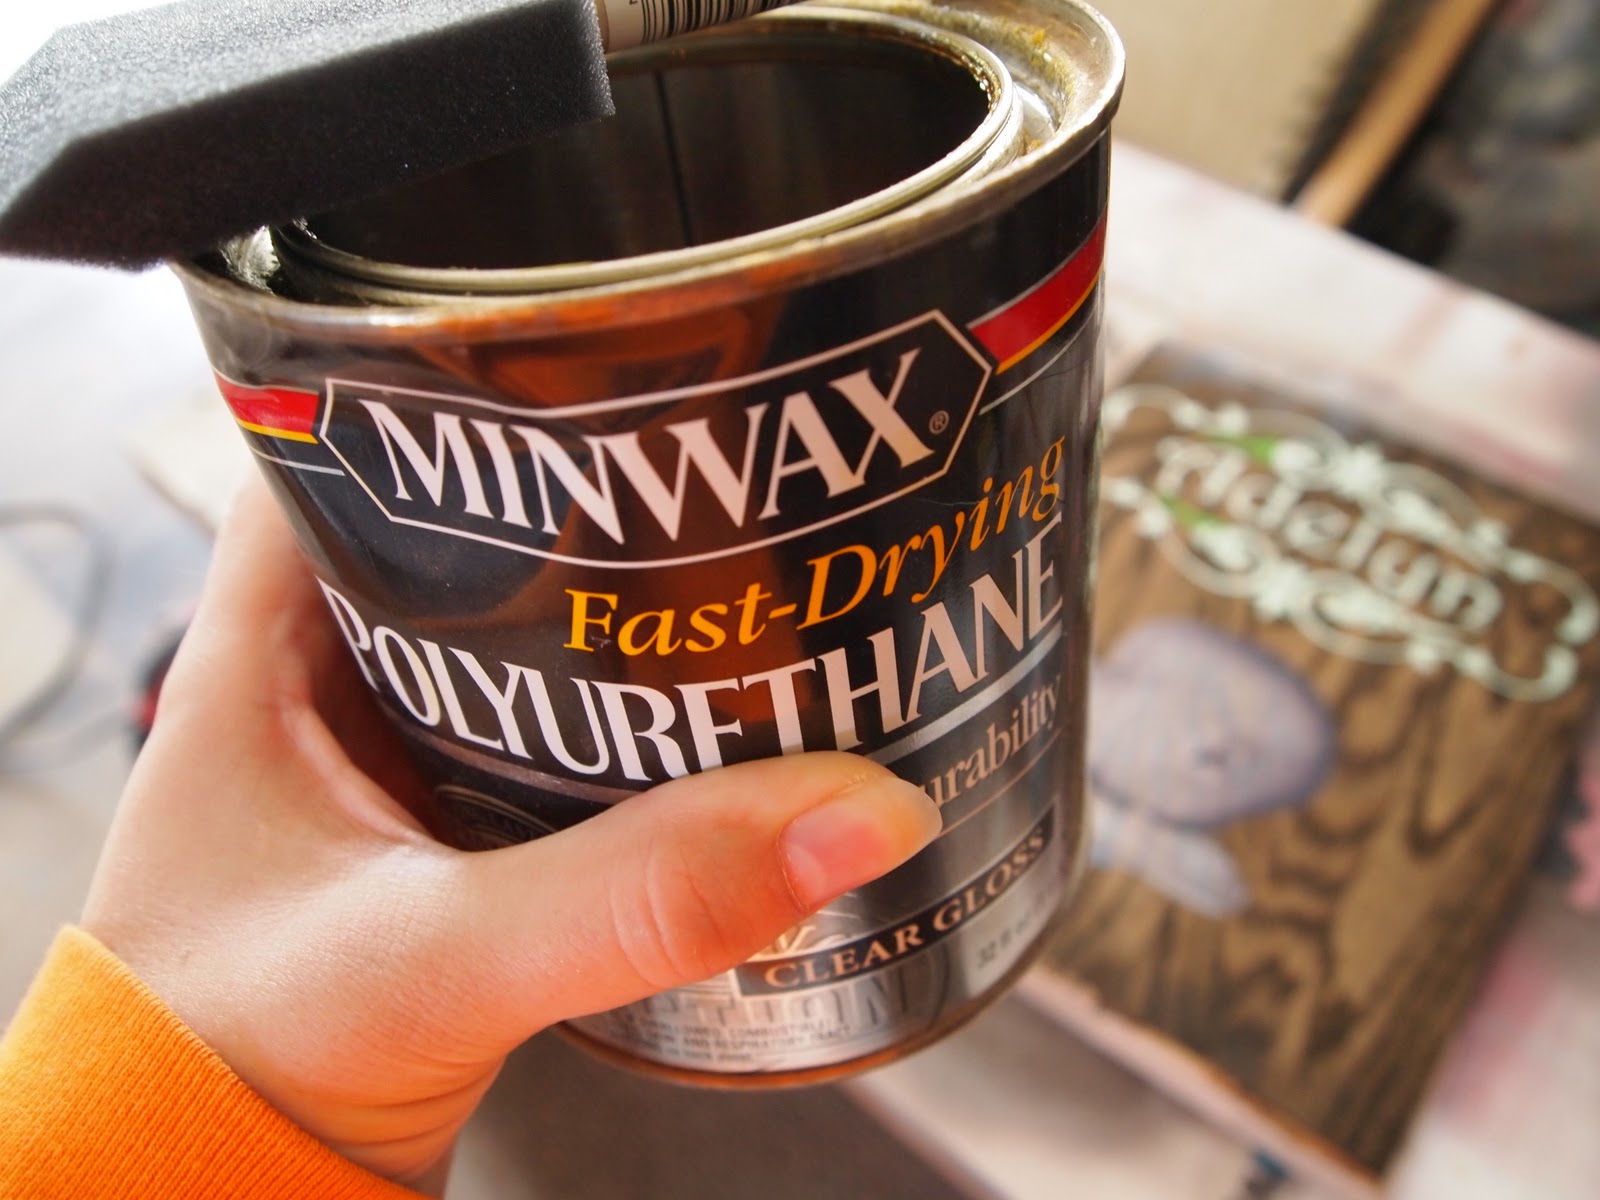
And we got down and dirty with our Minwax Ebony stain… LOVE THAT STUFF!
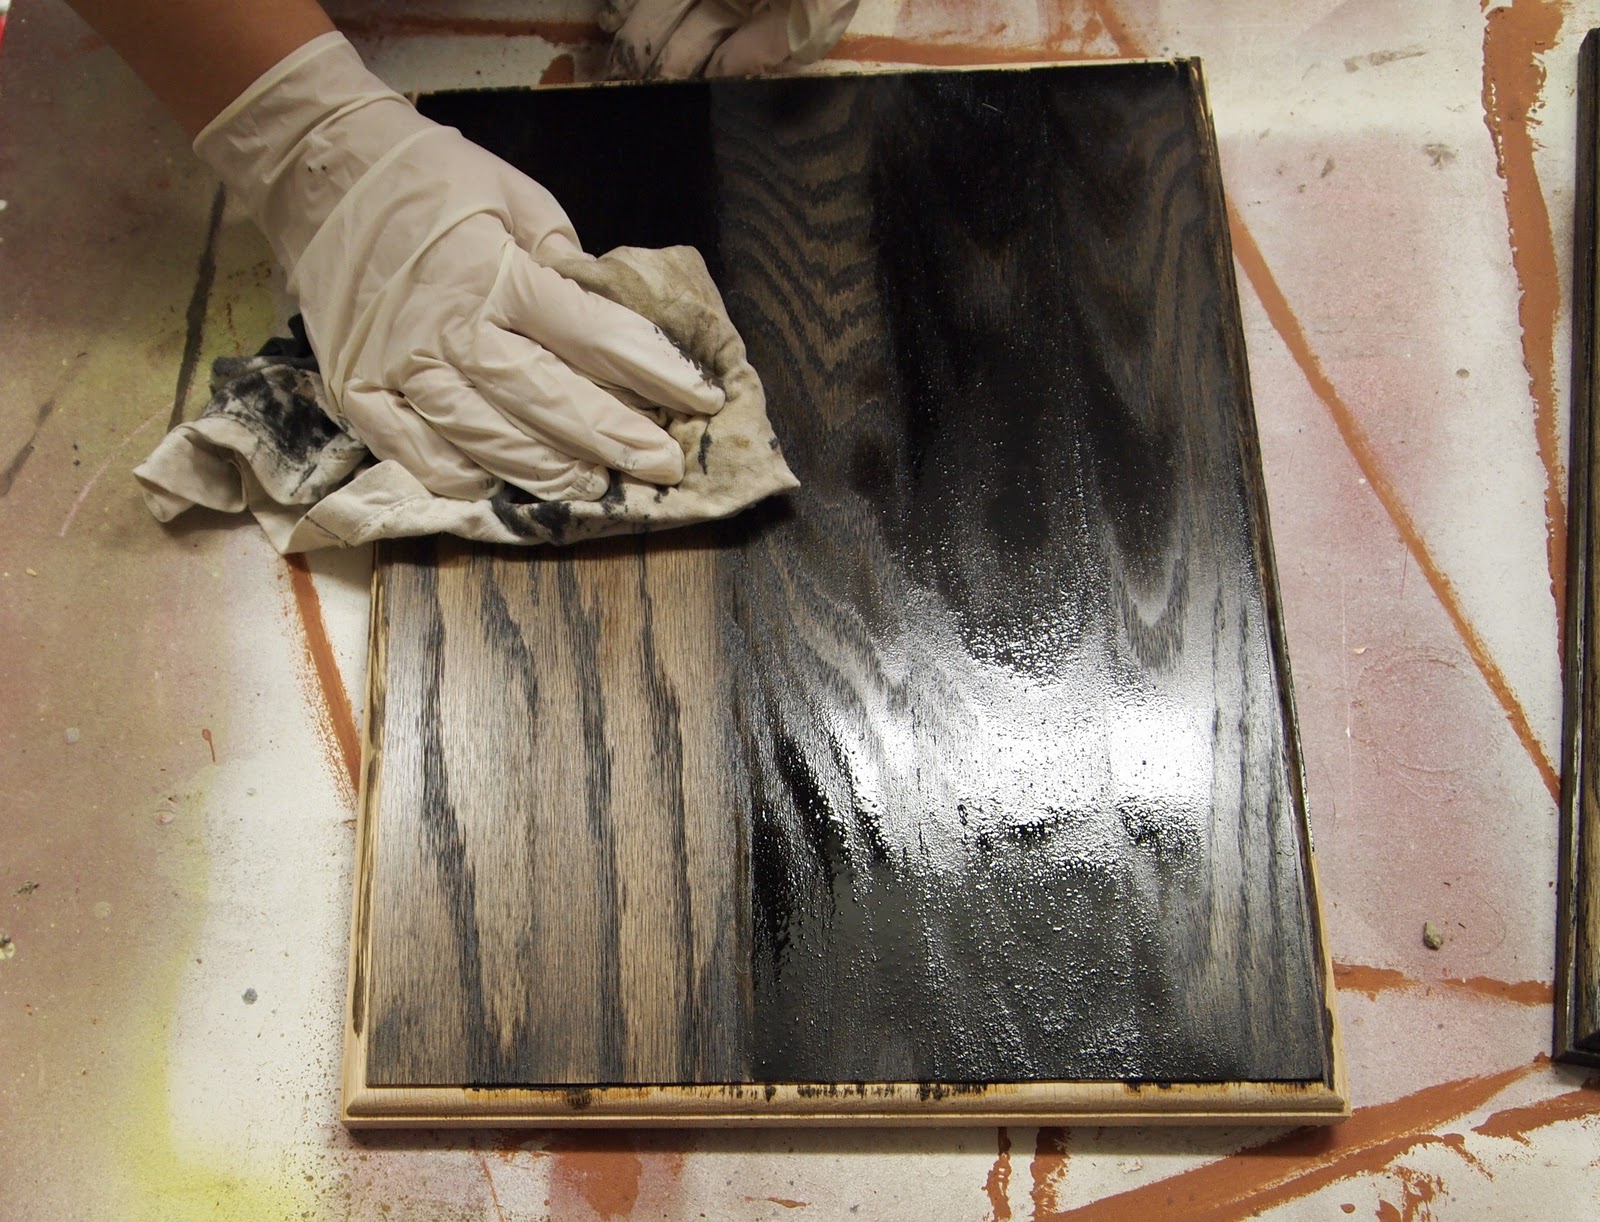
We didn’t go all the way down the edges on the second one because we realized all that would end up being painted white, so why bother?! Then we hit ’em with a couple coats of poly.

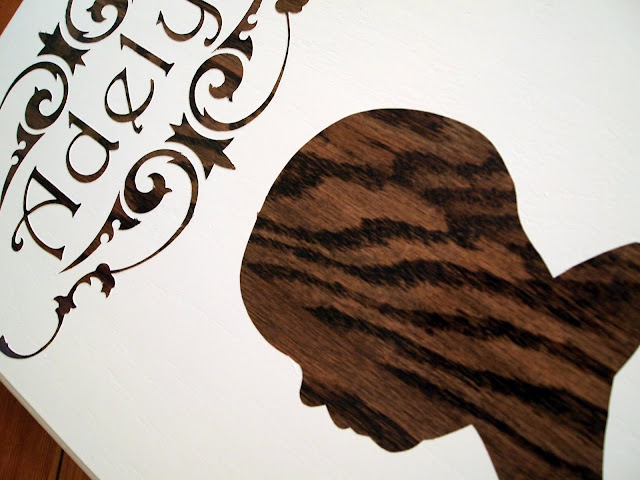
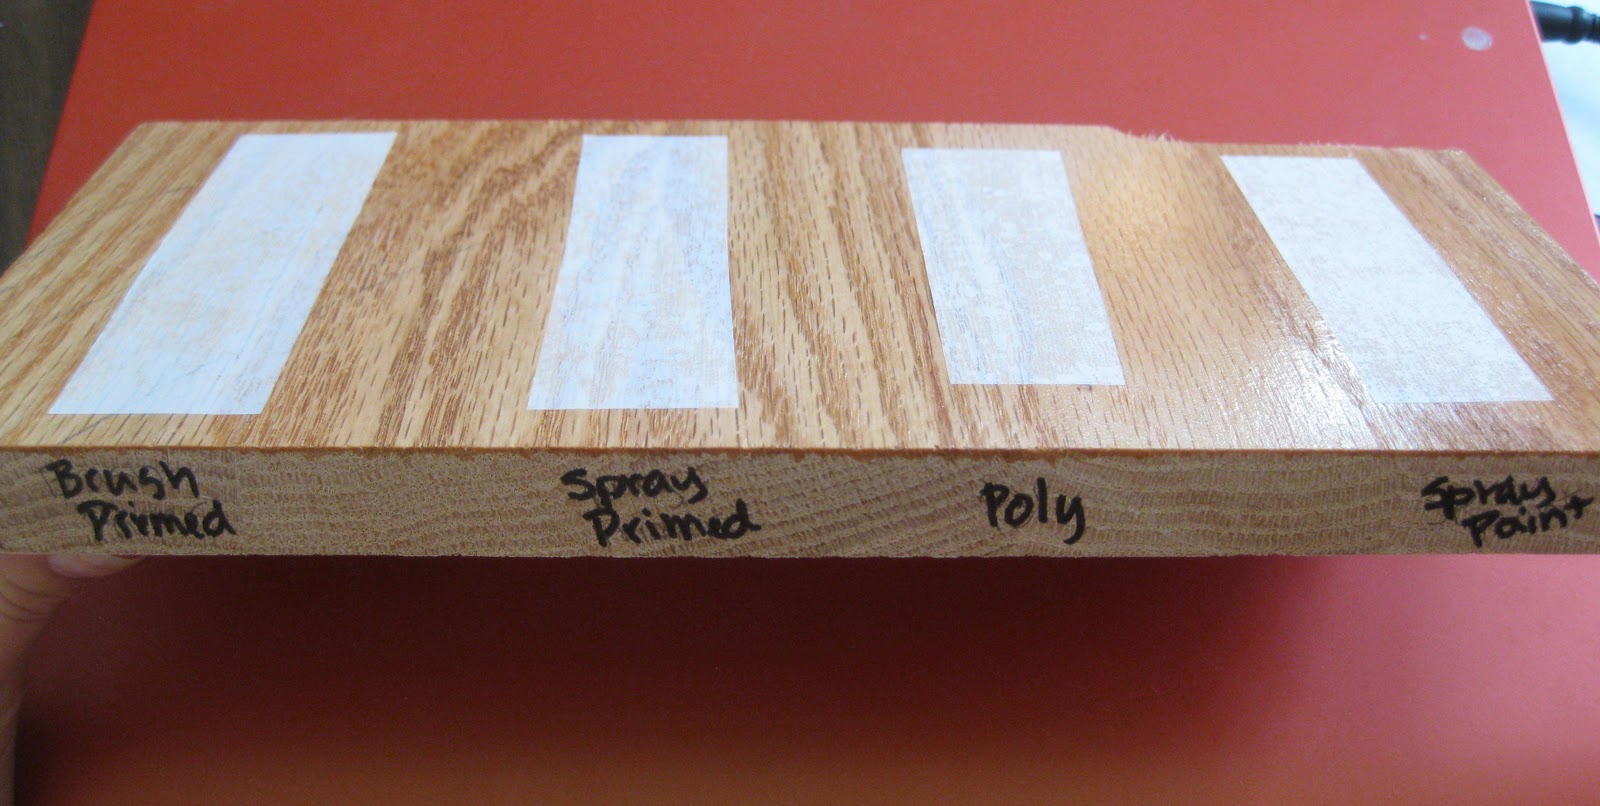
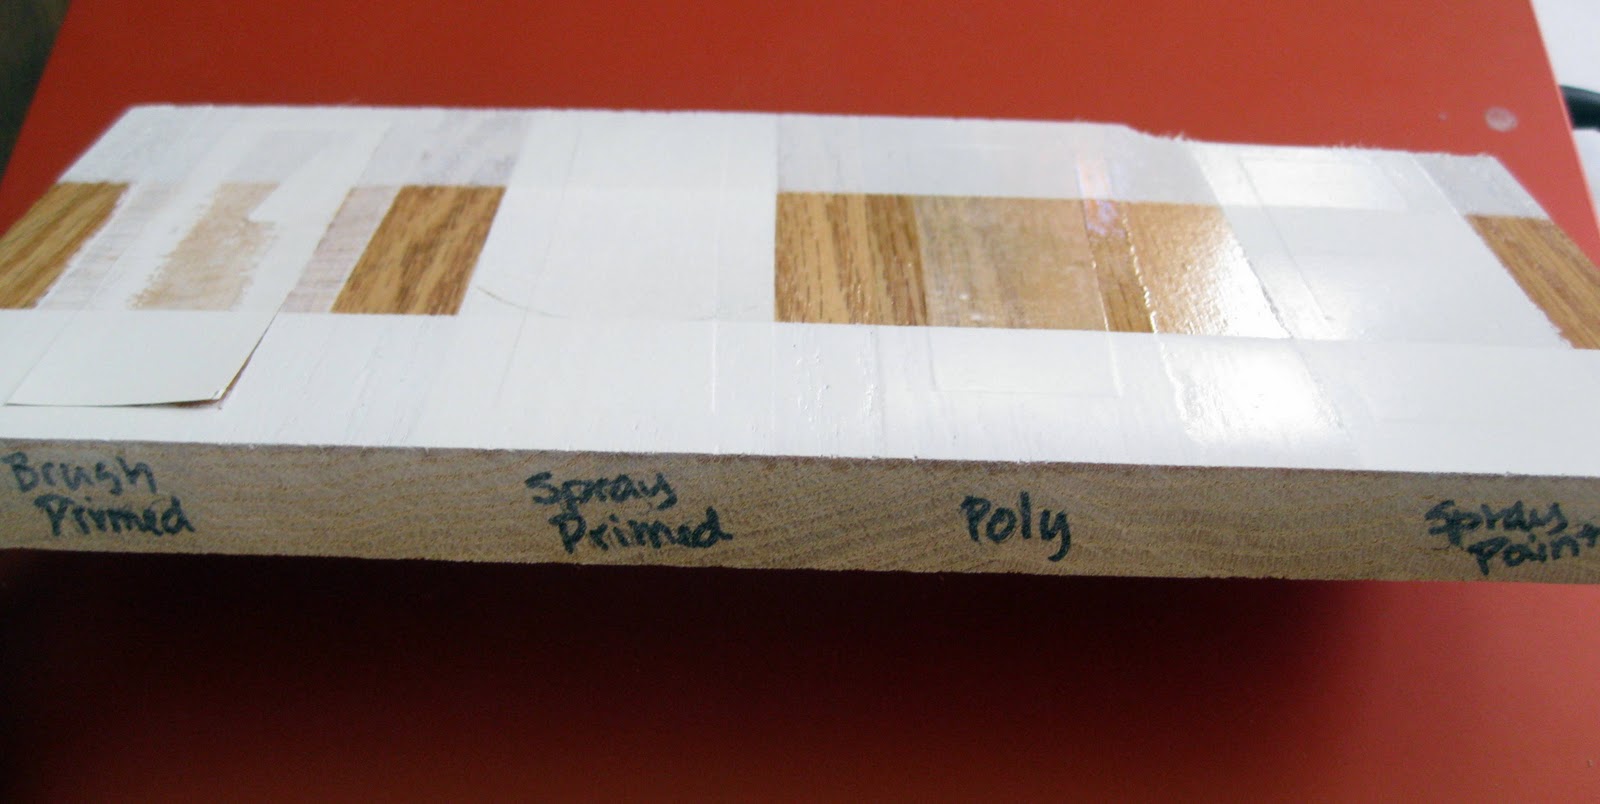
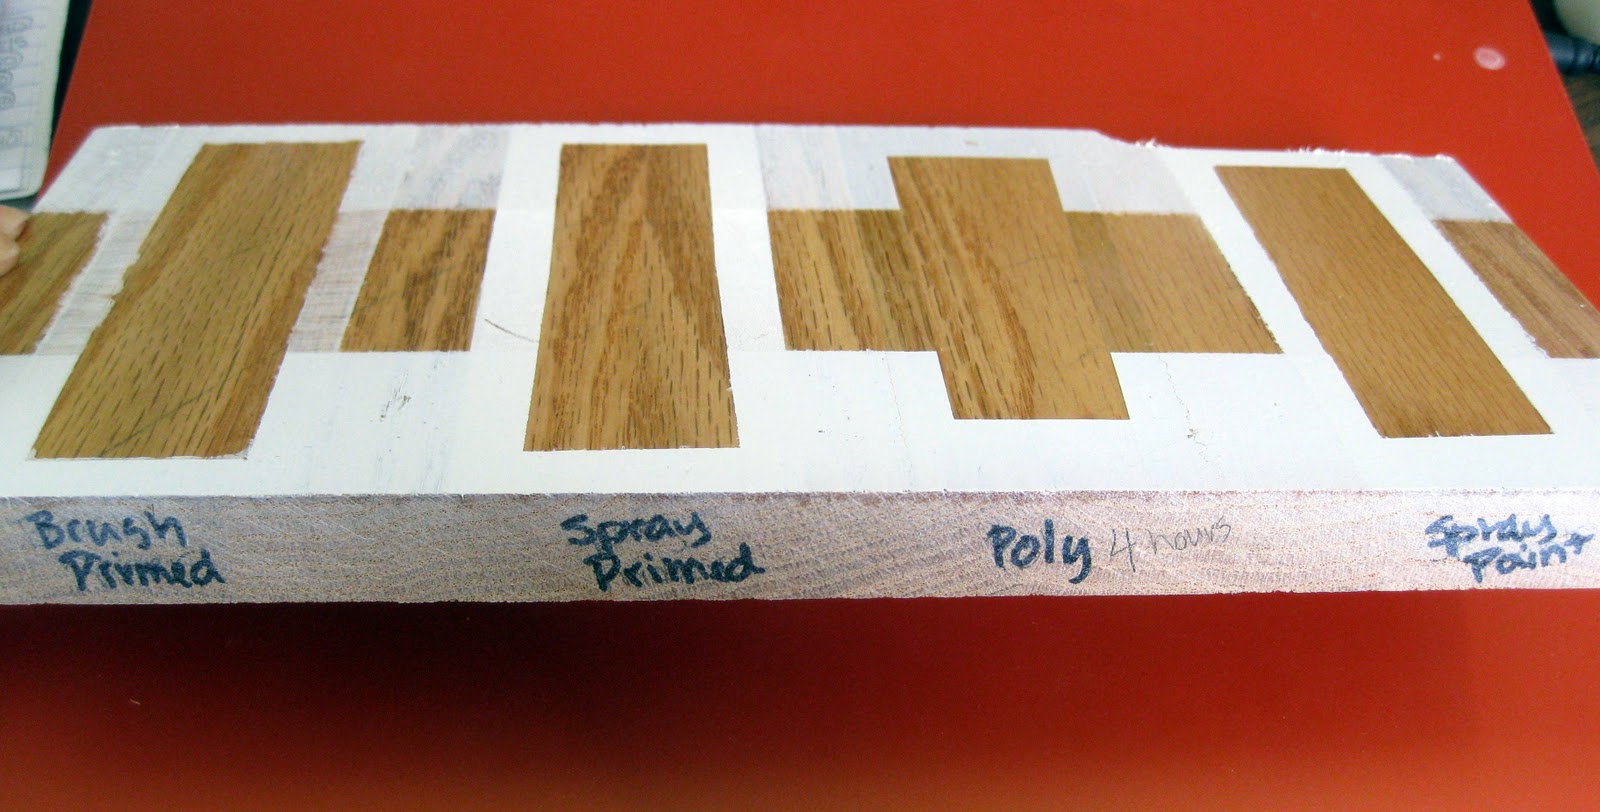
My ex-coworker Dana gave us some beautiful vinyl wall art that she MADE for us (check out her Facebook page HERE) as a baby gift that we were so excited to use for this project. And we had some contact paper to use for the profiles! I was really worried about the ‘crispness’ of the edges after the white paint went on, so I did a little practice sample board using a leftover chunk of oak. I polyed it twice (just like the plaques) and after it dried, I put 4 strips of contact paper on and did some tests using spray primer, brush-on primer, straight up spray paint, and a coat of poly. I’m soooo glad I did this! It was very helpful, and allowed me to determine that putting a coat of poly directly onto the contact paper really helped seal the edges. Then I just primed and spray painted after that and got a perfectly crisp clean line!
So next, we carefully put on the vinyl name decals (which involved some frantic calls to Dana to make sure we were doing it right). We have NO experience with vinyl wall art. But we got ’em on nice and straight.


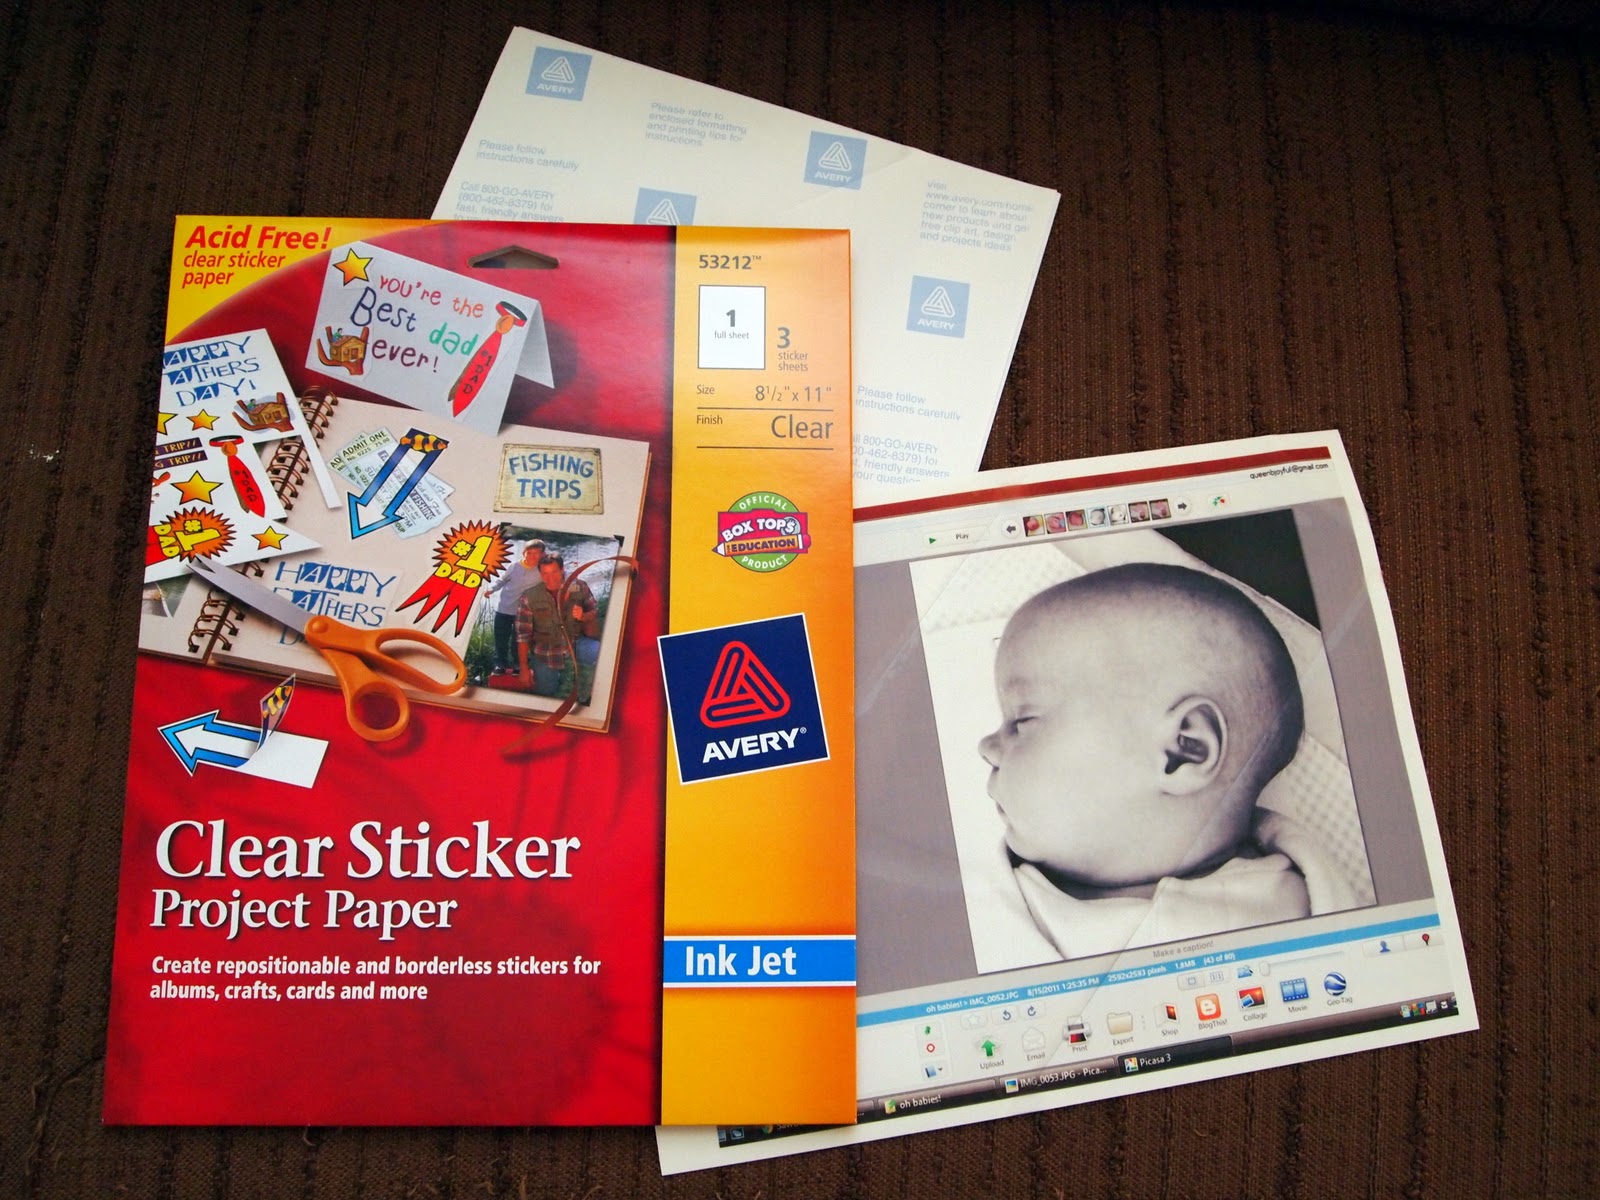
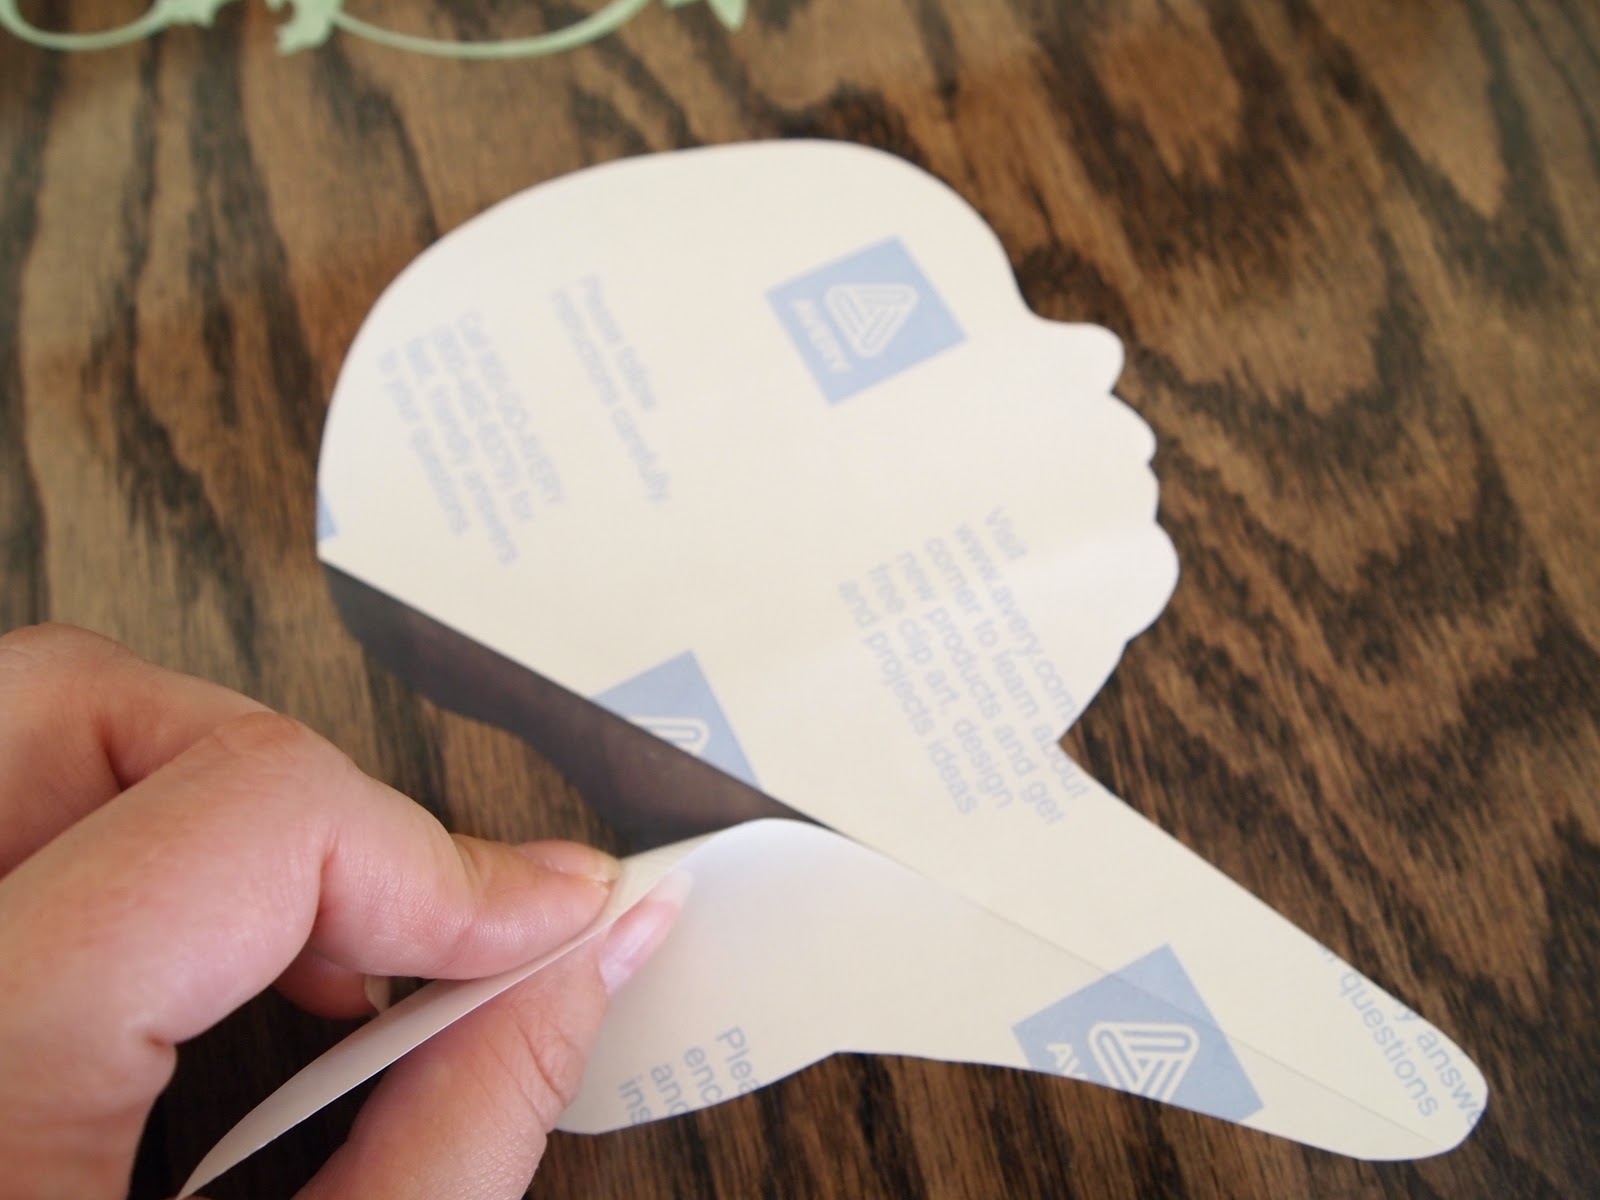
Then we printed the girls profiles (we took their picture when they were sleeping) and printed them on paper first to make sure they were the right size and so that I could practice cutting them out with scissors. It wasn’t as hard as I thought it would be! It just took some concentration and a steady hand.


Kinda creepy, eh?

And finally we printed them right onto the contact paper and carefully cut them out, peeled back the backing, and pressed their little faces right onto the plaque! I didn’t figure out exactly where the center was, I just eyed it and made sure that their faces were looking straight forward.


They then got two coats of poly.
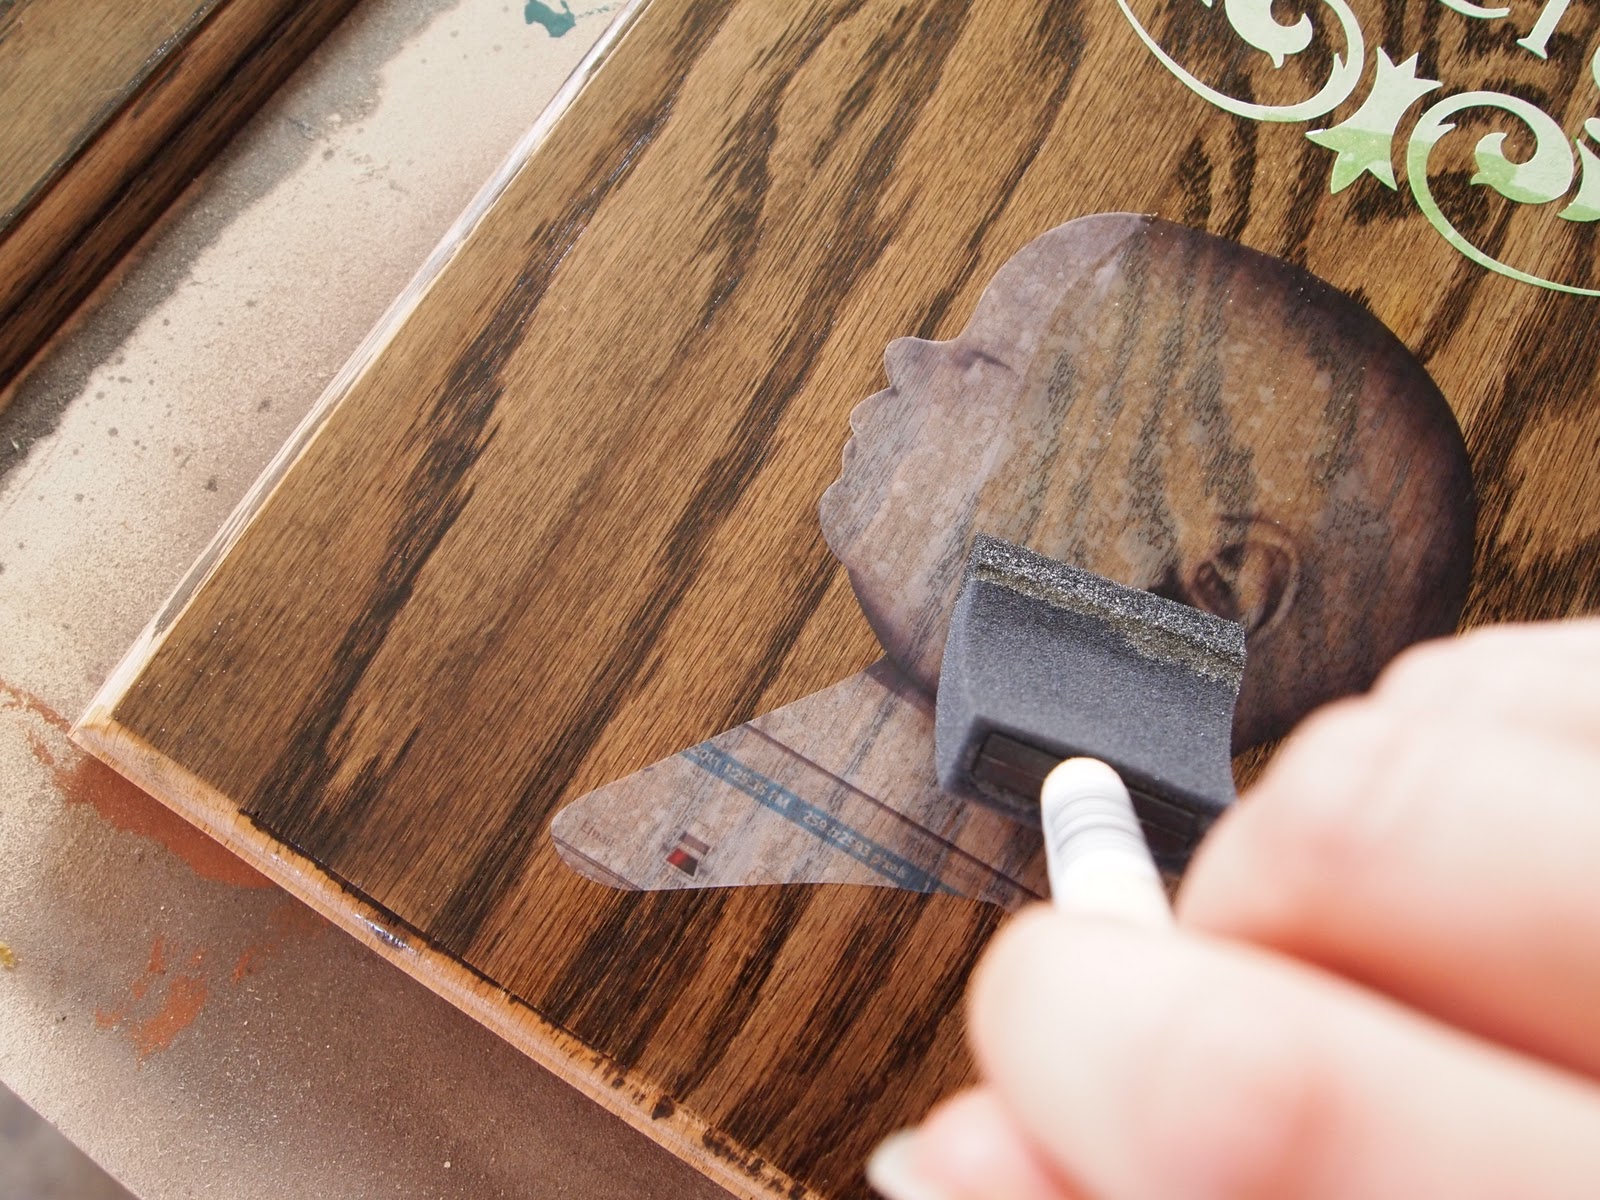
Once the poly was dry (about 4 hours) I hit ’em with spray Kilz primer. And an hour later, I hit ’em with Rustoleum flat white spray paint.
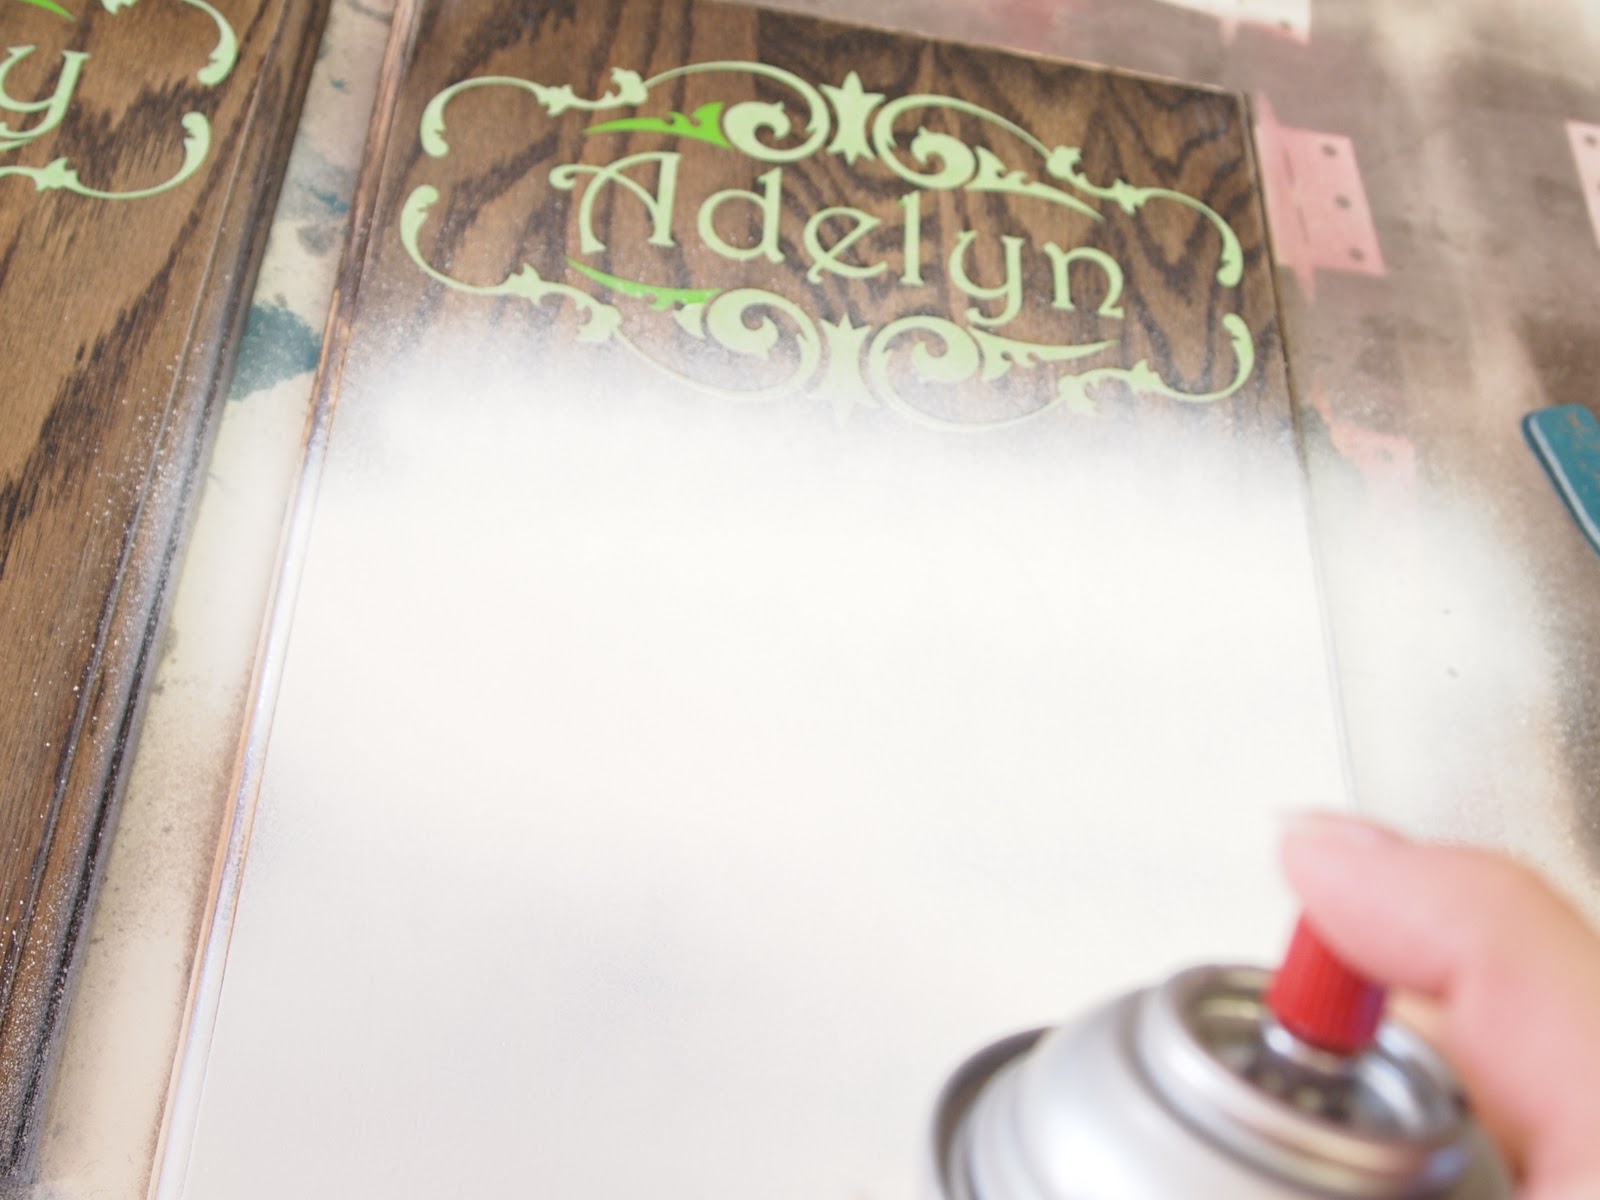
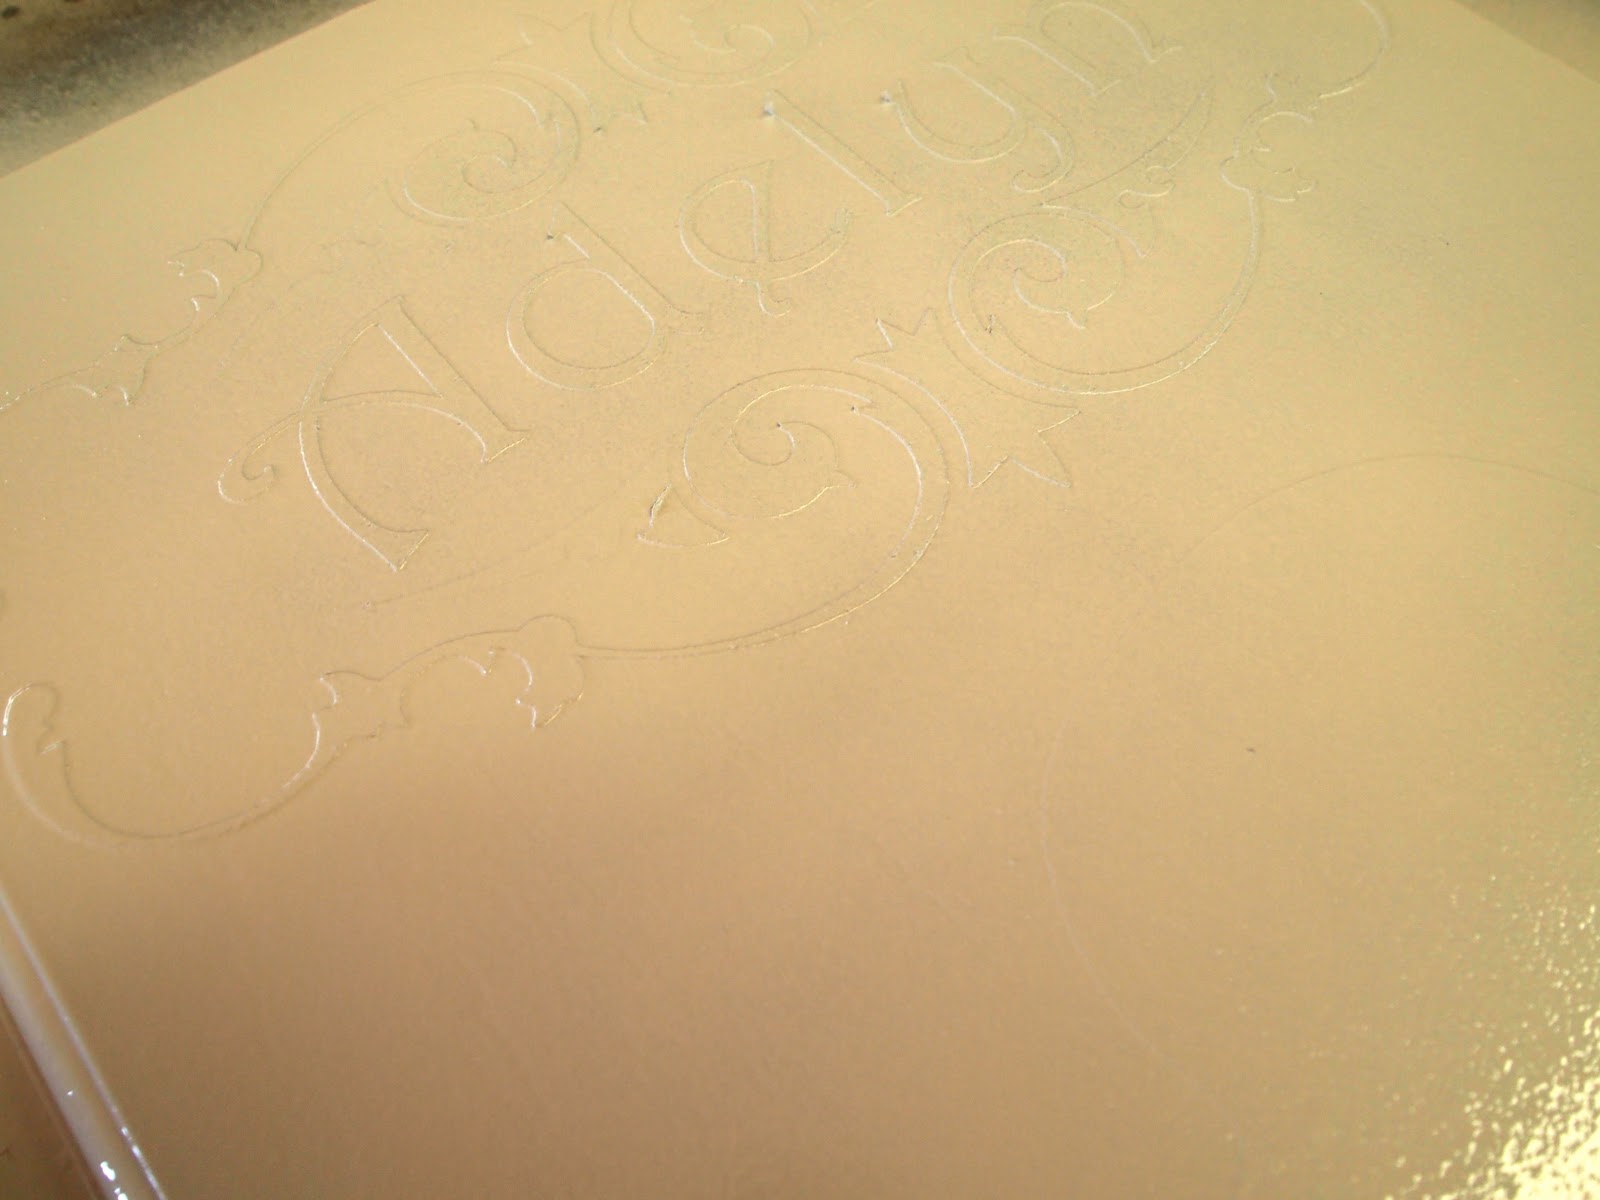
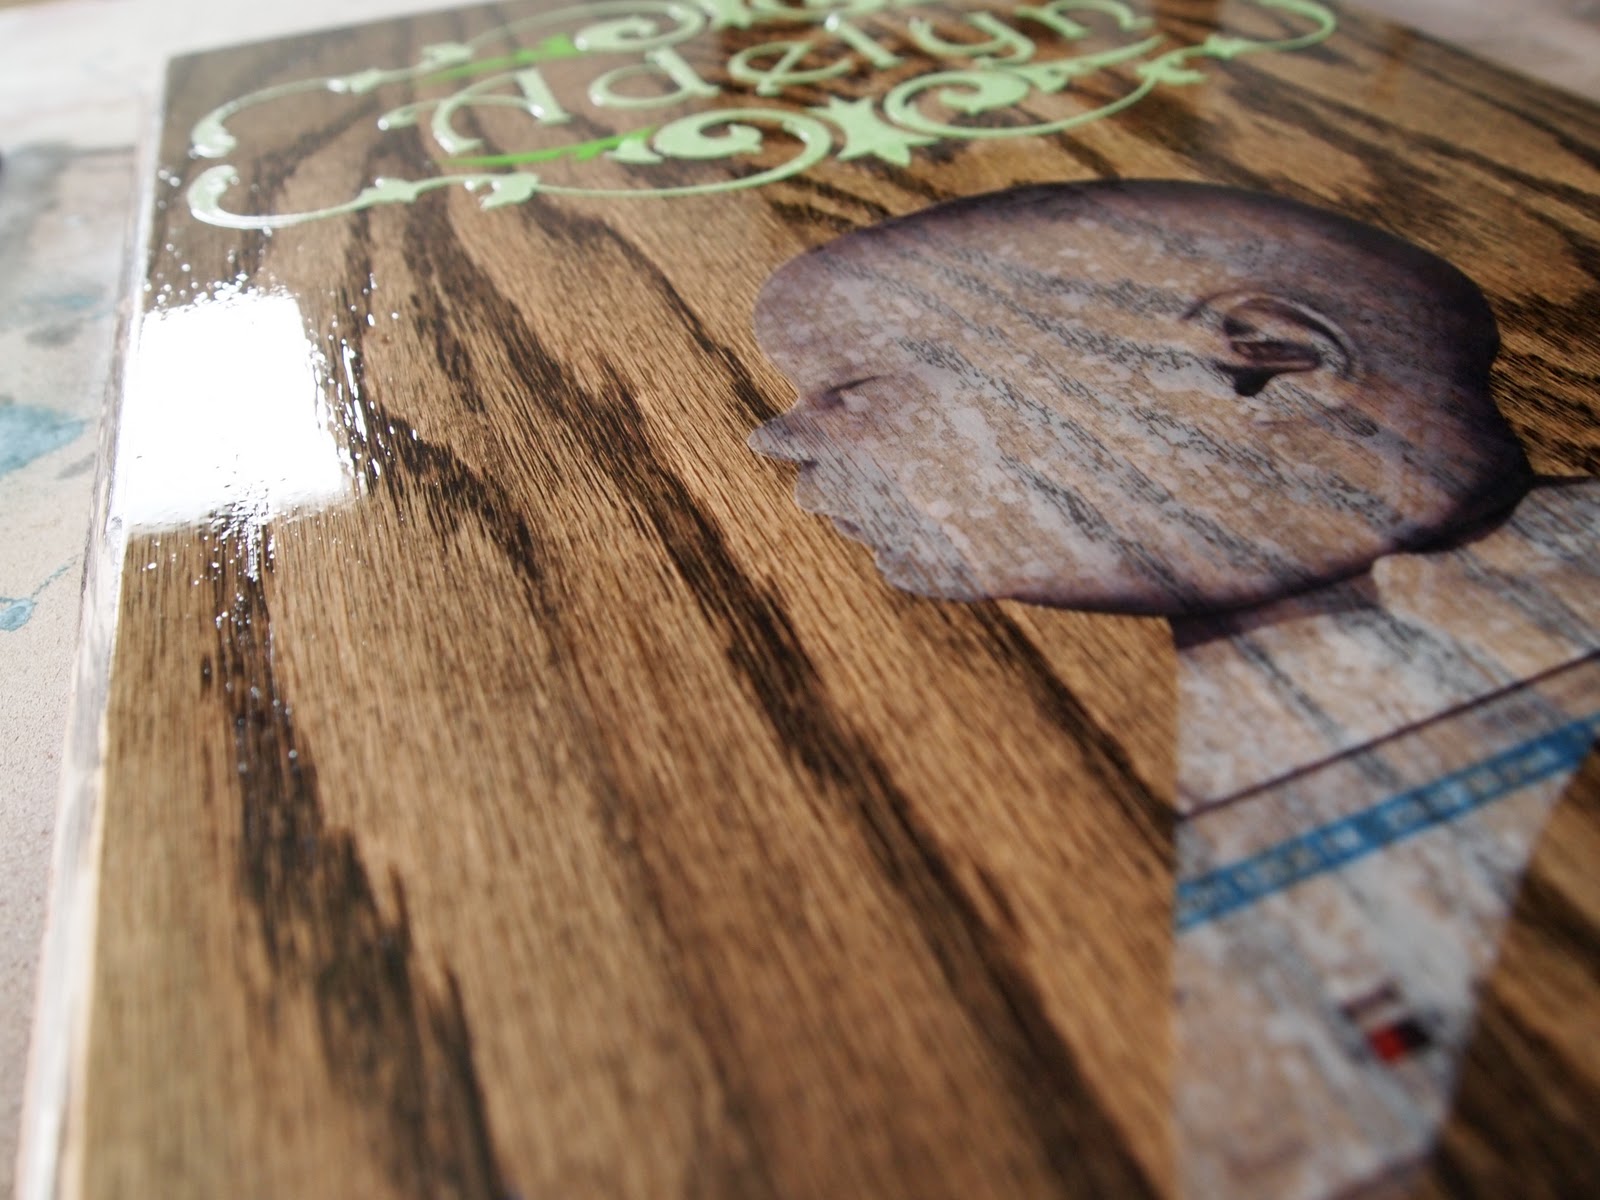
I only let the paint dry for about 10 minutes before I started peeling back the contact paper and vinyl. I wanted the paint to still be tacky so it wouldn’t be so dry that it would pull back the paint and make for a messy edge.


All pieces came off so easily… it was SUCH instant gratification! And seeing that beautiful wood grain popping through… Wow. Incredible.

These babies (no pun) got a comb hook on the back, and they were ready to go! Easily done in a day if you have everything on hand and/or don’t live in the wilderness so far from civilization that you’re not about to make a special trip to town for Kilz primer or contact paper, or whatever you don’t have. 🙂

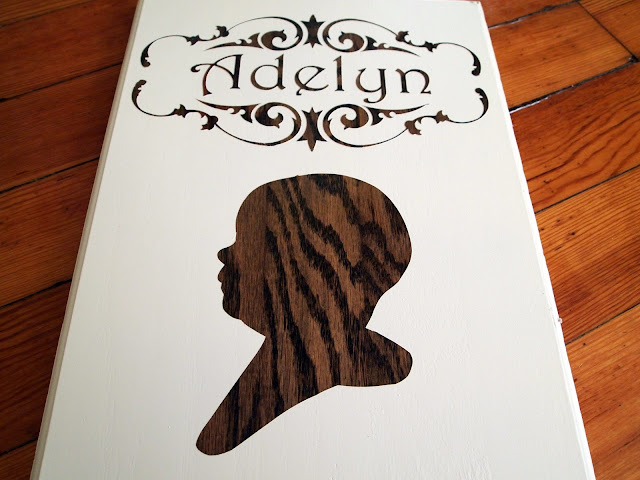

And I love that we have these beautiful custom plaques that are timeless and meaningful! The girls can cherish these for many years! And it might even be fun to make a new one every year to show how they change year by year.

Give it a try! And send me pics when you’re done! I can’t wait to see how yours turns out! We’re also posting these on our Etsy shop if you’d like us to make one for YOUR child(ren)! Go check our our Etsy shop HERE!
Related:
-

I have a fun and easy building project for you! And while I do end…
-

My kids are getting to the age where they want to tape pictures, cards, notes...…
-

I've been needing to figure out a solution for my overwhelming plant propagation situation for…
I enjoyed read over your blog post. Your blog have nice information, I got good ideas from this amazing blog. I am always searching for this type blog post.
Thank you so much for sharing such useful and interesting information
Hey, Mike ! ^^Glad to see you sold both of them. Adorable paintings by the way. Are you wonikrg on a new bunch ? I keep an eye on your blog anyway.Des bises e0 Alex et toi.J.
I love these, they are gorgeous. You did a fantastic job, your babies are adorable. I just found your blog and love it love it. Will be following it for sure.
You don’t know me, but I just LOVE your blog!!!!! You have the best ideas!
nice work! –Nicole
Um… these are gorgeous! I love the wood showing through, with the contrast of white! FANTASTIC! and very special!!
-Amy