• Home
  • About
  • Tutorials
  • Recipes
  • Furniture
  • Contact
    • Contact
    • Infertility
    • Disclosure
    • Privacy Policy
  • Shop
    • Facebook
    • Instagram
    • Pinterest

Reality Daydream

The Dream is Free, The Hustle Sold Separately

  • Home
  • About
  • Tutorials
  • Recipes
  • Furniture
  • Contact
    • Contact
    • Infertility
    • Disclosure
    • Privacy Policy
  • Shop

Spice Jar Organization

May 28, 2014 by Bethany Sy

I know how blessed I am to have a pantry, so I’m seriously not complaining. But it’s in need of some organization… especially the spices.

Sawdust and Embryos

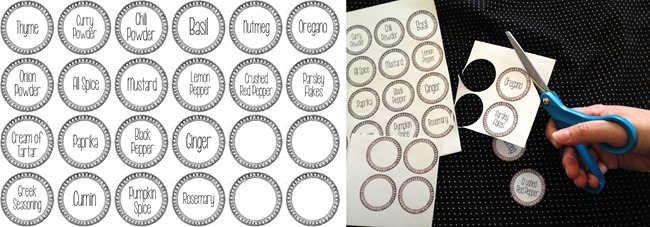
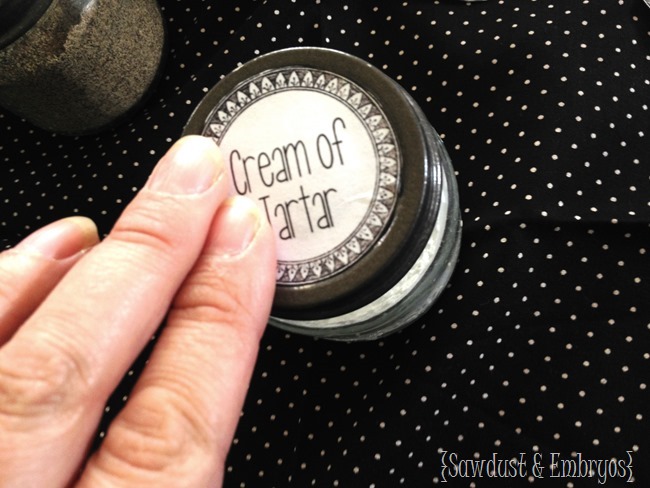
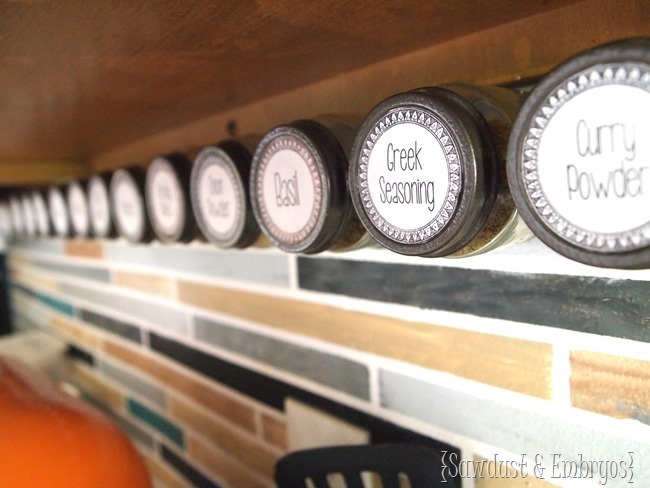
Awhile back, my friend Dana and I etched baby food jars for my spices, and while I love this look, sometimes it can be hard to read. So I’ve been wanting to add stickers to the tops too. I just went online and found free label templates, added the text for the spices I have on hand (using Picasa photo editing) and printed on a solid sheet of label paper. Then I just cut them out with a scissors, peeled off the backing, and pressed them onto the corresponding lid!

Using baby food jars for spices {Sawdust and Embryos}

Using baby food jars for spices! {Sawdust and Embryos}

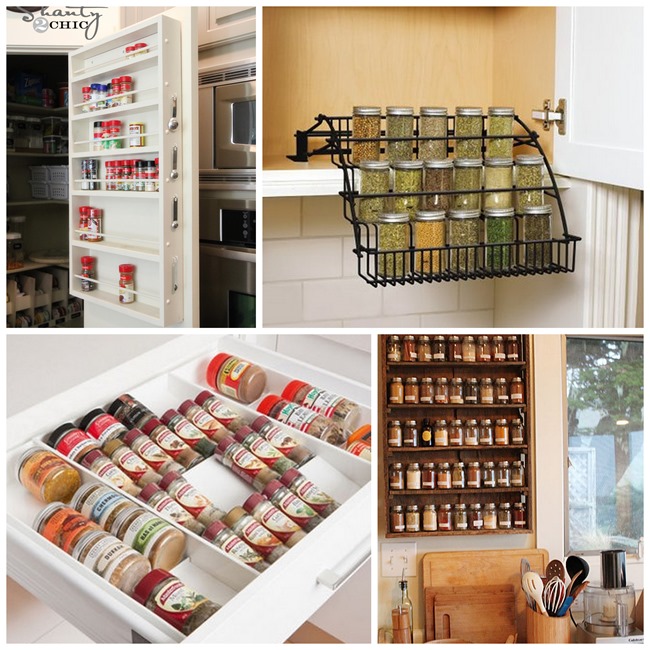
There are so many creative spice storage solutions out there, but none of them really fit my needs. Check out these genius storage solutions!

Spice jar storage solutions {Sawdust and Embryos}sources: 1 / 2 / 3 / 4

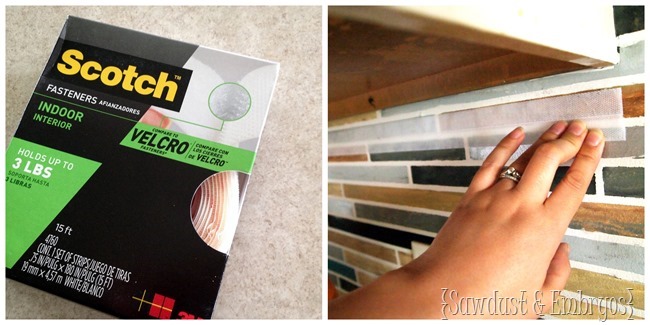
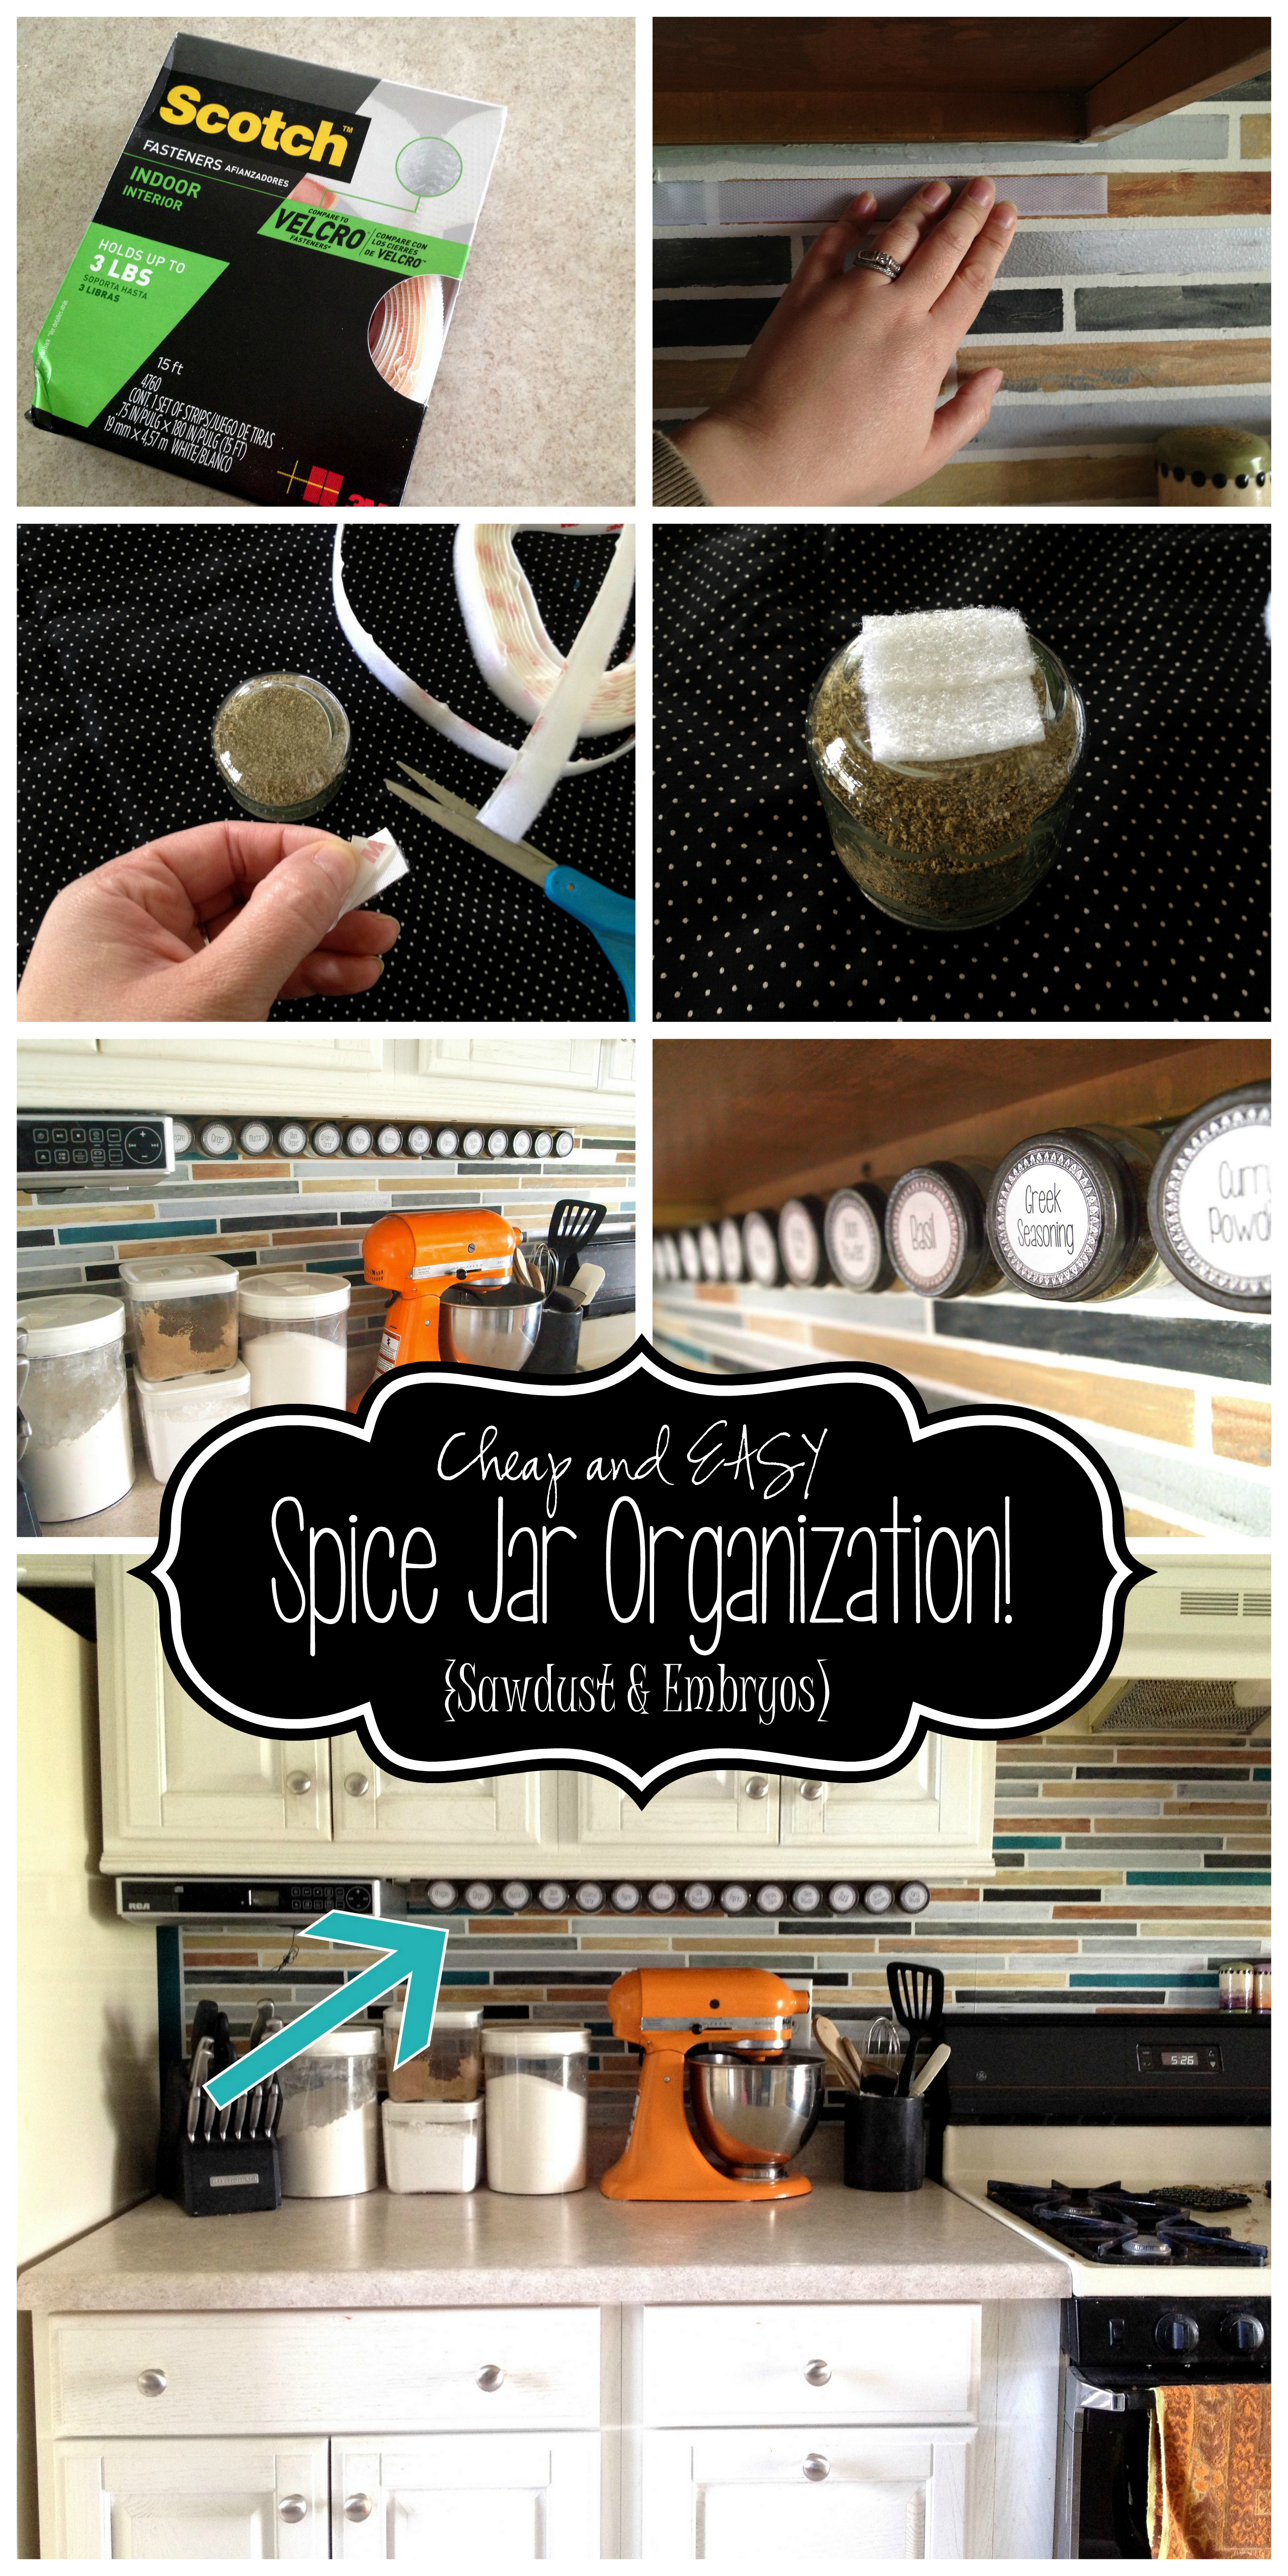
Since none of these ideas would work for our kitchen configuration, I set out to find a way to affix them below our cabinets. My two objectives were that they needed to be easily accessible while I’m at the counter cooking, and I needed to be able to see which spice is which without having to fumble through them. I used two strips of Scotch Indoor Fasteners and pressed them firmly about an inch below the cabinets. As you know, our backsplash is just drywall painted to look like a tile backsplash… but these fasteners can be affixed to just about anything (wood, metal, brick, you name it!).

Spice Jar4

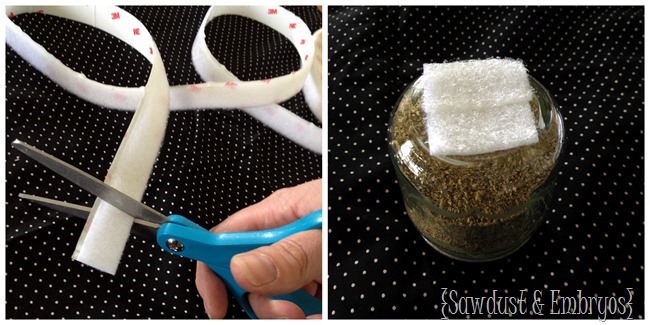
Then I took the corresponding strip of Scotch Fastener and cut two small strips to cover the bottom of each baby food jar.

Spice Jar3

THAT IS ALL. Simplest project on the face.

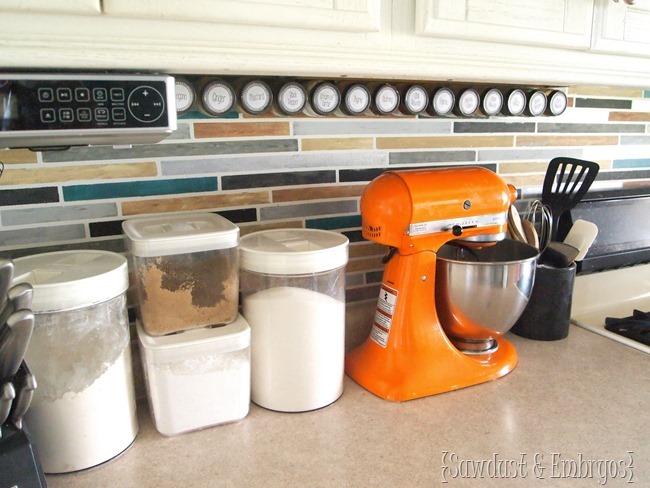
Just slap those bad boys up onto their new home, and stand back and admire your intense organization skills. This project literally took me about a half hour.

Affix spice jars under your cabinets using a velcro-like technology... genius! {Sawdust and Embryos}

Affix spice jars under your cabinets for easy access! {Sawdust and Embryos}

I love how they almost add a design element to my kitchen. No more cluttered spice jars!

Affix spice jars under your cabinetry using a velcro-like technology... so smart! {Sawdust and Embryos}

UPDATE: the velcro situation worked for about 6 months, but then the adhesive started falling off the jars, and the strip that was on the wall actually started pulling a hunk of drywall off the wall from the weight. Since then, I’ve found this brilliant company called Gneiss Spice and they carry darling spice jars in two different sizes, AND they’re magnetic! You can even order the magnetic plate to be a custom size to fit your needs. I did a Facebook LIVE about it if you want more info.

Sawdust & Embryos

If your new around these parts, be sure to check out some of the other budget-friendly projects we’ve done in our kitchen!
1 2
3 4
Affix your spice jars to your backsplash using a velcro-like technology... soooo smart! {Sawdust and Embryos}
This post is sponsored by Scotch 3M, but all ideas and opinions are ours!

Related:

  • Spring Cleaning and Garage Organization

    Is it too early to call this spring cleaning? The truth is, we've been planning…

  • Coffee Table / Lego Table

    We've been needing to update our coffee table situation in the living room for awhile…

  • Basement Organizing Efforts

    Hey guys, If you've been following along in our Instagram Stories, you know we've been…

About Bethany Sy

Nick and Bethany Sy are the creative free-spirits behind DIY/Lifestyle blog, Reality Daydream. They recently purchased a historic mansion and have been documenting the ups and downs of renovation and making this home their own... all while sharing tips and tutorials along the way! When they found themselves in the trenches of infertility, they started a journey that would prove to be their most important DIY project ever, and have 3 beautiful girls to show for it. <3

« Life as it happens…
Why you should never take for granted when a child hands you a dandelion »

Comments

  1. 18

    Kristin says

    April 8, 2017 at 8:44 pm

    This is great. Do you think it would work with the small herb Mason jars?

    Reply
  2. 19

    Nikki says

    March 16, 2016 at 4:00 am

    That is a great idea. Is the velcro still holding up?

    Reply
    • 20

      Beth @ Reality Daydream says

      March 16, 2016 at 11:46 am

      Yes yes it is! And it’s been a couple years now! Still one of my BEST ideas I think 🙂

      Reply
  3. 21

    Tina says

    September 14, 2015 at 4:39 pm

    I love this idea but unfortunately my counter doesn’t have enough clearance for this or much of anything else. I will just keep them on the turn table in the cabinet for a while longer. Thank you for sharing your ideas. I loveeeeeee your table with the flowers on them. AMAZING!!!

    Reply
  4. 22

    Ellen says

    September 14, 2015 at 7:57 am

    You are AWSOME!!!! I have been looking for an idea with my spices this is wonderful. Thank you!!

    Reply
  5. 23

    Emma says

    July 8, 2014 at 9:31 am

    What a fantastic idea for spices jars! I can’t wait to try this, thanks for sharing!

    Reply
  6. 24

    I Can't Paint My Walls says

    June 11, 2014 at 9:20 am

    Could you try waxed dental floss to see how it removes the adhesive? I know it gets between walls and other 3M products…

    Reply
  7. 25

    Kenz @ Interiors By Kenz says

    June 4, 2014 at 3:30 pm

    Love that! Super convenient for when you’re cooking. It’s RIGHt there!

    Reply
  8. 26

    Stacye Hixson says

    May 29, 2014 at 7:19 am

    I’m absolutely loving it. I just recently had to tear down the cabinet above my stove to install microwave and that’s where I kept all my spices. I see a project in the future. Thanks Bethany!

    Reply
  9. 27

    Mindy says

    May 28, 2014 at 10:28 pm

    Love it!

    Reply
  10. 28

    Suzanne says

    May 28, 2014 at 4:36 pm

    I have magnetic metal bottom ones with clear lids on the side of my fridge which is right next to my stove. They wash like a charm. I think I am going to chalk paint a spot so that I can put whatever spice I’m in the mood to use.

    Reply
  11. 29

    mary byrne says

    May 28, 2014 at 11:59 am

    That’s awesome, I love it.

    Reply
    • 30

      Bethany @ Sawdust and Embryos says

      May 28, 2014 at 2:24 pm

      Thanks Mary! Easiest project everrrrrrrrrr!

      Reply
  12. 31

    Cindy says

    May 28, 2014 at 10:43 am

    “on the face.” haha Those labels are super cute — I like that these are accessible but attractive. Nice project! xo

    Reply
    • 32

      Bethany @ Sawdust and Embryos says

      May 28, 2014 at 2:09 pm

      Thx Cindy! Can’t wait to see your face in a couple months!!!!

      Reply
  13. 33

    Jenn says

    May 28, 2014 at 10:21 am

    Oh. My. Gawd. I LOVE this! My one question, what is the result when you have to peel the backing tape off the wall? Does it peel off the paint? I live in an apartment, and would LOVE to do this, but don’t want to damage my wall!!

    Reply
    • 34

      Bethany @ Sawdust and Embryos says

      May 28, 2014 at 2:07 pm

      I tried pulling a corner back, and it did indeed start pulling off a thin layer of the drywall. I’m thinking if you scraped with a razor blade it would come off cleanly though.

      Reply

Trackbacks

  1. How to Paint your Kitchen Aid Mixer - Sawdust and Embryos says:
    November 3, 2015 at 9:19 am

    […] on a strip of velcro. It’s one of the smartest DIY projects I’ve done to date. (tutorial here!). Every single time I use a spice… which is pretty much daily, I silently congratulate […]

    Reply

Leave a Reply Cancel reply

Your email address will not be published. Required fields are marked *

Recipe Rating


  • Facebook
  • Instagram
  • Pinterest
  • RSS
  • YouTube
We are Nick and Bethany! Welcome to our blog, Reality Daydream where we share our DIY adventures!
Click here for lots of art projects using only wood stain on furniture!!
Please feel free to share or pin my posts! You're welcome to use ONE of my images (no collages or pinnables) with a link back to the corresponding post. Please do not edit or crop that single image in any way. Improper use of my photos, ideas or words is a violation of copyright. Thank you!

Categories

Attention: Almost any do-it-yourself project involves risk of some sort. Your tools, materials, and skills will vary, as will the conditions at your project site. Reality Daydream has made every effort to be complete and accurate in the instructions of the plans on this website. Reality Daydream will not assume any responsibility or liability for damages or losses sustained or incurred in the course of your project or in the use of the item you create. Always follow the manufacturer’s operating instructions in the use of tools, check and follow your local building codes, and observe all commonly accepted safety precautions.


Copyright © 2025 · Modern Blogger Pro On Genesis Framework · Customizations by Sweet Theory Designs · Privacy Policy · Log in