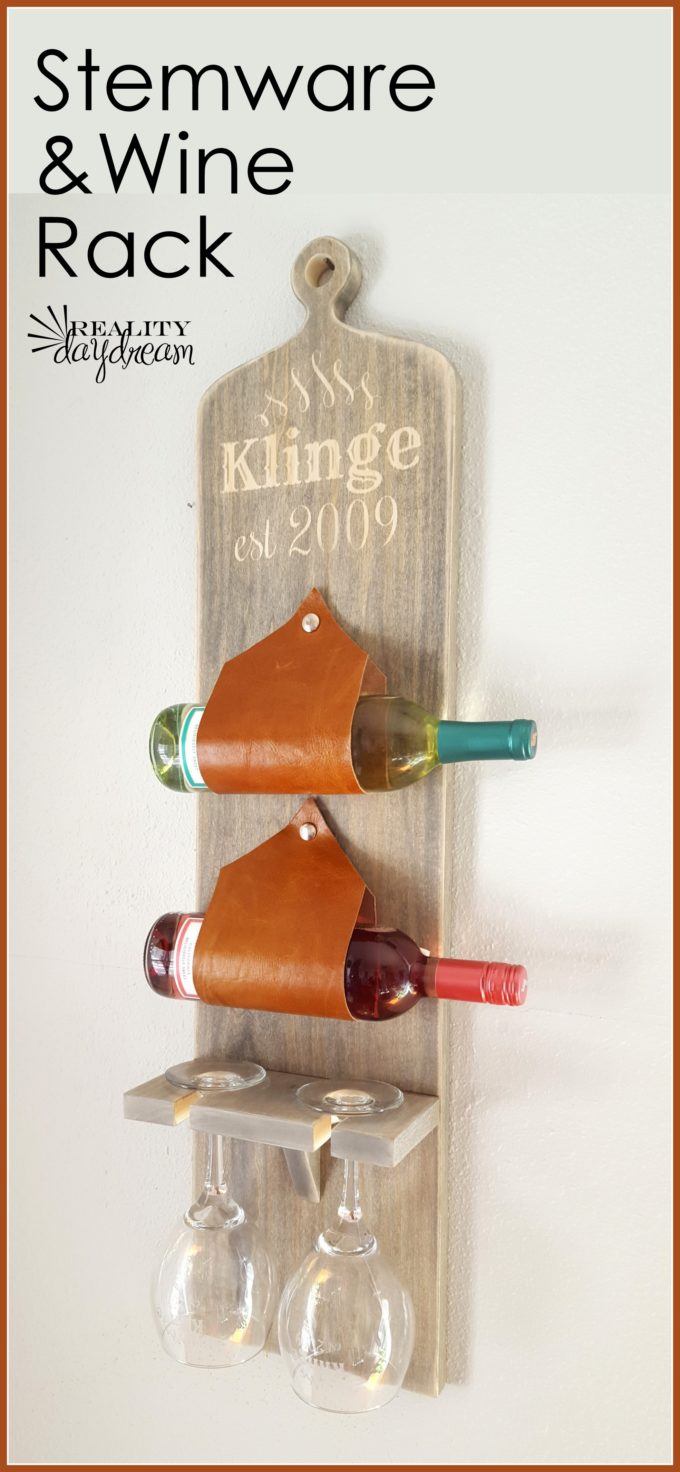
Great News! I have a really fun DIY gift idea to share today. Just in time for the holidays! I actually shared this Wine and Stemware Rack tutorial a few years ago, but it was a little too close to Christmas for anyone to actually make it as a homemade Christmas gift. So I’m re-sharing it now so you can add it to your list of DIY Gift ideas this year!
This entire design came out of my head… and I love it when your brain-child comes to fruition!
Wine & Stemware Rack Supplies
*This post contains affiliate links*
- 1×10″ slab of wood, 4′ long (we used Poplar)
- Jigsaw
- Sand paper or Random Orbital Sander
- Vinyl Stencil (optional)
- Wood stain in any shade you like! (the darker the better)
- Kreg Jig
- Leather scraps
- Canvas Snaps
- Leather Punch
- Pin Punch
- Wine
- Stemware
Step 1 – Cut your main board
I started out with a slab of 1×10 poplar (you can use any species obvs) and cut ‘er down to about 9” x 36”. I wanted the top portion of this wine rack to resemble that of a vintage cutting board, so I folded a piece of paper in half and drew out this design like so:

And then cut it out with my jigsaw!
Be of good cheer… it doesn’t have to be perfect!
Step 2 – Sand
Using a jigsaw (you could use a scroll saw too), cut along those pencil lines! Once you’ve got that shape cut out, sand it smooth. I used my RYOBI random orbital sander and started with 80 grit and made my way to 220 grit. You want it super smooth!
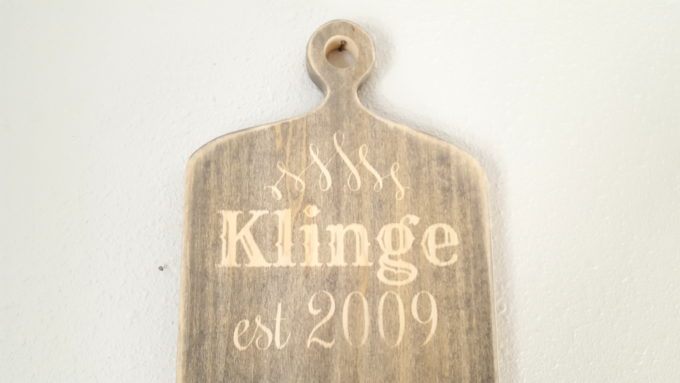
Step 3 – Vinyl as a Stencil
Since I wanted this wine and stemware rack to be personalized with their last name, I designed a little some’m some’m and cut it out of vinyl using my Silhouette to use as a stencil! If you don’t have a Silhouette or Cricut, and/or just don’t want to mess with figuring this part out, you can order a vinyl decal from my friend Dana! She can customize it any way you want!

Weed off the part of the vinyl that you will want to be stained wood, and leave the parts that you want left unstained. Then slap on some transfer paper and take the backing off. It’s like a giant sticker!

I’ve used vinyl as a stencil LOTS of times before, but never with wood stain. I wasn’t sure how crisp the line would be after applying stain and removing the vinyl decal. But it ended up working out perfectly!
Step 4 – Stain
It didn’t occur to me to take pics of the staining process… most likely because I was really concentrating. So I’ll just tell you… with gloves on, I wrapped a cotton cloth around my finger and dipped the very tip of my finger into the stain, wiping off the excess on the side of the can. Then I just lightly wiped the stain onto the wood, being sure that most of the stain was used up before I took to those vinyl edges. You want the LEAST amount of stain as humanly possible on your cloth when you hit those edges. Then peel off the vinyl from your wine and stemware rack!

As you can see, my lines aren’t perfect. But unless you put your face right up to it… you can’t tell! I love this weathered gray stain, but I wouldn’t go with a shade any lighter than this… otherwise you don’t have enough contrast between the stained and unstained wood. You want to be able to read it!

Step 5 – Drill Hole
I sanded the edges and corners a bit, and drilled a hole with a 1” forstner bit. If you don’t have a set of Forstner bits, you could totally use a scroll saw or jig saw for this.


Step 6 – Stemware Holder
Cut a piece of wood the same width as your ‘back board’ (for me it was 9”) with a depth that will is slightly larger than the wine glasses that you’re using (enough so they won’t clank together when hung). Mine ended up being about 4” depth.

You can use a jigsaw or a 1.5” forstner bit to drill out circles, then cut a little trail that’s just wider than the narrowest part of the stem of your wine glass.

Using a Kregjig, drill the pocket holes like so:

Stain this section to match the rest of the wine and stemware rack, and glue/screw it into place. I glued in a little wedge underneath for additional support. And so that it would look like a person.

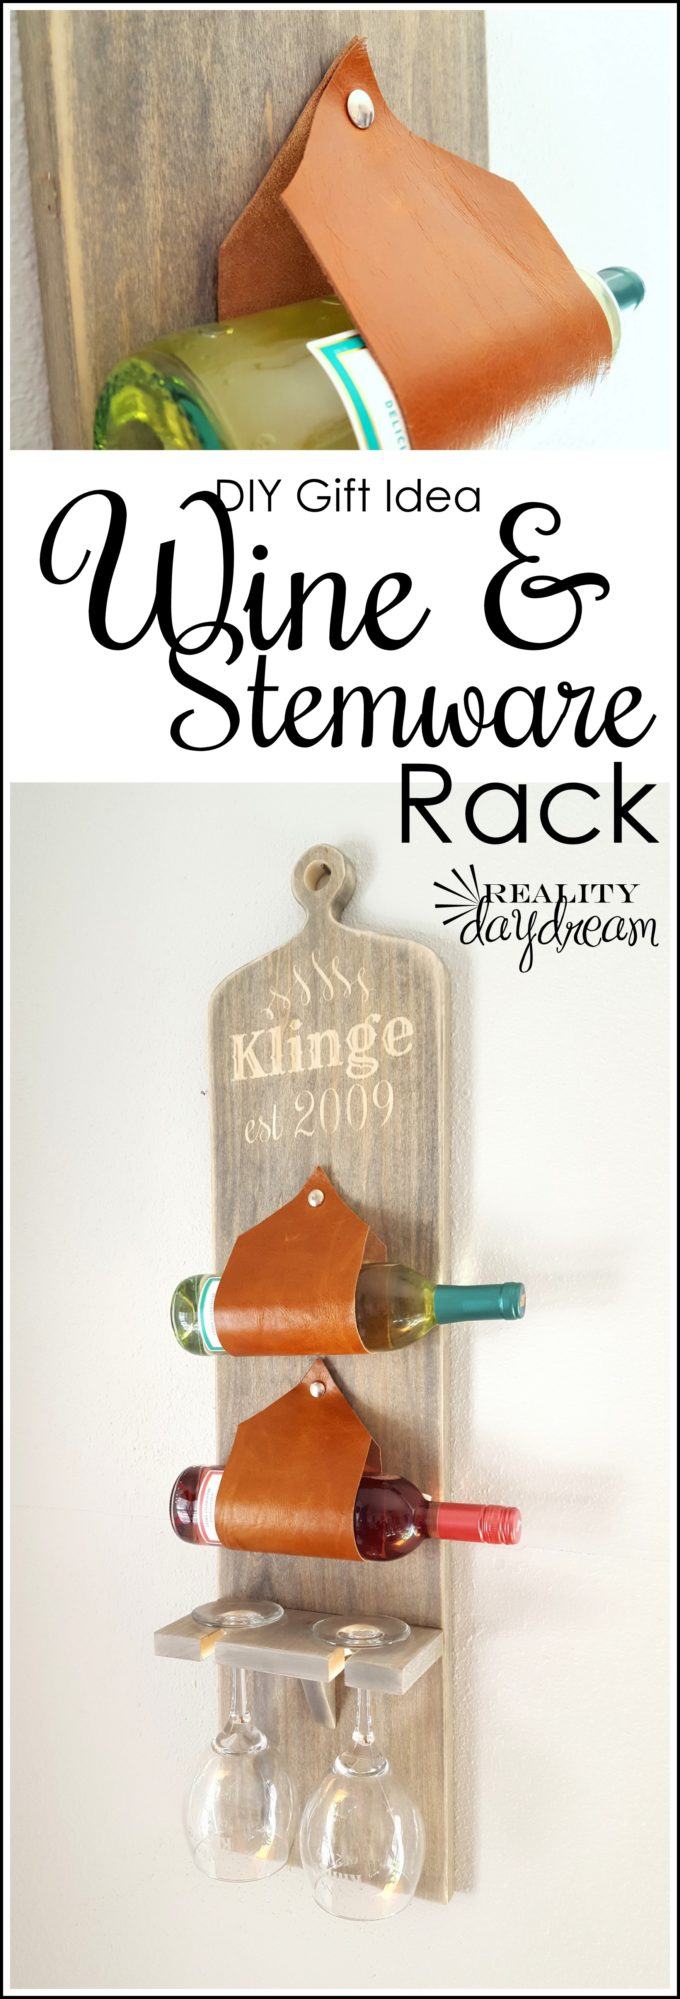
Step 7 – Wine Slings
Time for the leather ‘slings’ that will hold those luscious bottles of wine! I had a good size chunk of leather leftover from our DIY Leather Upholstered Storage Ottoman, so I laid it out and cut 2 strips about 15” long (point to point) and 5” wide.
Test it around the size of wine bottle you’re wanting to use. I made mine on the larger side so I could fit a slightly larger wine bottle in the sling.

Add Snaps
Next it’s time to add the snaps to the leather! We used these super ordinary snaps that you could get online or at Walmart. I used this leather punch, and demonstrate in the collage below.

- Find the ‘male’ side of your snap, and find the size that is closest on your leather punch.
- Mark where you want your hole with a pen.
- Punch a hole! We went through both layers since we want a hole on both ends of our leather.
- Admire your hole (I don’t know why I included this pic in my collage)
- Put the snap through the hole going from the front side of your leather to the back.
- Put your ‘female’ side of the snap over the edge.
Now you just need to affix them together using a pin punch. A couple good strikes with a hammer and you’re in good shape!

Then, the other hole on the opposite side of your leather, the side of the snap with the screw on it will go through. This is also the side that you’ll screw into your wine and stemware rack.
")


I love how unique and custom it turned out! And it’s almost ART on the wall!

Here’s a pic of it up on the wall in our old house. (PS that fiddle leaf fig in the pic below is the same one that’s 8 feet tall now!)

Step 8 – Etching Wine Glasses
It’s hard to see in the above pics, but we also etched the same last name design on the wine glasses. It’s the little things, right?! (Etching tutorial here)

Step 9 – ENJOY!
And here are some up close details, for your viewing pleasure. Because you spent SO MUCH TIME scrolling through this tutorial, I might as well reward you with lots of yummy pics, yeah?!


As always, if you try one of our projects, please send us pictures! We love to see your versions and get inspired by your creativity each time you email us your projects. There’s some crazy talented/creative people on that side of the computer screen (I’m looking at YOU)!
Bethany
~~~~~~~~~~~~~~~~~~~
Be sure to check out these other DIY gift ideas from our archives!

Thanks for Pinning!
Related:
-

I've been needing to figure out a solution for my overwhelming plant propagation situation for…
-

My kids are getting to the age where they want to tape pictures, cards, notes...…
-

I have a fun and easy building project for you! And while I do end…
I love this! Especially the leather – what a cool idea!
I don’t drink wine, but I love this.
Now that we have taken our Christmas decorations down, I have it hanging in the living room. Love it!! I am totally fine being your guinea pig any time 🙂
Hehe YAY! And the kids leave it alone?!
I just unfollowed you on bloglovin and followed you again on the new site, so I can fully adapt. Just an fyi, it says it isn’t claimed yet, so you’ll want to sort that out!
That’s good to know Annet! I’m going to work on that today. Thanks for the heads-up!
love love love love lovelove!!! great idea for a personalized gift!!! AWESOME!
Oohh! This is a great idea for a wedding gift, anniversary, or a house warming gift!
Love this! I don’t know how you come up with your ideas but they are truly inspiring to us novices! What a great present for your sister-in-law!
just popping in to let you know this showed up in my Bloglovin 🙂
That’s great news! That’s for letting me know!!