By now, if you follow us on Facebook or Instagram, you know that we’re participating in the GMC/Habitat for Humanity ‘Treasure Hunt Challenge’… which involves traveling along the World’s Longest Yardsale (my personal heaven on earth), snagging some great buys, and fixing up a house for a family in need at the end! Can you think of anything more fun and rewarding? If anything’s gonna snap me out of my pregnancy-induced-coma, it’s going to be a yard sale that’s 700 miles long. #thatsright
But today, since I have some down-time (and because I miss the girls), I’m going to share a little GENIUS project/life-hack with you that includes cute pics of my babes!
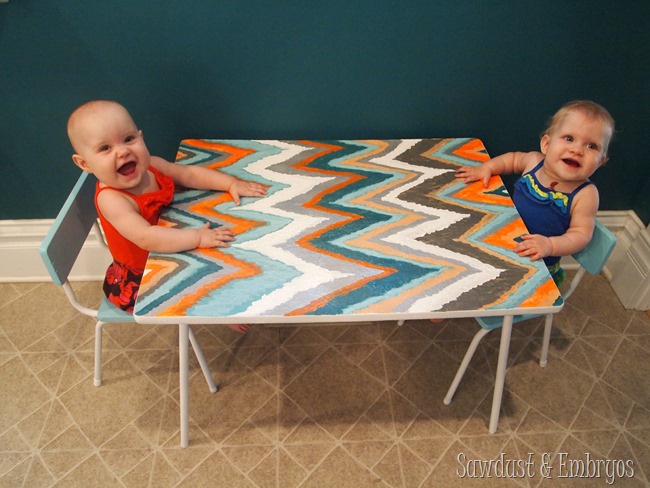
Remember this little table I thrifted and fixed up for the girls’ 1st Birthday?
This table has allowed for MANY hours of coloring, snacking, finger-painting and giggles. But it’s a little large for my taste and ends up floating between rooms, because it just doesn’t FIT anywhere.
And that’s when I had THE IDEA.
If a BED (#ofallthings) can fold down out of a wall and be called a ‘Murphy Bed’, why’o’why can’t a table fold down for the little chicklets when it’s time to craft or snack, and be called a ‘Murphy Table’?
I’m over here in a face-palm for not thinking of this earlier.
This is one of those projects that reminds me that Nick is my soul mate. I think up a concept but am not sure how to execute it. I share my idea with the man-child. He goes out to the garage and comes back 20 mins later with a PERFECT finished-version of my brain-dump.
Let’s go!
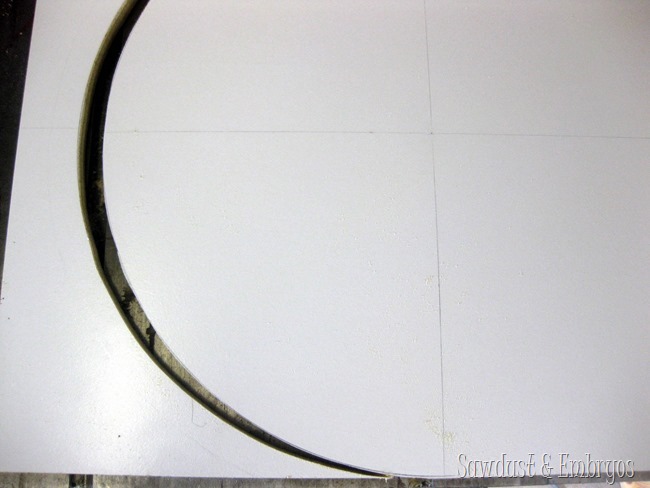
Start by rough-cutting a slab of melamine to 22” x 22” using a table saw or circular saw (use caution, as usual people!). Measure 9” from the center and make a mark. Using a string or yardstick, attach one end with a push pin, and trace out your half circle radius. Cut with scroll saw or jigsaw… and be sure to save your scrap piece!
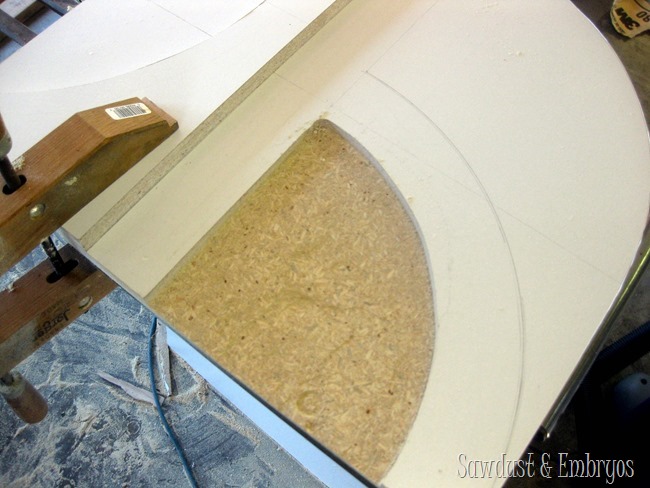
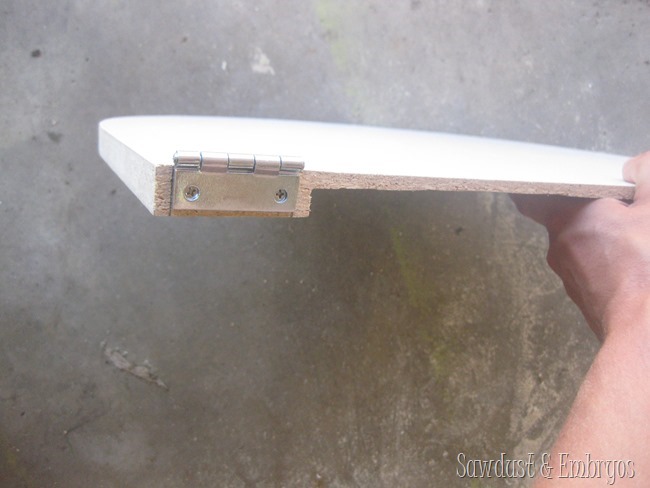
Clamp the half circle scrap to back side of board to act as a guard for the router. Using a 3/4 rabbit router bit, route out 1/4 circle, 9/16 in deep for support .
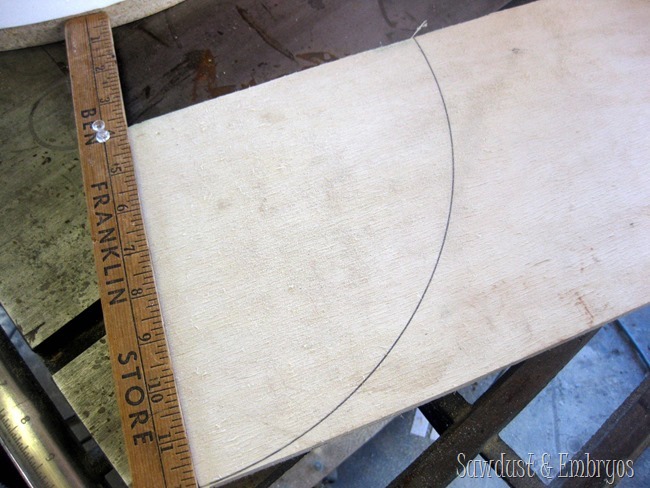
For the support piece, use a 1/2” piece of plywood and use a compass to lay out an 8” radius to create a 1/4 circle. Once again, cut with scroll saw or jigsaw. Then just sand/paint this piece white!
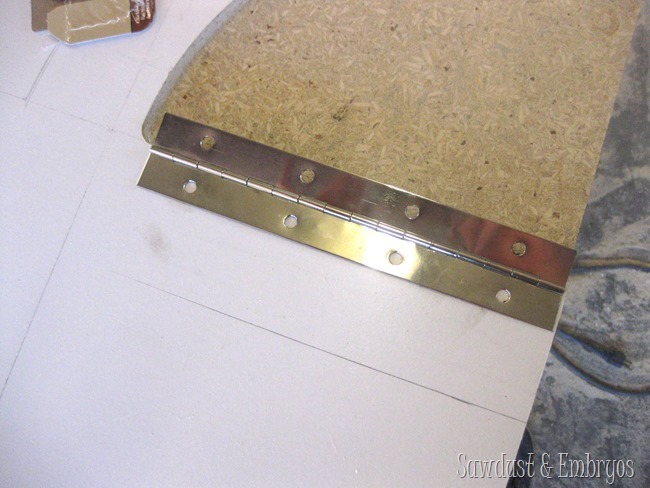
Attach 8″ piano hinge to support and desk. The support will need to stick out 1/8″ from the bottom to compensate for 2″ Murphy table hinges.
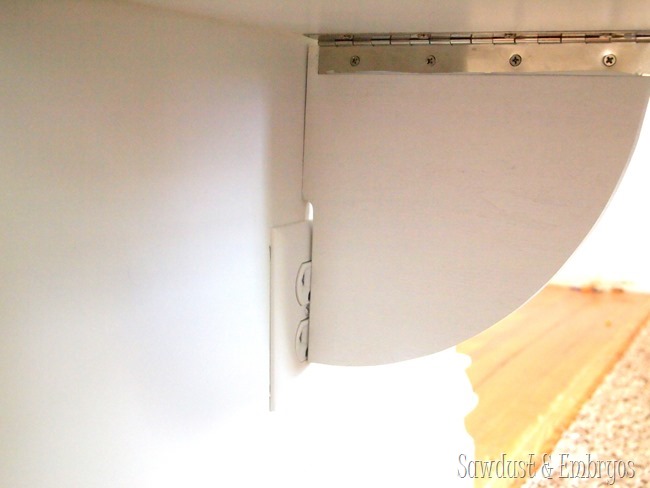
Because we had an electrical outlet in our way, we had to notch out a little space for it to rest over the outlet plate. You shouldn’t have to worry about this unless you find yourself in the same predicament!
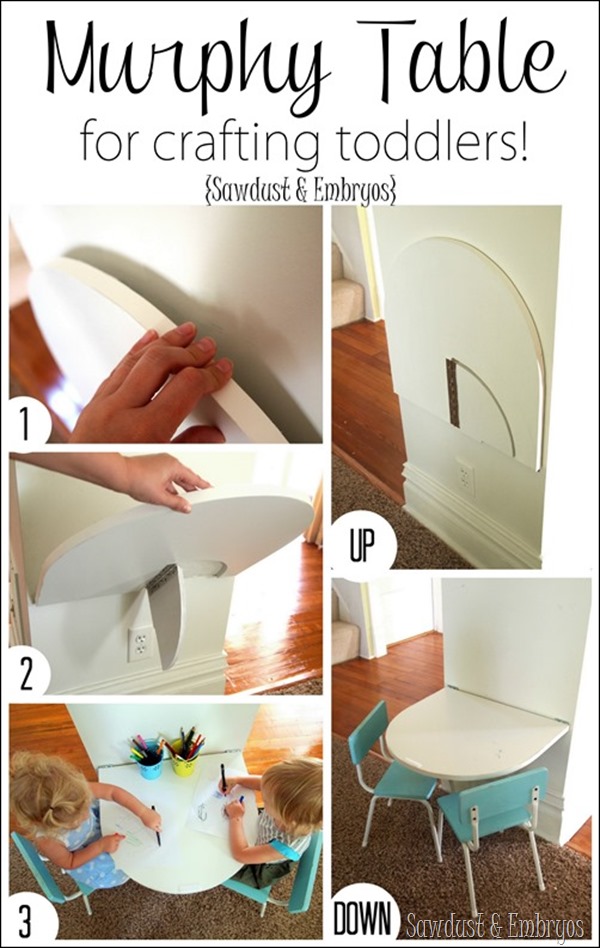
All we have left is affixing this bad boy to the wall! Layout 2″ hinges on desk 1/4″ in from sides, and drill 1/16″ pilot holes for the screws. Then screw them in and mount the other side of the hardware onto the wall! Snag a loved one for this part… it’s tricky to do alone.
The tricky part of this idea was how to get this thing to stay upright when not in use. But then it downed on me… our Scotch Indoor Fasteners! These are like Velcro on steroids! So after slapping on a 2” strip (one side to the wall and one side to the edge of the table), I just pressed them into place and VOILA!
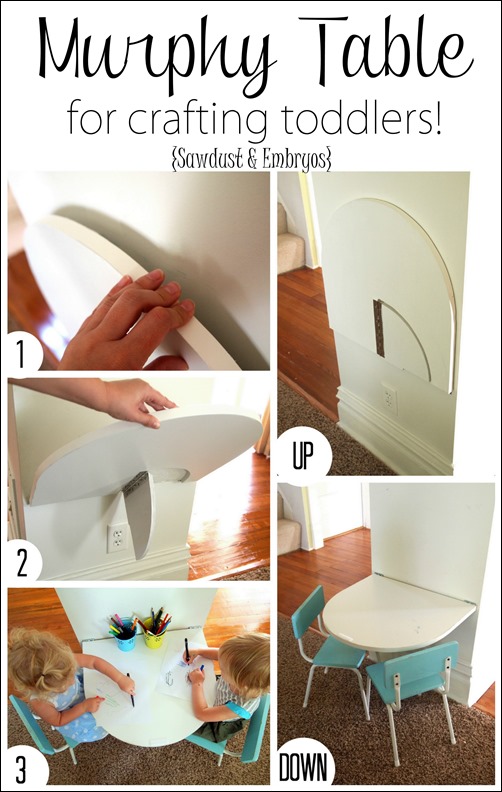
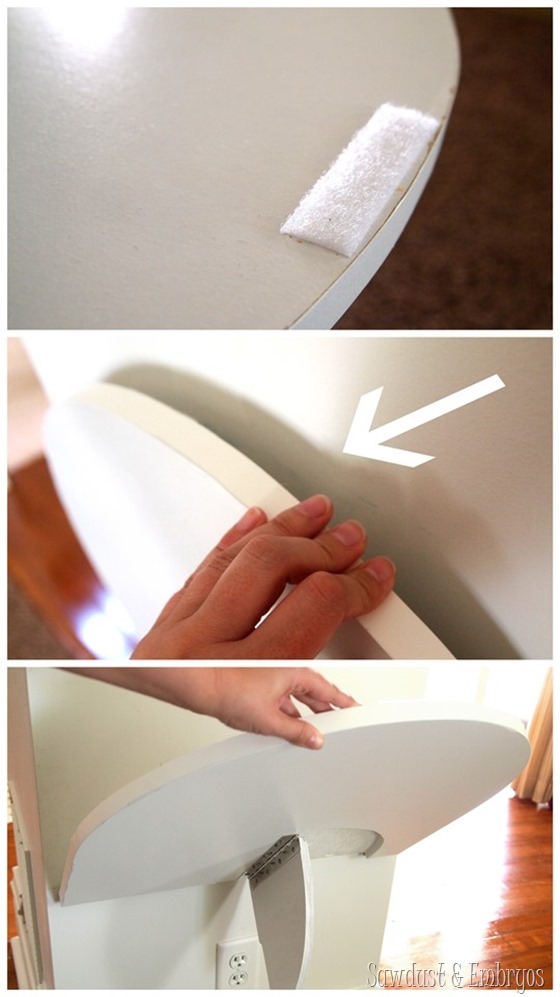 When we pull it down for the girls to play, the small 1/4” support piece naturally falls into place and it’s ready for crafting!
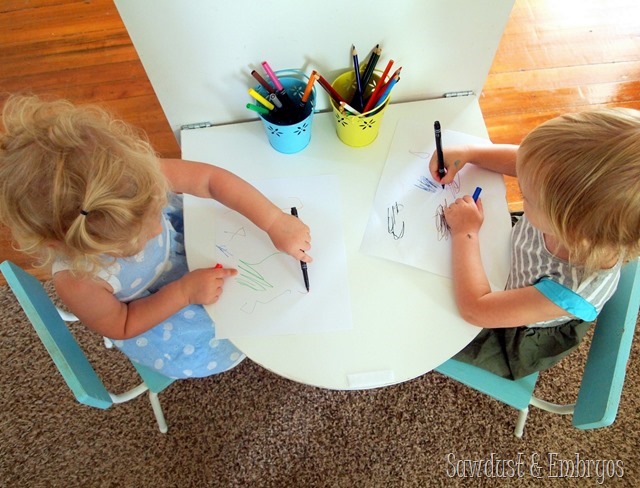
The girls LOVE to sit here together and create. And I love that I can fold it up against the wall when they’re done to get it out of the way. THAT my friends, is a WIN WIN! Wouldn’t you say?
I suspect this bad boy will be getting lots of use in the coming months. And MAYBE mommy will use that time to be productive? Don’t hold your breath. Heh.
Be sure to follow along this week as we drive along The World’s Longest Yardsale to fix up a house for Habitat for Humanity by following us on Instagram and Facebook (@sawdustandembryos)! It’s proving to be quite the adventure!



Such a great read, I’ll be bookmarking this for later
Genius! It is so so cute! I love how it hides away so nicely. You are brilliant.
Awesome! Oh, and I miss you guys already!!!
I LOVE this idea!!
Just out of curiosity, where do you guys store the chairs when the table is not in use?
Seriously, I love you guys. This is freaking awesome!
How does the table stay flat/get supported when in use?
The flap/ support piece doesnt touch the ground ?
The little piece underneath is the support that rests against the wall.
Freaking GENIUS. I really need a man in my life that can help me create all the cool ideas I come up with! You lucky girl you!