I’ve had this idea to make a wooden circle pendant light using various sizes of wooden circles for quite awhile, but I was having a hard time figuring out the logistics of it in my head. Nick and I even had a brainstorm session and did some experiments to test things out, but there was still a roadblock.
I knew I wanted to use a balloon as the form. And I knew I wanted to use Weldwood Instant Wood Adhesive (because it’s SO strong and durable, as evidenced by this project). But how can we make the wooden circles stay in place while the glue dries?
Then one night, I literally dreamed about this project, and in my dream I used spray adhesive on the balloon to keep the wooden circles steady while the glue dries. I woke up so excited to give it a try and FINALLY make this wooden circle pendant light! Are you ready?!
*This post is sponsored by our friends at DAP. Thank you for supporting the fabulous brands that make Reality Daydream possible! This post contains affiliate links.*
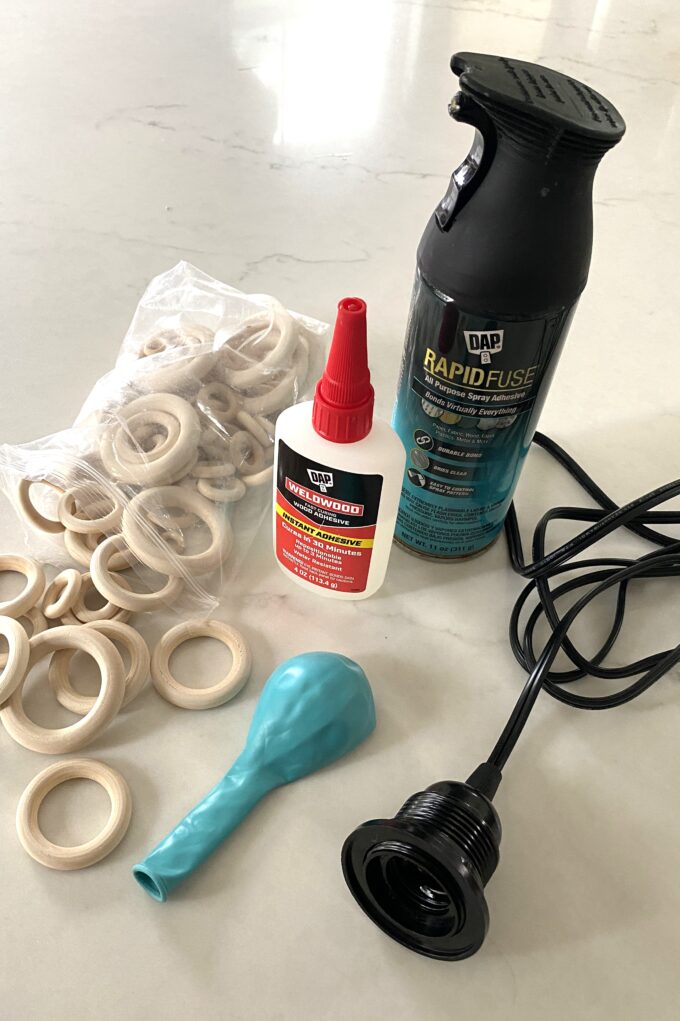
Let’s gather our supplies for this wooden circle pendant light.
Supplies for Wooden Circle Pendant Light
- Wooden circles (I used 2 packages for this one pendant)
- Weldwood Instant Wood Adhesive
- balloon
- DAP Rapid Fuse Spray Adhesive
- Pendant Light Kit
View this post on Instagram
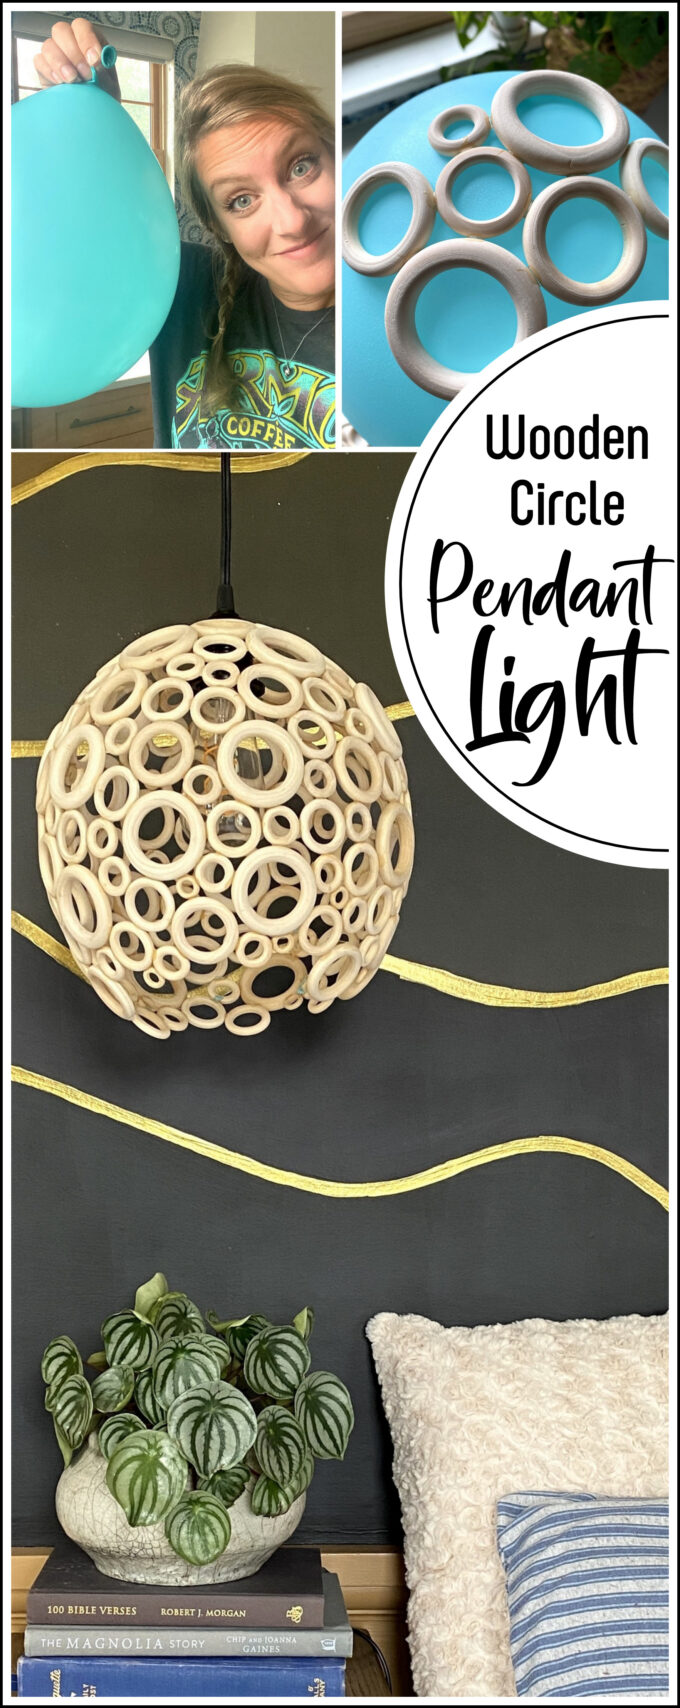
Blow up your balloon to the desired size. You could use a bigger balloon if you wanted, or even a beach ball maybe? I kinda want to try it!

Head outside and put a nice even coat our DAP Instant Spray Adhesive on the top half of the balloon. You know I love this spray adhesive for my scroll saw templates, and I’m always shocked at all the different applications it comes in handy for!

I used a glass measuring cup to hold my balloon upright. We classy.

Place your first wooden circle (one of the largest ones) on the top of the balloon, then add a dot of glue to the next circle and put them together. The tackiness of the spray adhesive on the balloon will hold them in place!


The thing I love about Weldwood Instant Adhesive is that it sets in 30 seconds, but it’s repositionable for up to 3 minutes! That came in so handy during this process. And it’s completely dried and cured in 30 minutes… so much so that you can even sand, stain, and paint! AND this adhesive is even waterproof, so it can be used on both indoor and outdoor projects!
I just tried to be ‘purposefully random’ about the sizes of rings that I chose, and tried not to think too deeply into whether or not there was a right or wrong ring for a certain spot. This entire half of the balloon took me about 20 minutes.

Continue adding wooden circles until you reach a point where gravity is working against you. Let things dry for an hour or two, then flip the balloon over and continue where you left off. You really don’t need to add spray adhesive to this side of the balloon because each new wooden ring can sit on previous wooden rings, and everything stays in place! Like MAGIC.


At this point, I was happy with it, and let it dry overnight JUST TO BE SURE. Honestly I was pretty nervous about popping the balloon, so when Cypress asked if she could be the one to pop it, I joyfully said yes.
Look at that face. She’s so excited! It’s hard to tell in this pic, but she’s holding a push pin up to the camera.

I was holding my breath for sure. But it was ok! None of the wooden circles faltered! We just had to pick off bits of the balloon here and there where the glue had affixed the balloon to the wooden rings.


Starting with the plug side, string the cord of the light kit through that first wooden circle that’s centered on top of your wooden circle pendant light. Pull it all the way through until the socket blocks you from going any further, and pop a light bulb in! YOU’RE DONE!

I actually hung this light in several different places before I found just the right spot… over our bedside table! Isn’t it so good?


We just used one of these hooks in the ceiling and looped the cord over, easy peasy! Look how fun it is at night!

I hope you enjoyed this project, and may even give it a try for yourself! Be sure to send me pics! I’m @RealityDaydream on Instagram, and love to share our everyday shenanigans in Stories. Hope to see you over there!
~Bethany
PSSSST! Check out the pendant light I made immediately after this! It involves *cough* WOOD SLICES *cough*. 🙂
~~~~~~~~~~~~~~~
Thanks for pinning!

Related:
-

I have a fun and easy building project for you! And while I do end…
-

We're in the dog days of summer, and it seems like my kids are always…
-

We recently ripped off our old mailbox because it was falling apart and there were…
I love it! What’s the DAP spray used for? And can I use something else instead? Thank you!
It’s a spray adhesive that helps the wooden rings stay in place while the glue dries. You could skip this, but you’ll have to hold the rings in place for about a minute before moving on to the next one. Does that make sense?
Bethany,
Are you going to make another so you have a set? Thanks for the information on the glue. I totally am going to have to get some.
Hey, I have something I want to send you but don’t know where to send it. Please let me know.
Maureen
That came out SO cool! Where could I put one of these? Cuz now I need one. 😄
Love this light! Thanks
Donna B
Okay, that’s seriously awesome.