• Home
  • About
  • Tutorials
  • Recipes
  • Furniture
  • Contact
    • Contact
    • Infertility
    • Disclosure
    • Privacy Policy
  • Shop
    • Facebook
    • Instagram
    • Pinterest

Reality Daydream

The Dream is Free, The Hustle Sold Separately

  • Home
  • About
  • Tutorials
  • Recipes
  • Furniture
  • Contact
    • Contact
    • Infertility
    • Disclosure
    • Privacy Policy
  • Shop

Tutorial: Painting Furniture {using a projector}

March 15, 2012 by Bethany Sy

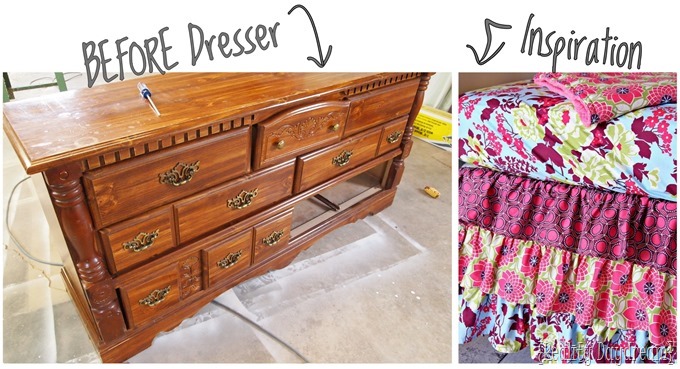
So my friend brought us this serious clunker of a dresser. Solid, chunky and 80’s if I do say so myself. She wanted us to make it purrrty for her impending baby girl to use as a changing table in their nursery! She had purchased this absolutely adorable bedding for the nursery, and wanted us to coordinate the crib sheet into our design for the changing table. Isn’t this bedding absurdly cute?
AMAZING dresser makeover - using a projecter to map out the painting {Reality Daydream}

Inspiration Image Source

 The dresser had some funky-weird engraved designs on a couple drawers that needed to be gone… like yesterday. Check out this tutorial for all the dirty details on how we made them disappear. LIKE MAGIC.
 Use wood filler to get rid of those ugly out-dated carvings {Reality Daydream}
So after wood-puttying/sanding about 5 times, and lightly sanding the whole dresser and drawers, we primed with this stuff, and painted the whole thing a lovely shade of Krylon Peekaboo Blue. Easy enough, no?

Paint a PERFECT design on furniture ...using a projector! {Reality Daydream}

 
Then, using a photograph of the crib sheet, I cropped it around one of the roses and printed the image blown up to 8.5 x 11, and then traced the flower onto a transparency via Sharpie! Do you see where I’m going with this?
Joel Dewberry Crib Sheet... and a painted dresser to match! {Reality Daydream}Flower traced onto a tranparency and projected onto a dresser! {Reality Daydream}
 
You guessed it! With my handy overhead projector I blasted the flower image asymmetrically onto the dresser (similar to our very own changing table in our twin girls’ nursery!). When I had it just where I wanted it, I used a pencil to lightly trace! Or if you’re super-human, consider free-handing it and let me know how that works for ya!

Project a pattern onto a dresser using an overhead projector, and paint the PERFECT design onto your furniture! {Reality Daydream}P3152892

Then I got busy painting, using simple Folk Art acrylic paints. Obviously the more complex your design, the more time-consuming and tedious things become. But the outcome is soooooo worth it! No creativity needed! ANYBODY can do this. All you need is a relatively steady hand!


Paint a PERFECT design onto furniture using an overhead projector! {Reality Daydream}
 
I can’t believe I’m going to post this picture of me awkwardly painting this dresser in less-than-flattering lighting. But it’s the only ‘action shot’ I have of me painting this thing!
Paint a perfect design onto furniture {Reality Daydream}

The original hardware wasn’t altogether unfortunate, but it was just a little too… brass. Ain’t nothin’ a little sanding, priming and painting white wouldn’t fix! And whatdoyaknow? It looks amazing! I was worried we might need to hunt down some perfect hardware… but NO! Lucky break for sure.

Paint a PERFECT design (or anything!) onto furniture ...using an overhead projector! {Reality Daydream}

 Use an overhead projecter to help you paint the PERFECT design on anything! Including furniture! {Reality Daydream}
And here’s a little reminder of what it looked like when we started.
AMAZING transformation of a clunky old dresser! Click through for the step-by-step tutorial {Reality Daydream}
So there you have it!
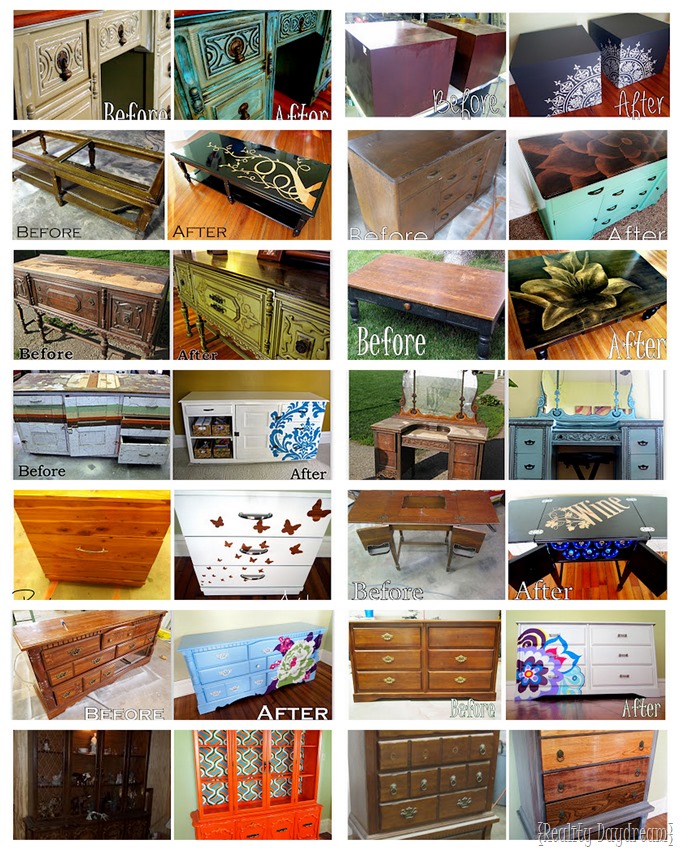
Be sure to check out our giant portfolio of unique furniture transformations!
TONS of unique furniture makeovers! {Reality Daydream}
*This post contains affiliate links*
Thanks for pinning!
Transform ANY OLD clunky dresser into something beautiful by projecting a pattern or design using an overhead projector, and then tracing and painting! Tutorial... {Reality Daydream}

Related:

  • Centerpiece Tray Tutorial
    Wooden Centerpiece Tray Tutorial

    I have a fun and easy building project for you! And while I do end…

  • DIY fabric-wrapped bulletin boards
    DIY Fabric-Covered Bulletin Tutorial

    My kids are getting to the age where they want to tape pictures, cards, notes...…

  • Make this propagation station with test tubes!
    Test Tube Propagation Station Tutorial

    I've been needing to figure out a solution for my overwhelming plant propagation situation for…

About Bethany Sy

Nick and Bethany Sy are the creative free-spirits behind DIY/Lifestyle blog, Reality Daydream. They recently purchased a historic mansion and have been documenting the ups and downs of renovation and making this home their own... all while sharing tips and tutorials along the way! When they found themselves in the trenches of infertility, they started a journey that would prove to be their most important DIY project ever, and have 3 beautiful girls to show for it. <3

« An old sewing table… given NEW LIFE!
Spring Babes »

Comments

  1. 52

    Courtney Bishop says

    April 14, 2018 at 1:12 am

    Well that’s just the coolest technique I’ve ever seen! I’m currently working on my first dresser but I will be trying this for the next go-around.

    Reply
    • 53

      Bethany Sy says

      April 16, 2018 at 1:10 am

      Yay I hope you do! Please send pics when you’re done!! beth@realitydaydream.com

      Reply
  2. 54

    Cheri Lentz Riggins says

    August 30, 2016 at 4:03 am

    I love the way you use your transparencies…placing them off center. Very nice looking!

    Reply
  3. 55

    Jessica Looney says

    May 3, 2015 at 10:31 am

    Hi!! How many cans of spray paint did the blue take? I have a dresser almost identical that I am thinking about doing in this color. But have never spray painted. I want to try to sell it when im finished so Im wondering if it is practical for this specific project. THANKS!!!

    Reply
    • 56

      Bethany @ Sawdust and Embryos says

      May 4, 2015 at 10:05 am

      We did this dresser a long time ago, so I don’t remember exactly how many cans we used… but I would guess about 4 or 5?

      Reply
  4. 57

    Amanda Woolf says

    April 28, 2015 at 8:14 am

    For the blue do you spray paint or roll or brush?. I just can’t get a clean smooth finish.

    Reply
    • 58

      Beth @ Sawdust and Embryos says

      April 29, 2015 at 3:51 pm

      Amanda, for the base color, we always use spray paint. It sounds trashy, but it gives the most even PERFECT finish. If you have a paint gun, that works too! That way you can use any paint that you have mixed at the store. 🙂 Hope this helps!

      Reply
    • 59

      GlammerHammer says

      April 29, 2015 at 9:01 pm

      Amanda, I use Floetrol mixed with my paint, and brush it on with a good paintbrush (I use a Wooster). While the paint is still wet, I load a foam roller brush with just a touch more paint and go over the part I just brushed on. I find this gives me fabulously smooth finish. I never have been able to get nice, even coverage with spray paint without using about a kajillion cans. And, as far as paint sprayers go, I’m pretty sure I have PTSD from the last time I tried to use one. ;0)

      Just an option if you’re challenged with spray paint, like me!

      Reply
  5. 60

    Eric says

    October 4, 2013 at 4:57 pm

    Great work! I have a lot of acrylic paints that I’ve used for a variety of things, but for this they seemed a bit thin. I could see the color underneath in streaks when I was done. Do you have to do multiple coats?

    Reply
    • 61

      Bethany @ Sawdust and Embryos says

      October 4, 2013 at 5:00 pm

      Yes I did two coats of each. Acrylic paint works better, but acrylic is what I had. We’d love to see pics of your finished project!

      Reply
  6. 62

    Beth @ Sawdust and Embryos says

    July 24, 2013 at 2:23 am

    Wow! Freehand? You’re braver than me for sure! I’m glad you went for it!

    Reply
  7. 63

    Naomi Ocean says

    July 24, 2013 at 1:45 am

    I just started painting my own furniture in my room. Was really bored and out of canvas with lots of paint and free time. I did it free hand and kinda like it, but need to do it like this. Much cleaner… Mine you can tell someone with zero training did it. It’s all done in acrylic so if I ever get tired of the design warm water and a rag or Mr. Clean- Ta-Da! Restart!

    Reply
  8. 64

    Corinna Bennett says

    June 10, 2013 at 11:51 pm

    Your transformation pieces are absolutely stunning. I follow a bunch of blogs, but your projects blow me away! You are so talented. Thank you for sharing and showing the rest of us how we can attempt to achieve this awesomeness in our own homes!

    Reply
    • 65

      Beth @ Sawdust and Embryos says

      June 11, 2013 at 12:30 pm

      That is SO SWEET Corinna! Thanks for the encouragement, and for following along!

      Reply
  9. 66

    hotel furniture says

    May 24, 2013 at 5:08 am

    Elegant info..it will useful for my furniture work..

    Reply
  10. 67

    Nearlydawn says

    May 22, 2013 at 3:36 am

    I’ve seen you work a LOT of magic, but I think this one takes the cake!! I can’t even count the # of times I’ve seen one of those dressers and been turned off by the “engraved flower”. I never thought to fill/paint the darned thing. My mind is blown by the difference.

    One question… you guys are always bringing in/shipping out furniture. Care to give us a peak at your method for moving those huge pieces? (other than your hulky man?). Also, what kind of system do you use for keeping up with parts/plans/paint for each project?

    Reply
    • 68

      Beth @ Sawdust and Embryos says

      May 22, 2013 at 12:22 pm

      We usually just heave it into our van, and head home with the girlies. If it doesn’t fit in the van (on a RARE occasion) Nick will make a special trip in his pickup… but we prefer not to do that.

      As far as a system for keeping up with a supply list, we don’t really have a method! We did have a spreadsheet at one point, but we got lazy and quit using it. 🙂

      Reply
  11. 69

    Jaidee says

    May 8, 2013 at 12:30 pm

    did you use krylon peek a boo in gloss or satin? thanks!

    Reply
    • 70

      Beth @ Sawdust and Embryos says

      May 8, 2013 at 10:58 pm

      Jaidee, we used gloss… but in hindsight, Satin would have been easier to paint the flower design over with less coats. Totally a preference thing though!

      Reply
  12. 71

    Sidu says

    May 5, 2013 at 6:34 pm

    hi , lov your blog. Quick question, after painiting the design with the acrylic pin , do we need to use anything to seal the design to prevent chipping n flaking ?

    Reply
    • 72

      Beth @ Sawdust and Embryos says

      May 5, 2013 at 6:48 pm

      We usually seal with PolyCrylic… which is just a water-based urethane and can be found in the isle with varnish and such. Hope this helps!

      Reply
  13. 73

    Sidu says

    May 5, 2013 at 6:32 pm

    hi , lov your blog. Quick question, after painiting the design with the acrylic pin , do we need to use anything to seal the design to prevent chipping n flaking ?

    Reply
  14. 74

    Heather says

    April 30, 2013 at 12:05 am

    This is AMAZING!! LOVE it!

    Reply
  15. 75

    Mellissa Rose says

    April 20, 2013 at 1:01 pm

    Clearly I need an overhead projector! Amazing 🙂

    Reply
  16. 76

    Alphia Sauer says

    April 12, 2013 at 4:55 am

    you just made my day with this tutorial

    Reply
  17. 77

    Anonymous says

    April 4, 2013 at 4:19 am

    What paint color is your wall that color looks good in any room!

    Reply
    • 78

      Beth @ Sawdust and Embryos says

      April 5, 2013 at 6:41 pm

      The wall paint is ‘celery’ by Sherwin Williams!

      Reply
  18. 79

    Buy Hotel Furniture says

    April 2, 2013 at 5:00 am

    Paint can make a that much noteworthy difference that we can’t even imagine. We can see that the above pictures and notice the difference..

    Reply
  19. 80

    Kim@todayismysome-day says

    March 2, 2013 at 1:46 pm

    I finally found an overhead projector! I had to fork out $50 for it, but I’m thinking it’ll be worth it! Can you tell me what kind of transparency paper is best to use in a printer? I’m planning to order some, but don’t want to order the “wrong” kind, if that’s a possibility 🙂 Thanks so much for the inspiration!

    Reply
    • 81

      Beth @ Sawdust and Embryos says

      March 2, 2013 at 3:46 pm

      SWEET! $50 will totally be worth it, if you use it as much as I do! 🙂 The type of transparency depends on they kind of printer you have There’s specific transparencies for inkjets and laser printers, so just make sure you get the right one. I get mine at Staples. Hope this helps!! Congrats on your new purchase!!

      Reply
      • 82

        Jen says

        March 12, 2019 at 7:34 pm

        A printing store can often make the transparency for you – I called FedEx (used to be Kinko’s) – about 80 cents to print on a transparency for me…

        Reply
    • 83

      Kim@todayismysome-day says

      March 4, 2013 at 1:29 am

      Thank you 🙂

      Reply
  20. 84

    Anonymous says

    February 28, 2013 at 12:17 am

    You can put your transparency in a copier just like paper. No need to trace it with a Sharpie. Just get a clear design and copy onto the transparency!

    Reply
    • 85

      Beth @ Sawdust and Embryos says

      February 28, 2013 at 12:22 am

      I actually do that with almost all my projector projects. But with how BUSY this fabric was, I wanted to just outline the parts I want to trace. 🙂

      Reply
  21. 86

    baby furniture says

    January 11, 2013 at 11:21 am

    Very Innovative!!! Thanks for Sharing…..

    Reply
  22. 87

    Stacye Hixson says

    January 7, 2013 at 8:39 pm

    First I want to start by saying that your blog is by far my favorite. I love that you have taken the hum-drum of furniture upcycling or refinishing and rocked it off the planet. I bought an overhead projector about a month ago at my favorite thrift store for $5. When I bought it I really didn’t have any plans for it (maybe project something on the wall and paint it, boring), but for $5 I just could not pass it up. And then I found your blog. Presto! I have so many ideas now I don’t know where to start. So thank you for your blog and keep up the goodd work.

    Reply
    • 88

      Beth @ Sawdust and Embryos says

      January 7, 2013 at 9:00 pm

      What a great find! I have people asking me all the time where they fan buy or rent projectors… and they’re hard to find! And for $5? Wha?

      Thanks for all the sweet things you said too. We definitely have a blast with our furniture pieces, and hope that shows!

      PLEASE send us pics when you’ve finished a project! We love seeing what our readers come up with!

      Reply
  23. 89

    Anonymous says

    November 11, 2012 at 5:58 am

    Why does the dresser change colors before/during painting? First it’s the blue color, then when you’re painting the flowers etc on it (laying on your side) it seems like it’s gray. Was a second blue coat applied and not dry before you painted the flowers??

    –Kathy

    Reply
    • 90

      Beth @ Sawdust and Embryos says

      November 11, 2012 at 2:55 pm

      Haha! No, the dresser doesn’t change color… the photo where I’m painting the flower was taken at night with a light shining on the dresser, so it just appears differently.

      Reply
  24. 91

    Anonymous says

    October 22, 2012 at 3:08 am

    Wow…..you are blessed with a gift!

    Reply
  25. 92

    Bethany says

    August 29, 2012 at 8:49 pm

    Hmmm, I always thought you could rent them from the library, but maybe not? I got mine from my church… they used to use it back in the day for projecting the words to songs. You could call around to some churches, or call a bunch of libraries and see if they’ll even SELL you theirs for cheap, since they’re upgrading and all. Also, occasionally I see them on craigslist… but not often. 🙁

    Reply
  26. 93

    Tracy Kalescky says

    August 29, 2012 at 2:45 pm

    can you tell me where you got your overhead projector? I used to borrow from the library,but smart boards have taken over.I have a small projector but overhead is the best.

    Reply
  27. 94

    Amy says

    July 29, 2012 at 12:55 pm

    Beth I can not tell you how much better I am feeling about this project now! Will keep at it with many coats! Thanks so much!
    Amy

    Reply
  28. 95

    Bethany says

    July 29, 2012 at 12:19 am

    Amy, sorry about that! I usually have to do 2-3 coats, if it makes you feel any better. And white is the HARDEST! With white, I usually do 2 coats of primer first just to save me from having to do a million coats of white paint. Send us pics when you’re done!

    Reply
  29. 96

    Amy Kann says

    July 29, 2012 at 12:05 am

    Hi! Loved your changing table and it inspired me to try a project myself,I started painting my image but am just frustrated with the brush marks! GRRR I am useing regular latex low luster and an art brush, I fear I will have to sand it off and use craft paint?
    (re-trace, ugh)
    I really love your furniture make overs! Always pinning! Amy Kann

    Reply
  30. 97

    Maria Deleon says

    July 16, 2012 at 4:44 pm

    I am absolutely in love with this dresser! Gorgeous!

    Reply
  31. 98

    Sarah @Savvy Young Something says

    June 6, 2012 at 3:06 pm

    Oh my gosh! I love this! So graphic and cool. This further confirms my desperate want for a projector!

    Reply
  32. 99

    Bethany says

    April 30, 2012 at 1:38 am

    Cassy, it looks AWESOME! Great job! i loooooove the soft monochromatic colots!

    Reply
  33. 100

    Cassy says

    April 30, 2012 at 12:23 am

    I totally was inspired by this rose and did a dresser in monochromatic colors! You should check it out…thanks for the inspiration!
    http://www.cassandradesign.blogspot.com

    Reply
  34. 101

    Me says

    April 21, 2012 at 4:59 pm

    This is gorgeous! I don’t know how you find the time but kudos to you!

    Reply
  35. 102

    baby furniture says

    April 12, 2012 at 10:50 am

    Impressive art,Your painting looks amazing and thanks for sharing such nice photographs of your paintings in my opinion you should apply non allergic and harmless paint for paintings,thanks.

    Reply
  36. 103

    Liz Brown says

    April 12, 2012 at 1:27 am

    I am pinning this … right now. Cool! Never thought of using a projector for this sort of thing. 🙂

    Reply
  37. 104

    calcottc says

    April 12, 2012 at 1:03 am

    AMAZING! You are so talented!
    I have a couple questions for you-
    When you prime with Kilz do you brush it on or use the spray paint?
    AND
    After you paint your design with the acrylic paint, do you finish with a clear coat?
    THANKS!

    Reply
  38. 105

    lyndyjo says

    April 12, 2012 at 12:21 am

    Beautiful, Beth! I love it!

    Reply

Leave a Reply Cancel reply

Your email address will not be published. Required fields are marked *

Recipe Rating


  • Facebook
  • Instagram
  • Pinterest
  • RSS
  • YouTube
We are Nick and Bethany! Welcome to our blog, Reality Daydream where we share our DIY adventures!
Click here for lots of art projects using only wood stain on furniture!!
Please feel free to share or pin my posts! You're welcome to use ONE of my images (no collages or pinnables) with a link back to the corresponding post. Please do not edit or crop that single image in any way. Improper use of my photos, ideas or words is a violation of copyright. Thank you!

Categories

Attention: Almost any do-it-yourself project involves risk of some sort. Your tools, materials, and skills will vary, as will the conditions at your project site. Reality Daydream has made every effort to be complete and accurate in the instructions of the plans on this website. Reality Daydream will not assume any responsibility or liability for damages or losses sustained or incurred in the course of your project or in the use of the item you create. Always follow the manufacturer’s operating instructions in the use of tools, check and follow your local building codes, and observe all commonly accepted safety precautions.


Copyright © 2025 · Modern Blogger Pro On Genesis Framework · Customizations by Sweet Theory Designs · Privacy Policy · Log in