• Home
  • About
  • Tutorials
  • Recipes
  • Furniture
  • Contact
    • Contact
    • Infertility
    • Disclosure
    • Privacy Policy
  • Shop
    • Facebook
    • Instagram
    • Pinterest

Reality Daydream

The Dream is Free, The Hustle Sold Separately

  • Home
  • About
  • Tutorials
  • Recipes
  • Furniture
  • Contact
    • Contact
    • Infertility
    • Disclosure
    • Privacy Policy
  • Shop

How to Make a Snow Globe Craft

January 29, 2018 by Bethany Sy

We’ve got a new installment to our ‘Kids Craft Archives’, compliments of my Mom, the art teacher! My kids are obsessed with snow globes right now, so the idea of making their own was THE BEST! And there are so many different ways to customize and make it unique to them. Let’s just say this Snow Globe Craft was a big hit!
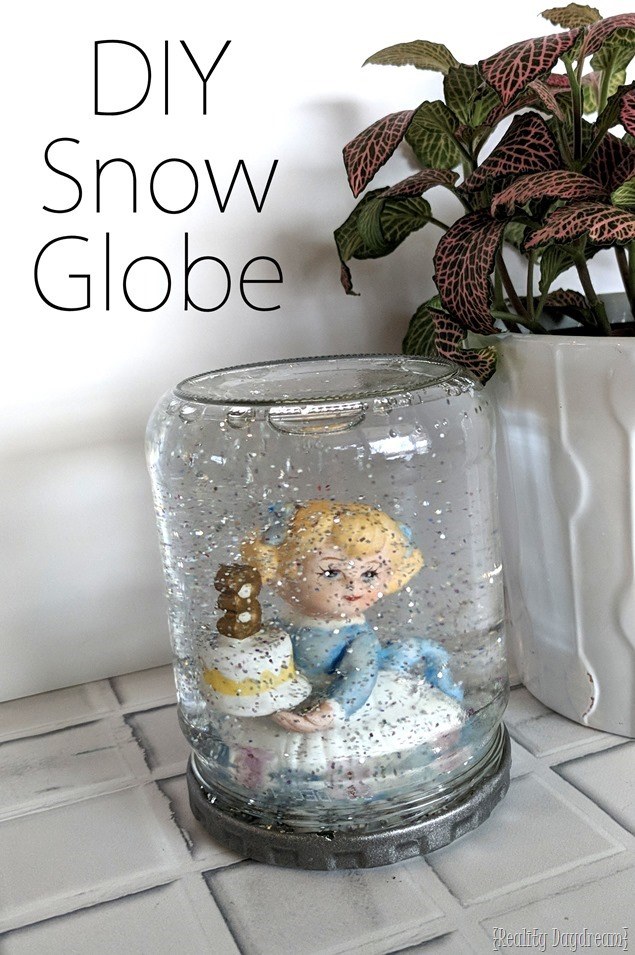
Make your own DIY Snow Globe at Home - fin kids craft or girls night! {Reality Daydream}*This post contains affiliate links*

First things first… find a trinket or figure (or several!) to display as the subject inside the snow globe. You could go to the thrift store and pick up something cute. Or, if you’re like me, you have a multitude of glass figurines you’ve acquired over your lifetime and can’t seem to get rid of.

I decided to make a snowglobe at the same time as the girls (HEY, it can totally be an adult craft too), and I used this little girl porcelain figure that’s holding a birthday cake with a ‘3’ on it from my childhood. Perfect for Cypress’ upcoming 3rd Birthday!

Glass figurine of a little girl with a number 3 - perfect for making a snow globe! {Reality Daydream}

Did anyone else get glass figurines with numbers on them each year for your birthday? I think I got them all the way until I turned 16! I guess they had to stop somewhere, because I doubt they make figurines with the number ‘35’ on them.

Let’s gather our supplies!

Supplies for DIY Snow Globe Kids Craft

  • Glass figurine of your choice
  • Jar with lid (make sure it’s large enough for your figurine!)
  • Xacto Knife
  • Rapid Fuse adhesive
  • Glitter (white or silver is preferable)


Peel off the labels on your jar, and clean with GooGone if necessary. I used an old salsa jar for mine. But the twins used these mason jars for theirs (you’ll see what those look like at the end of this post).

DIY Kids Snow Globe Craft {Reality Daydream}

Prime and paint your lid (or use a paint/primer-in-one like I did (this stuff). I will say, in hindsight, I wish I hadn’t spray painted the inside of the lid, because I worry it won’t hold as strong once I add the adhesive. So don’t be like me. At least in this situation. I decided to be extra safe by carving some grooves with an Xacto Knife on the inside of the lid for the glue to really have something to hold onto.

Make your own snow clobe craft at home! {Reality Daydream}

Glob some Rapid Fuse glue around the base of the figuring, and press into place in the center of the lid.

How to make your own snow globe at home - fun kids craft! {Reality Daydream}

This next part is totally optional, but I decided it would be fun to add some teeny white pebbles on the base around the figurine to add to the ‘snow look’ of the snow globe. Just be careful not to get any glue or pebbles too close to the edge of the lid so it will still close snuggly.

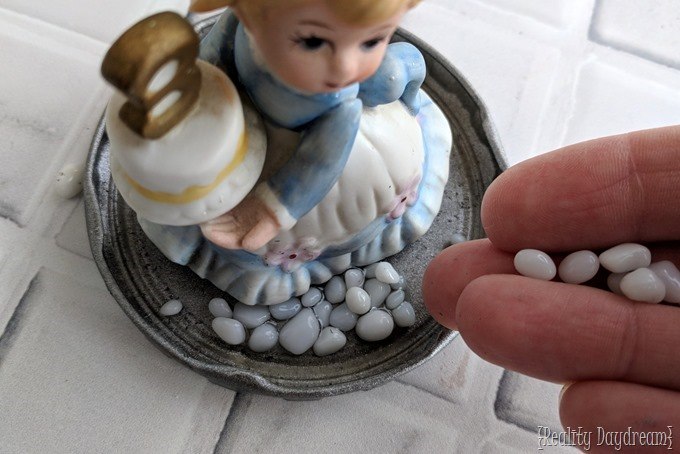
How to make a snowglobe at home {Reality Daydream}

Make your own snow globe at home {Reality Daydream}

Recycle old figurines into DIY Snow Globes! Such a fun kids craft too! {Reality Daydream}

While your adhesive is drying (about 30 minutes), fill up your jar with water, leaving about a half inch at the top, and add about 1 teaspoon of glitter.  One of my daughters learned the hard way that colorful glitter turns the water funky colors. So we found it’s best to stick with silver or white glitter.

If you want, you can add a couple drops of glycerin into the water as well. This helps the glitter be more ‘floaty’ rather than just falling quickly to the bottom after the snow globe has been shaken.

kids snow globe

Time to put the lid on! My girl can breathe under water. Don’t worry.

Use old figurines and glass jars to make your own snow globes at home! {Reality Daydream}

Top it off with water until it’s completely full!
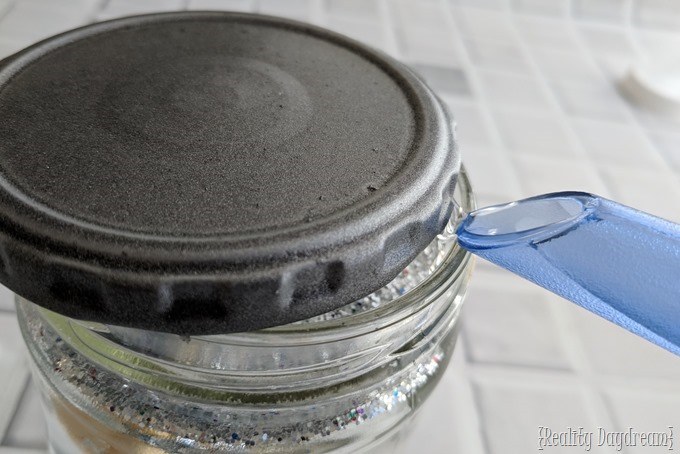
DIY Snow Globes as a fun kids craft or girls night! {Reality Daydream}

I just turned my lid on really tight, but you can also glue the lid on just to be really safe. Flipping over your new snow globe for the first time is so satisfying and magical!

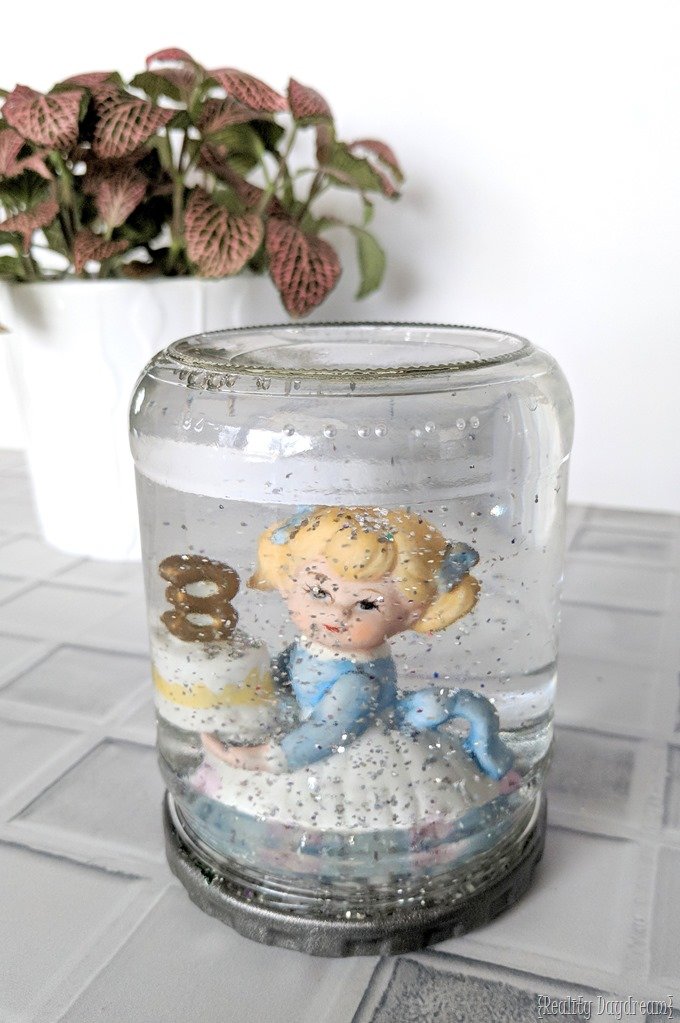
DIY Snow Globe Tutorial - fun kids craft! {Reality Daydream}

DIY Snow Globe using a jar and a figurine! {Reality Daydream}Kids Craft Ideas - DIY Snow Globes! {Reality Daydream}

How to make snow globes at home! {Reality Daydream}

The twins used some faux greenery in their snow globes, and it really added a nice touch! We love how these turned out, and the girls treasure them! Each of them have their snow globes in a prominent place on their dressers!

And besides being a great kids craft idea, I also think this would be SO FUN for a girls night out! Pour some wine, and everyone brings a figurine! WHAT COULD BE MORE FUN?!

If you (or your kid) tries this Snow Globe Craft, be sure to tag us on social media! You can find us on Instagram and Facebook. And we recently started a DIY Community on Facebook where you can come and share your projects, ask questions, and get inspired! Click HERE for an invite!

~Bethany

~~~~~~~~~~~~~~~~~~~~~

Thanks for pinning!

How to make a snow globe with this fun DIY craft - perfect for girls night or kids craft ideas! {Reality Daydream}

Related:

  • DIY Fabric-Covered Bulletin Tutorial

    My kids are getting to the age where they want to tape pictures, cards, notes...…

  • Kids Travel Activity Clipboard Box

    I got a brilliant idea to make my girls a little something for Christmas (totally…

  • Kids' Tiny Closet Makeover

    Our daughter has been living with a very small closet that isn't conducive to her…

About Bethany Sy

Nick and Bethany Sy are the creative free-spirits behind DIY/Lifestyle blog, Reality Daydream. They recently purchased a historic mansion and have been documenting the ups and downs of renovation and making this home their own... all while sharing tips and tutorials along the way! When they found themselves in the trenches of infertility, they started a journey that would prove to be their most important DIY project ever, and have 3 beautiful girls to show for it. <3

« How to Install Chunky Crown Molding
Strawberry Snickerdoodle Cheesecake Bars »

Comments

  1. 7

    Valerie says

    November 27, 2018 at 5:00 pm

    Hi we are making Christmas’s snow globes as gifts this year. We have put a frosty and a Santa figurine in two different jars. We used som model trees and little fake presents too. My problem is after a few days the white in the figures has turned blue! I did soak the trees many times to remove excess color before we appoxied them down. I was wondering if you know of a way to seal the figures so they won’t turn colors?
    Any help would be nice.

    Reply
    • 8

      Bethany Sy says

      November 28, 2018 at 12:57 pm

      Yikes, I haven’t had this happen. 🙁 You could get a can of clear sealant and spray the figures beforehand. That should help this problem. Just make sure they have plenty of time to dry and cure before submerging into the water.

      Reply
  2. 9

    Norma Rolader says

    January 31, 2018 at 3:51 pm

    So so adorable

    Reply
  3. 10

    K&E says

    January 31, 2018 at 3:42 am

    This DIY is just too fun! Can’t wait to try out. Xoxo, K&E

    Reply
  4. 11

    Susan Long says

    January 30, 2018 at 9:58 pm

    I love it – I have a couple of couple baby deer I would love to do. Thanks !!

    Reply
  5. 12

    Faye says

    January 30, 2018 at 6:44 pm

    Wow – this takes me back to Gr 1 – that’s about 47 years ago. I made one of these for my Mom for Mother’s Day and she kept it for years. We used a baby food jar and put in a plastic flower (mine was a pretty little rose). For an extra little pizzazz my teacher cut the prettiest light blue tulle that was secured around the lid with an elastic band – it covered up the lid and gave it a pretty base. I was always so pleased that she kept it for so many years!
    Thanks for sharing!

    Reply
  6. 13

    CryStal says

    January 30, 2018 at 2:29 pm

    Will the paint eventfully peel off the figurine? I image sitting in water for a long period would do that?

    Reply
    • 14

      Bethany Sy says

      January 31, 2018 at 12:35 am

      I don’t know, but we’ll find out I guess 😉

      Reply

Leave a Reply Cancel reply

Your email address will not be published. Required fields are marked *

  • Facebook
  • Instagram
  • Pinterest
  • RSS
  • YouTube
We are Nick and Bethany! Welcome to our blog, Reality Daydream where we share our DIY adventures!

realitydaydream

Still can’t get over these shelves. 😍 These Still can’t get over these shelves. 😍

These Aksel Radius Floating Shelves by @shelfology are the perfect finishing touch to this wall in our kitchen. 🙌

#gifted #shelfology #radshelfie #floatingshelf #akselradius
I needed an instant-gratification project today fo I needed an instant-gratification project today for my well-being, and this little wooden stand was so fun and fast!

Details and links to everything in this pic in Stories!
If ya just need a slab of wood, grab a cutting boa If ya just need a slab of wood, grab a cutting board when you’re at Target or Walmart! They’re made of hard wood!

I used this cutting board to experiment and make some prototypes for a large-scale piece of art I’m doing for our church. It’s got me EXCITED!

Follow along for that project- happening soooon!

@dapproducts @dremel @jet.woodworking
You’ve all seen the video, but here’s some sti You’ve all seen the video, but here’s some still shots of the kitchen wall in all its glory!! 

The Aksel Radius Floating Shelves by @shelfology were the perfect finishing touch! 

Should I do a house tour of our main floor this week?!?! 🙌🌿

#sponsored #floatingshelf #radshelfie
Load More Follow on Instagram
View of our entryway of our historic mansion that we're slowly renovating and making our own.
Click here for lots of art projects using only wood stain on furniture!!
Please feel free to share or pin my posts! You're welcome to use ONE of my images (no collages or pinnables) with a link back to the corresponding post. Please do not edit or crop that single image in any way. Improper use of my photos, ideas or words is a violation of copyright. Thank you!

Categories

Attention: Almost any do-it-yourself project involves risk of some sort. Your tools, materials, and skills will vary, as will the conditions at your project site. Reality Daydream has made every effort to be complete and accurate in the instructions of the plans on this website. Reality Daydream will not assume any responsibility or liability for damages or losses sustained or incurred in the course of your project or in the use of the item you create. Always follow the manufacturer’s operating instructions in the use of tools, check and follow your local building codes, and observe all commonly accepted safety precautions.


Copyright © 2023 · Modern Blogger Pro On Genesis Framework · Customizations by Sweet Theory Designs · Privacy Policy · Log in