If you’ve been around our blog for the past year or so, you know we recently did a room makeover in our master bedroom! It was long overdue, and now that it’s done I can’t believe we waited so long! It’s one of my favorite rooms in our house! We’ve been getting questions about installing crown molding (or is it spelled ‘moulding’?) to be SO BEEFY and chunky; which is a valid question… because it looks amazing. #justsayin
When we installed it, I took pictures of the whole process with intention of sharing a tutorial, and then my pictures went missing for the longest time. But this week I found them on my computer!! Three cheers! All the pics from that project had gotten dumped in the wrong folder, hidden in plain view! Rest assured, now they’re stored in a folder clearly named ‘Installing Crown Molding’. So I’m here to show you just how to install this chunky crown molding yourself!

*This post contains affiliate links*
Installing Crown Molding to be CHUNKY!
Our adventures started out at the home improvement store. We bought the widest crown molding we could find, as well as an equal amount of base molding trim and 2” trim (that might be meant for a chair rail?). Then we hauled it up to the master bedroom, along with the miter saw (we use this one) and all of the children… naturally.

As a little practice round, we cut each of the 3 trim pieces to 6 inches, and assembled them with our cordless Air Strike Nail Gun to find out where the top and bottom trim would need to be nailed into place on the wall. This is important, because these two trim pieces will go up before the true crown molding piece will be installed to finish off the look.

We marked on the wall and the ceiling where each of the trim pieces would need to be nailed, and used our chalk line to slap up a straight line that would be visible and easy to follow.


Nick installed the bottom trim piece first, slopping on some Loctite Trim and Paneling adhesive to the back before nailing it into place on the wall.

Repeat the process of marking where the ceiling trim would go, chalk-line it, add adhesive, and installed. I wish the trim wasn’t pre-primed so you could see it better against our white walls. Sorry!

Time for actually installing crown molding! When you add the adhesive this time, just put it on the edges that will be touching.

And nail into place with your nail gun!


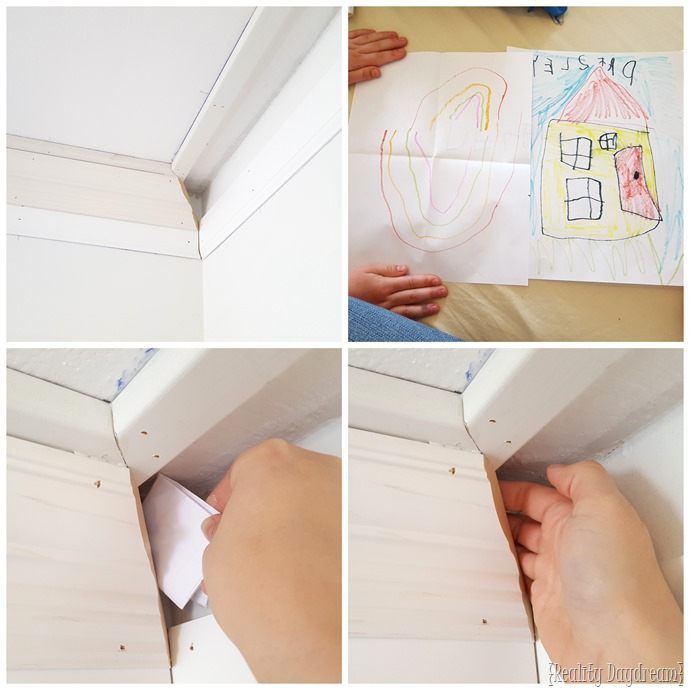
There are lots of tutorials out there for how to pull off perfect mitered corners for installing crown. My fave is this one by my friend Sandra. When we were working our way to the final corner, we decided it would be fun to let the girls leave a ‘note’ in the crown molding. Such a fun way to leave a little piece of themselves with the house forever! So stinking cute.

I filled the holes and cracks with this silicone caulk and this handy tool, and then painted! We went with this creamy tan color (Sherwin Williams ‘Reticence’ 6064). I love that it allows the trim to pop against the white walls. Plus I just love to do things that are unexpected. ![]()
Speaking of unexpected things, I know a few of you will ask about the plywood shapes on the walls (below). There’s a tutorial for that right here!


Is that crown molding so chunky, beefy and SUBSTANTIAL?! We freakin love it.


Of course we painted all the trim in the room, and now I want colored trim in every room of my house.


Installing crown molding in a room seems like it wouldn’t make THAT big of an impact, but I think it’s the single most important design decision in a room. It adds instant character! Whether you paint it white, or a color, or just wood tones!
~Bethany
~~~~~~~~~~~~~~~~~~~~~~
Be sure to check out all the other updates we’ve tone to this room to get it to this point by clicking the images below!
Thanks for pinning!


Do you sell Mohawk Epoxy Putty Stick?
Wow!!! Love the dramatic look of a different colour on the molding…beautiful. I might just have to do this throughout my house. Thank you for sharing.
It’s remarkable what a difference it makes…how tall are your ceilings?? Is it me or does the moulding make them look taller??? Love this project..
RIGHT?! For some reason chunky molding DOES make the ceilings look so tall! Our bedroom ceilings are 8 ft
Awesome looks amazing
definite improvement in the room. looks so good! easier to see full effect if you took photos of room in one corner with a before and after. always enjoy your projects and clear tutorials. fun to sneak in a time-capsule [sort of].