Yes it’s true, I painted my rug yesterday whilst Nick was at work. I didn’t tell him of my devious plan, because I knew the look he would give me. I don’t recall how the idea came into my head. But I’ve been wanting a beautiful decorative area rug in the living room for quite some time now. I’ve even spent hours on overstock.com looking at all the different options, knowing we wouldn’t have the money for it anyway. We’ve been living with this off-white 5×8 rug that we got on clearance at Walmart… yep, Walmart. For $17.
I found it to be very boring and solid in color, lacking the ‘statement’ that I wanted it to make. So I set out to give it a little boost in life!
Supplies you’ll need:
- Boring solid color rug
- Stencil
- Can o’ spray paint
- Painters tape
- Measuring device
Project total: $0 for us! We already had everything!!
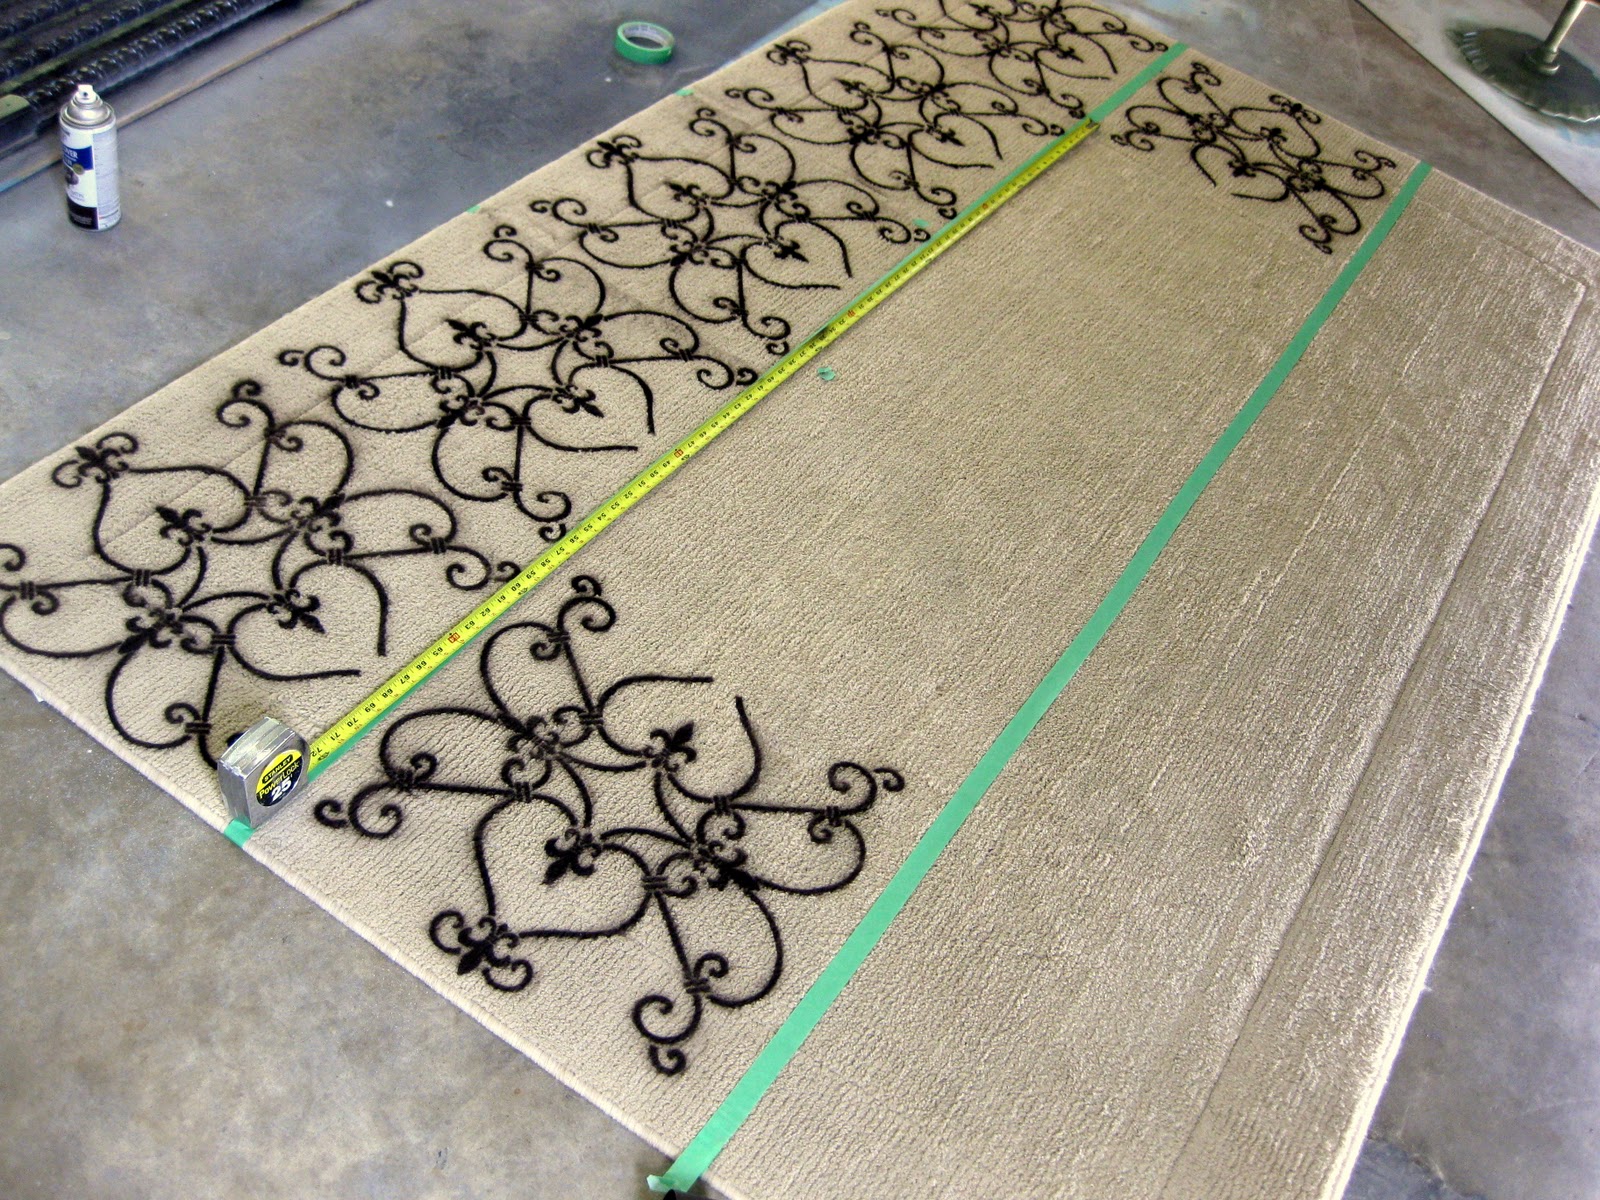
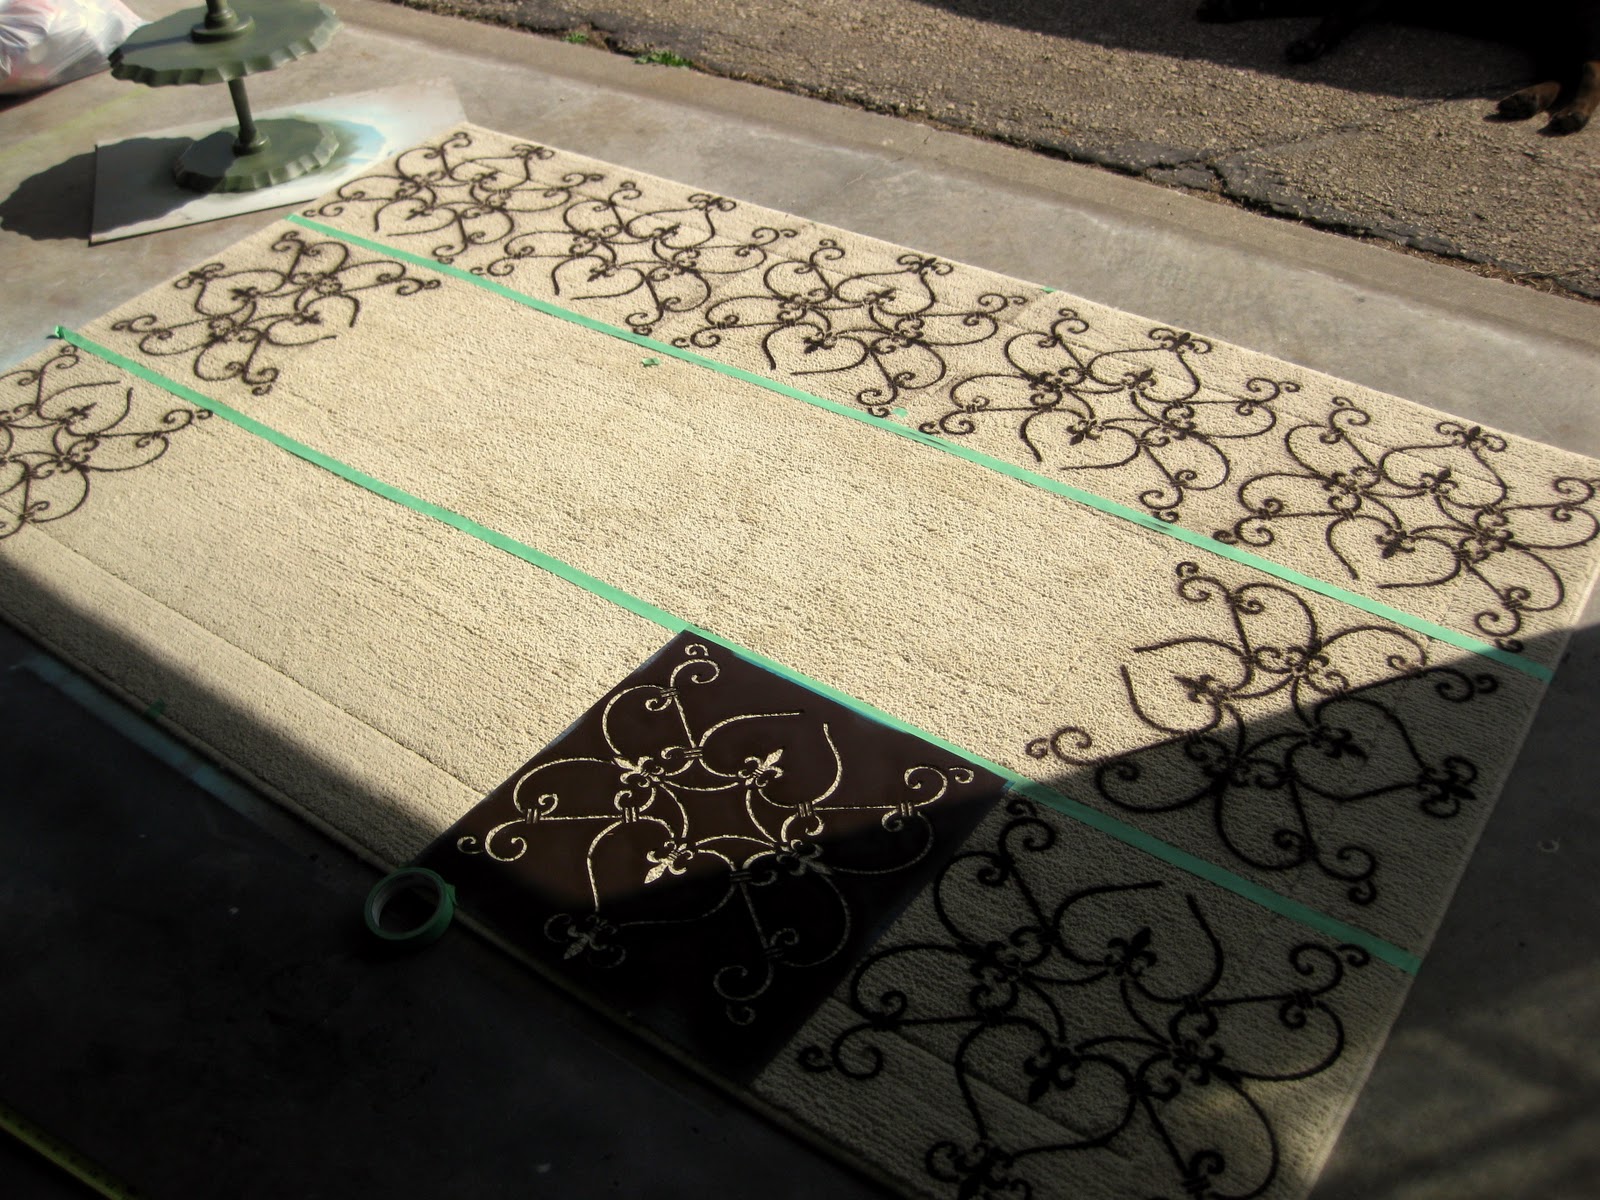
Using a large stencil we picked up at Hobby Lobby for a nursery project, I started laying out my increments. This was a stretch for me, for I’ve become very dependent on my better half and his mathematic skillz. But I found that the stencil fit across the 5′ side of the rug 3 times (with about an inch to spare… no biggie), and on the 8′ side, 5 times! It wasn’t a perfect fit on either side, but with a stencil, you have the benefit of having give on either side. Allowing a little extra room between increments, or squeezing them just a little closer together.
 Since there are to be 3 stencils on the 5′ side, I divided the rug evenly with tape going long-ways. Losing the width of the tape ended up being ok because there was some extra space when laying out the stencil 3 times. Make sense? No?

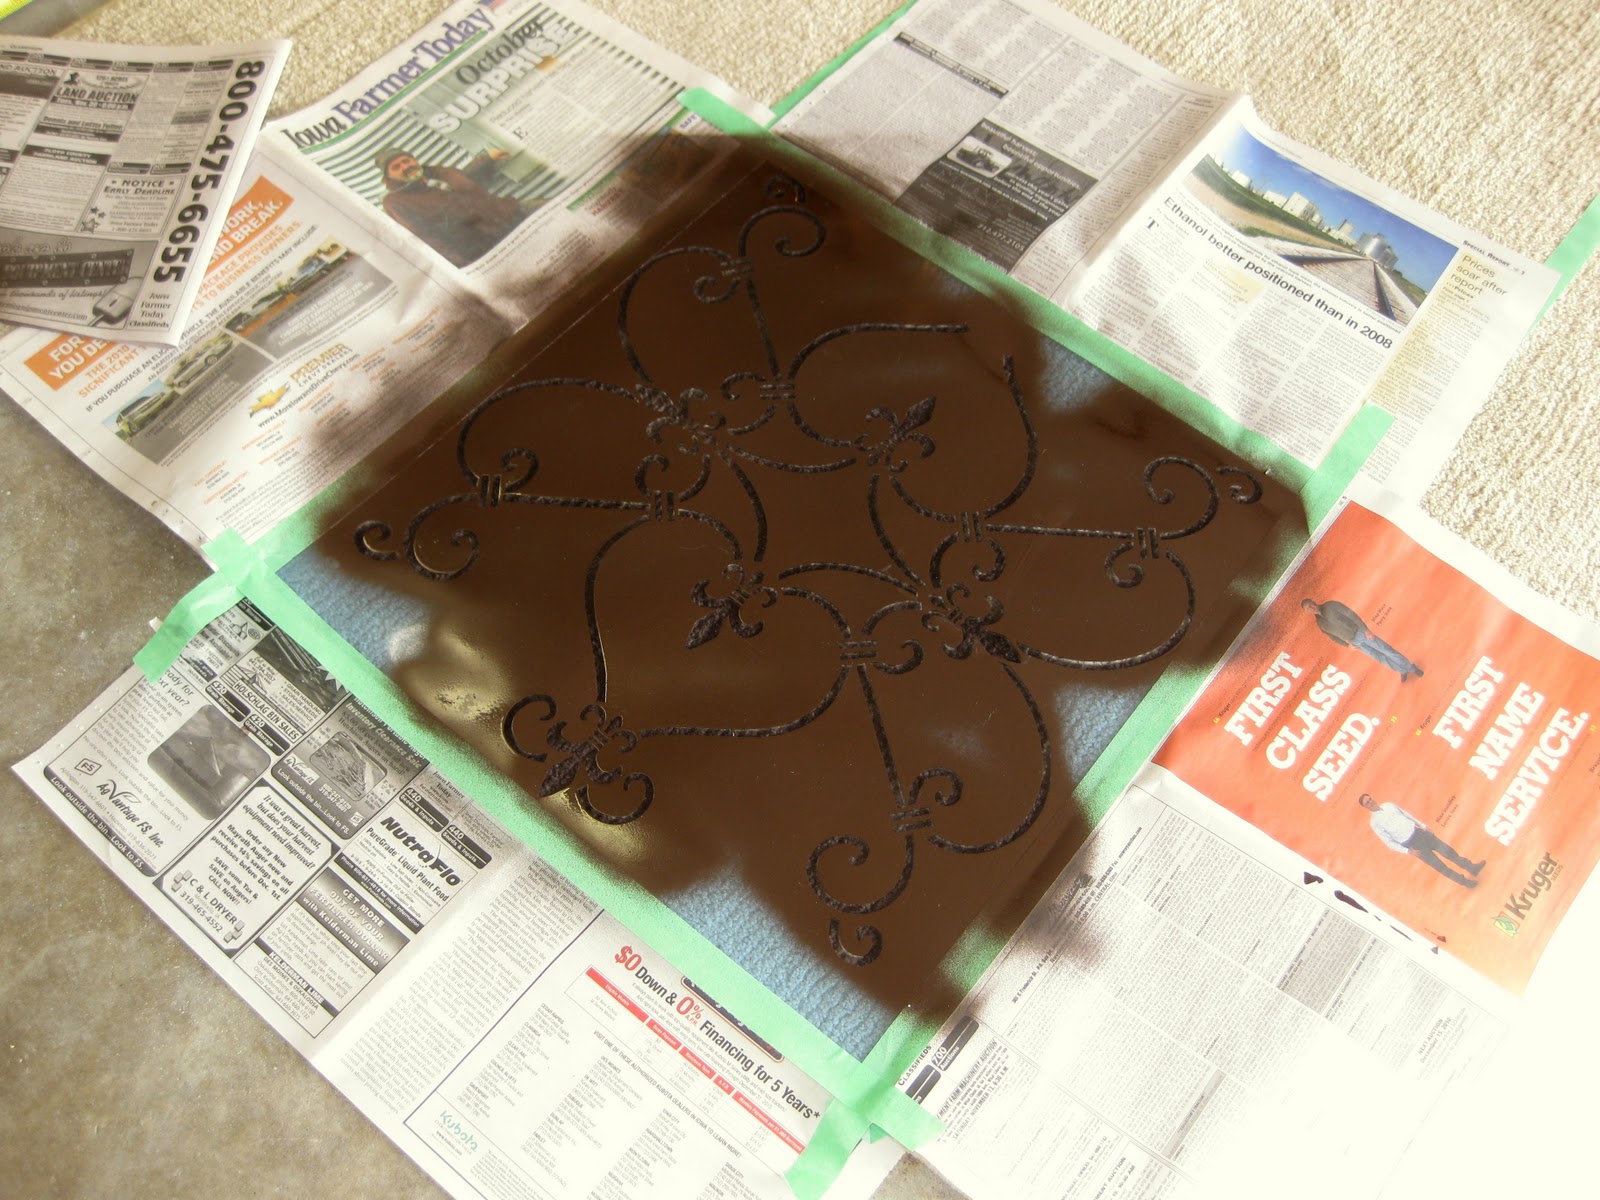
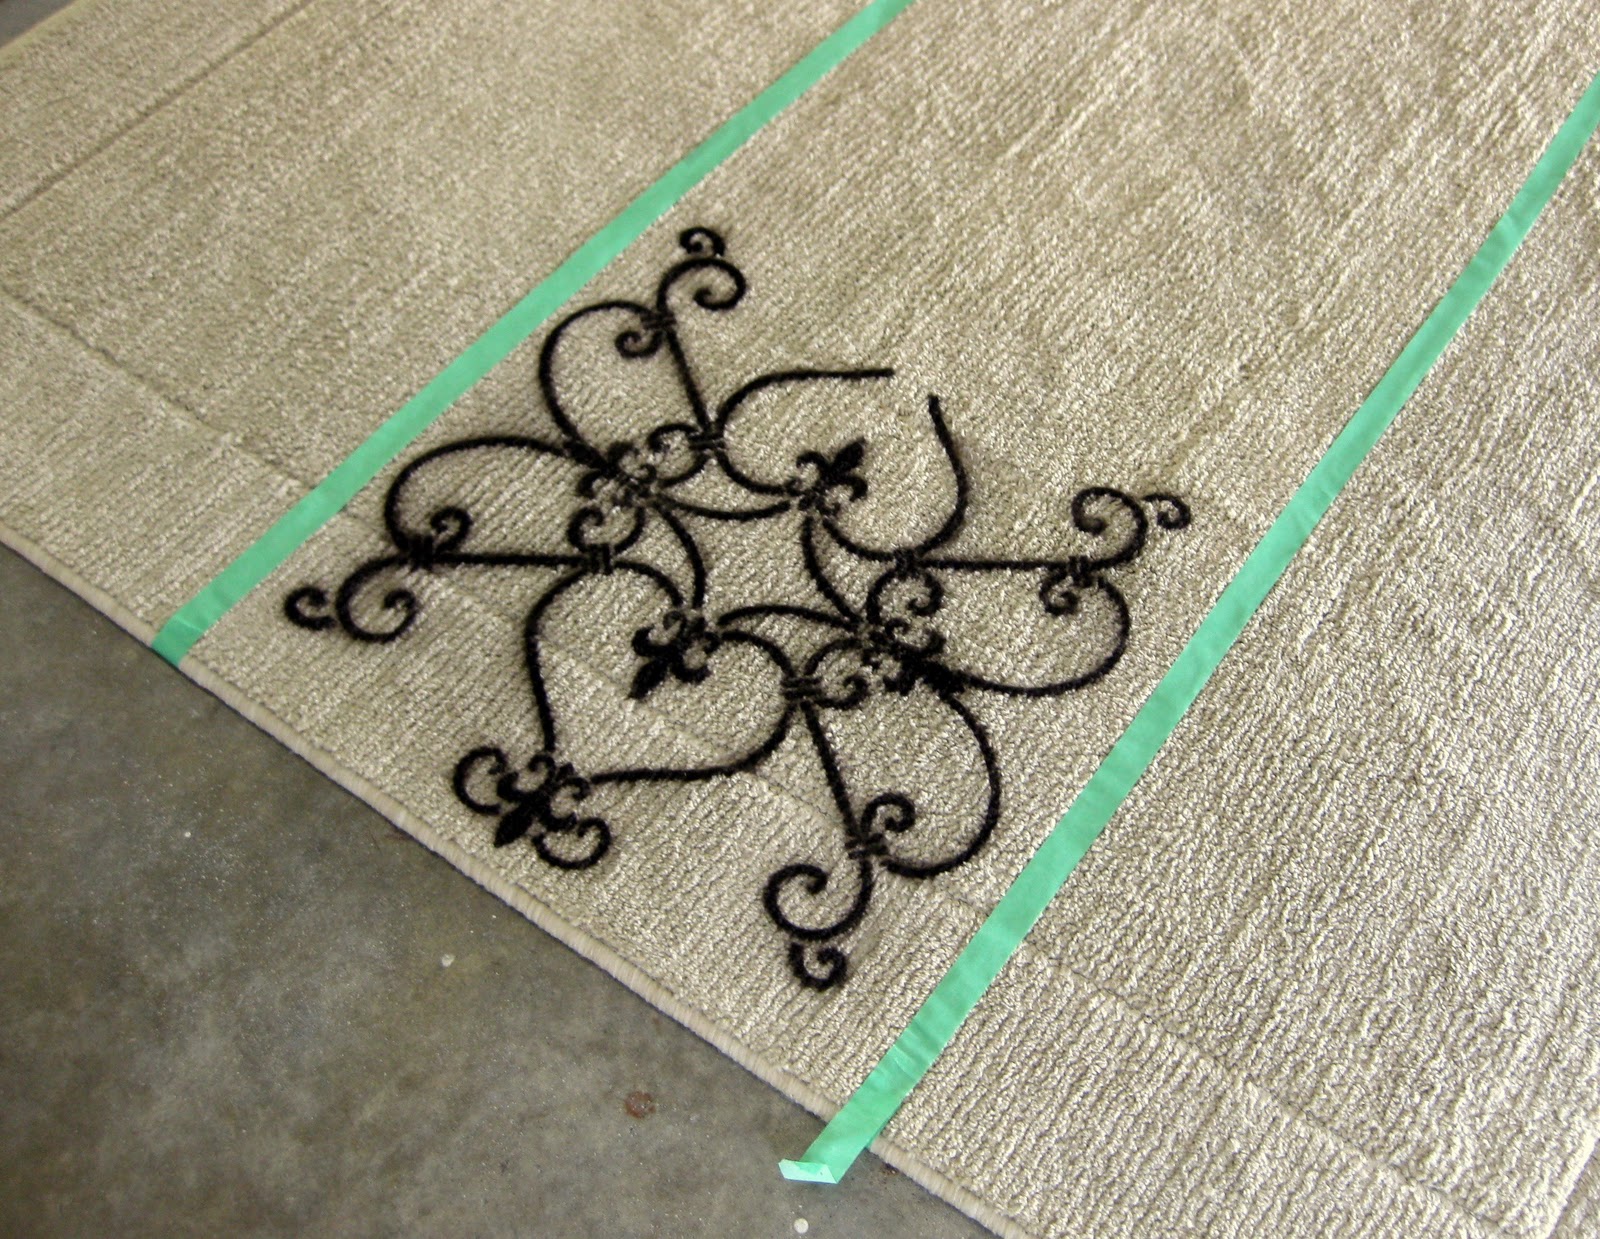
Slap on your stencil kids! I used a can of Rustoleum Satin Espresso spray paint we had lying around, but you could use any color, any brand. On the first couple, I took the time to tape and cover with newspaper, but I found that this was unnecessary, because there was almost no overspray if you’re careful. I was pleasantly surprised by how crisp the lines turned out!

Continue around the rug, being careful to use proper increments based on your measurements.
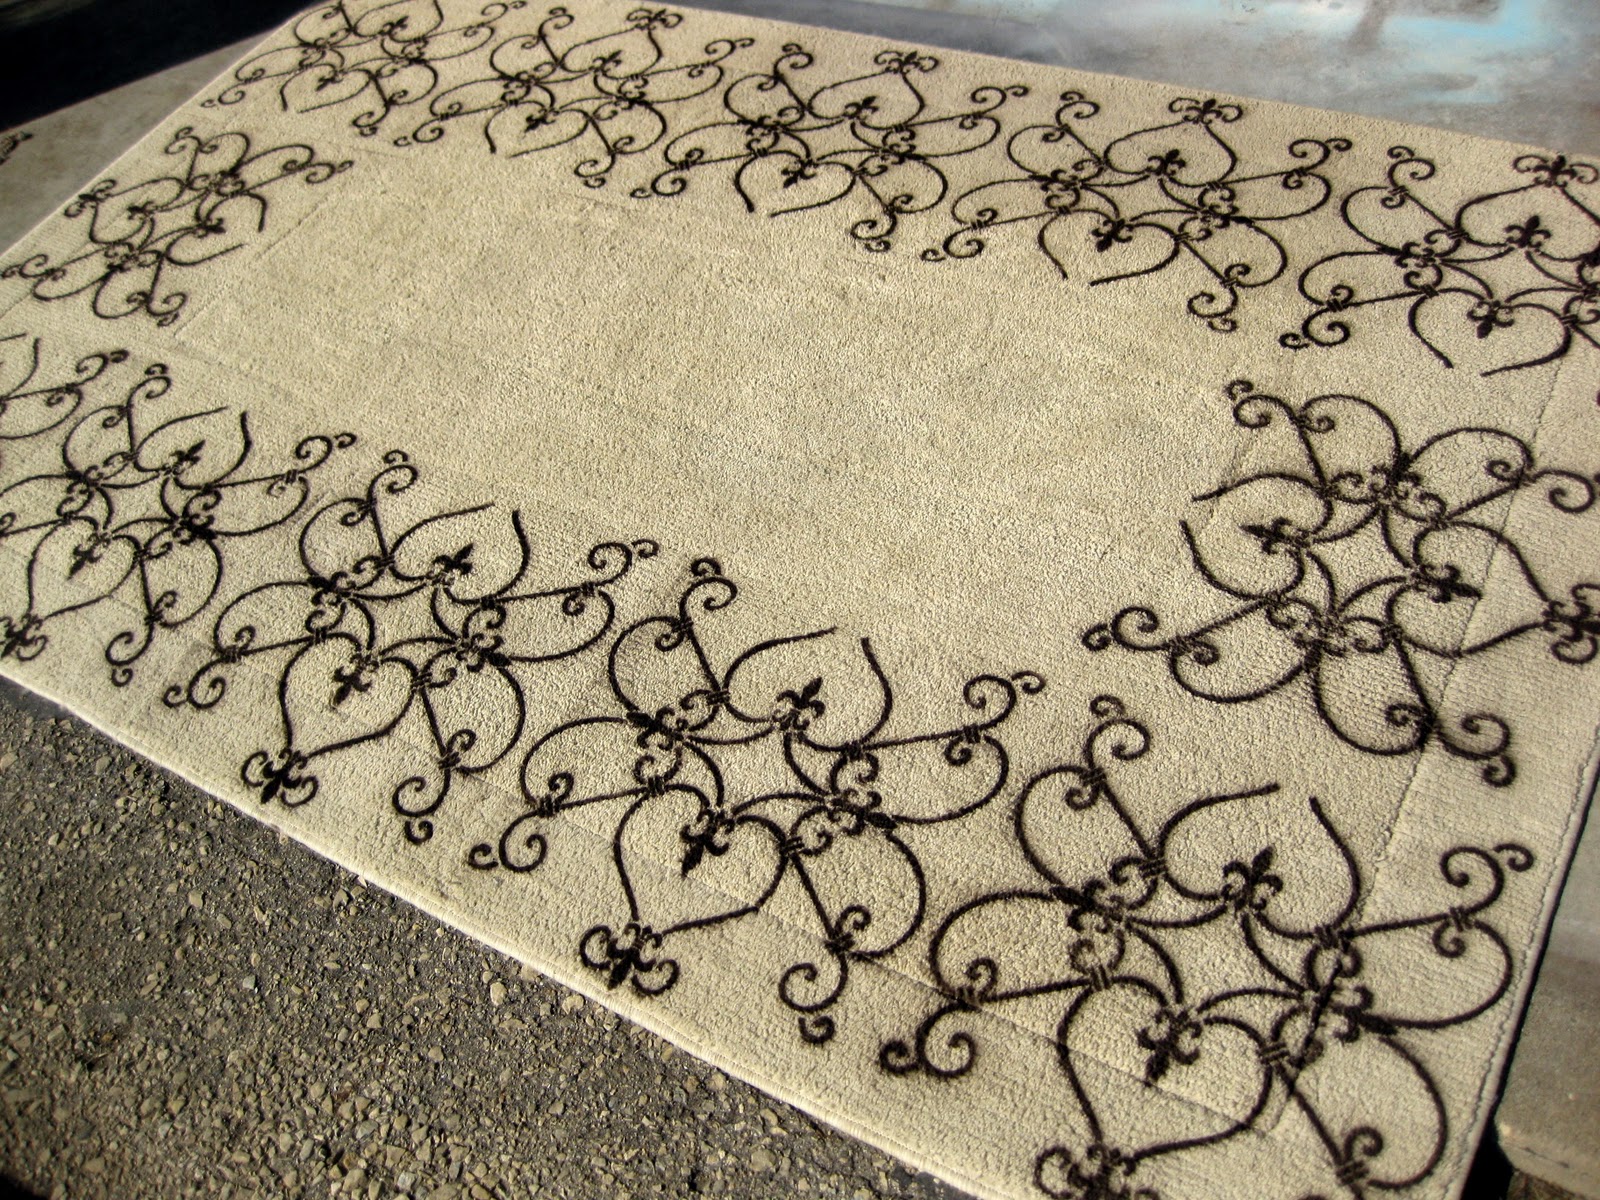
Until your DONE!!! Isn’t it sooooo much better?
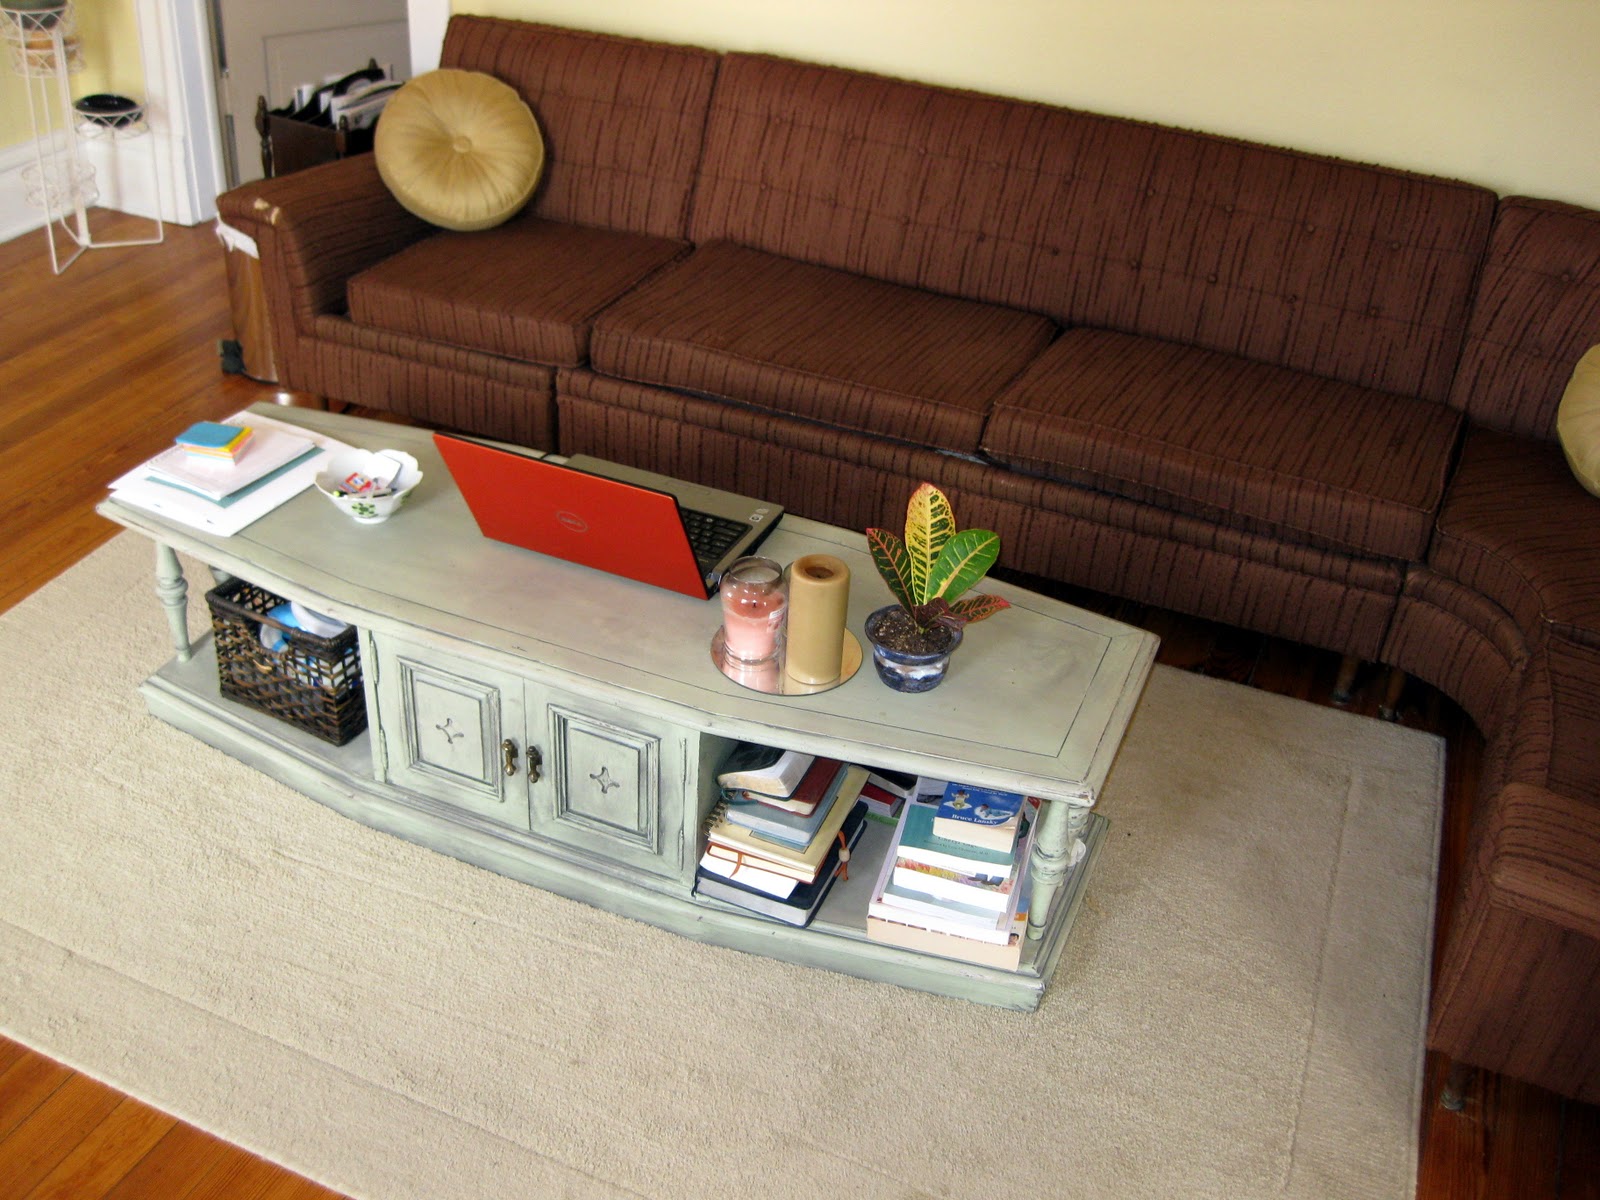
Here ’tis in our living room!
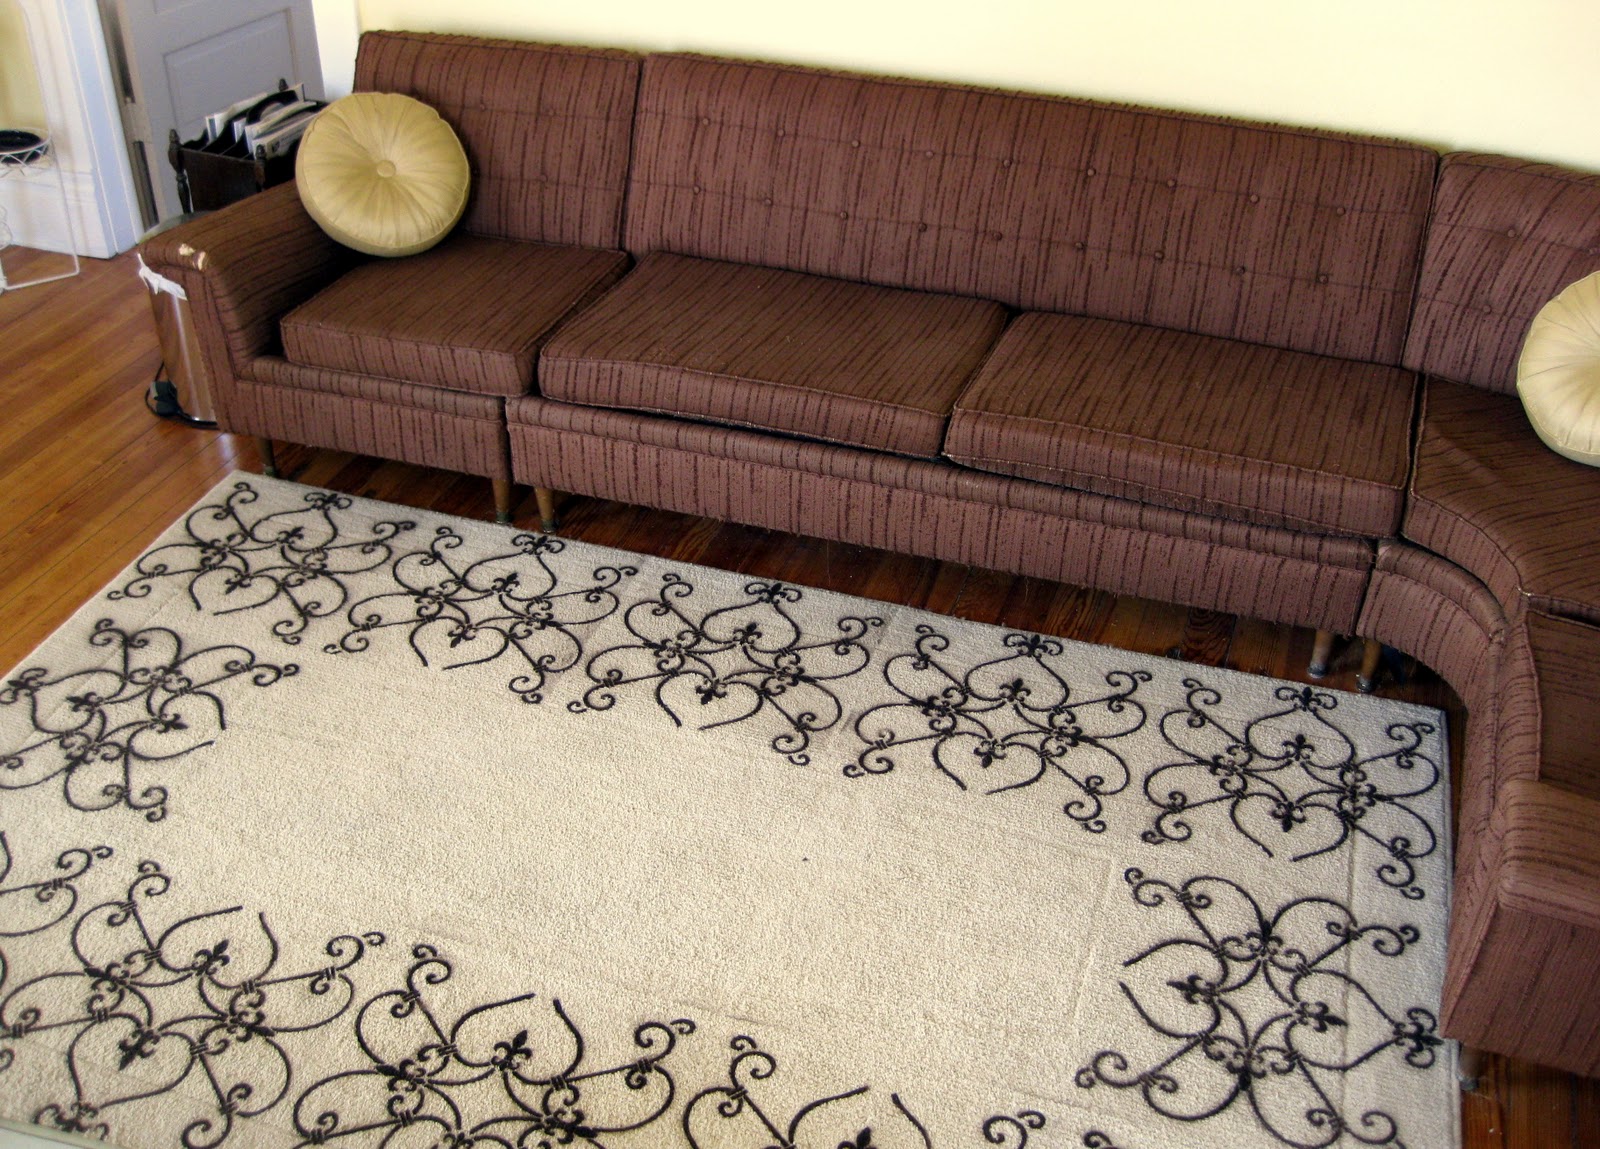
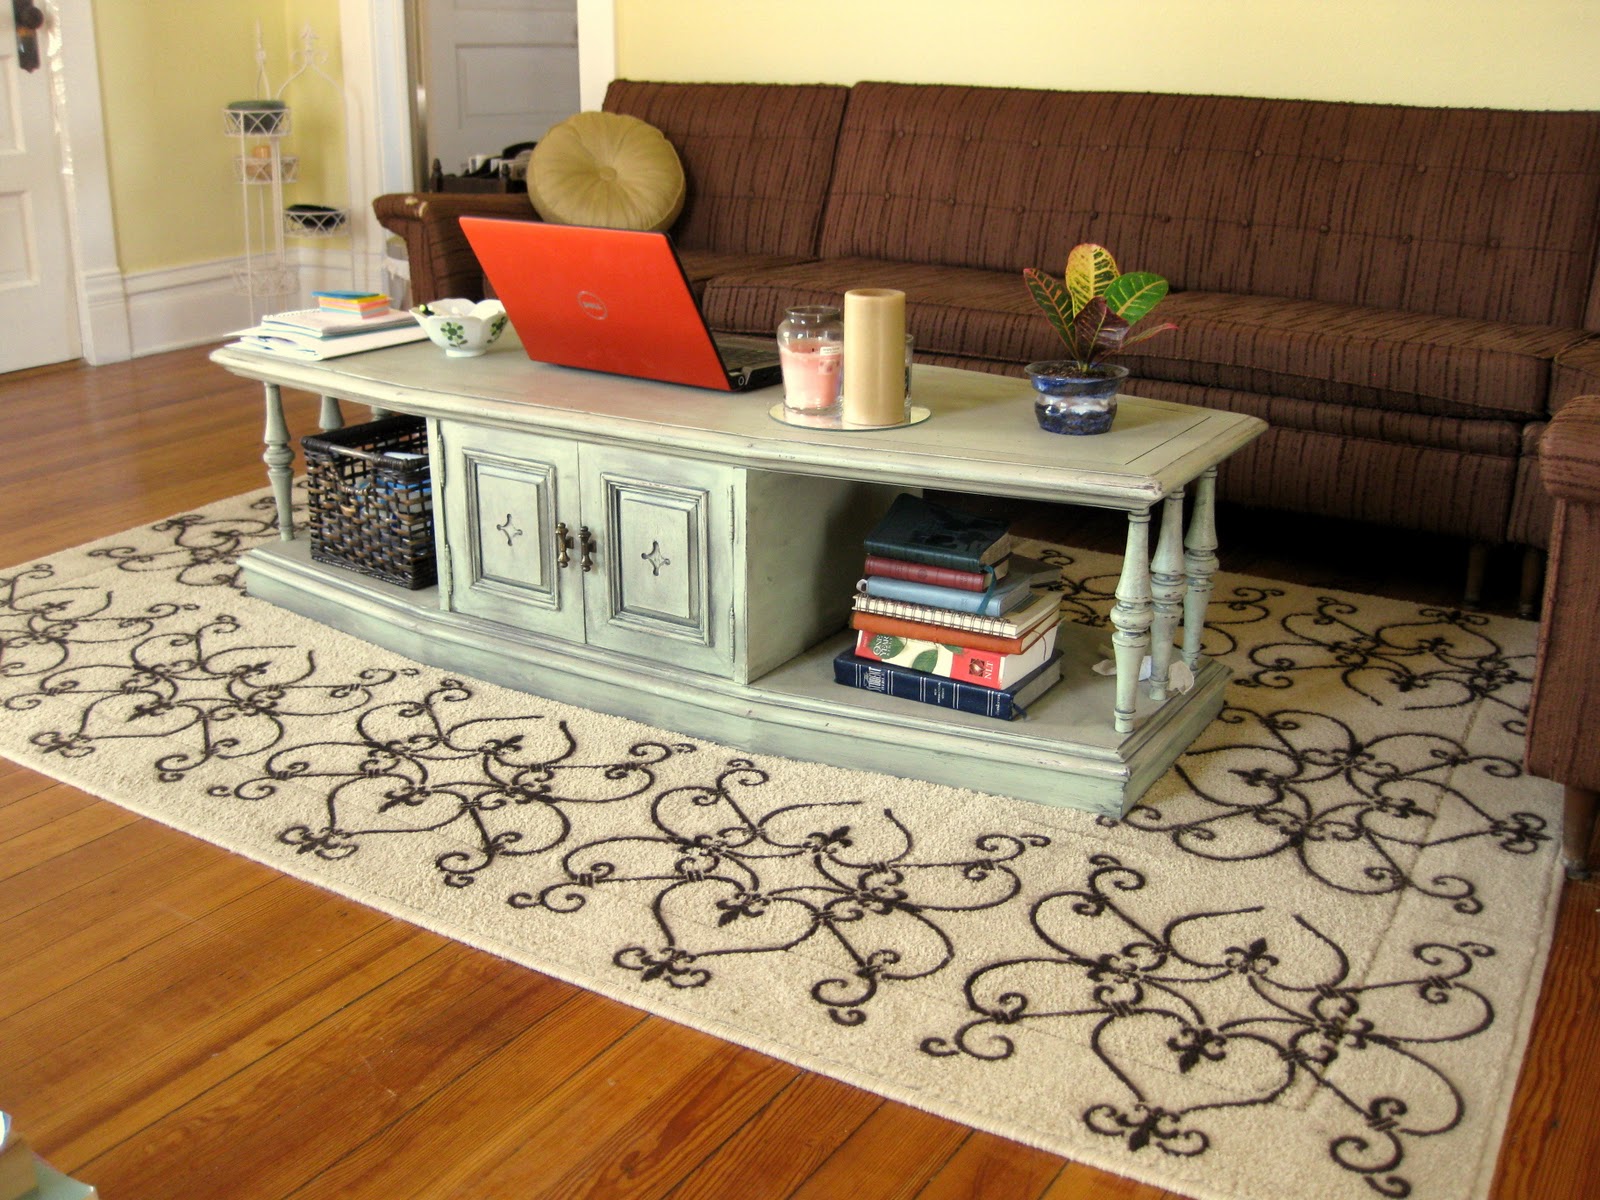
I absolutely love how it turned out. It brings texture and visual interest into our boring living area. And it’s not ‘crusty’ like you might think!! As for durability, we’ll see over time. But if it starts to wear off, I’ll just remind myself that this project cost me ZERO dollars and chalk it up as a learning experience.
UPDATE: it’s been a week now, and the rug looks exactly the same as when it was originally finished!! Crisp lines, and great color. And after being lived on and walked on, the slight crustiness has diminished completely and it’s soft and fluffy to the touch! You can feel no difference between the unpainted portions and the painted ones! Holla!!
When Nick got home from work, he loved it! And admitted that he would have been skeptical had I told him of my bizarre plans beforehand.
Have you guys ever painted something unconventional like a rug? …or curtains for that matter? Was it a victory or fail?
Small print: no babies were hurt in the making of this rug, with the help of a respirator mask and a 68 degree day. Can’t wait to meet my twin girls!
Related:
-

My kids are getting to the age where they want to tape pictures, cards, notes...…
-

I have a fun and easy building project for you! And while I do end…
-

I've been needing to figure out a solution for my overwhelming plant propagation situation for…
This is great. Do you need fabric or an oil based paimt?
I used spray paint, which is always oil based. I will tell you that we had this rug in a high traffic area, and after about 6 months, it was very faded. It was fun for a season, but if you’re wanting something that will last, don’t go this route!
If you want to wet vacuum the rug… what happens? will that paint run?
I’m not sure, but in theory it should be fine since the paint is oil-based.
I LOVE your Rug! i was in same boat, kept looking and looking for a rug every where! So spring 2014 i saw a pinterest post on painting a canvas to use as a rug n i started digging for other tutorials on rug painting…. I hand cut my stencil from cardboard and hand painted after drawling in sections my design. cost me 30 bucks for the rug and tester house paint pots and 1 quart of my main color so 50 for whole project!! way better than 100++++ lol great job!
Way to be resourceful! I love that!
I love that Charlene! Way to be resourceful!
I just finished painting a rug today, with a foam roller, latex paint, and foam brushes; the problem is, it came out very stiff. Not something I want to walk over at all. How is the texture of your painted rug? Is there a difference in using spray paint, as opposed to latex?
Yes latex makes fabric and rugs very crusty and ‘plastic-y’. Spray paint gives a nice soft feel. But it did start to fade after about a year of heavy use.
I have done something similar! I used a decorative rubber outdoor mat as a stamp. It turned out pretty great.
Oooo! That’s a genius idea!!
I decided I wanted to make a wall hanging to match a pretty box I had, so I bought some muslin! I wanted it to resemble canvas! Anyway, I used stencils, but I did sponge paint it. I taped the stencils down, as well so they wouldn’t move on me. To give it a stronger feel, I cover painted the whole piece which is 4×6 feet. First I did the borders just using a yardstick and then placed the stencil patterns inside of the borders.
I think it turned out nicely. I bought a dowel and painted it black and then a couple of tassels and it hangs today!
Jane
I love this stencil but wasn’t able to find one like it. Is there any way you could take a pic of it and post that…so I can make my own…??? Thanks in advance!
I am SO doing this one…right up my alley…wow!
Bethany,
I happened to see your blog just yesterday from some link and got a chance to read about your life/babies and your spirit above all.
You are so smart in your work and I loved all your furniture painting and stenciling on the chests.
Your girls are also absolutely adorable.
God bless you and your family……..loved reading your blogs.
Luv.
SM
You are SO SWEET! Thank you for taking the time to leave such a nice comment.
I love the rug sooo much.I want to try the paint for my couch.I have been looking at paint for upholstery,do you think it has to be that kind?
I would definitely use a fabric or upholstery paint. The spray paint we used looked good for awhile, but it definitely faded over time.
I love how your rug turned out although it was a very risky venture to begin with. I was toying with the idea of painting our Walmart rug with a nice border to revive it and then I came across your post and got a huge burst of inspiration. I did it yesterday, sadly my project was nowhere as good as yours and I decided that spray painting on stencil is only for the expert hands. Some of the problems I had:
1.I used my own stencil made from a plastic folder, the edges in the design started curving in after about half the rug was done. This became so messy and towards the end of the border my design (which was very crisp to begin with) cameout very blotchy. Was I doing something wrong?
2. The spray paint vapors were driving me crazy although I was wearing a mask.
Having said that, I also loved the fact that it was done quickly and dried in no time. But overall, I am gonna stick to the brush for stenciling I guess.
I’m sorry that you’re didn’t turn out as well! I’m guessing that the reason your stencil corners started curling up is because of the homemade stencil. The solvents in the spray paint eat away at the plastic…. we’ve had similar problems with our homemade stencils when using spray paint. On this particular project, we used a stencil purchased from Hobby Lobby, and it must have some solvent-resistant qualities, because it held up quite nicely.
As for the fumes, this project is best done outdoors so you don’t get yourself all high in the process. I also had a pretty hefty respirator mask on (because I was pregnant) and couldn’t smell a thing. They’re only about $20 if you want to invest in one for next time.
Thanks for your input! That explains a lot about the stencil cause the one you used was store bought and it retained its shape till the end. I tried stenciling with a brush on canvas last night and it came out soooooo beautiful. I am in love with stenciling now…..thanks to you and brooke from Allthingsthrifty.
I think I’ll try the spray paint again on some other project, got a whole can of it left that I can use with your advice now.
Awesome idea!! Been looking for a rug to go beneath kitchen table but anything pretty is too expensive so definitely going to try this. I did make some cafe curtains last summer for my window over kitchen sink. I stenciled white over a tan linen fabric and i love them and they were so easy. Jist wish i knew how to add a pic so you could see them. Thanks for the idea and howto!!
Jaci, we only used spraypaint because we were using a stencil. Since you’re painting a larger surface area, I would recommend using fabric paints and working them deep into the fibers. This should make your rug less crunchy, and less likely to fade. Check out this post from Kara Pasley http://karapaslaydesigns.blogspot.com/2012/01/diy-painted-starburst-rug.html
Good luck! Send us pics when you’re done!!
I’m planning on painting a cow print rug for my boys bedroom…do u think the crusty feeling will be worse on larger portions or still wear away ok?
I’ve heard of people doing this same thing to canvas rugs or concrete floors in the basement or patio and have it work out great. Wouldn’t think it would work as well on a rug with a thick pile, so keep us posted about how long the pattern lasts.
WoW! This is a beautiful outcome of a scary project!! I’m getting ready to do something similar. My sister gave me two beautiful rugs that match my shabby chic decor to a “t”. One problem…I have two 701b. aussies! And I take them hiking in the mornings and they have all day access to the back yard even when I’m at work, rain or shine. WELLLLL…needless to say, in ONE day these beautiful pastel cotton rugs were already footprinted. Before she gave them to me, I had planned to paint some canvas floorcloths to cover my newly done floors SO, I’ve decided to Polyurethane my rugs! Yes! It’s ok if they’re hard because I want to be able to mop them off. We’ll see what happens. ANYBODY with sugesstions, PLEASE offer them. Thanks.
I painted a cream color chair, a dark brown with acrilic paint mixed with water. Totally worked
Cate! Let me know how your rug turns out! I’d love to see pictures!
love this idea, i want to use it to recreate this type of look!!
http://images.lowes.com/product/converted/748679/748679288359xl.jpg
thanks!!!!
Great job…I have that stencil..this looks great! Thanks for sharing
i found you through better after also. i love what you did with that rug….so creative. and i love your pregnancy announcement video. it brought me to tears….. how did your family react when they saw it?
i love all of the great projects you have done in your house…i’ll be watching for updates on the girls!!
hugs, cindy
Looks so cool now..Here from Better After and your rug is definitely Better After!
Amazing transformation…LOVE this!
here from BA, I love this and I really love that you used spray paint! Girl after my own spray painting heart 🙂
Visiting from Better After….LOVE your rug and your blog name is just fabulous!
How brave are you?! It looks great!
Saw your rug on Better After. I love it! Thanks for sharing the how-to. This is definitely going in my try-it-someday file.
Fantastic!! I absolutely love it!
Found you on Better After. Great job. Btw, where did you get your couch? I love it!! And the rug…
Stephanie from http://www.ThePowers-thatBe.blogspot.com
Cool rug! Found you on Better After. Great job!
Beautiful! What a great new look, and I love the pricetag.
I love this!!! I’m gonna have to do the same things as you… not talk about this project until AFTER it’s done then see what he thinks. 😉
I love this!!! I’m gonna have to do the same things as you… not talk about this project until AFTER it’s done then see what he thinks. 😉
I just saw your project on the Paint Ideas facebook page – I love it!! I would not have thought to use spray paint on carpet, but it turned out so great! Maybe I’ll try this on our blah carpets in the basements tv/play room! =)
~ Mara @ Super Savings
I just saw your project on the Paint Ideas facebook page – I love it!! I would not have thought to use spray paint on carpet, but it turned out so great! Maybe I’ll try this on our blah carpets in the basements tv/play room! =)
~ Mara @ Super Savings
i envy your talent!
i envy your talent!
Beth, this project looks amazing! So creative and such a cool finished look. Thank you so much for using Rust-Oleum and keep up the great work on all your projects.
We like it so much, we’re going to post it as our project of the day over on our Paint Ideas Facebook page tomorrow.
facebook.com/paintideas
– Rust-Oleum Scott
Not yet, but I’m trying to muster the courage to try something like this: http://generalsplendour.blogspot.com/2011/02/ambush-makeover-my-formica-countertops.html
Not yet, but I’m trying to muster the courage to try something like this: http://generalsplendour.blogspot.com/2011/02/ambush-makeover-my-formica-countertops.html
A-ma-zing.
A-ma-zing.
I’m definitely a fan!
I’m definitely a fan!
that is awesome,looks like you bought it that way and didn’t paint it. i stenciled my kids shower curtain, and it turned out great.
Beth you should be proud of yourself and keep up your healthy productive lifestyle.
Beth you should be proud of yourself and keep up your healthy productive lifestyle.
I LOVE the rug makeover! It is totally fantastic. I don’t like rugs and I would use that one.
I LOVE the rug makeover! It is totally fantastic. I don’t like rugs and I would use that one.
Gosh Beth!!! You are SOOOOOO stinkin smart and amazing and SOOO talented. YOu make my blog look BLAH!!! I think you need to give me some of your inspiration. Luv ya.
Deborah
Gosh Beth!!! You are SOOOOOO stinkin smart and amazing and SOOO talented. YOu make my blog look BLAH!!! I think you need to give me some of your inspiration. Luv ya.
Deborah