I have to admit, between the ‘renovations’ we’re doing at the new house, and the updates we’re making at the old house to get it ready to put on the market, I’m finding it hard to find time to sit down and actually WRITE A DARN BLOG POST about the things that are being accomplished.
Also, that was a run-on sentence. But I keep reading it to try and figure out how to divide it up, and I just can’t. 🙂
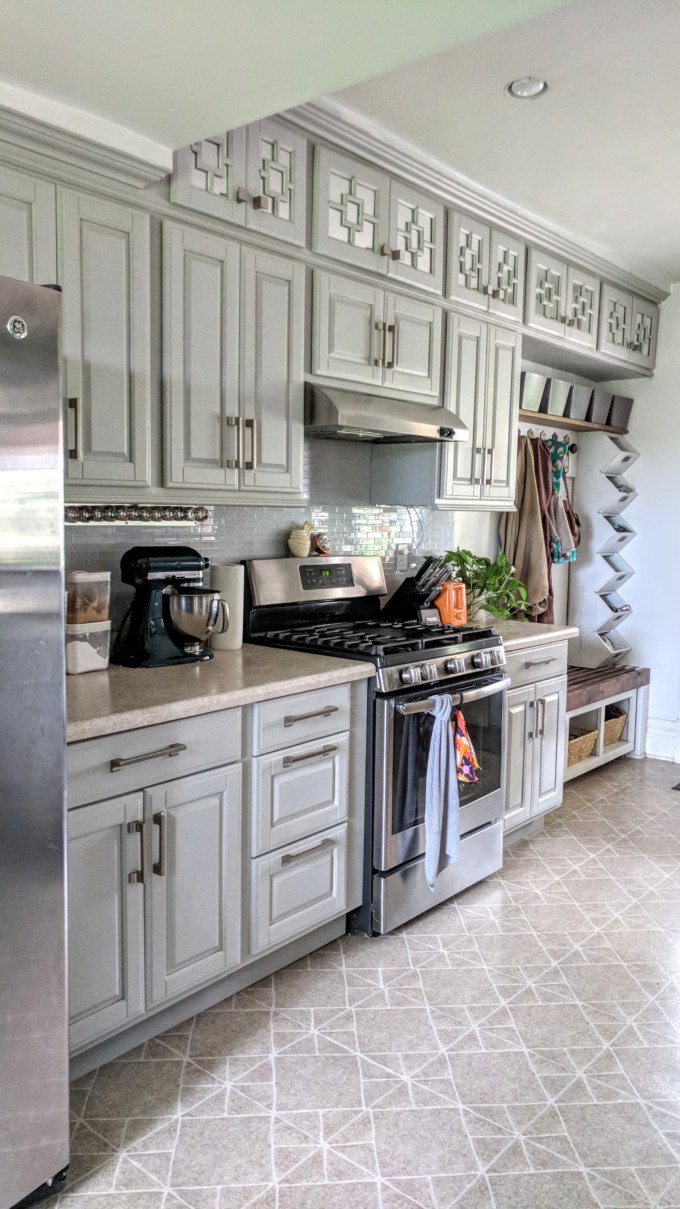
Talk to me about this kitchen.
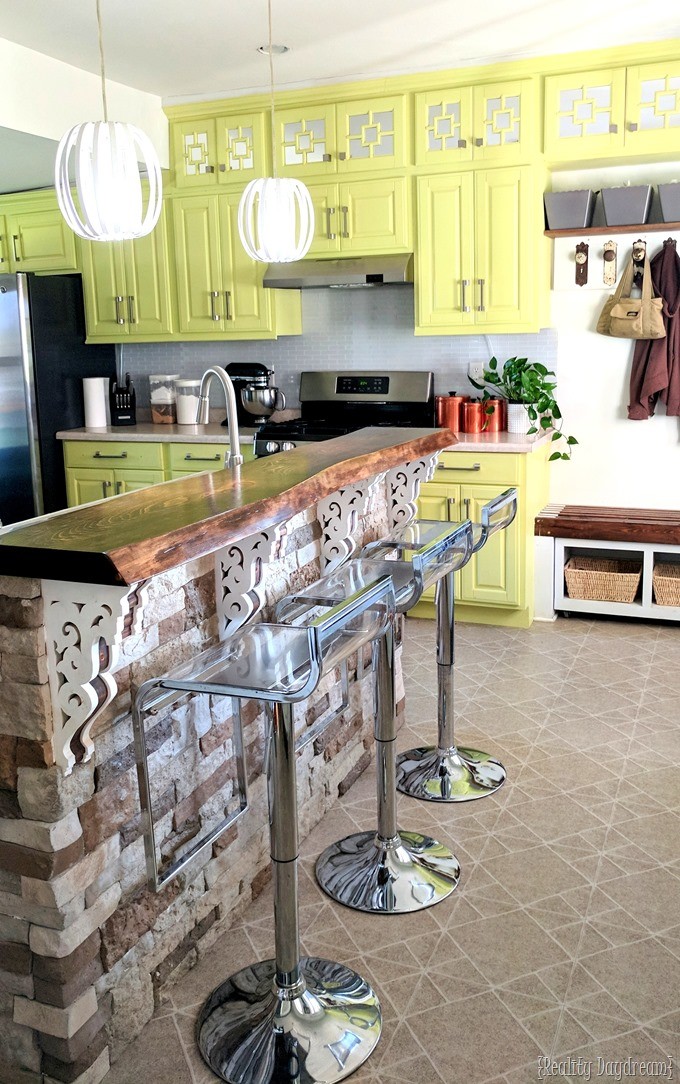
You know I love taking risks in my home decor, and I’ve loved these chartreuse kitchen cabinets over the years. But ever since we bought the new house, I knew the clock was ticking on this cabinet color.

I’ve never apologized about this obnoxious choice. But I know that having a light and bright (read: NEUTRAL) kitchen is important to a lot of folks that are in the market for a new house. And I don’t want the kitchen to be a bad first impression for people, since the main entrance goes right into the kitchen.

We thought the kitchen at our new house would be built by now, but things have been slow moving (TO SAY THE LEAST). We didn’t expect to have to carry two mortgages for this long. And we need to get this sucker on the market!
So last Friday, I got out my impact driver while Nick was at work, and I JUST STARTED. I took off all the pulls first, and then the doors and hinges.

But before we jump right into this process, I want to acknowledge that painting your kitchen cabinets seems like an enormous and daunting task. Even for a seasoned DIYer like myself that has been around the block with painting kitchen cabinets. I’ve been dreading it and putting it off for months.
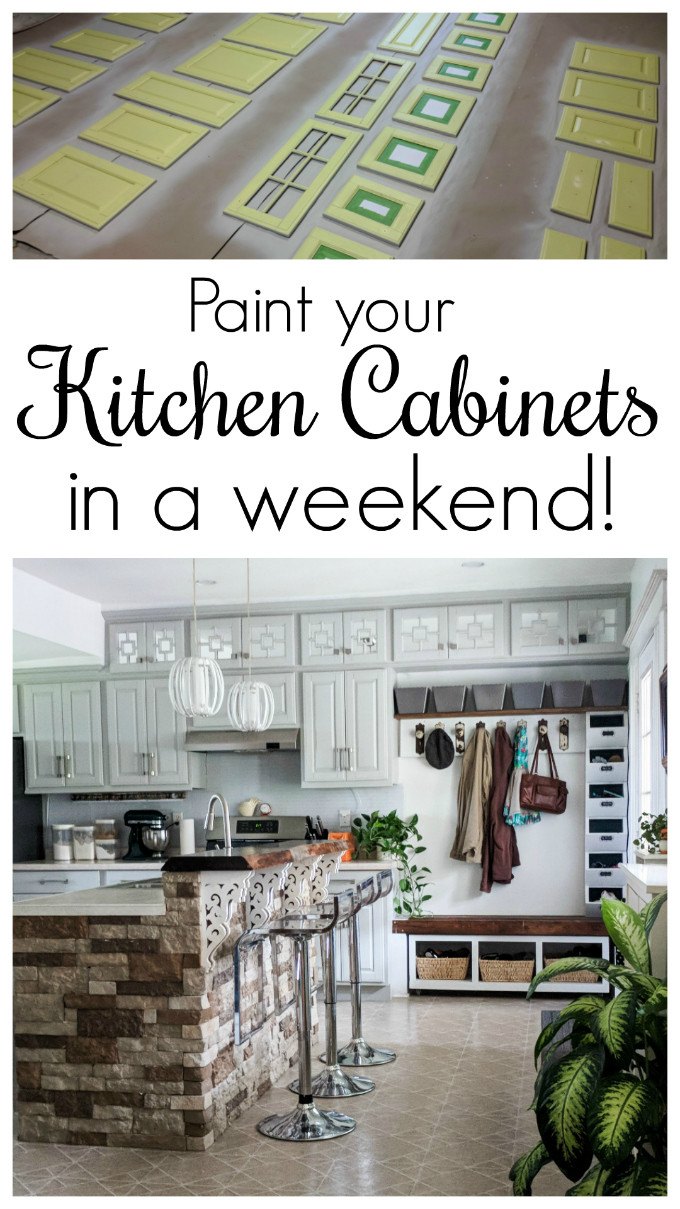
And finally, I took my own advice and JUST DID THE THING! I printed out my own motivational checklist, and knocked this project out in a weekend. And you can paint your kitchen cabinets in a weekend too!
 *This post is sponsored by DAP. Thanks for supporting the fabulous brands that make Reality Daydream possible! This post contains affiliate links*
There’s just something about thinking through the actual steps of the project and tools/supplies needed to accomplish that helps me feel so much more prepared and mentally organized to tackle a project. And I give this method all the credit for us pulling off this project in a weekend (with small children in tow I might add).
So let’s break down this project of
PAINTING YOUR KITCHEN CABINETS!
1. Gather your thoughts and your supplies
Oh yeah, we just discussed this.
FRIDAY NIGHT
2. Remove cabinet pulls, doors/drawer fronts, and hinges
In that order too! And I recommend putting all the pulls and their corresponding screws in a gallon ziplock baggie together. And the hinges with their screws in their own bag as well… just to keep everything together and organized.
Additionally, as you’re taking down doors, use a pencil to number the doors in an inconspicuous corner on the back side of each door and drawer, and the same number just inside the cabinet that the door or drawer goes on. This will save you a ton of time when you go to put the kitchen back together!

FIRST THING SATURDAY MORNING
3. Scrub those doors and drawers
If you’re like me, your doors and drawers have actual visible chunks of nasties on them. But even if you’re not like me and yours look relatively clean, THEY’RE NOT. They’re greasy from food, and they’re greasy from your hands touching them. And paint doesn’t stick to grease.
We hauled our stack out to the patio with a bucket of hot soapy (dishsoap) water and a bucket of clean water, and started scrubbing! Using these scrubbie pads is a good choice. Wipe down every inch of them with soapy water, but give special attention to places where you know hands have touched them regularly, like around the hardware/handles. You’ll also want to spend extra time on cabinets that might have been above the stove top.
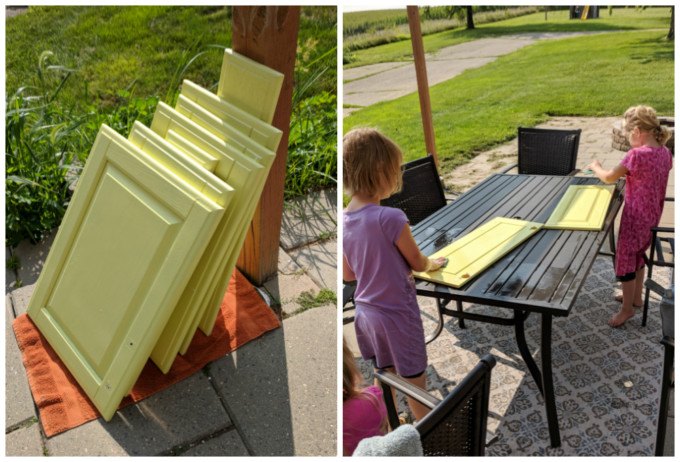
Feel free to recruit tiny helpers for this task. You can’t mess this part up! I washed, and they rinsed with the clean water. Then we dried them with a towel.
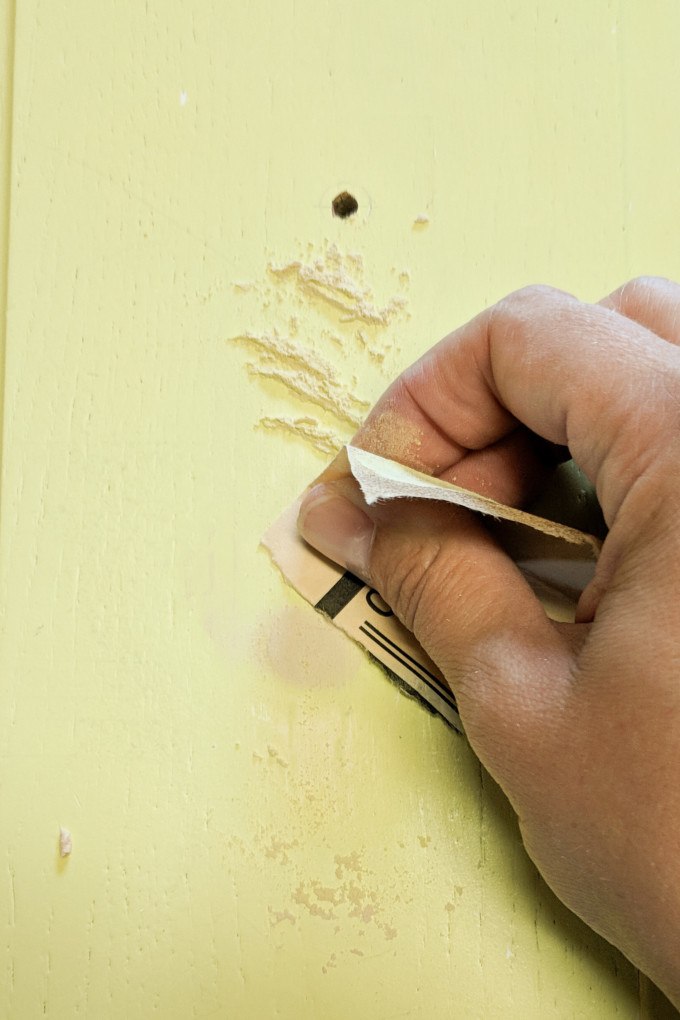
4. Fill Holes and Cracks
I’m embarrassed to even say this, but I never fixed the old hardware holes from before we upgraded our hardware. If you look closely at the pics at the beginning of this post, you can see holes centered on the drawers. #facepalm
And even though we’re painting this kitchen essentially for someone else, I wanted to do the job right and not cut any corners. So I whipped out my favorite wood putty (by DAP!) and started wiping it into the holes and pushing it in with a putty knife.
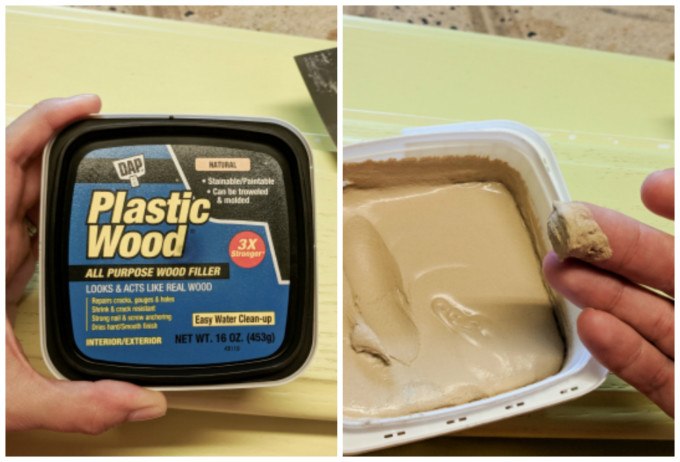
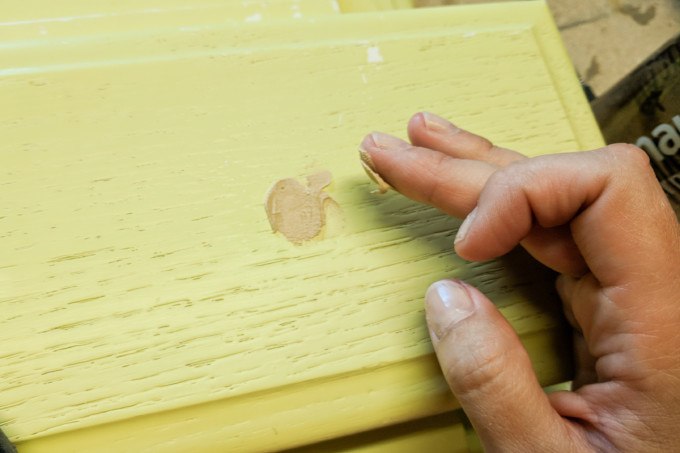
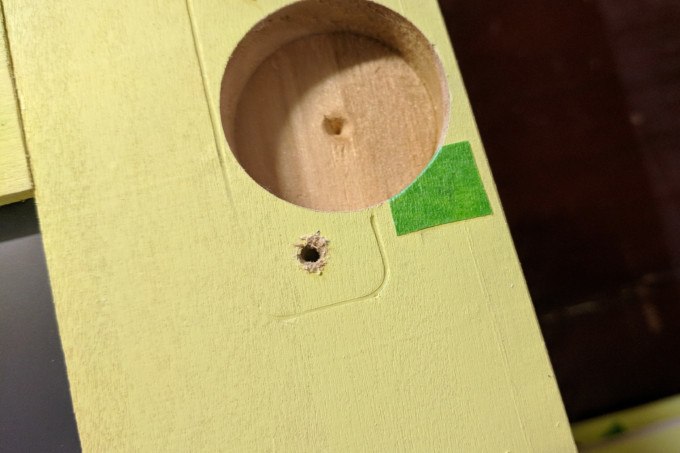
The thing I love about this stuff is that you pop open the lid and it’s ready to use. No mixing components or smelly fumes. And it’s so easy to work with! Make sure you glob it on pretty thick so that you can’t see the hole or crack anymore. Then when it’s dry, sand away! Dell and I just hand-sanded with a little piece of sandpaper, and we were done in about 30 seconds.
LIKE IT WAS NEVER THERE!
If your cabinets are a wood finish that you’re wanting to paint, OR if they were previously painted with a glossy sheen of paint, you do need to sand them. This doesn’t have to be as grueling as you might think. All you’re doing is roughing them up a bit and taking the sheen off the finish so that the prime and paint has something to really grab onto. It will prevent chipping over time, and will make your cabinets durable! To make this task quick and easy, use an orbital sander. They’re super inexpensive! Here’s the one we have.
Since our cabinets were previously painted in a satin finish, we were able to omit this step.
5. Prime
But before you do, put a little piece of painters tape over the number you put on each door so it won’t get covered with paint!
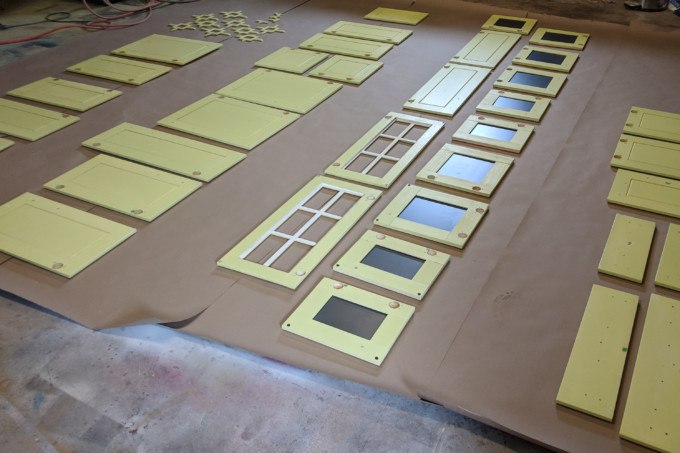
Clear out your garage, and roll out strips of brown paper to protect the ground below from getting painted. When you’re laying out your cabinet doors and drawers, put them UPSIDE DOWN. You want to paint the back first! And make sure you leave yourself rows where you can walk!
If your cabinets fit the criteria for not needing to be sanded (see Step 4), then you can also skip priming!
We didn’t prime this time since our cabinets were previously painted a dull sheen. But if you do need to prime, use this stuff and use your paint gun according to the painting instructions below, sanding lightly afterwards. One light coat on each side is enough.
6. Mix your paint
After lots of research, we decided to go with Sherwin Williams Pro Classic paint in the satin sheen (color: Silverplate). We love it’s durability properties and super soft/perfect finish. But before dumping this stuff into our paint gun, we did a little mixology. You want about 4 parts paint, 1 part water, 1 part Flotrol (which is an additive that magically helps the paint settle and dry smooth without any orange peel texture or brush strokes).
PICTURE
7. Paint!
Let’s chat about paint guns.
We’ve used a TON of different brands, but our current favorite for this type of application is this Fuji Paint Gun. If you don’t have an air compressor, don’t go buy one just for this. Fuji has a < rel=”nofollow”a href=”https://amzn.to/2BO4VAf” target=”_blank” rel=”noopener”>paint gun that comes with it’s own air compressor for wayyyyy less than what you’d pay for both. Or this one that is even more cost effective.

Our goal was to get the first coat of paint on before dinner, to allow 4 hours to dry between coats. That way we could put a second coat on before going to bed and allow it to dry overnight before flipping over. There are so many things to think about when painting your kitchen cabinets!
SUNDAY
8. Flip and paint again
Since you let the backs off the cabinets dry overnight, you can feel comfortable flipping them over to paint the fronts. But even if a crumb sticks to a tacky spot on the back, AT LEAST IT’S THE BACK, right?!

Two coats, four hours apart, and you’re GOLDEN! Or in this case, Silverplate gray.
7. Tape off and paint the cabinet boxes
Meanwhile, between coats on the doors and drawers, you can paint those cabinet boxes! There were a few places I needed to tape off. Like around the backsplash above the stove, and around the corner cabinets and floor.

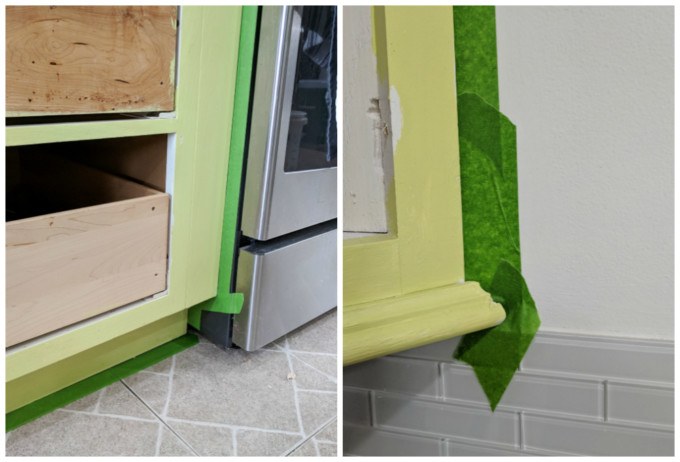
Nothing fancy here, I just brushed on the paint. And since this paint had the Floetrol added, it self-leveled and dried perfectly without any brush strokes. And once again, this took two coats.

8. Put everything back up!
How are you feeling about painting your kitchen cabinets?!
Even though the can says the paint is dry after 4 hours, we let the final coat dry for at least 24 hours before putting everything back together. Avoid stacking the cabinets when you bring them into the house, because they’re prone to scratches these first couple weeks!
Nick got all the cabinets up, and I came in and put all the hardware on.
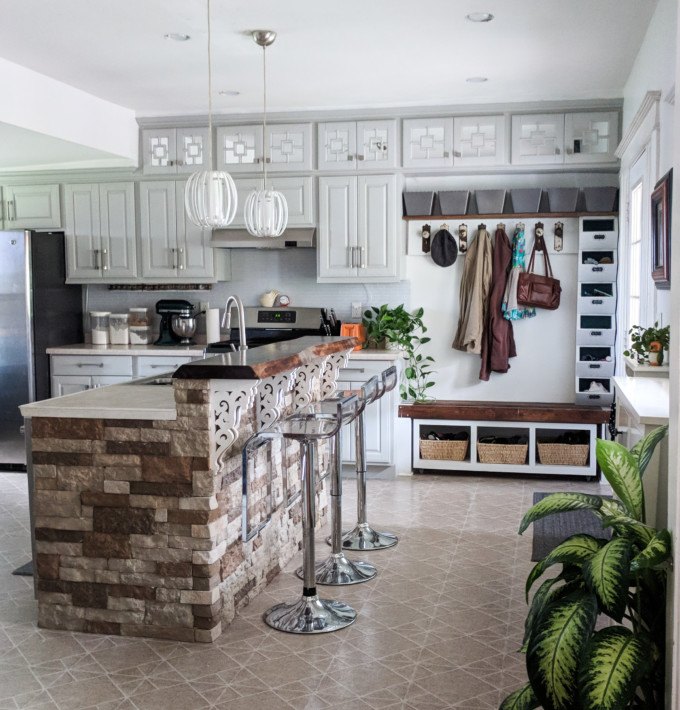
And we stood back and admired:
My honest opinion is THAT I EXPECTED TO LIKE IT MORE.
I mean, I don’t hate it. And I know that it is serving a purpose. But I really thought that I would LOVE the gray, and think ‘this is gorgeous too!’
In the words of Nick ‘it looks like its unfinished. Like we primed it and forgot to paint it.’
Although, putting the hardware on and adding plants really helped matters.

I know many of you are wondering ‘If you’re painting your kitchen cabinets to sell the house, why not paint it white?’
I have several reasons:
- The walls are white. And if everything in the kitchen is sterile and white and lacking personality, it wouldn’t go with the rest of our home. It would feel out of place and wouldn’t flow naturally.
- I just couldn’t
Also, note that you can’t see any old hardware holes on those drawers anymore. It’s like they were never there. YOU’RE WELCOME FUTURE HOMEOWNER.
Here’s a side-by side for comparison to what it once was.

I’m very interested to hear all your thoughts and opinions! I’m so far removed from this house at this point that it won’t hurt my feelings what you think either way.
Most importantly, do ya wanna buy my house? 😉
~Bethany
~~~~~~~~~~~~~~~~~~~~~~
Thanks for pinning!
Related:
-

We just got back from our weekend trip to Muscatine, IA! It was such a…
-

Got a hole in your wall that you wish wasn't there? We do! When we…
-

I've had this idea in the back of my mind for quite awhile... why not…
I needed this today! I am itching to paint my cabinets black. This tutorial is making it not so intimidating!
PS I like both, but prefer the yellow.
Thanks for share……
Awesome tips and ideas on kitchen cabinet painting. Looks like it’s an awesome kitchen cabinet and the design was amazing.
Thanks for sharing!
Thanks for the inside look at what all of the work will really look like. I’ve been researching online, and your blog and another blog (this one: https://www.nhance.com/nance/kitchen-cabinet-painting-mistakes/) said a lot of the same things. This really helped me to see what type of work I’ll have to put in.
I like it, a lot, though. That’s just the shade I’m thinking of, coincidentally. Thanks!
You just added thousands of dollars to the value of your house on-market. I have an ochre wall adjacent to an apple green wall in my kitchen so don’t think I don’t do color–but people prefer to use their own after getting to know the space for a while. And as for first impressions, this now looks like a stunning grown-up kitchen instead of something out of a playhouse.
I like it! I had considered painting our cabinets gray, but then I went with the traditional white. I really did love the energy of your kitchen before, it seemed so joyous! I think your house will sell fast. You have put so much detail in it, if we lived there I would want to buy it ?
I think it looks great! I had never heard of Floetrol and am definitely going to check it out next time we have some painting to do. Your step-by-step pics and directions are so well done – easy to follow!
I think it looks great. Sorry, but I’m more of a traditional girl and I wasn’t a fan of the previous colour., but I admire that it suited your energy ..(& it was to suit your family after all ). I think a prospective home buyer will love it . It’s neat, looks fresh and they can add their own personalities with accessories.
Thank you for your honesty! I do think it’s the perfect blank slate for prospective home buyers. 😉
The grey gives your kitchen a very classy feel. I like it a lot with the pops of other color in the room. Makes it look even bigger too.
I like the old color much better!
I agree! It makes the room look bigger! There are definitely pros and cons. Hehe!
Altho it looks kinda blah after the brightness, I really like it. If I was buyer, I’d be so excited to NOT HAVE TO PAINT CABINETS!!! I don’t move as quickly as I used to & it has taken FOREVER to get my kitchen cabinets painted. I want to move in, do my pretty stuff & have a party!
Hope you sell soon!
Haha I’m glad! That’s the idea!
The new owners will love it!
Thank you Mary! I hope so!
I’m with Nick. It looks like you guys forgot to paint it! It is very neutral and will be perfect for the new home owners , but just not something you can love like your old kitchen, which was gorgeous btw! All about that color!
We’re with ya Jordan. 😉
I loved the color – the new grey looks like a black and white photo to me. I understand why you did it, but coming from the same position, we’re about to sell our house – I’m not painting before I go – people will just have to love purple, yellow and turquoise if they want this house:)
That’s so funny that you said that Judy. When I was editing these photos, I actually said to myself THESE LOOK LIKE BLACK AND WHITE PHOTOS. I’m guessing part of that is because our eyes are used to seeing highlighter-yellow in this space. 🙂
When I saw the bright color I thought it definitely needs to be toned down. Then once I saw the neutral color it was like no no no….
LOL, we just can’t win!
I agree!! I was never a fan of the chartreuse, until it was replaced with this grey. Honestly, I’d much prefer to live in a house with bright, happy chartreuse cabinets. I just didn’t know it until I saw the alternative.
I’m officially a convert, lol!
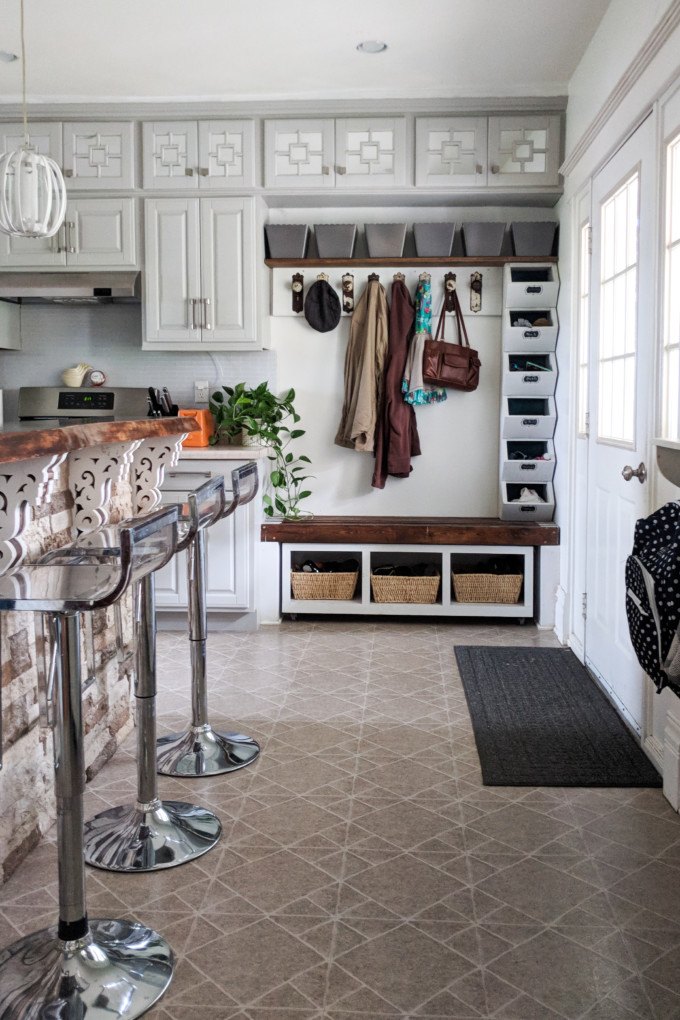
I think it is the perfect neutral pallet for the new homeowners to come in and make it their own. Adding color through new storage boxes, curtains, rugs and kitchen accessories will take away that “unfinished” look. You had such a bright color before, you had to stay very neutral with everything else. Now, you need to do the opposite. I think this kitchen is going to be fabulous!
SO much wisdom Renee. <3
Hi ! The colors look more harmonious and blend together . I would not have anything hanging on the pegs and nothing
showing in the baskets. A couple right size, colorful pillows on the bench to make up for the empty wall space. Clear off the counters, put
a biscotti jar where the mixer is and a good sized colorful platter up against the wall on the counter. If the Happy sign is not
permanent I would remove it. It’s a nice kitchen & the paint job looks great!
Haha, thank you Leenie! You are very specific! Right down to the biscotti jar! 😉
You did a great job teaching others the process of painting cabinets, thank you. I have to agree with Leenie, the decor is way to busy. I can not enjoy the detail of the beautiful kitchen because of all the clutter. As you prepare the house to sale depersonalize as much as you can but still show it was a loving home.
Beautiful paint job! Thanks for all the great how-to hints. While the gray and beige are serene, however, my eye craves something bright as a focal point. How about putting a pop of color on the back wall where you hang your jackets? It’s a small area that the new homeowners could easily repaint. Use the same accent color occasionally in the rest of the house, on items that won’t stay with the house — a few doodads of the very same color to use when “staging” for your open house. Repeat it in a bowl on the bar or coffee table, flowerpots, pencil holder on a desk, chalk on the blackboard, the rug at the entry, towels in a bathroom, toss pillows on the couch, etc. Repetition can have a grounding effect, and it’s comforting, somehow, to come upon a familiar spot of color that was a bit of a surprise upon entering the house. Good luck selling your home!
I love that idea Gloria!
It looks finished and very nice. I think you should consider removing the corbels so they don’t compete with the straight lines of the upper cabinets. All that painting! Oh my goodness! So Much Work! You’re a warrior.
Yes it was a lot of work! But I’m glad I did it. Hopefully prospective buyers can see themselves in this space!
I think one of the limiters here is the existing color scheme of the other structural elements (floor, counter, etc.) as well as that beautiful custom island. That said, moving away from the chartreuse was wise if you are looking at new buyers – good job! It is difficult for an artist to go neutral (huge understatement, I’m quite sure). I have been on a dark kick, which some shy away from if it makes the space appear small. That said, with good light and high ceilings, I may have gone to the dark side with this one, maybe even a midnight eggplant or something odd which I’d get griped at for ? You should feel great about all the consideration and effort you put into this fresh paint! It would be equally as satisfying to me if someone (like one of us reading your blog) were to buy it and then could see this as a fresh clean canvas, ready to add our own touches. Most buyers will leave it as is and move in with some funky kitchen aid color already in tow, decorating accordingly. There is no wrong answer here. I’m not in the market, but I do love what you have done ? If you get a buyer with some flair, I’d be asking if you can then visit later to see what they have done with the place – it is an awesome space and it will be amazing no matter what. Good Luck❣️
It’s funny that you said that, because I wanted to paint these cabinets a moody color so bad! But after polling our audience of THOUSANDS of people, every single person said that they would want the cabinets white or very pale neutral color. And the whole point is to please the masses when your home is on the market. 😉
In all honesty I am with your thinking here Bethany. I like it but I am not in love with it. Sorry. Hope you sell soon.
Haha, thanks for your honesty! It is what t is right? Hopefully when our house is on the market people will e able to see themselves in this space. 😉
I agree but I am very much a “color” person. They seem to just blend in. When we bought our new house the paint counter laughed at the variety or colors I had. I do have white cabinets but the walls are purples and greys. I guess it depends on personality quite a bit.
Bahahaha! I love it! Those paint counter dudes don’t get to have an opinion. 😉
I love it and think it is perfect for a buyer! You don’t want something too specific that people cant imagine how to make their own. This is a perfect neutral that can go with many styles and looks very cohesive with the stone, flooring and backsplash.
Mckenzie, thanks for the encouraging words! I do hope so too!
I love the grey!
Thanks Kirsty <3
Diane says for a color suggestion maybe pick One of the brown shades from the stone face from the sink area. It looks like you tried to pick your color to compliment the stainless appliances. To me the problem is the grey you have is too light and close to a grey primer color. Just some thoughts. You have already gone to the work of cleaning and patching the holes. To repaint again will go much quicker.
I agree. The gray is too light, you can hardly see the glass windows in the doors.
Haha! I am NOT repainting these cabinets!
Yes the grey isn’t cutting it for me. You could probably quests my favorite color for painted woodwork.
I’m a neutral girl – I LOVE it!!! Nice job!!
I agree! It is gorgeous!
Thanks girls! <3
I was excited about the color but disappointed about the outcome. Too much grey with all that brown. If you could afford too, I would update the countertops and painted backsplash.
Also you will need to decutter for your showings.
You’re probably right about the countertops and backsplash, but we’re done updating this space. The new homeowners can take it from here. The flooring needs replaced too. And we could probably drop 10k updating for the new homeowners. But we’re not gonna. 😉
I think it looks great. Staging will help a lot especially if you repeat the paint color with an accent color.
Yes I agree! I’ve been brainstorming different ways to bring in pops of color with staging.
It definitely brings out the stone more but I’m with you….I thought I would like it more haha
It’s so hard to visualize things, isn’t it? Well, it’s up to the new homeowner now. 😉 Assuming someone will buy it. LOL!
I think it looks nice and clean. Personally I think the stone looks better and more the focal point this way. It is always tough when you go from color to “non” color. Definitely ready for the next owner.
I think you did a great job! I too think it looks very clean. I like the color especially the one picture that shows it a bit silver. If you had to do it over what color would you go for?
Great Job!!!
Jane, if I had to do it over, I would change nothing. If anything I think having a patterned backsplash would spice up the space a bit. But we’re not going to go to that much effort. 😉
Totally agree. I think it feels “unfinished” because it went form such a bright intense color to such a light neutral color.
Yes Elizabeth, I think the two extremes assaulting our eyes are leaving us craving something in the middle. But I don’t regret my color decision and I think it will serve new home buyers just fine. 😉
Thanks Pam! <3