Doing up the girl’s nursery DIY style has been not only gratifying, but also saved us some big bucks! Here are some final pictures… and at the bottom of this post, I’ve given a breakdown of the cost of each item and it’s source.

The truth is, we started with the mustard walls… and had NO idea where we would go from there. I’m not one of those people that dreams up a full mood-board in my head in advance. I’m a design-as-I-go kinda girl. It works for me. But you were skeptical in the beginning… weren’t you!?! Don’t lie!

But I did know I wanted a Jenny Lind crib, and I waited a good long time to find one for CHEAP! I was originally going to paint it a bright cheery color, or white… but when I fell in love with the white paisley eyelet fabric for my DIY pumper pad and crib skirt, I knew the crib needed to be black!

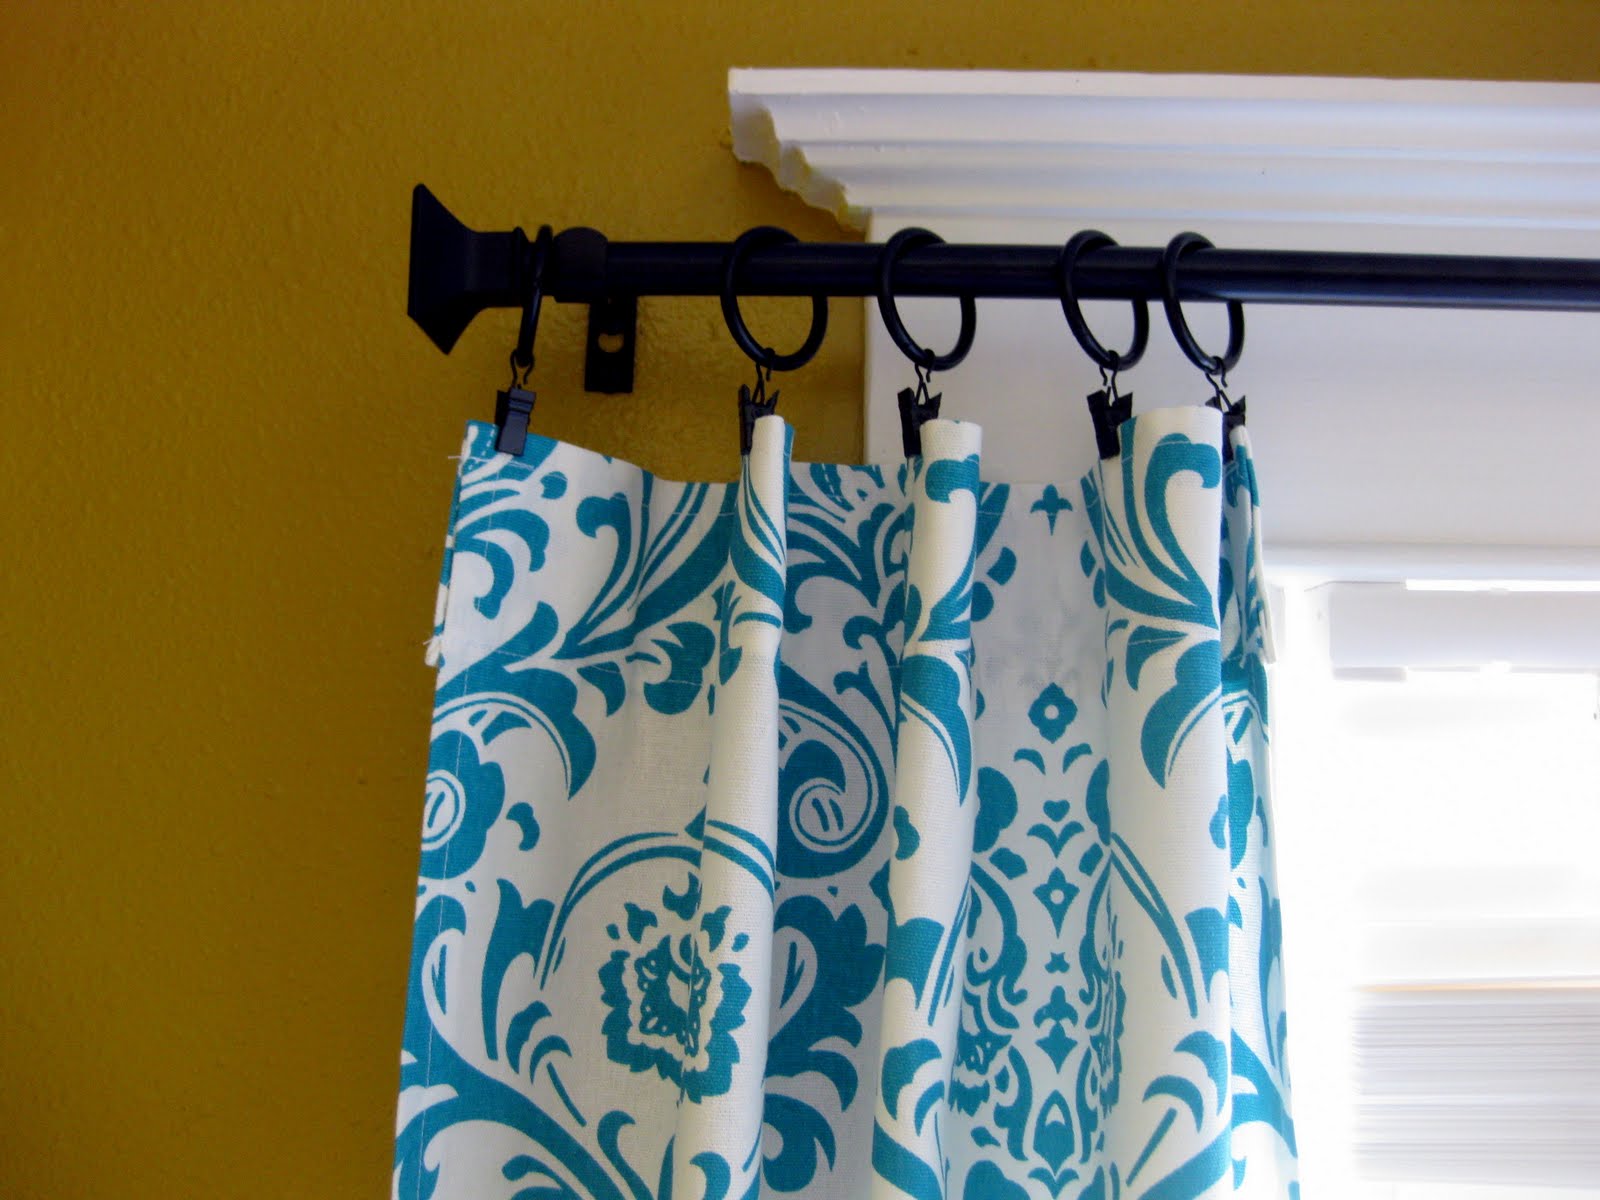
When I found the curtain fabric, it was a no-brainer! I loved the turquoise with the mustard, such an unconventional combination!

But things were becoming a little too gender neutral for my taste. So why not throw in some pink! The room really started to come together when I made the obnoxiously large tissue paper mobile.


The changing table project was a special treat. If you missed that post, I encourage you to catch up here. I wanted to pull the damask pattern from the curtains into the changing table somehow, and I loved the idea of doing it asymmetrically.


I think I’ve covered all the major items in the room, and you can always go to the individual posts for each item/project by clicking the links I provided.
Source list:
Wall Paint – $23 – Better Homes and Gardens Paint: ‘Tan Almond’
Jenny Lind Crib and mattress – $40 – craigslist
~ paint for crib – $11 – Krylon glossy black
~ fabric for bumper pad and crib skirt – $60 – Joann Fabric (on sale)
~ foam bumper pads – $26 – walmart.com
Fabric for curtains – $42 – Amazon.com or HERE
~ Curtain rods and hardware – $43 – Walmart
Reclining Lazy Boy Rocking Chair – $25 – craigslist
Tissue Paper Mobile supplies – $10 (see post for full tutorial)
Changing Table – FREE (out of my grandma’s barn)
~ wood to rebuild/reinforce rotting changing table – $40 – Menards
~ paint – already had
Long Shelf:
~wrought iron shelf brackets – $18 – Hobby Lobby (on sale!)
~ shelf wood – $7 – Menards, particle board
Wall Decor:
~ homemade quilt – FREE – Grandma
~ paint chip bunting – FREE supplies!
~ doily garland – $2 – garage sale doilys and twine
~ floating shelves/book rack – $10 – designed and built by husband!
Patchwork Stuffed Animals -homemade by mom – can be purchased HERE
Chandelier – $15 – craigslist
~ paint – $4 – Krylon: ballet slipper
Closet:
~ white wall paint – already had
~ rope lighting – $11 – Walmart
~ plastic crates – $6 – Dollar Tree
Grand total for furnishing, decorating and accessorizing: $393
The best part of this nursery is that we poured ourselves into it and created memories in the process, making it such a sentimental labor of love for our girls that we worked so hard to conceive. We fashioned it to be not-too-cutesy so it can grow with them. Not to mention, the color scheme can easily be converted to accommodate a possible future baby boy by simply losing the pink accessories and replacing with navy blue or charcoal gray. In fact, I look forward to that very much! (but not till the girls are potty trained!!)
This concludes our lengthy nursery saga, a journey that we’ve loved every minute of! In the weeks before the girls were born, I found myself wandering into the nursery just to look at it. I would stand over the crib and imagine my princesses sleeping soundly. And now it’s a reality. Our biggest accomplishment yet.
And because everyone loves a good before and after:


Related:
-

We've been needing to update our coffee table situation in the living room for awhile…
Wow! Being in the middle of putting together a nursery myself, I’m AMAZED you were able to do all of that for so little money! You go, girl!!
I just love your home and am so happy to see you posted tutorials and/or instructions with a lot of the rooms. So glad I popped in from Pinterest to check out the blog. Now following along and looking forward to reading more! Thanks again for sharing.
You’re super sweet! Thanks for commenting and welcome to the fun!
I think this is an informative post and it is very useful and knowledgeable. therefore, I would like to thank you for the efforts you have made in writing this article.
Hey Beth! Visiting from the Haven linkup. Your nursery looks awesome and I especially like the non-traditional color for a girl’s room! It really turned out great. I’d love to feature this on my paint color blog. Let me know if you’re interested!
Hey Jena, thanks for commenting! We’d love to be featured on your blog!
Ah, I don’t know how I totally missed seeing your response! I’m featuring you tomorrow! 🙂
I love it! It’s so cute and what a deal! I need to start doing these DIY things! Congrats on everything!
Great job, i love how you did everything!
You have added a burst of sunshine to my day with your creative ideas. The home my husband and I live in and own, has been in his family since it was homesteaded in 1898. The house was actually built in 1903. We are the fourth generation to live here. An additional unique fact, the house has never been moved out of since 1903. Great Aunt Martha was the original owner, when she aged and became ill, my husbands grandparents moved in and cared for her. When his grandarents aged and became ill, his mother and step-father moved in to care for them. Following a divorce, my mother-in-law was at risk of having to put the home on the market due to finances. This was in 1998. My husband and I decided to buy the home. We moved in with our 3 children and Grandma Helen and all 95 years of “treasures” ( if old magazines, bank statements, broken dishes, stuff….. are your treasures), stayed. This past fall grandma Helen became ill with cancer and passed 26 days later. (You read that right, 26 DAYS), at the same time all three children launched from the nest, leaving this old, five bedroom house, now with almost 108 years and four generations of the earlier mentioned treasures for my husband and I to sort through. Everyday is an adventure, linking stuff, stories and people to memories.
Now that I have filled you in on the past 108 years, I will get to the point of this message. In July 2012, our oldest daughter, Kala, will be blessing our life with our first grandchild (grandson). As an exremely excited grandmother, I have already purchased two cribs from Craigslist. I plan to use one to fill one of the now unoccupied rooms in our home into a nursery. You will be amazed to hear, that in 108 years and four generations, this house has yet to have ever been graced with a nursery.
I am sure you can appreciate my desire to make sure there is a part of the past generations included in the nursery to greet and comfort our bundle of joy. After reading your blog, for the very first time, I was inspired with exactly how and what to use to accomplish this.
In our basement is a part of the old kitchen cupboards used for years by those we have loved and miss. Seeing the recreation of the piece your husband found in your grandmother’s barn that now has become a changing table in your nursery, I am thrilled at the anticipation of my husband I creating a similar changing table for our new nursery that will hold the love and memories of all that used it in the kitchen in the past. Thank you for this AMAZING inspiration.
As I read this to my husband just now, his response……. is the same as mine!!!
Thank you, thank you, thank you for inspiring us to contine to use the treasures already in our home!
it’s just a berber carpeting that was already there when we moved into our home. we actually don’t like it much at all. it’s not very soft and stains easily. but the pattern on it is pretty i suppose. sorry i couldn’t be more helpful!
really like the carpet..any information on it?
thanks
Um, Wow!! What an amazing transformation!
What a transformation! Awesome job!
absolutely amazing!!!
Looks adorable! Love it! 🙂
I love the DIY stuff and that you made so many old things look loved again. So in love with the turquoise curtains and the way the design was painted on the dresser. Not so much a fan of the mustard colored walls. (I’ve changed too many diapers to want that color on my walls!) Great job and much congratulations on the birth of your daughters!!!
OMG!!! this room turned out AMAZING! so dang cute! great job!
It’s such an awesome nursery! I love it. I love the colors all together – it totally works. And I am a HUGE fan of damask, so that paint work on the changing table just kills me! You are incredible. So excited that you are now holding those baby girls in your arms instead of your belly. It’s so much better. 🙂
We bought the chandelier from someone on craigslist, so I have no idea where it was purchased originally. Sorry! And yes, it’s just ribbon strung through the holes that we paper punched in the paint chips. You can see how this was done on this post: https://realitydaydream.com/2011/06/nursery-final-chapter.html
and yes! I think the bunting would be awesome in an adult’s bedroom! send pics!
You did an amazing job! 🙂 Everything is beautiful! Can I ask where you got the chandelier? It’s so pretty. Also, what did you use to make the paint chip bunting to hold the pieces together.. is it just ribbon? Do you think the bunting would look vintage in an adult’s bedroom?
i love how you did everything! im storing away many ideas for when i can hopefully use them for my own kids!
you’re finally home and your family is complete. Your joy is so good to see!
I can’t wait to see the girls grow up in the happy environment you’ve created.
Nice work honey!
Once again I’m impressed beyond words! You have such a way of making a beautiful room. Congratulations on the girls.
WOW I feel like I just flipped through something out of House Beautiful!
Nicole Goodwin
Great job, as always, on everything. (including the girls!) Congrats again!
I love it! It’s so cute and what a deal! I need to start doing these DIY things! Congrats on everything!
I love it 🙂