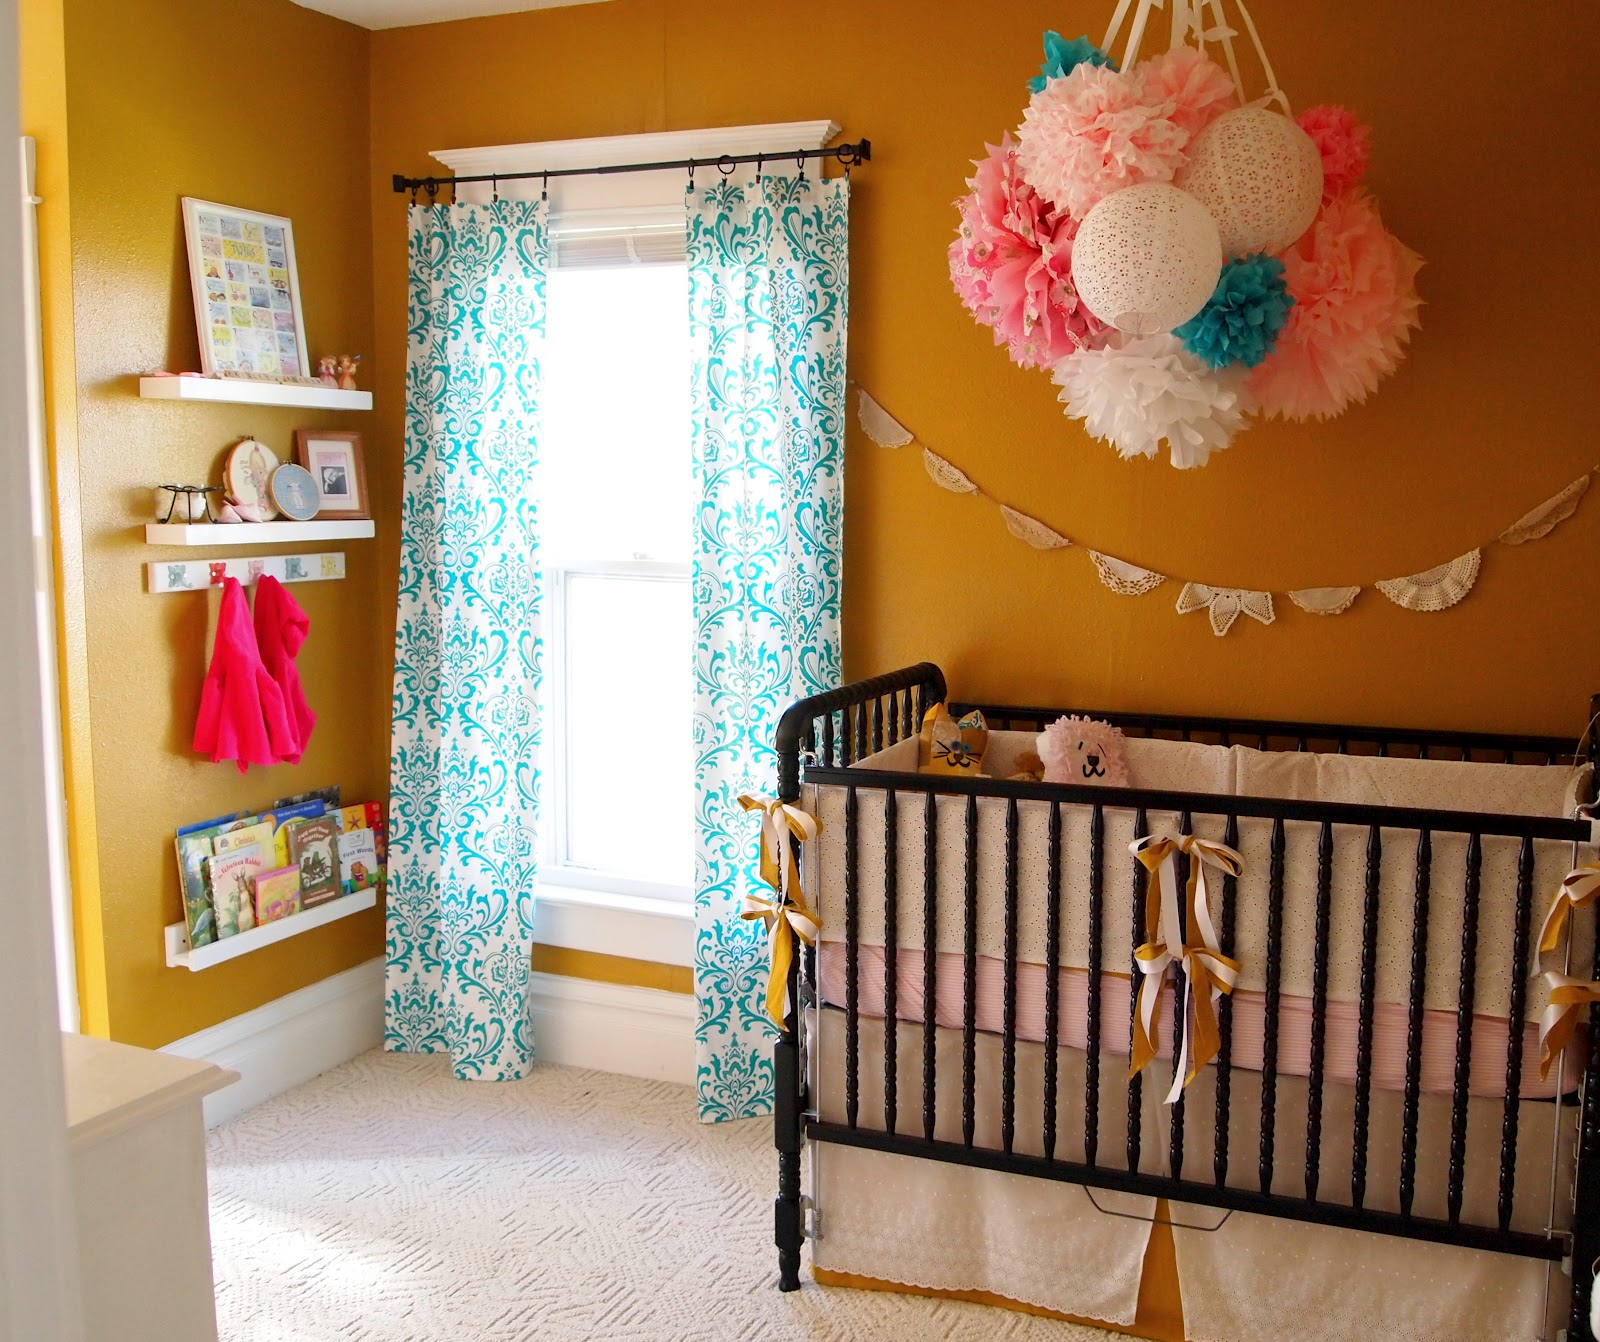
UPDATE! Check out the final nursery reveal HERE!
I try to stay away from all things trendy, but the tissue paper mobiles sucked me in. I love how fluffy and airy they are, you have unlimited color combo options, and it’s one more thing that I can make with my hands for my precious girls!!
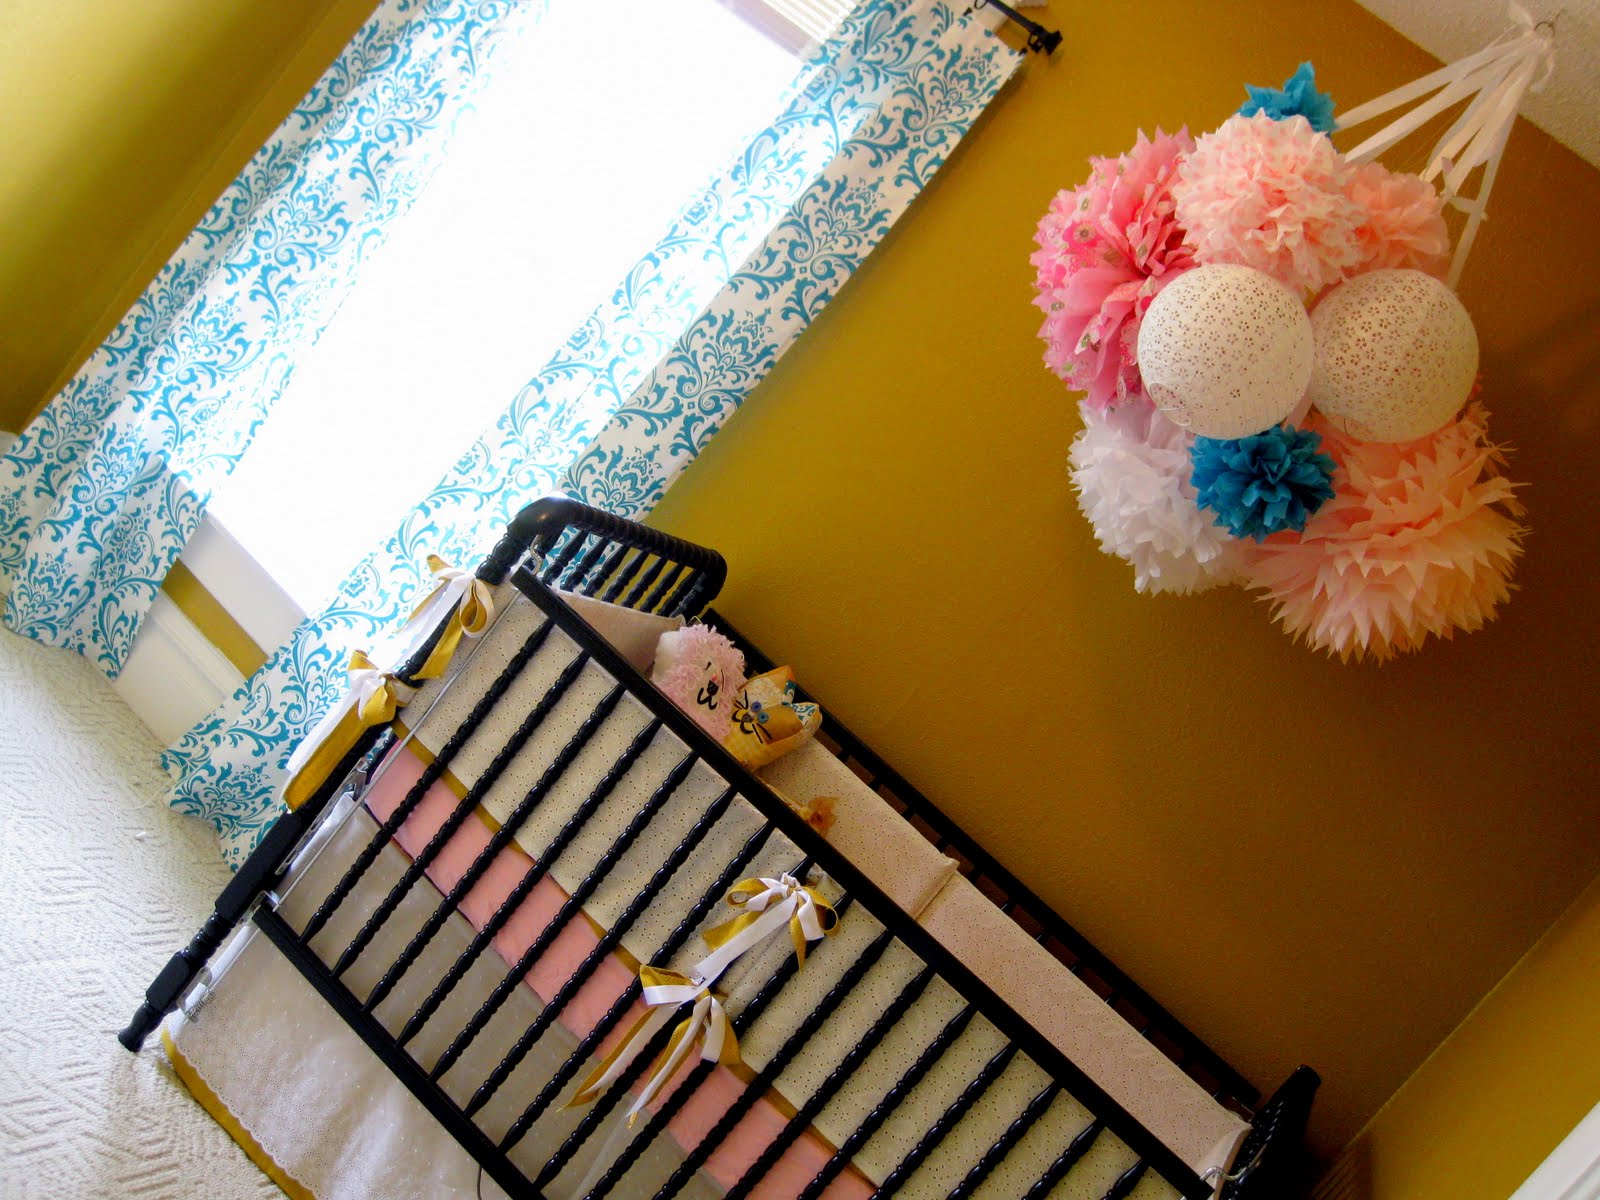
HOWCUTEISTHIS? I die.
So I know you’re getting all anxious for the tutorial, so let’s get started! I hope you’re really bored at work and have lots of time to look at each step that I photographed. The fact of the matter is, it’s super easy… and it’s real hard to go wrong.
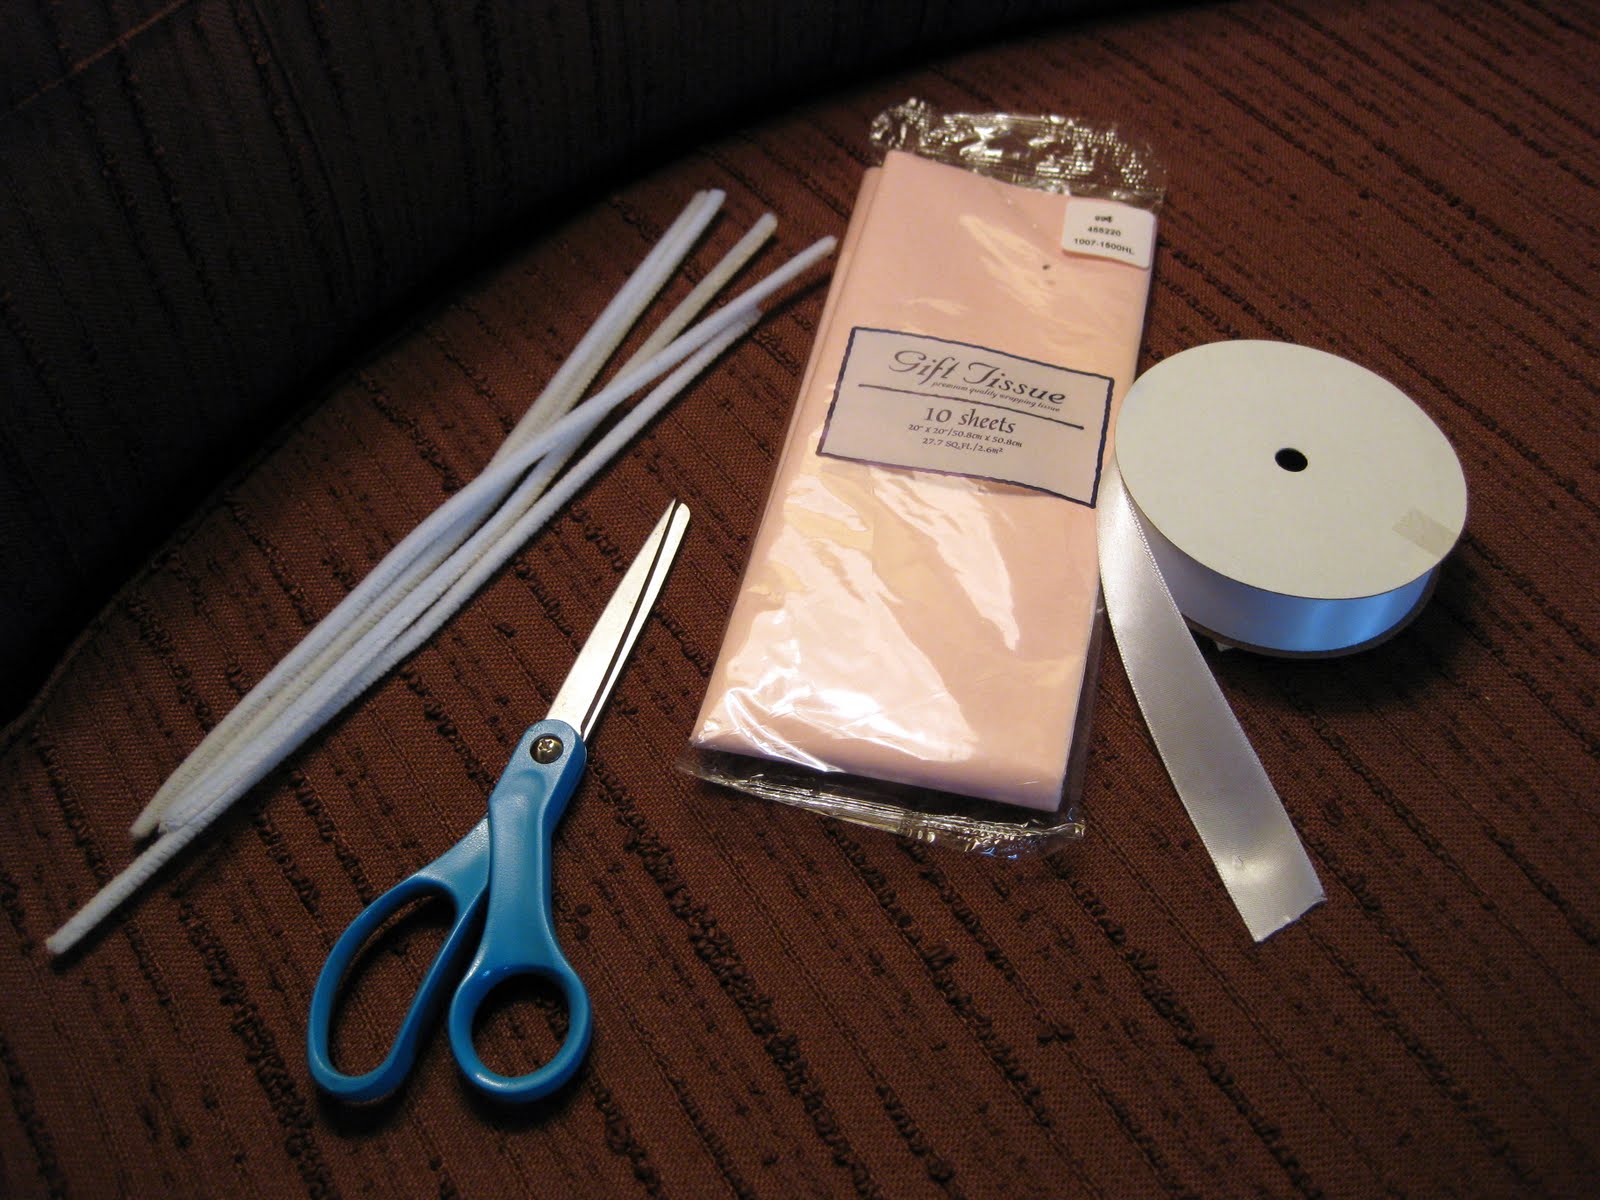
Supplies you’ll need:
~ full pack of tissue paper
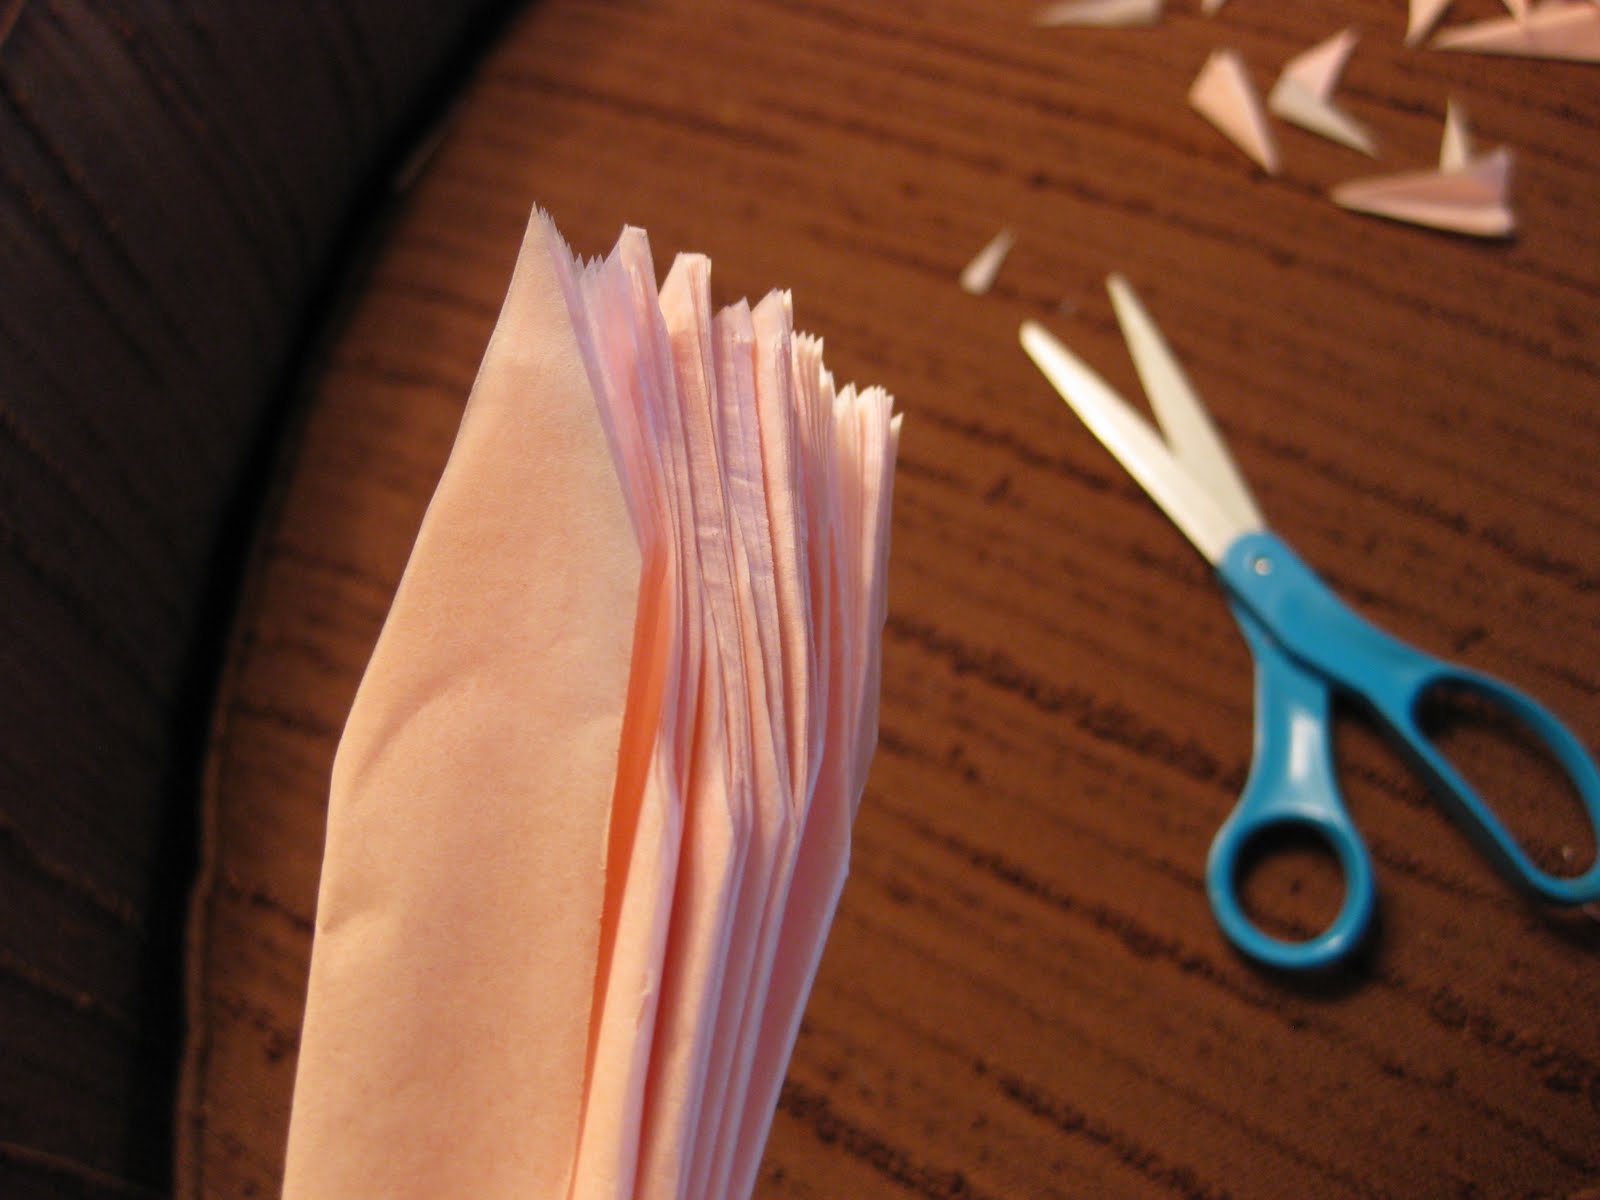
~ scissors (the sharper the better)
~ pipe cleaners or crafting wire
~ ribbon
Unfold your tissue paper and make sure all the layers line up with each other.

Start folding accordion style. I did my folds about 1.5 inches.

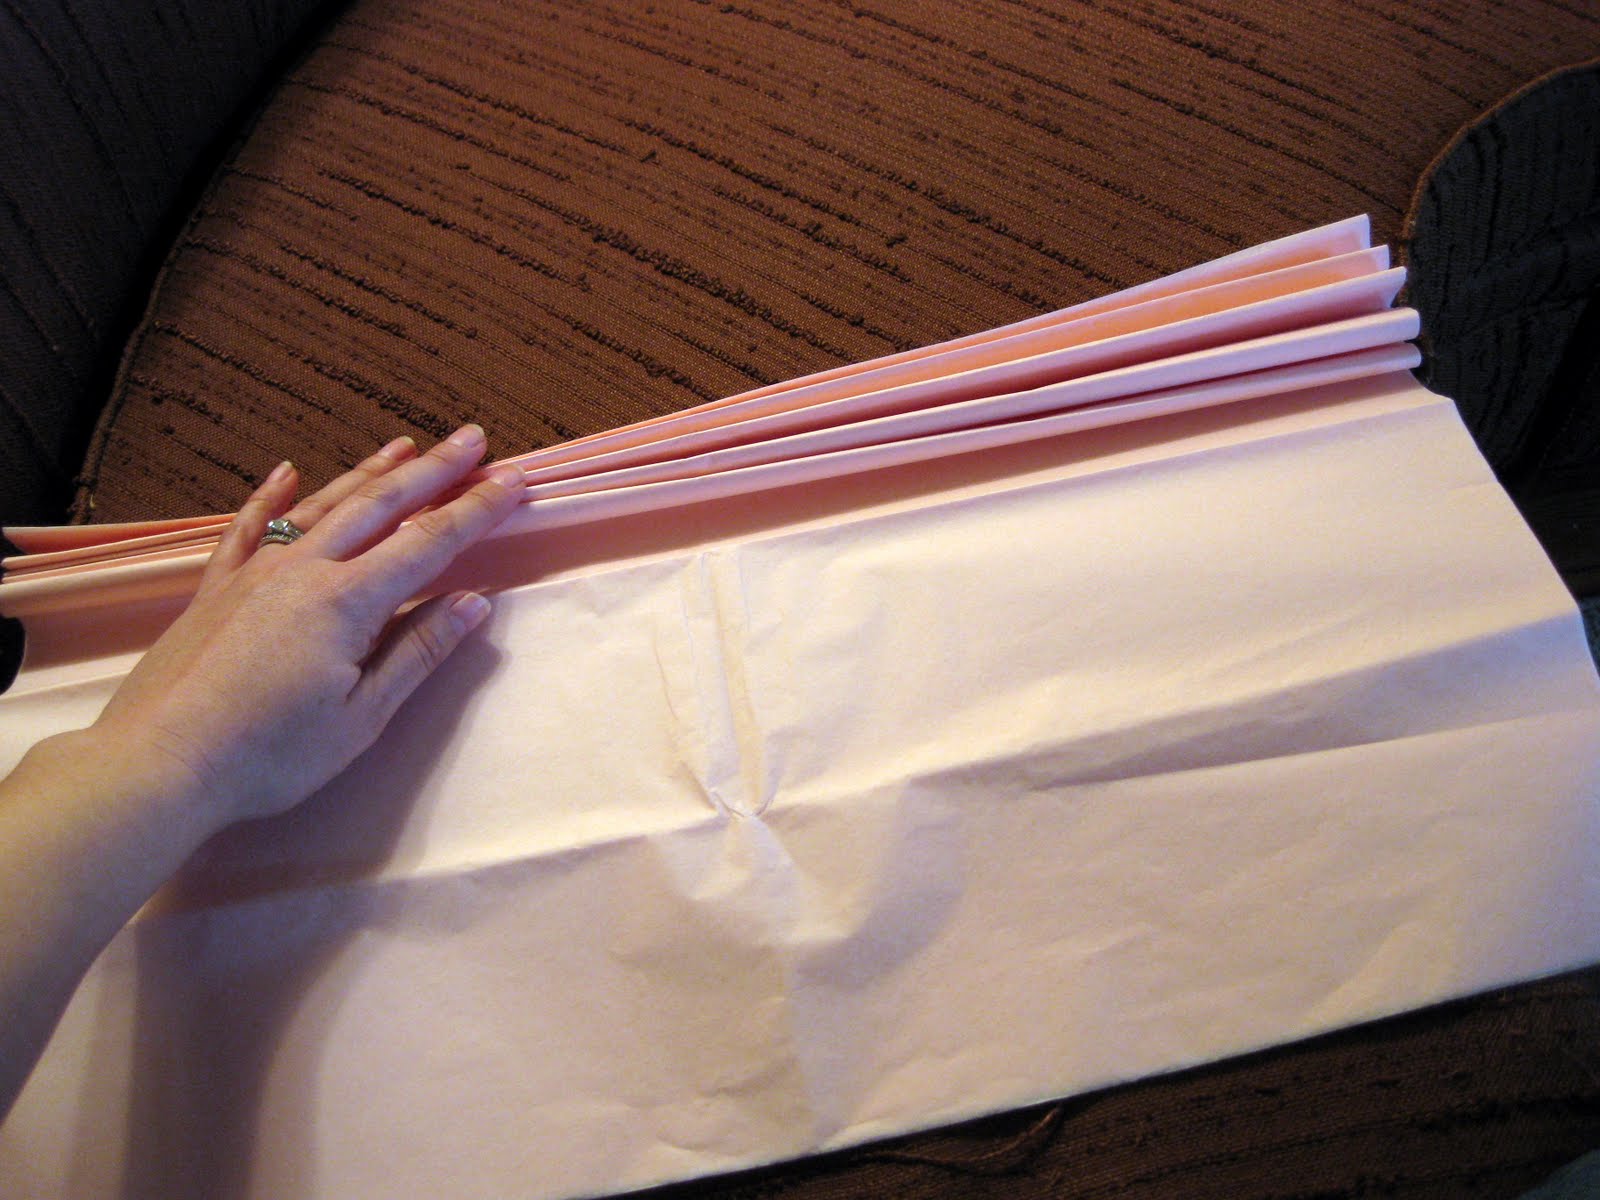
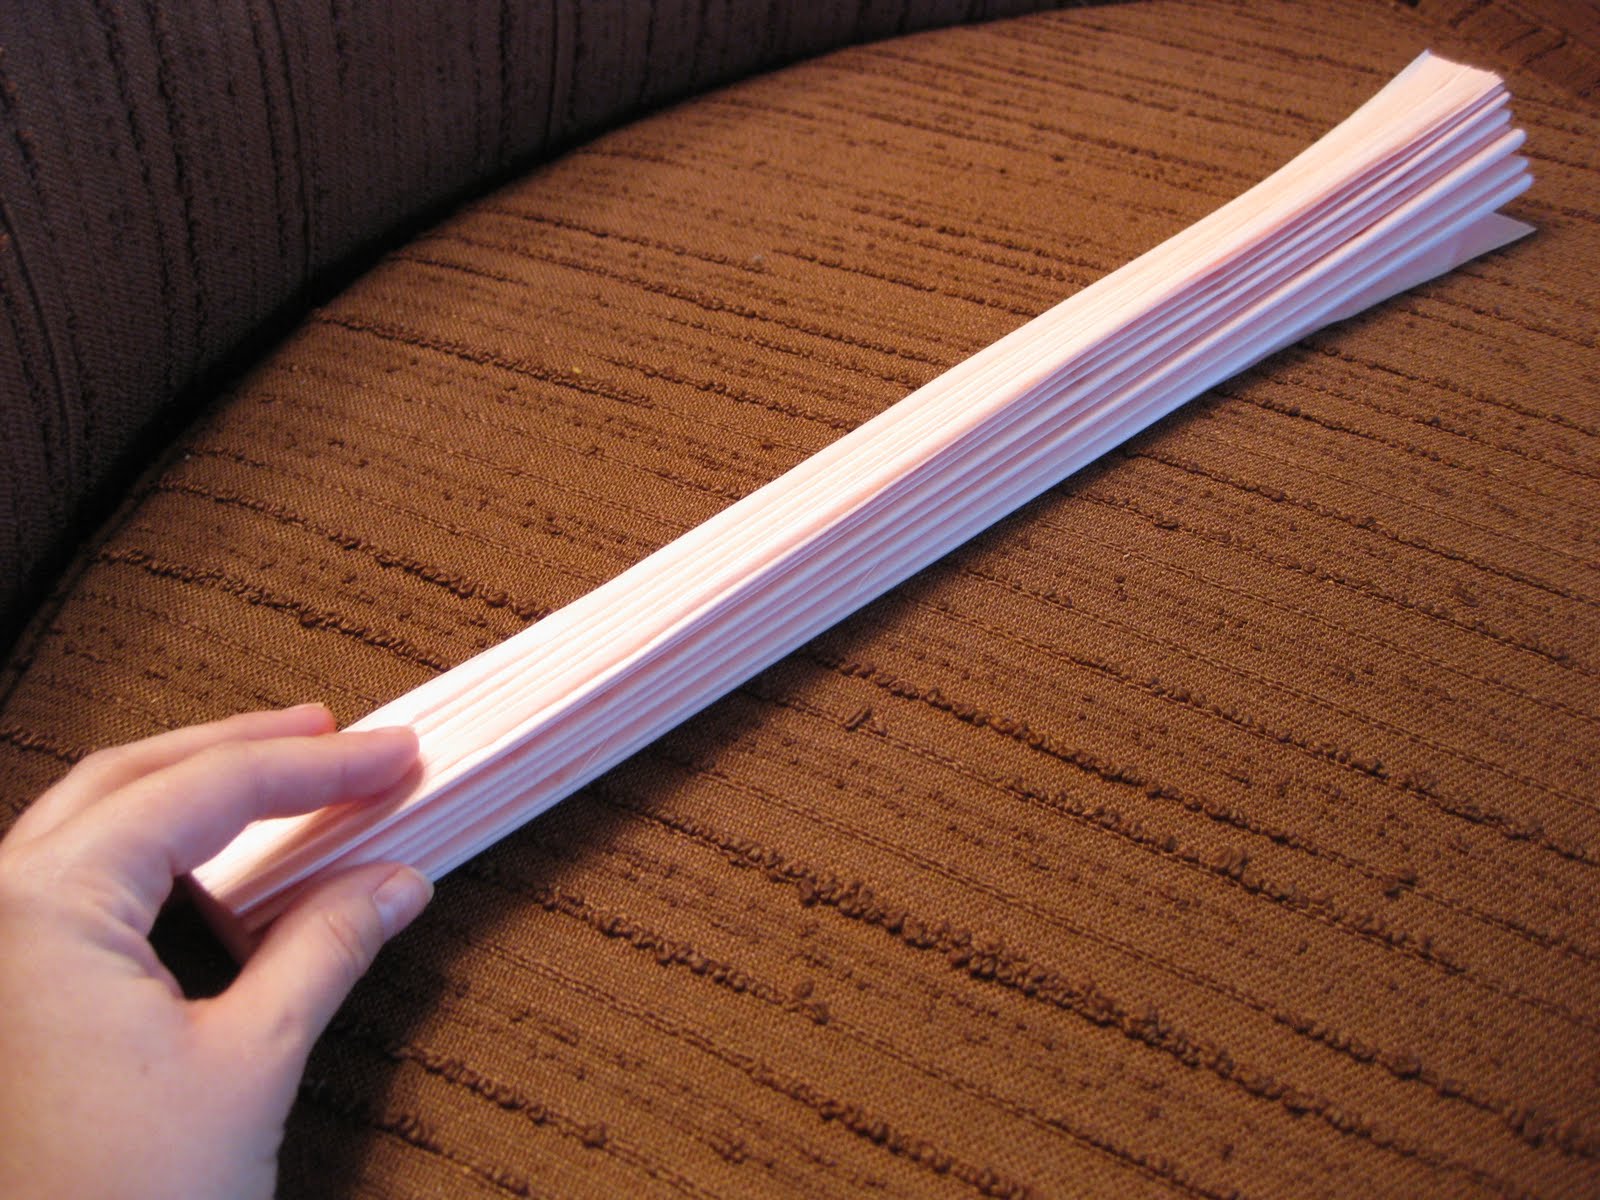
Until you get this:
Snip off the edges to make a point, or you can round them off like a flower petal. I did a few of each.
NOTE: you’re cutting through a LOT of layers, and besides having sharp scissors, you’ll need to put a little muscle into it. You don’t need a crisp perfect cut… some jagged edges gives texture.
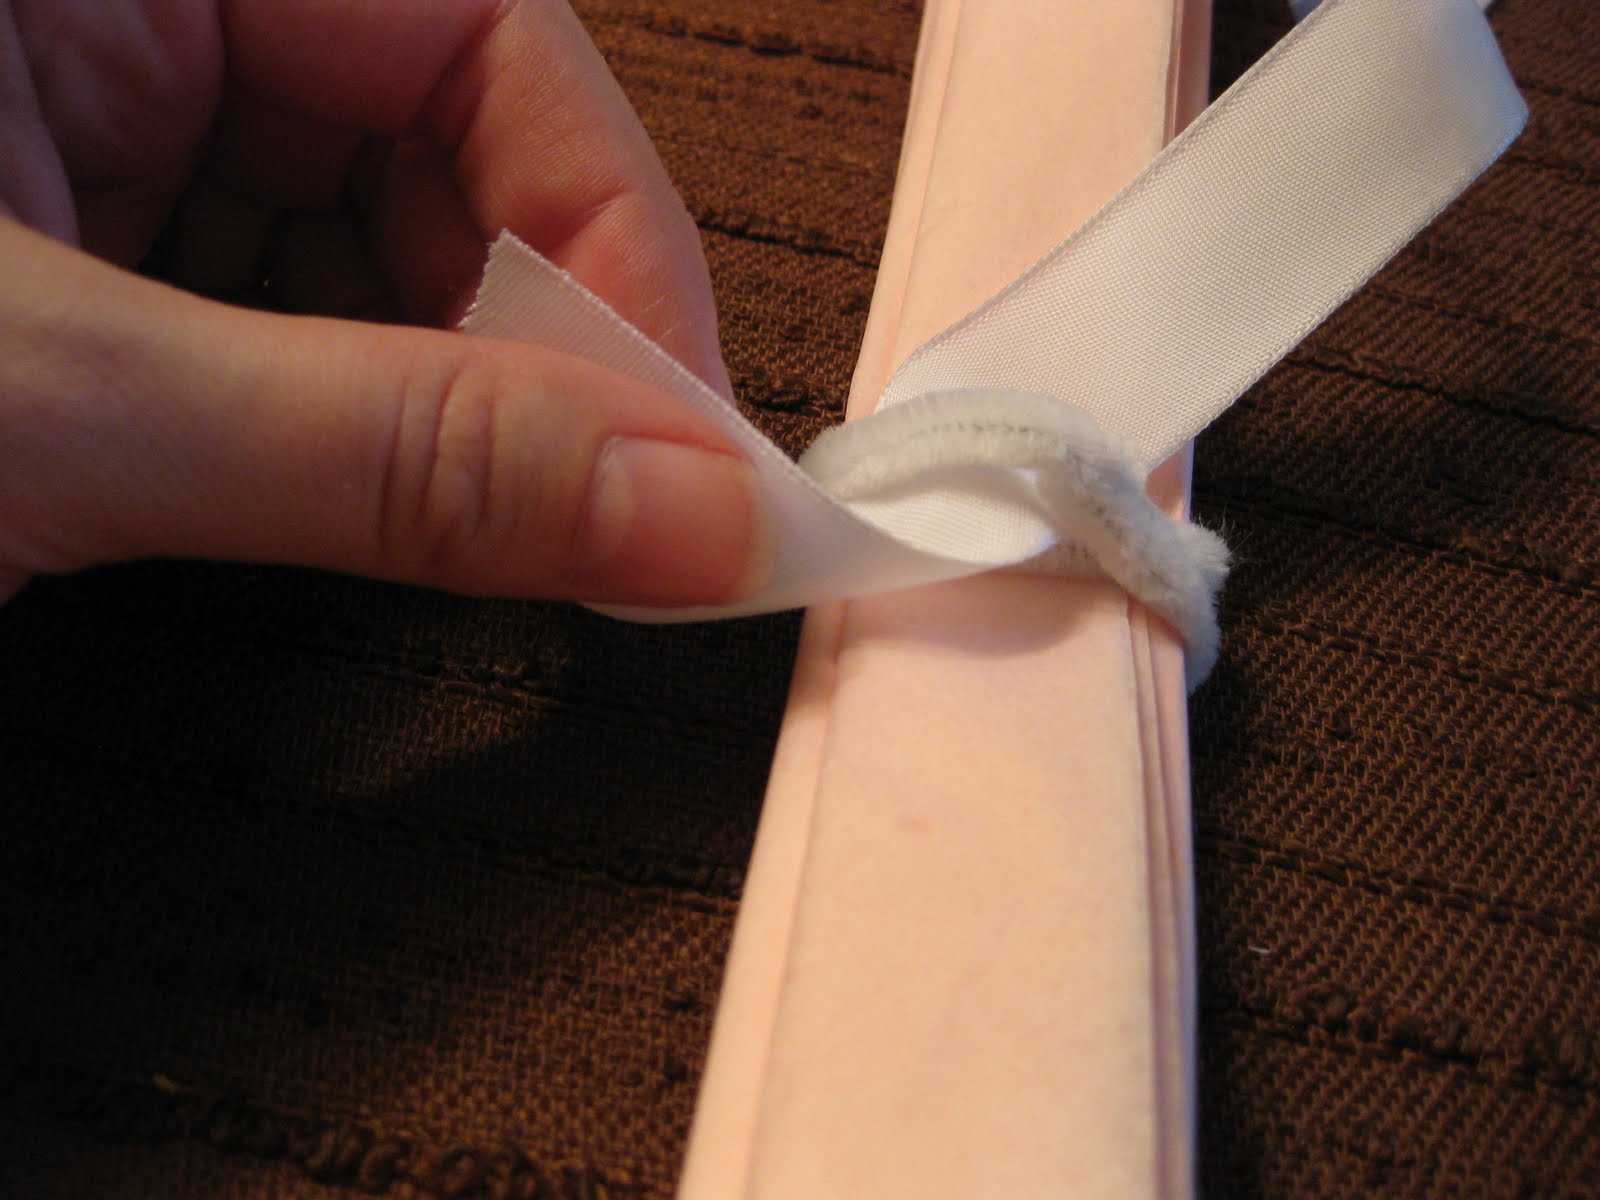
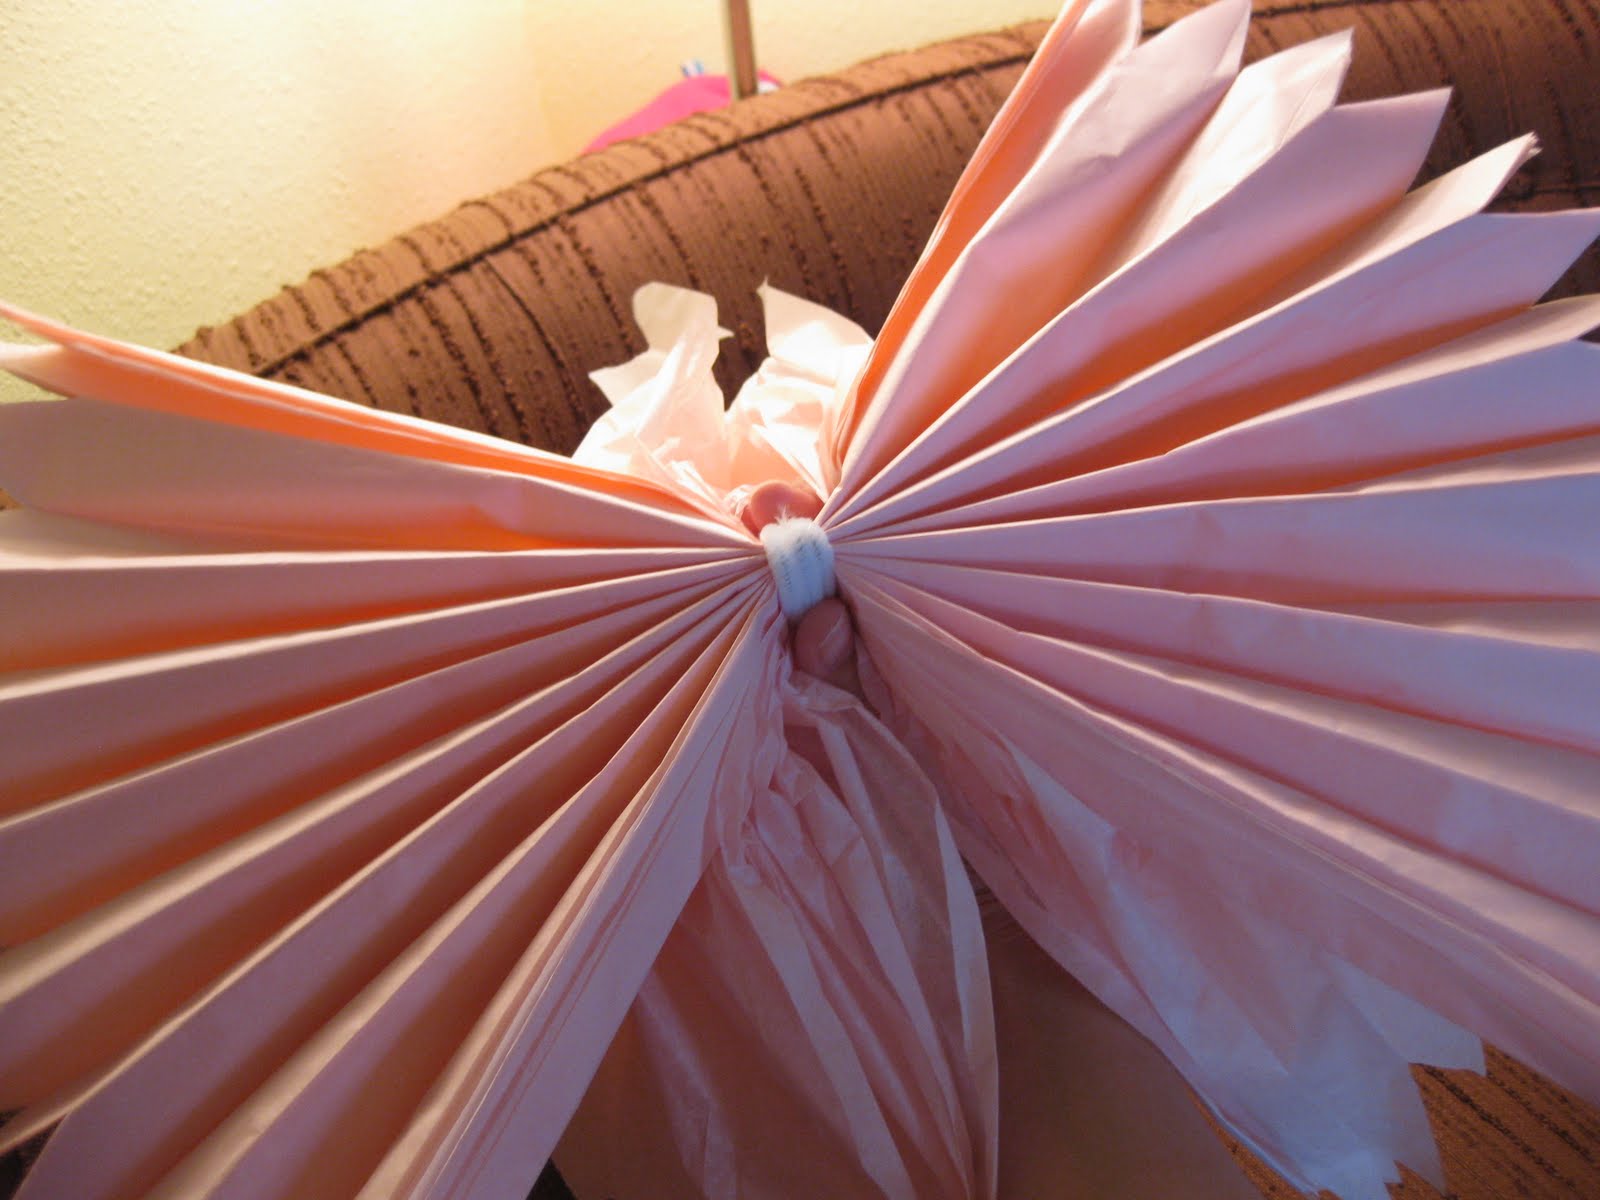
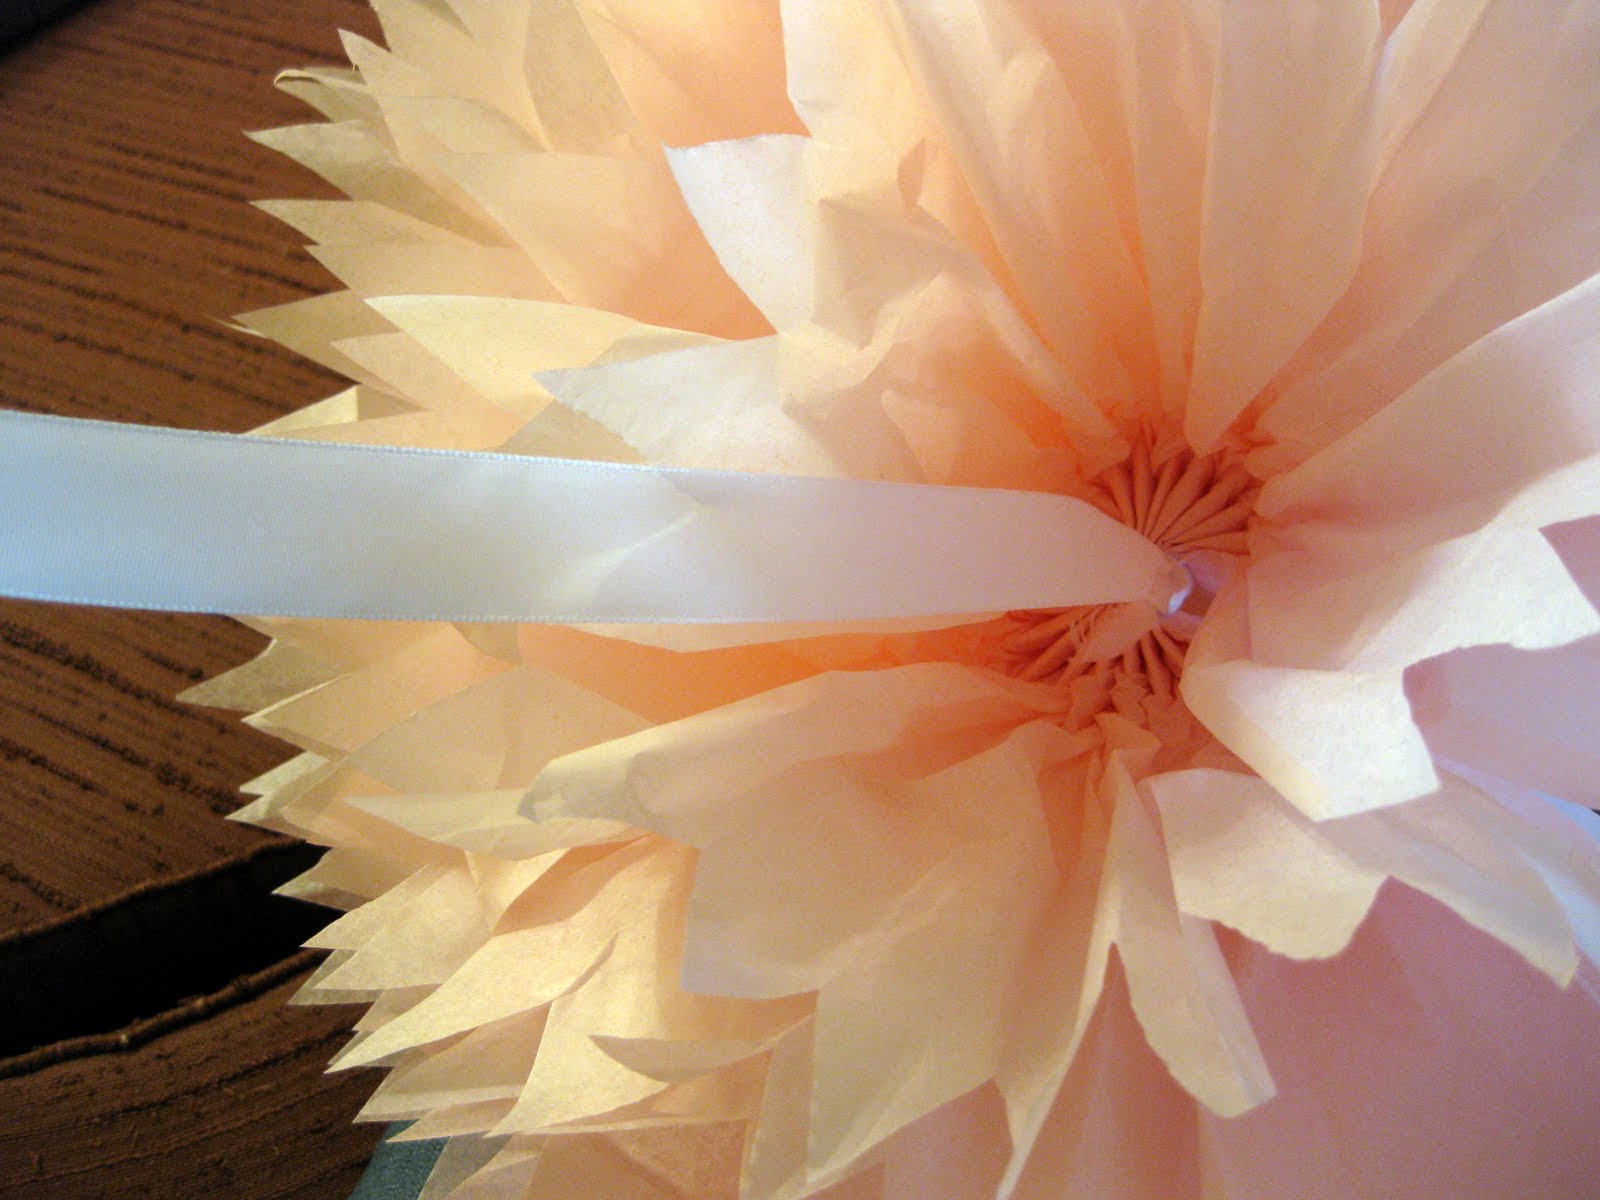
Find the middle, and wrap your pipe cleaner around and twist it off tight. Make sure there’s one loose ‘loop’ of pipe cleaner that you can tie your ribbon to.


Tie your ribbon… and make sure your ribbon is cut plenty long so you have options later.

Start gently peeling back one layer at a time.
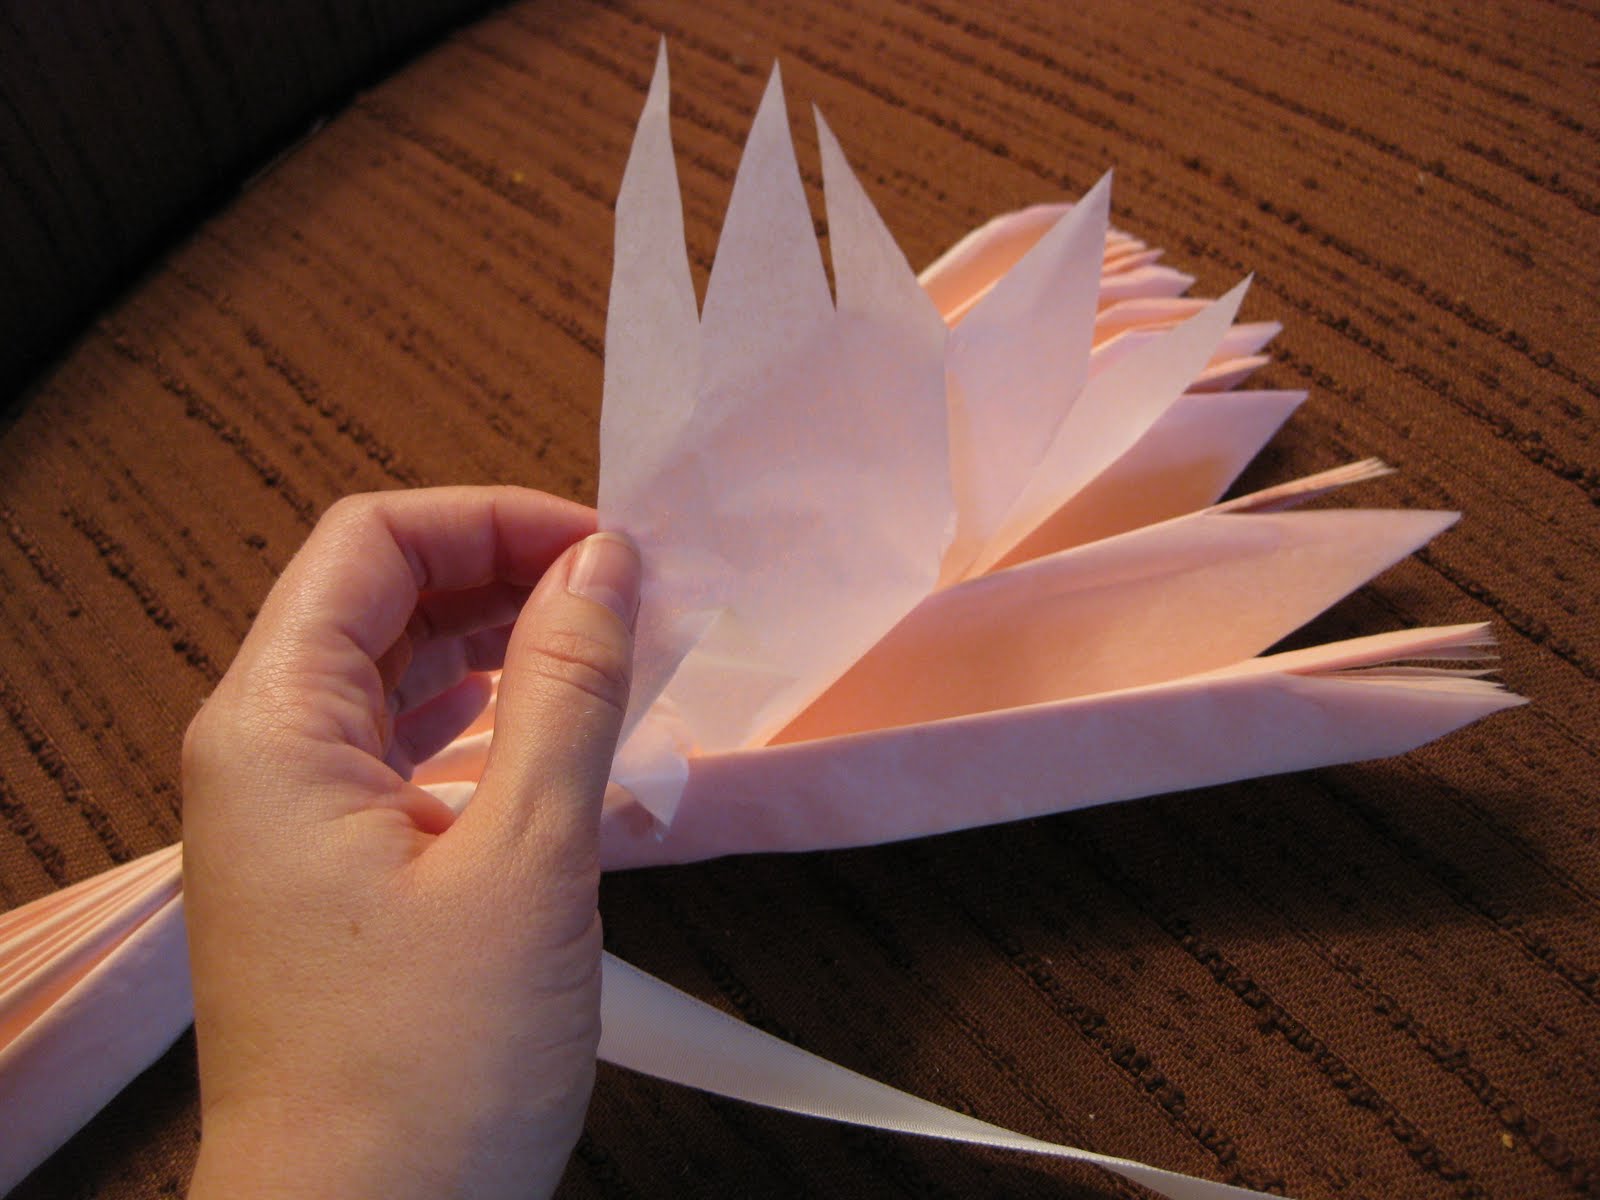
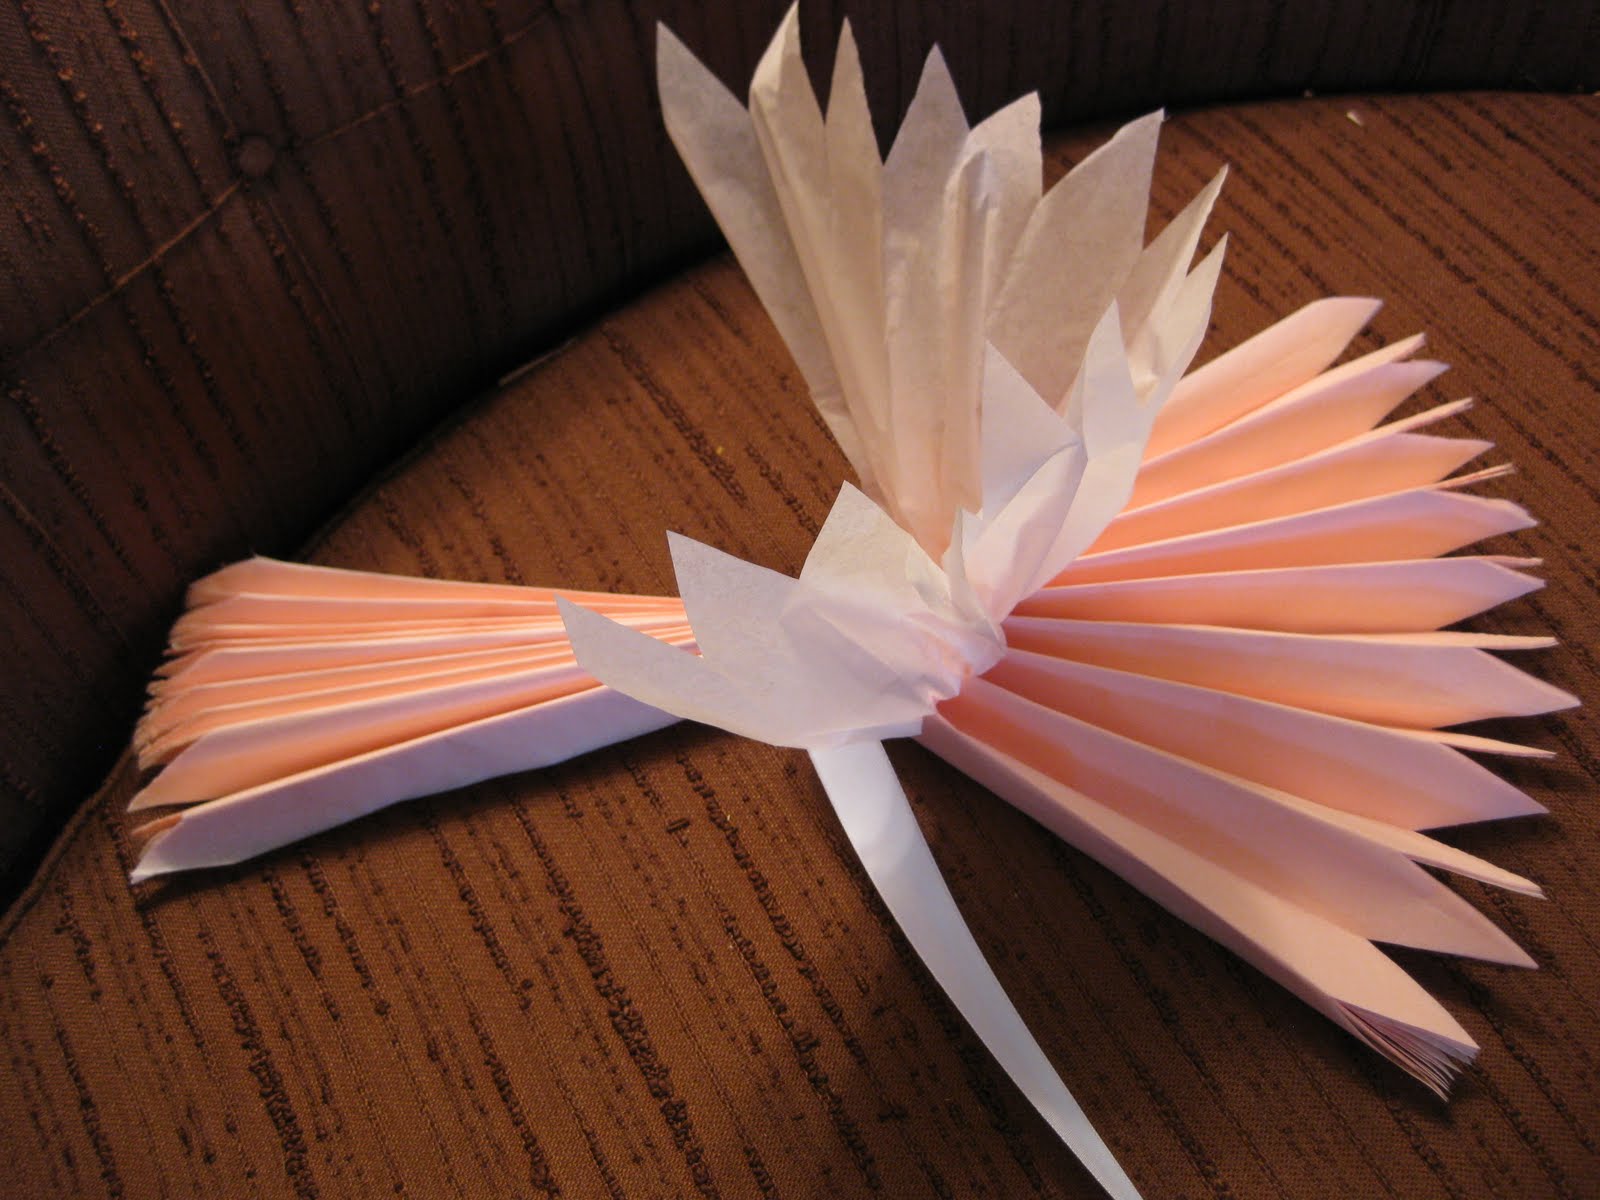
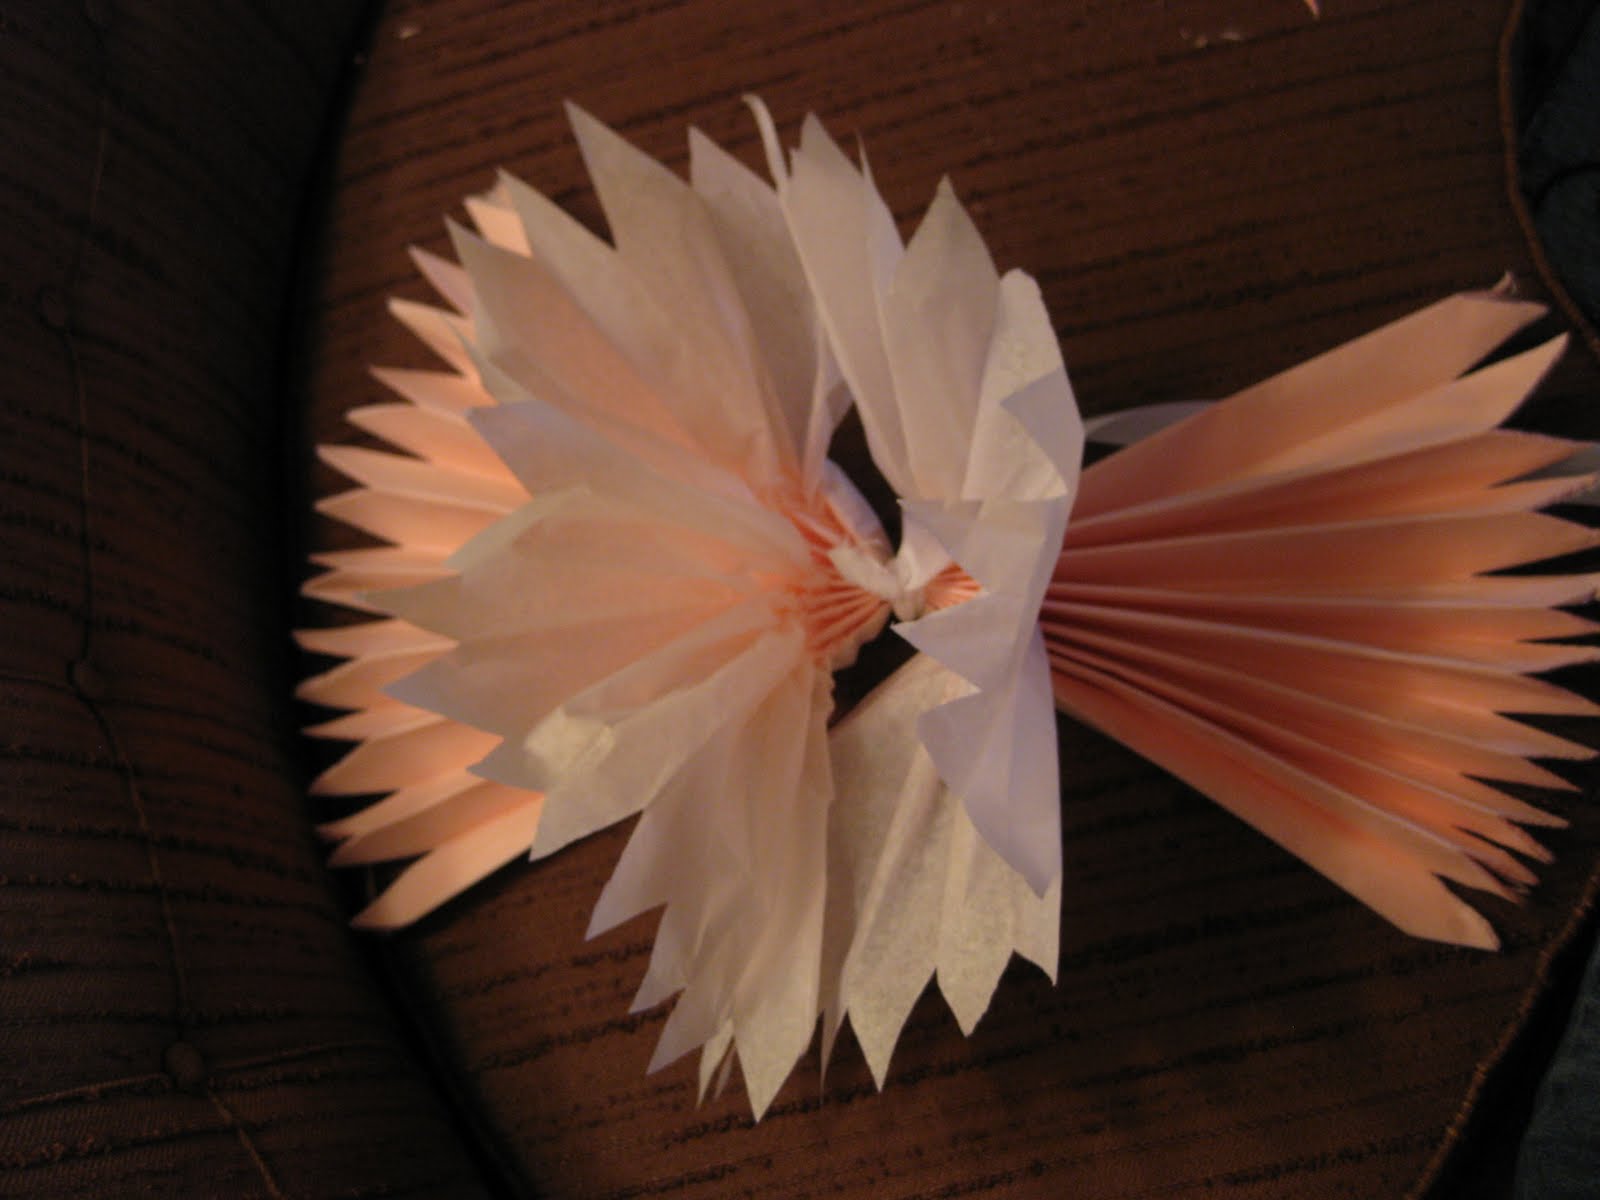
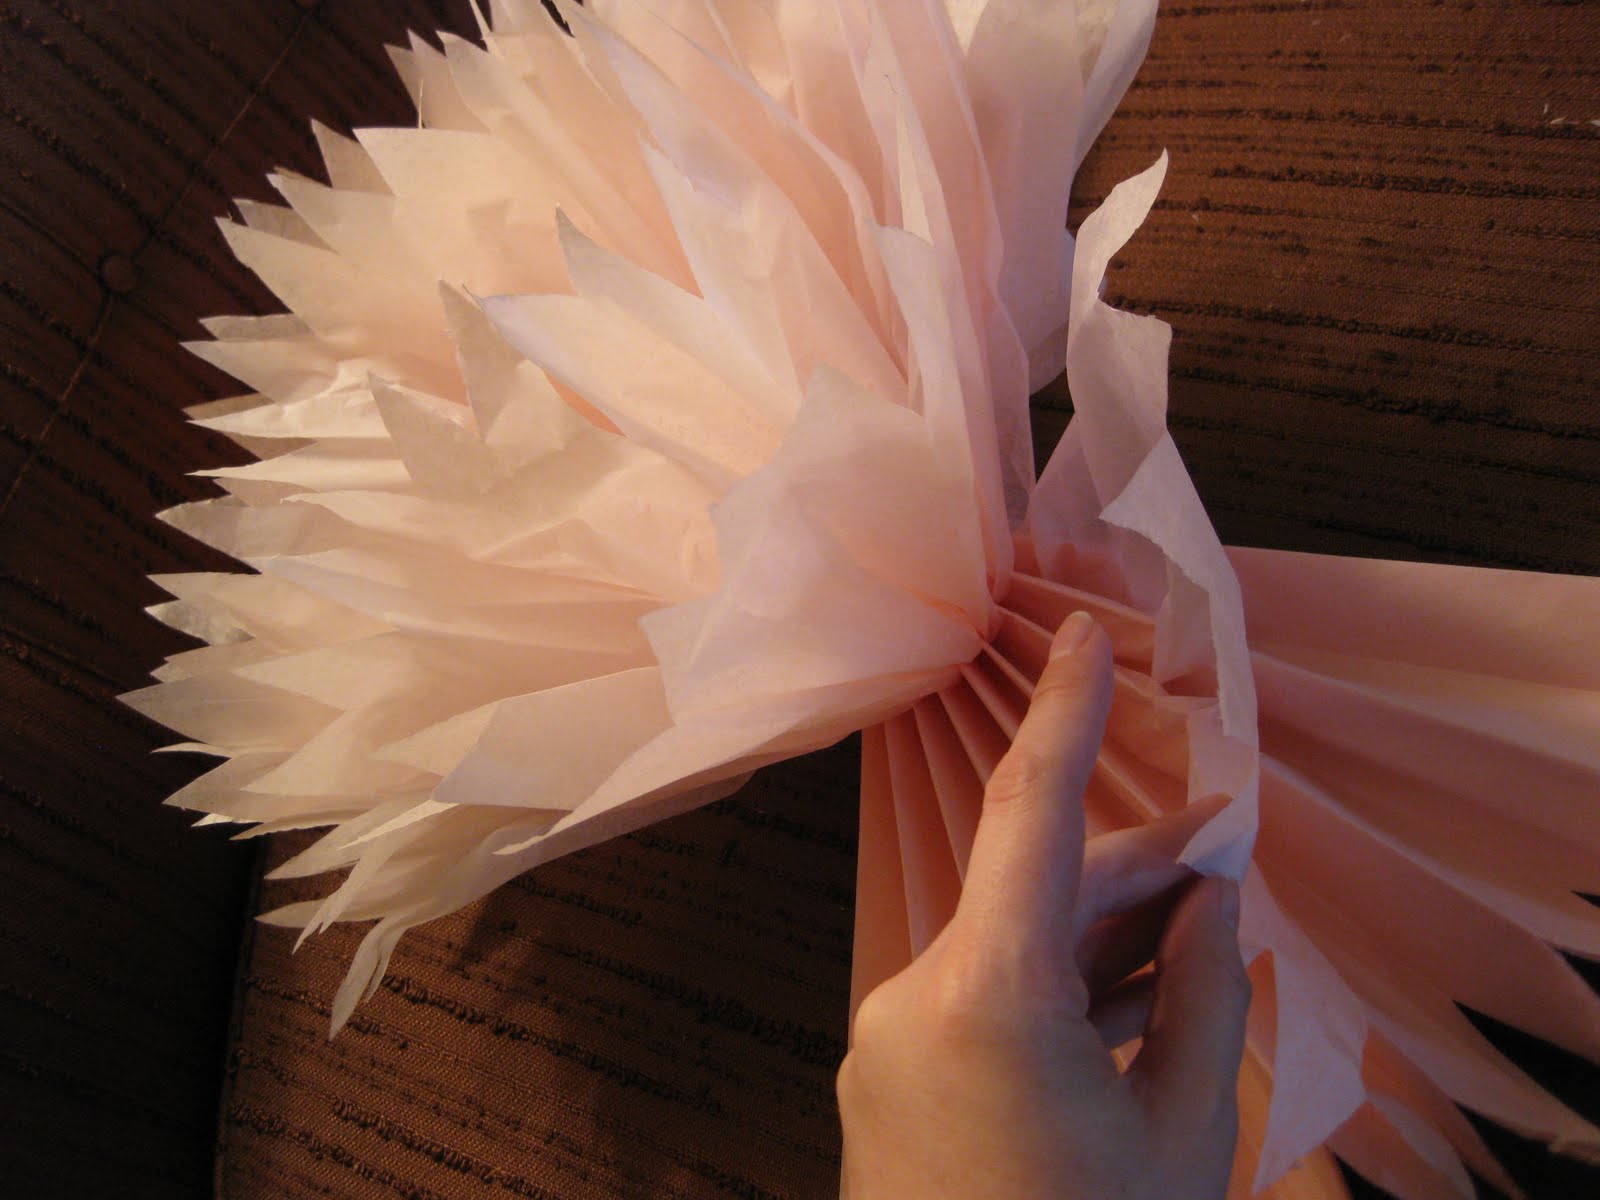
When you get through about half of your layers, use one hand to hold the center and the other hand to peel back layers on the opposite side. You’ll get a feel for it, and start to see it taking shape! Totally instant gratification!


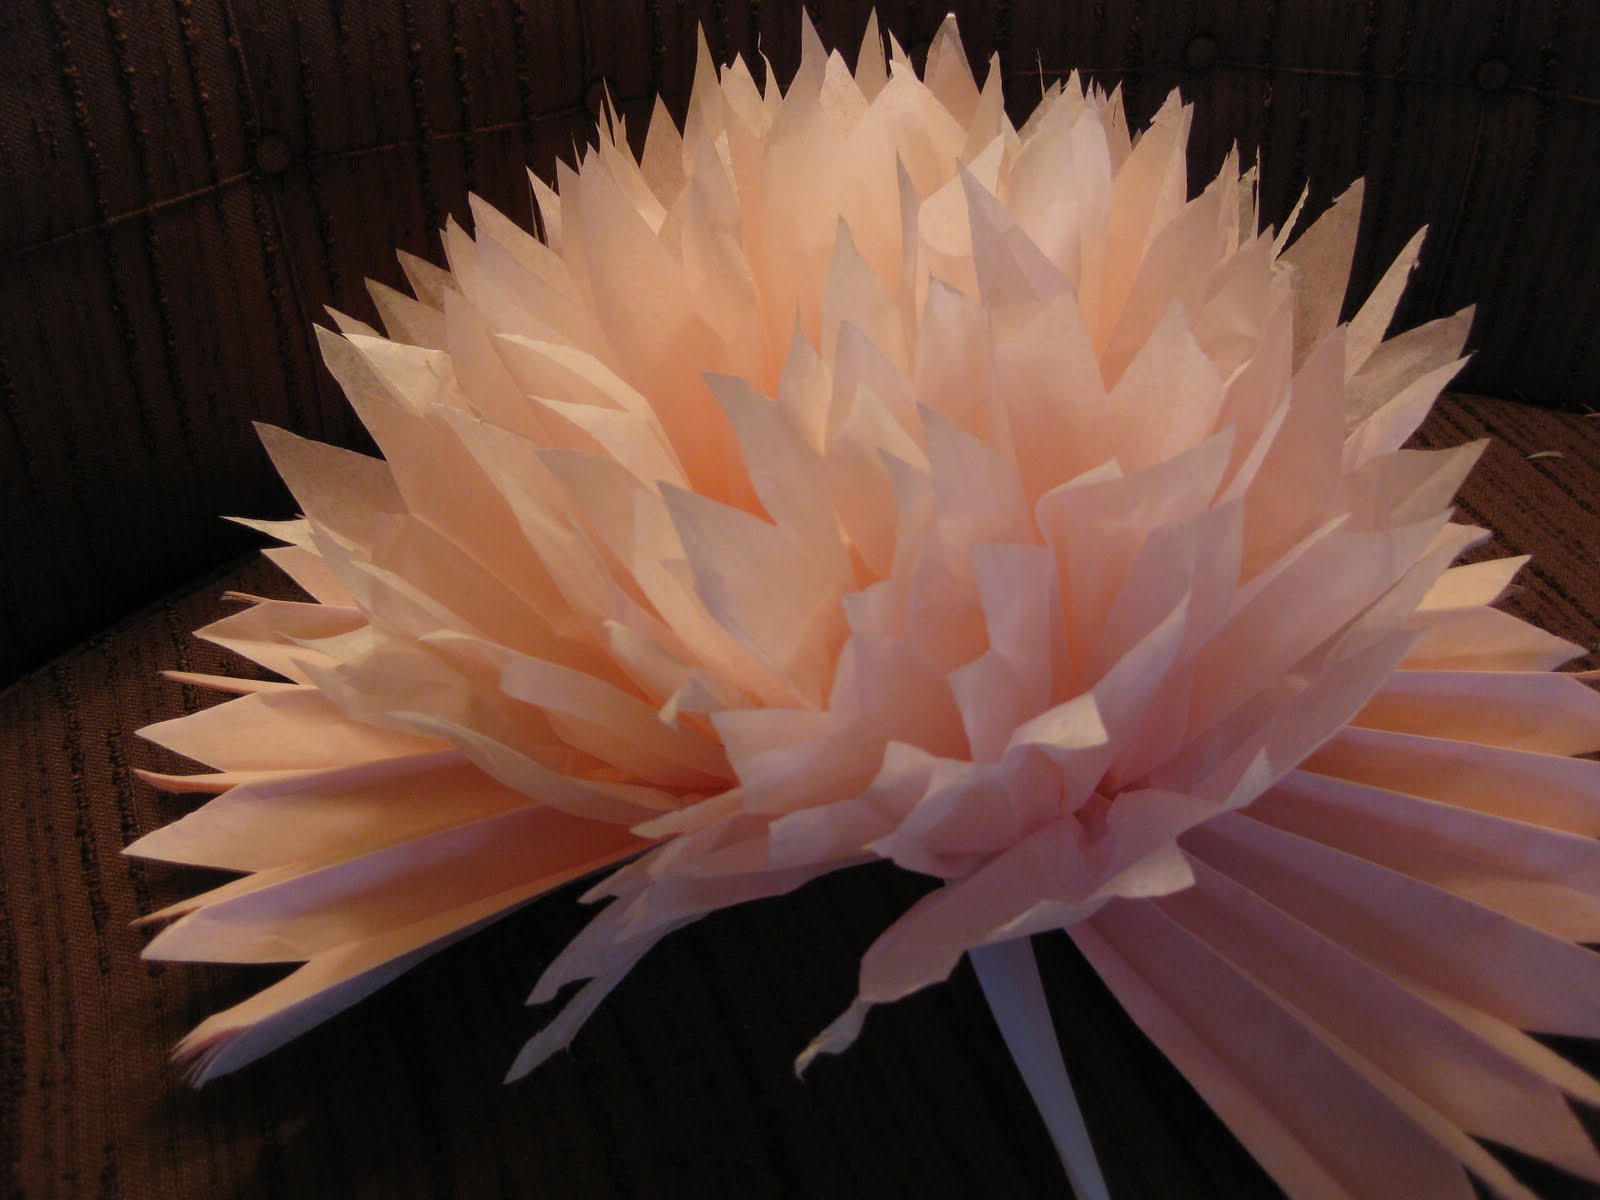
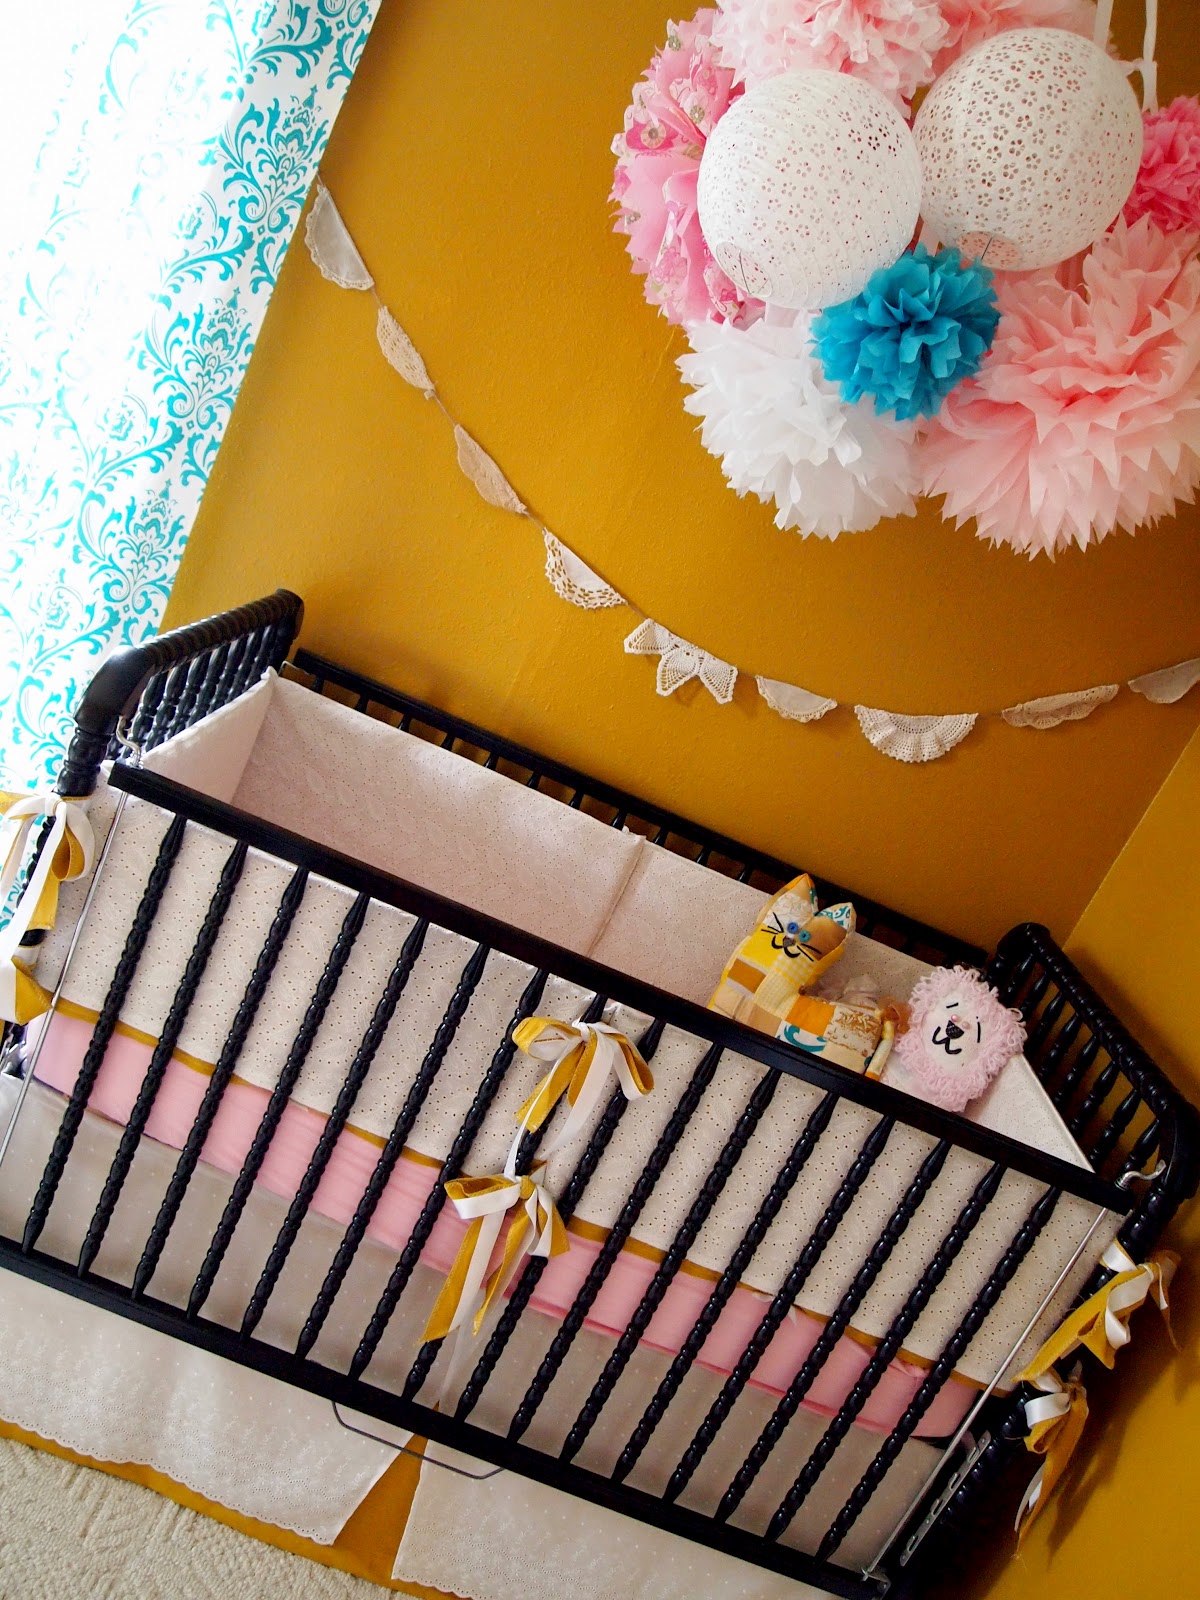
It seriously only takes a couple minutes to make one, and you could do so many things with them!! I’ve seen them used at weddings (hanging individually from the ceiling here and there) and over dining room tables, etc. The possibilities are endless! I added in some white eyelet paper lanterns that I had left over from my wedding. I love the variety of textures!
Let me know if you give it a try and how yours turns out!
UPDATE! Check out the final nursery reveal HERE!

Related:
-

I have a fun and easy building project for you! And while I do end…
-

My kids are getting to the age where they want to tape pictures, cards, notes...…
-

I've been needing to figure out a solution for my overwhelming plant propagation situation for…
I saw a few people asking about the lanterns. Found some pale pink ones here! https://www.shopsweetlulu.com/item/Pink-Eyelet-Lanterns/1331/c146
Just made these for a baby shower!! I cut the paper in half and made some smaller ones too!! Thanks for the awesome easy tutorial!! 🙂
Awesome! I’m glad they turned out!
Did this.. didn’t look nearly as neat, but I’m not the neatest, so it fit me perfectly! Putting them around my room!
The hubs built it with his bare hands!
Love these and LOVE the little bottom book shelf…where did you find that little gem? I’ve been looking for a while…
Anonymous, I used tissue paper from two different stores, so the light pink one had 10 in the packet, and the other colors were 8 in a packet. If you’re making the big pouf, I would definitely use two packs of 8 for one pouf, if not 3.
Hi!
I’m wanting to make this for the baby room when baby #3 arrives later this year. In your picture of the materials, your pack of tissue paper shows 10 pieces. Is that the amount you used for most of them? (I saw that you said you used 16 for the larger ones). I keep finding packs of 8, and i’m not sure if that’s enough???
I’m going to make these for my daughters room!!!
Thanks for the step by step instructions!
the more sheets you use, the fuller it will be. i used 16 on my larger ones, but i wished i had used even more because they weren’t as full as i wanted them. play around with it and try different amounts! i probably wouldn’t use more than 24 tho. 🙂
how many sheets of tissue paper do you recommend for the big huge flower balls? I have packages of 10, 24, and 35 sheets!
You are amazing Beth!! wish you were here to do my kids room…I would hre you in a sec. You have got so much going for your future with this design stuff!! LOVE IT LOVE IT…robin
This is FAN-TAS-TIC!!!! I know you have incredible taste and style, but I was a bit skeptical about this nursery–until now! The mobile brought it all together and it’s now my FAVORITE nursery look! (I kind of wish you were having twin boys so I could copy you for my little guys!)
We affixed them to the ceiling by tying all the ends of the ribbons to a key ring, arranging the tissue balls how we liked, and hung the ring from a hook in the ceiling!
I tried to make these for my son’s 2nd birthday party last year (it was a Dr. Seuss themed party, so I used bright fun colors) and they were a HOT MESS! Haha! Not sure what I did wrong, but they did not look nearly this cute (plus I kept ripping the tissue paper when I was peelng back the layers). I may have to try them again and see if I can do a better job! Yours are adorable! Happy Mother’s Day!
What did you use to affix them to the ceiling?
That looks AWESOME!!!!! The nursery is looking beautiful 🙂
i really don’t remember where we purchased the lanterns. we got them for our wedding, and it was a long time ago! 🙂 sorry.
Where did you purchase the lanterns?
you can make smaller ones just by cutting the tissue paper in half. the medium sized ones i made were 2/3 of a whole sheet.
How cute! I am going to make a bunch of these for my grandson’s bedroom! I love them!
I love it! They really tie all the elements and colors in the nursery together! My daughter (19) is moving from home this summer – – I’m going to make a bunch for her new apartment bedroom – – too cool!!!!
Absolutely adorable and gorgeous. I have never seen anything like it but I LOVE IT. How did you make the smaller ones? Just cut the tissue paper in half? I am definetly going to give this a try. Thanks for such cute ideas!!!