Our bedroom transformation has to be the slowest room makeover in the history of interior design. And for that I apologize. This weekend, we finally got around to making curtains for the room! And I’m going to show you just how we did it.
Fabric can be so expensive. Even when it’s on sale, it still seems to add up when you’re buying enough for something like curtains. It’s one of those things where it’s almost cheaper to just buy already-made curtain panels. But where’s the fun in that?
I got to thinking about the cheapest possible way to acquire fabric… and it hit me: a drop cloth!!! (I learned yesterday that I wasn’t the only one that had this idea… my girl Brooke at All Things Thrifty did the same exact thing! Great minds think alike! Check out her curtain transformation here!) So I bought a 9 foot by 12 foot drop cloth… for $12. This was the perfect amount of fabric for 4 curtain panels for our two windows in the bedroom. That’s right, $3 per curtain panel!

After cutting the drop cloth into 4 equal panels, ironing and hemming the edges, I laid a strip of lace (I scored 3 yards on sale for a total of $7!) on top of the drop cloth like so:

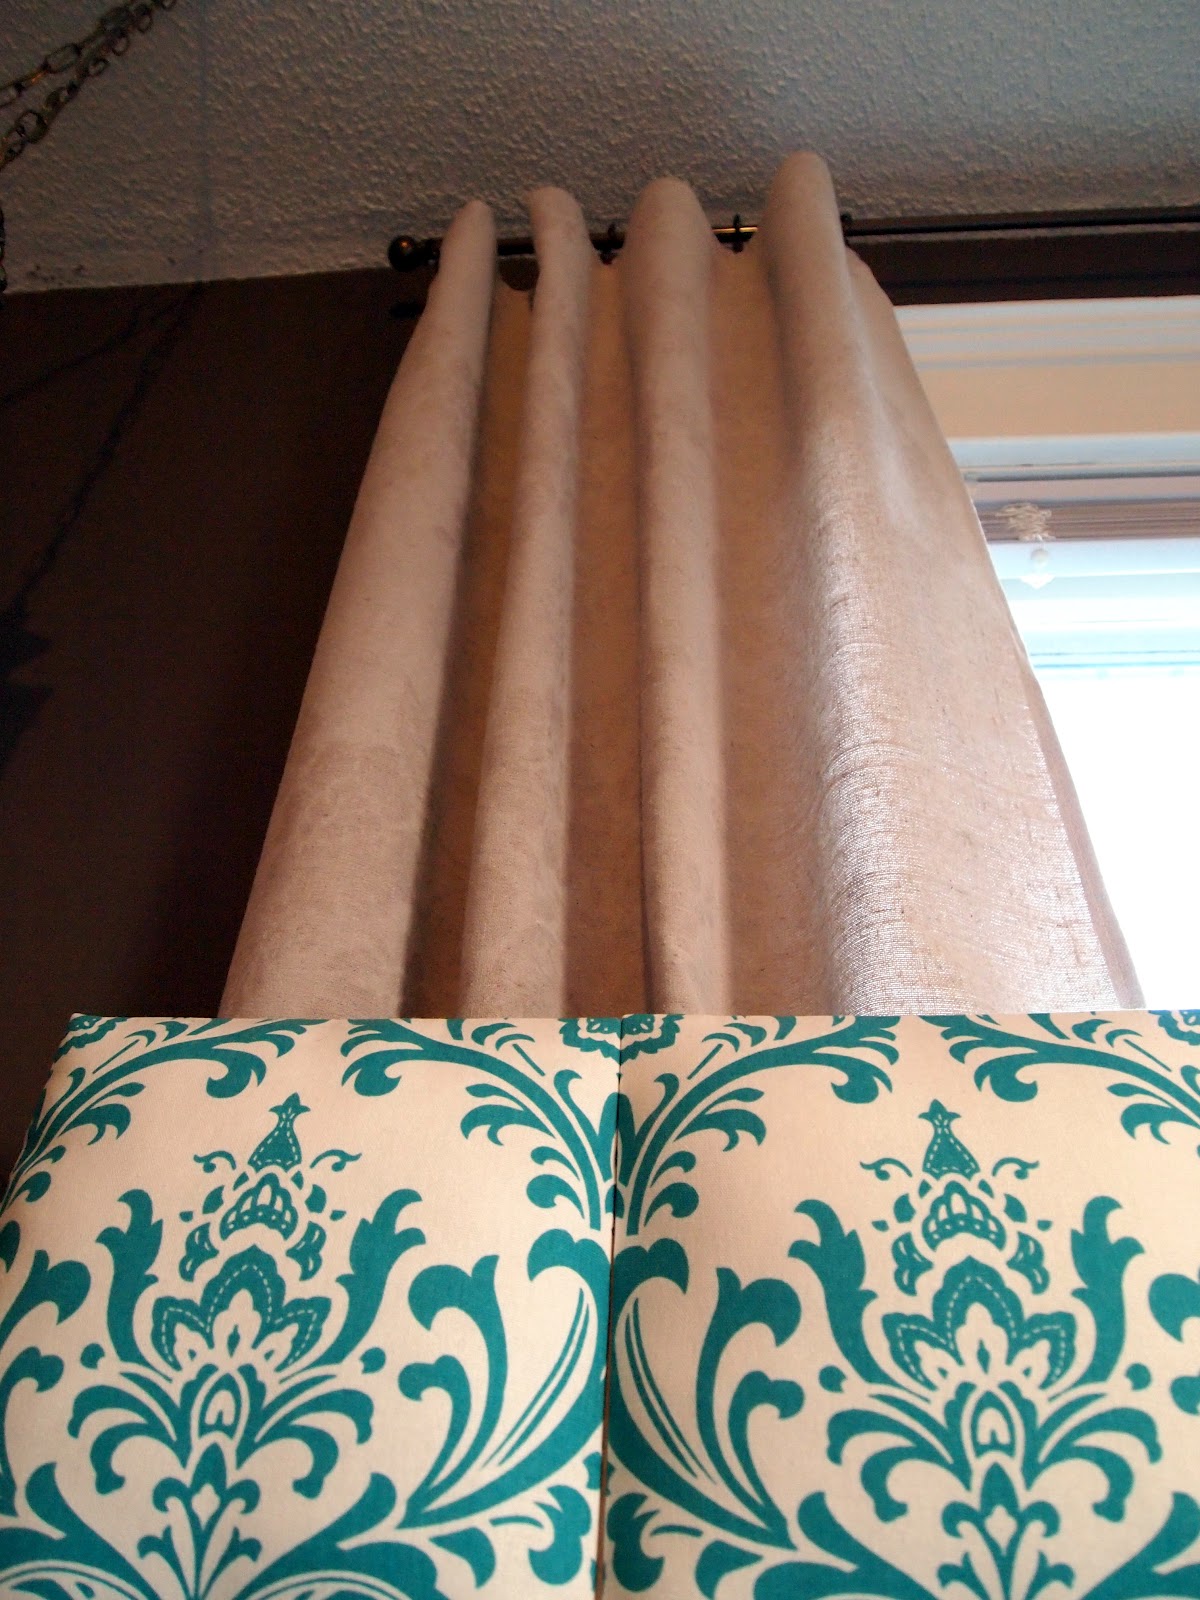
Using the lace as a stencil, I spraypainted over top. The drop cloth was already light gray-ish in color, I wanted a very subtle yet elegant design (since our headboard has a busy damask print on it), so I used a simple white flat Rustoleum spraypaint. (As you well know, painting curtains and other unusual items is not foreign to me, if you remember the Skyline Curtains and my Stenciled Area Rug from back in the day!) I used 2 cans of spraypaint on each panel to make sure I had good coverage. It gave me just the right amount of contrast when I removed the “stencil”.

After waiting a half hour or so, I just pealed off the lace to reveal a beautiful reverse lacey design! AND, I was able to reuse the lace for all 4 curtain panels!


Having finished my curtain panels, we put up our curtain rods (and by “we” I mean NICK) We went with oil rubbed bronze finish to complement the antique DIY swag lamps.

I loooooooooove the way that curtains make such a huge difference in a room.
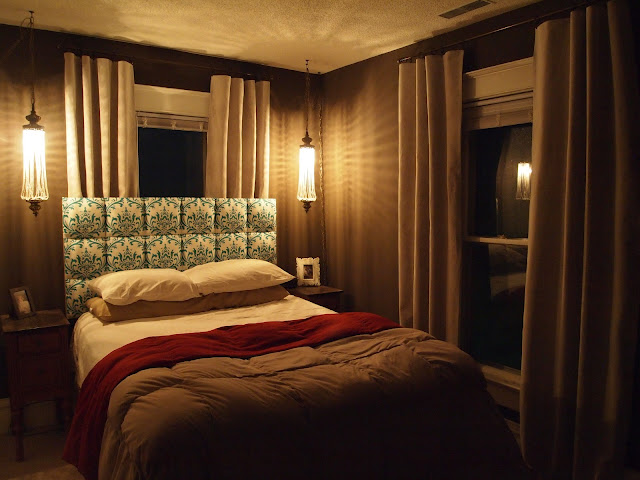


They just make everything feel more soft and… finished looking.

In certain lighting, the subtle lacy stencil really pops! And other times you can’t see it at all. But that’s ok with me.


Obviously we need to address the bedding situation. I’m keeping my eye out for the perfect comforter. Since we’ve gone bold with the walls, I think I’m going to look for something light and airy feeling. Here’s a pic with no bedding… do you have any comforter suggestions?

I’m planning to DIY a bedskirt using inspiration from something I found on Pinterest. And some fun throw pillows will really make things feel more fluffy and inviting. And we still need to tackle the opposite side of the room. I’m looking for a low/long dresser, and a couple chairs for a little seating area! Our master bedroom is slowly coming together!
Related:
-

If you've been following along on the 'gram or Youtube, you know we've been turning…
-

WHAT A JOURNEY! What a labor of love! What a pain in the booty! I…
it was sure a pleasure of mine to make one comment on this blog. Have bookmarked this website for future reference. Will definitely share this info with friends
Yes, you should be able to get the fabric ones anywhere that they sell paint! We got ours at Menards. Be sure to wash them first, they’re kinda crusty 🙂
this may be a dumb question (in fact, I’m sure it is), but where do you buy fabric drop cloth?
I always buy the plastic cheap ones, can you get the fabric ones from big box home improvement stores like Home Depot?
We screwed the 2x4s into the wall, and used the flushmounts to attach the headboard to the 2x4s.
Did you use the interlocking flush-mounts to mount the 2×4’s to the wall & the headboard to the 2x4s?
i have been wanting to try this, the room looks beautiful xxx
I love how putting the curtains up above the windows really elongates the room and makes it look more roomy. I NEVER would’ve thought to do that, but now that I’ve seen it done before it makes perfect sense. Love how the room is coming along!
This is so pretty! I really like the color on your walls. My husband and I are renting and our room is a creepy way too light of lemon color with light pink showing through from a previous paint job. Maybe I can convince the landlord to let me paint. Cute babies!!
I love those curtains. Even if you don’t have the comforter yet, the whole room looks amazing. Rich. And not chocolate rich, but, mu-la rich. Great job.
Deborah
I really like what you have done with your curtains. I am still trying to figure things like that out. We have a lodge-pole bed, I’ll have to sew any bedding we do. You can’t use a regular dust ruffle with ours. I am loving your color scheme so far.
great job, Alexis
We are trying to figure out cheap curtains for our bedroom, and drop clothes are looking like the perfect solution. Thanks for the tip!!
How do you have the time?? YOu are soosoo Good!! I wish you could ccome here for about a month and give me some basics around here. Love the headboard too. where did you get that? You have great ideas and so classy!
Robin
beautiful! what a clever idea!
Your too hard on your self, you have babies remember! Great job on the curtains, clever. Thanks, Mary
Very, very nice!!
Man, your room is fantastic! I loveee it!!!
Awesome tutorial!!
peace. Amy