A looooooooong time ago when we painted this backsplash, the homeowners Stan and Sue gave us a tour of their lovely home… and I comment on how I loved their vintage swag lamps in their living room. It was meant to just be a compliment… but they proceeded to remark, “those old things? We just bought new lights to put in their place. Do ya want the old ones?” …ummmm, yes please? And so Stan whipped out his ladder and climbed up to their high vaulted ceiling, and removed the fixtures right in front of us. How incredibly generous and awesome?!
I’m sad that I don’t have pictures of the lamps before our ADHD dog broke the globes (we shouldn’t have had them in our garage I guess)… but we were left with just the ornate brass parts of the lamps, which is what I loved about them to begin with… so it was ok.

After occupying our garage for far too long, I finally decided what I could do to make them awesome again. Our bedroom’s been in desperate need of some new matching bedside lamps, and we all know how hard it is to find two matching lamps at garage sales or thrift stores. Why is there always only one? So the swag lamps were the obvious and budget friendly choice for our bedroom… AND they have major character!
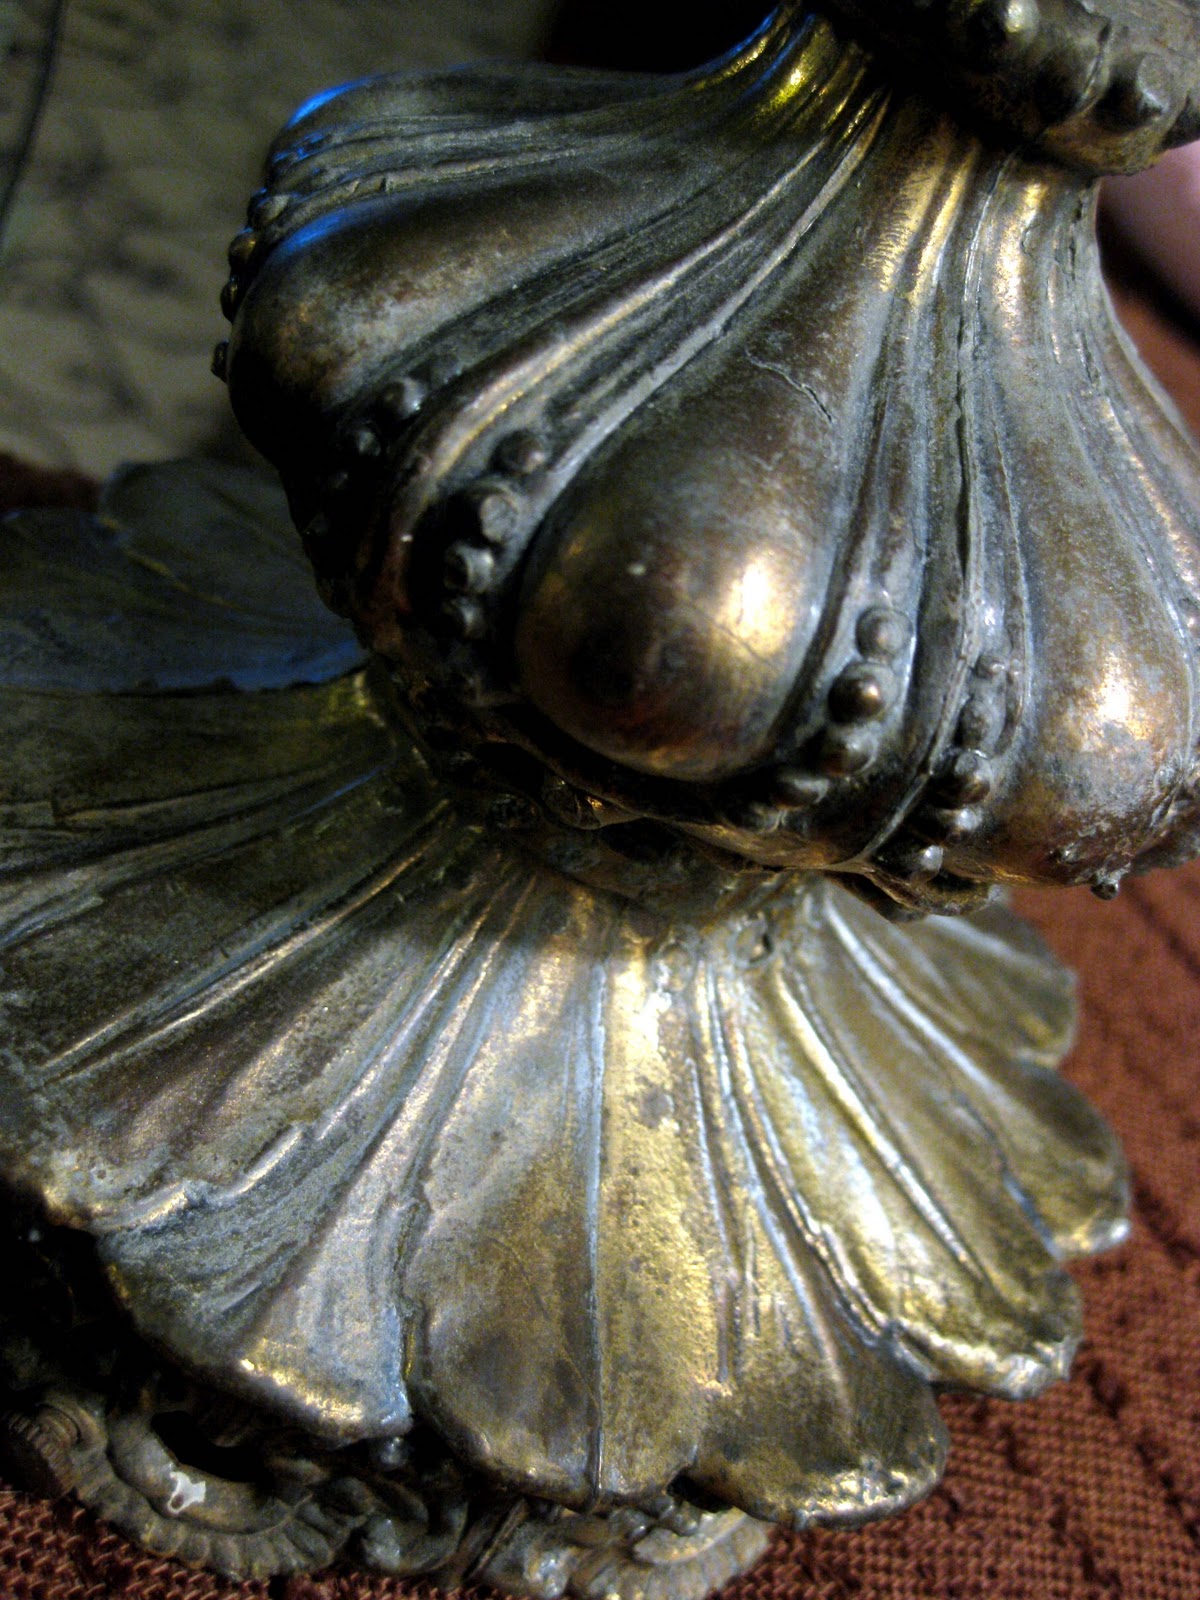
So here’s what we did. The brass was very tarnished and icky, so everything got a good scrub-down with soapy water. Which didn’t help AT ALL. So after googling some home remedies for shining up icky brass, I went at it with lemon juice and an old toothbrush. Also didn’t help. So we broke down and bought some brass polish which worked like a charm. We’ll know for next time, eh?
For $15, I ordered 36 yards of 6mm crafting beads from Amazon.com. I cut lengths of 18 inches.

While I was measuring and cutting strands of beads, Nick was wiring and soldering the fixtures so that they would work… and not be fire hazards.

Then I just used crafting wire and attached each strand of beads to the brass top and bottom thingys. I didn’t take very many process pictures, because I got on a role and wasn’t thinking to document my beading journey. But this is what it looks like now!

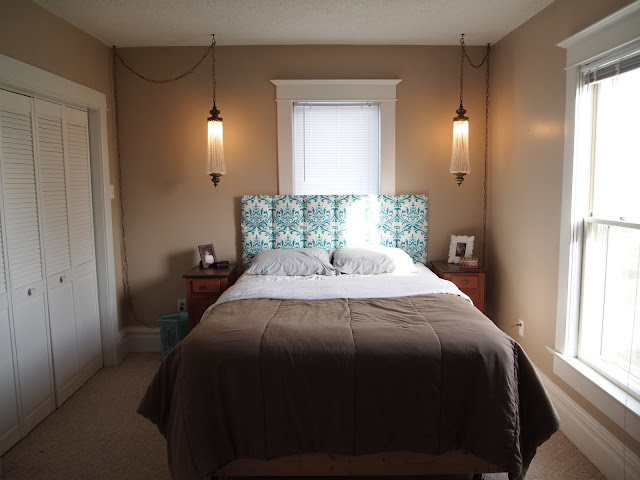
And here they are in the bedroom during the day.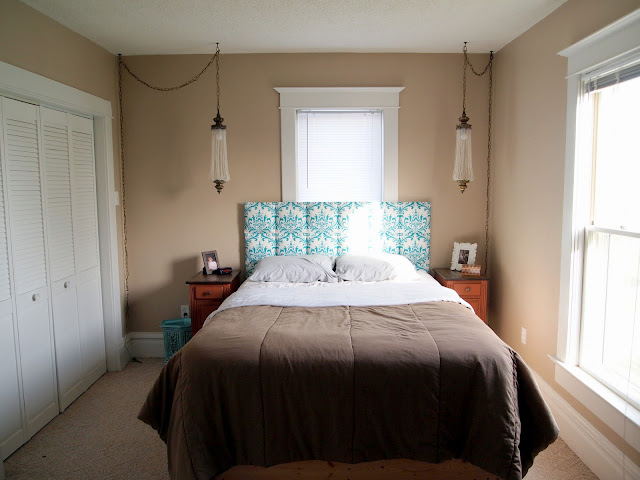

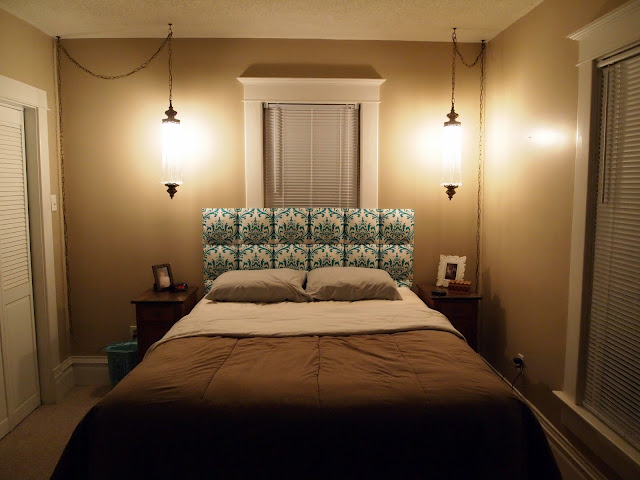
And at night.
We tried putting in some amber tinted bulbs, and it made for a fun vintagey-yellowy glow.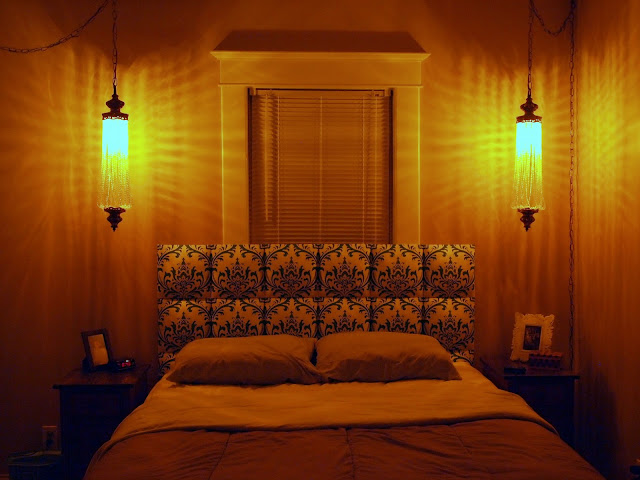

But I’m not lovin’ how the amber bulbs look during the day. So maybe we’ll just pull out those bulbs for “special occasion mood lighting.”
Remember what our bedroom looked like just last week?
The addition of the headboard and nightstands and sweet swag lamps is making a world of difference! It’s slowly starting to feel like a romantic paradise escape from our wild chaotic life!
I’m not saying that being a hoarder is a healthy lifestyle, but there’s SOME merit to keeping things around “just in case I might use them someday.” Such an improvement!!! Not sure what’s next. Curtains p’haps?
Related:
-

If you've been following along on the 'gram or Youtube, you know we've been turning…
-

WHAT A JOURNEY! What a labor of love! What a pain in the booty! I…
Lordy! I don’t know where to start! Random google for kitchen remodel stuff and I happened upon your Mason jar backsplash page. Two hours and ? Cups of coffee later! LOVE the twins room – those beds!! I want one, grown up size! Love your 112 (older by now!) yr old house. Five acres is a dream! Hubby with MAD skills – HELLO!!! LUCKY GIRL!!! Laundry Suite!!! I could go on…. ADORE these lamps!!!!! Now that you’ve gone boho, I hope they still have a happy home, do tell! Staying home with your babies is the most HONORABLE job any woman could have!!! Kudos to you and your family for making it happen ❤️
Awwww Sandy you’re so sweet! Yes I am a VERY lucky girl.
So the swag lamps… yes we still have them, but they aren’t being used right now. I’m not sure where to put them! But I love them too much to let them go. Haha! Gosh, that was sooooo many years ago that I wrote that post. I had no idea what my blog would become back in those days. It’s nice to know that people still stumble upon those old posts from time to time. 🙂
hey…love the idea…can you tell something about the electrical wiring of the lamps? i have several diy lighting ideas for my room but the wiring is where i m stuck always
Hi Tahira! Wriring fixtures is on our list of tutorials to knock out soon, so stay tuned!
Wow,im really impressed! Thank you for sharing your creative and beautiful lamps!
I just love all of your work .I am having trouble figuring out how are the bottom and top attached giving the beads the draped look .so I can find something to make them similar .
We used craft wire slightly shorter than the beads so it would have the billowing effect. The wire also makes things more secure than if it was just beads. And you can hardly see them!!
Hi threespirit, sorry it took me so long to respond! OOPS! So, we ended up getting really low wattage bulbs (15 watts) because we really only use these lamps for ‘bedside light’ and not as an actual main light source for the room. 15 watts ended up being plenty bright. And we did a ‘controlled experiment’ to make sure they were safe. We left the lights on for several hours and checked on them every 15 mins or so to see if the beads were getting even remotely warm, and they didn’t! We’re so happy with the result, and we love that these aren’t a fire hazard!
I can’t believe the difference those two elements have made. I’m totally inspired to sort out my own bedroom that taste forgot! I’d love to try making lights like that, is there any danger that the beads would melt?
Hokeyy smokes! The lights are fabulous and make all the difference in the world!!… the perfect touch!!!
Hmm, add that to the list of things I would never have thought of..very pretty!
Are you a bed skirt kind of gal?..cuz I noticed you don’t have one..maybe that could go on your list?? I’m sure with your mad skills you could whip one up out of burlap–or thin air!!:)
looks AMAZING! I just love it!
Beth, you are soooo talented. I would not have any clue what to do with that 🙂
i’m dying to see what color you end up painting the walls 🙂 i have a guess, but i could be wrong.
AWESOME!
If those’re your candles, I’m jeouals. I used to have a little candle log when I was younger, basically was going for the same thing then it was thrown away.The end.We did see some beautiful lightning driving back from Salem yesterday, though! I wish my camera could’ve caught some of it.
Wow! I wish everyone could have seen a good before of my parents old lamps in their full glory – I couldn’t see how they would have inspired anything other than a trip down memory lane to the 1970’s! I love them!!
Thanks everybody! Kristen… most of our ideas come out of our heads, but every once in awhile we’re inspired by someone else’s project, either from another blog or Pinterest. When we’re using someone else’s idea, we always give them credit in that post!
Wow you are always amazing me, I LOVE how the lamps turned out. Where do you get your idea’s from?
I LOVE the lights! They’re gorgeous!
Beth, you are AMAZING!! Those lamps look beautiful the way you did the beading and then hanging them. And such a little amount of effort and your bedroom is already pretty. I agree, you SHOULD do the curtains next.
Lynnsey
You are getting there! The improvements you have made are awesome and I LOVE the lights! They are perfect!
Wow that looks amazing! 🙂 I love that you changed a few little things for a dramatic change in the room!