For some time now, I’ve been really itching to tackle another room in our home. The only rooms I feel are done are the nursery and the kitchen… (and the kitchen could really still use some new appliances, flooring, and the washer and dryer needs to be moved OUT of my pantry so I have room for our month’s worth of food). And since we’re on a serious budget, designing and updating our home has been put onto the back burner. And that… drives me CRAZY. I neeeeeed to keep crafty in order to feel alive and legitimate.
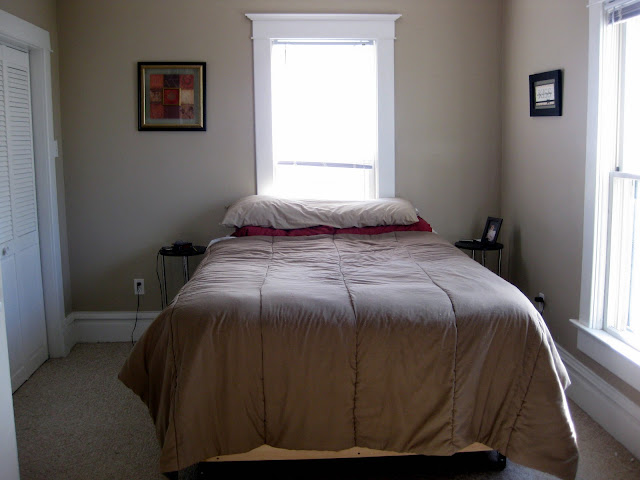
With all that being said… the living room and our master bedroom are the two rooms that are in the running for “needs to be next” on the list. And while we’re not about to run out and buy a bunch of stuff (even from craigslist) I realized I could be using some of the things we already have to start making improvements… specifically to the bedroom in this case. Here’s the view of the bed, as it’s been (embarrassingly) for the last two years. Hate it.
Firstly, I’m SUPER happy to announce that we decided to keep our classy damask upholstered headboard that we crafted a few weeks ago (tutorial here). At first I wasn’t a fan of having the same exact fabric displayed in the nursery AND our master bedroom… but then I decided: who cares? I like it a lot, and I want it on my bed. And if that’s bad design, then call me an amateur. Cause technically, I have no qualifications whatsoever.

Additionally, my cousin Johnny and his wife Heather passed along this charming painted childrens desk/hutchy thing about a year ago, and gave us free reign to do whatever with it. They just wanted it out of their garage! And while I love this piece (what with it’s great legs and whatnot) I just didn’t know what to do with it! Should I save it for the girls room someday down the road when they’re old enough to use and appreciate it? Should I fancy it up and sell it? Should I let it sit in our garage to accumulate sawdust and house our spraypaint collection? Yes! Let’s do that!
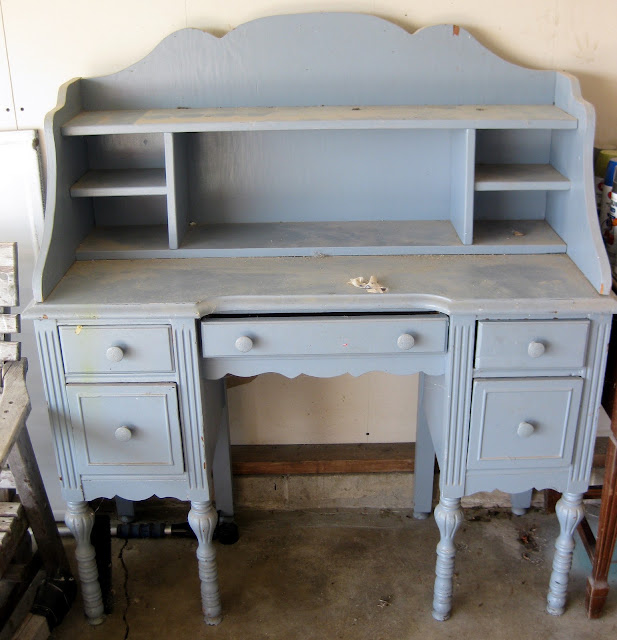
BUT… about a week ago, it hit me. I knew exactly what the fate of that little tween desk would be. And, by fixing this dilemma, I would also be fixing another dilemma. That being our serious issue with our nightstands. They’re really flimsy and without storage or style. And I hate them. Can you see where this is going at all??

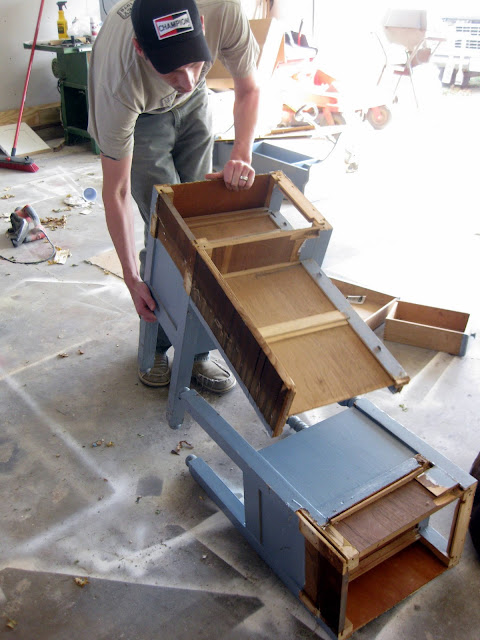
So after convincing the man-boy of my unconventional plan, we started the demolition. Truthfully, I was excited about swinging a sledgehammer, but Nick got all logical and parental on me.


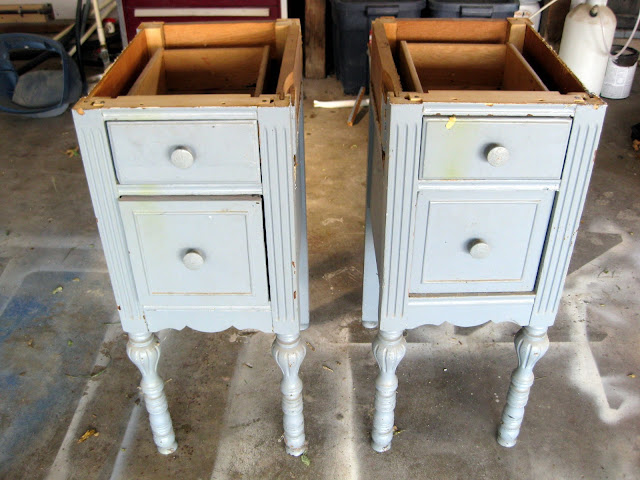
Which left us with two awesomely perfect matching nightstands… nightstands with great legs. Holla!
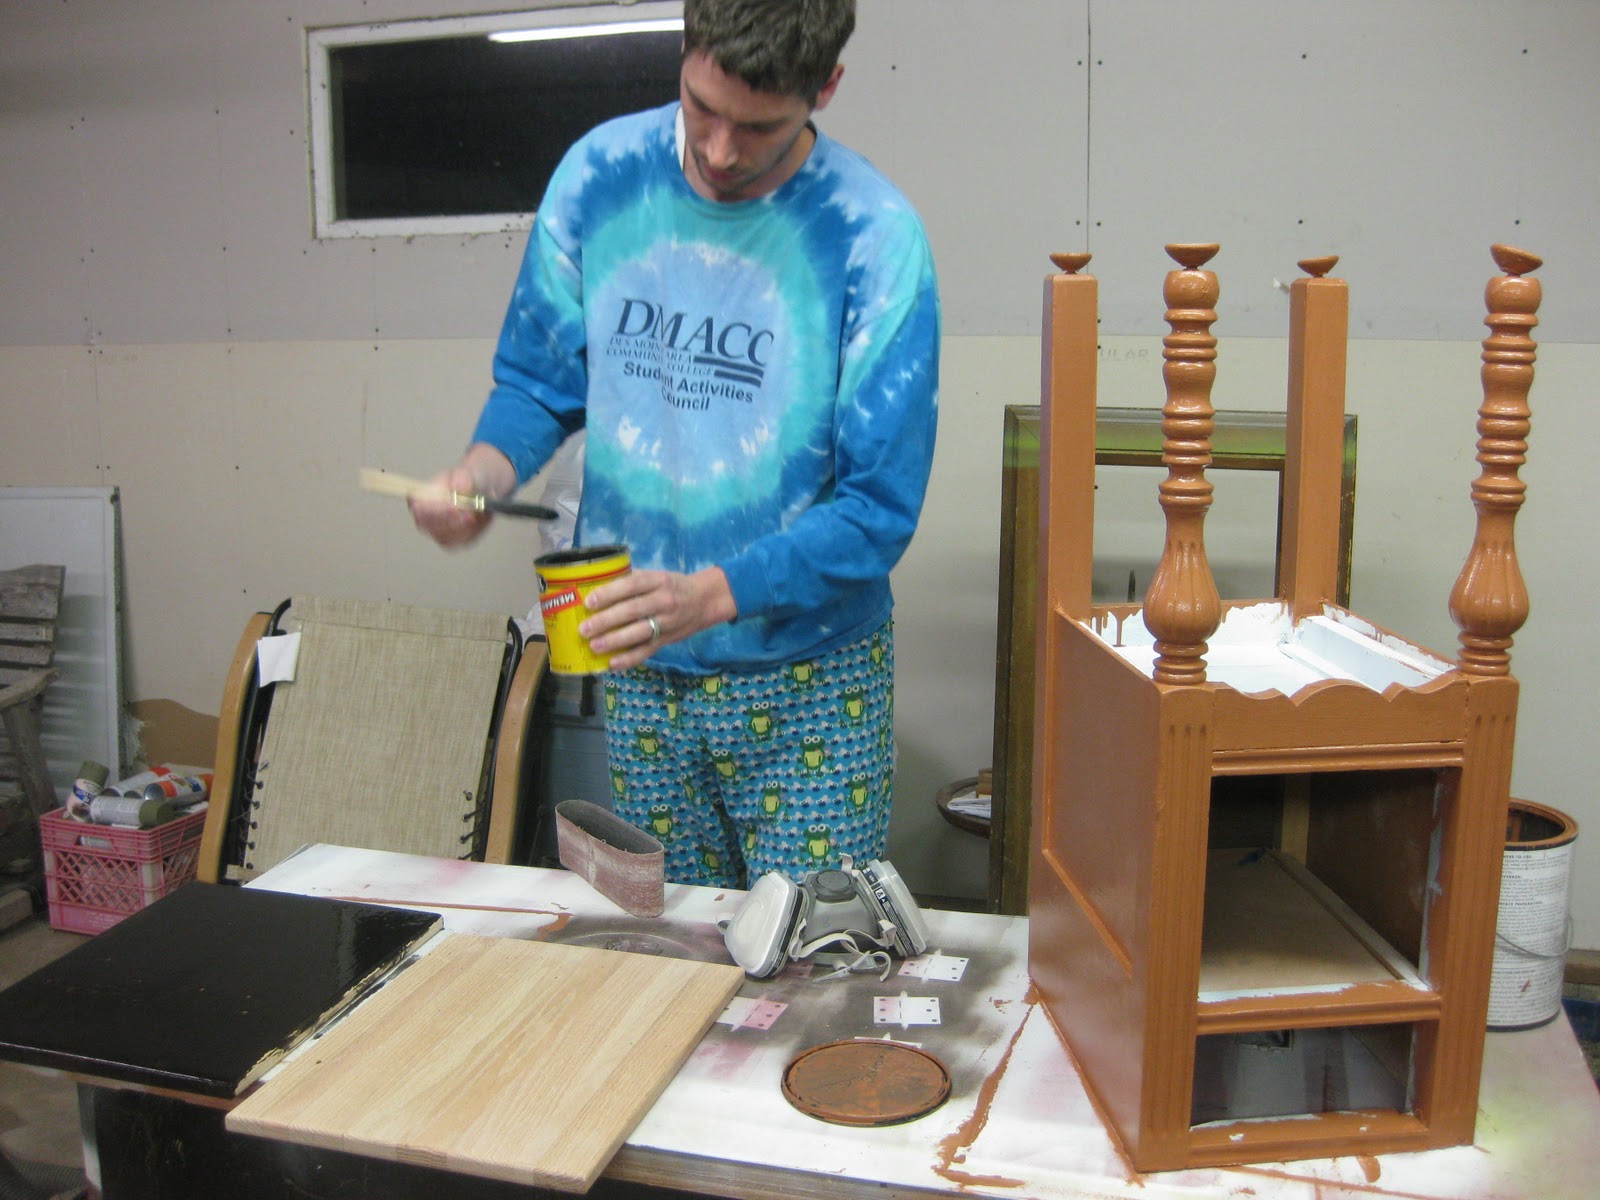
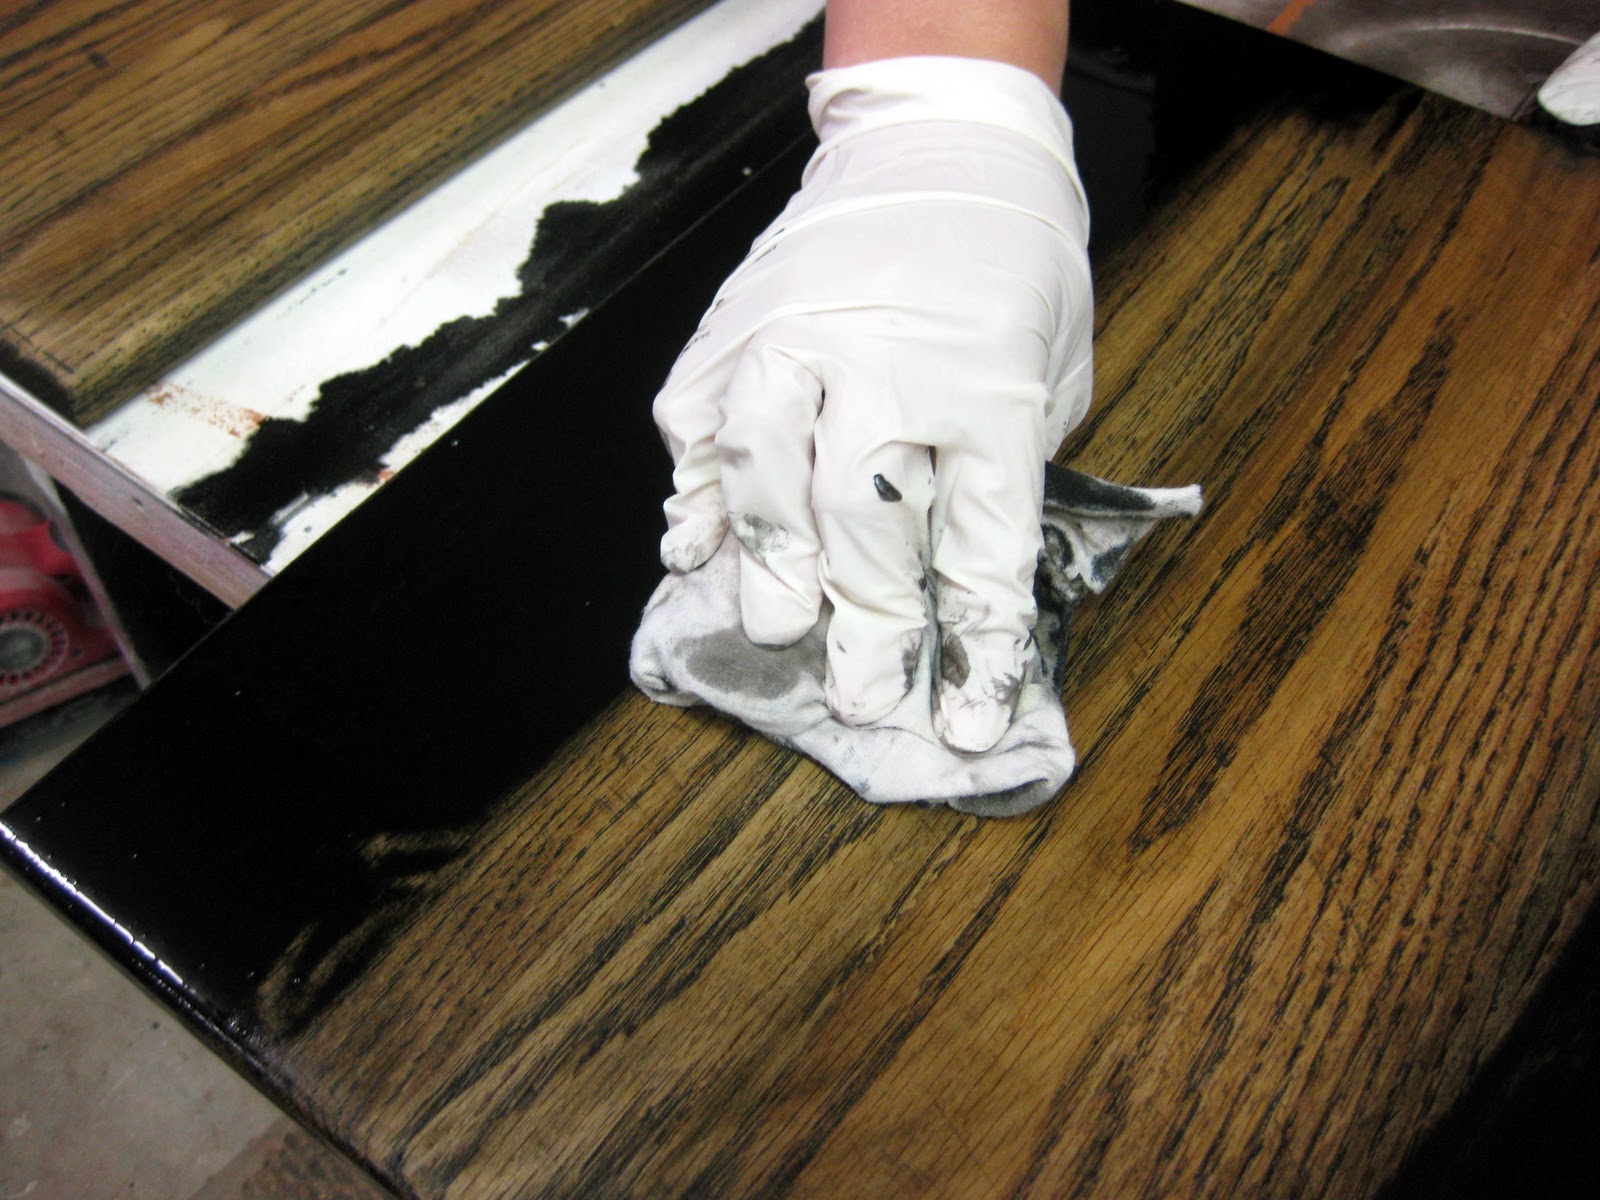
They got about 3 coats of burnt orange paint (that I brushed on, since we had a leftover can of paint from HERE in the color I wanted). This experience reminded me why spraypainting is SOOOOO much easier… and funner. And it gives you a better finish. And it’s faster. I can safely say that if I had instead driven an hour round trip to town and purchased the color I wanted in spraypaint form, and come back home to spraypaint my bedside tables, it would have taken less time than using the can of already-owned paint. That’s all yo. We glued together a couple planks of oak, and stained them in Minwax Ebony… for the tops of the nightstands. I loooooove how these turned out. …(yes, that’s my husband sporting a tie-dyed T-shirt and classy froggy flannel PJ pants) #dying

Then these little gems got some glazing treatment, and they’re ready to go!
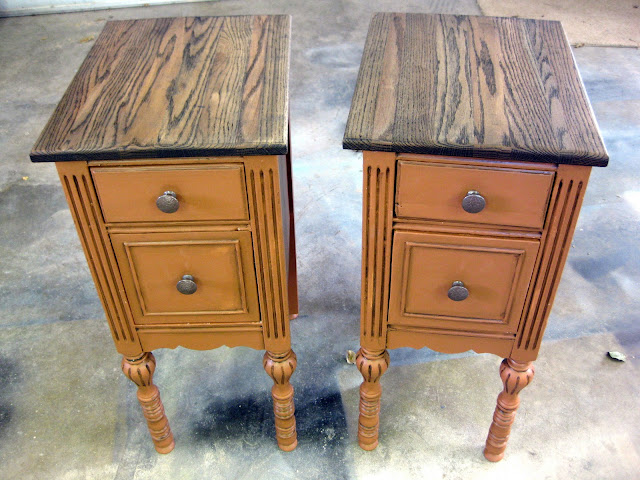
Not only do we have matching adorable bedside tables with TONS of character… but we also have storage for all those bedside “items” that we won’t discuss here… because this is a family blog. JK… I’m mostly speaking of my retainer.

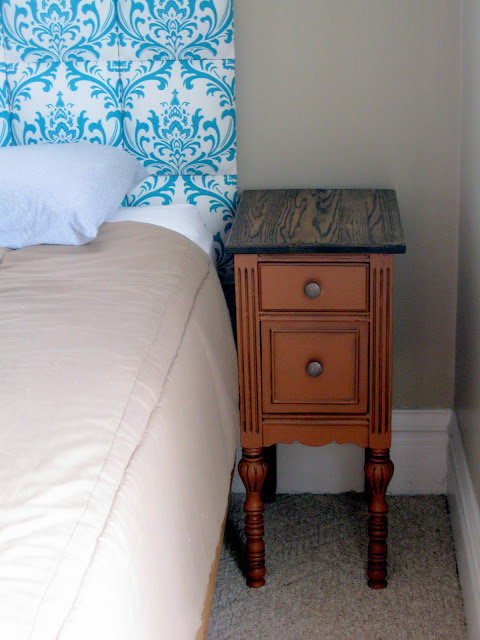
I so love these new little additions to our bedroom! There are still many things to do in this room, but I think this is a pretty good start for now.

~Bethany
*this post contains affiliate links
Related:
-

If you've been following along on the 'gram or Youtube, you know we've been turning…
-

WHAT A JOURNEY! What a labor of love! What a pain in the booty! I…
-

We love the original wood of our library, and wanted to find a desk that…
Question.. how did you attach the oak top to the end tables once you got them finished?
This is what I’m going to do to a vanity I just bought .. nobody uses vanities anymore and spare bedrooms aren’t big enough for them anyway
This is the first of your projects to disappoint. You could have found the same pieces floating around a secondhand store, but chose to dismantle something that would have been true to its origins as a dressing table….it could have been a desk even, with that add-on shelving used elsewhere. And the tables’ narrowness accents the small size of the bedroom, as two wider pieces might not have…..
I’ve learned a lot from your tutorials, for which I thank you. You are an excellent and creative painter.
Wow! You are really doing some cool stuff. I particularly like the choice for the tops of these tables. You are making me salivate for garage sale season! I will definitely be back to see what you are doing next.
As for the bedding, I personally think a fluffy white duvet with comforter, it looks super comfy, and works well with the pillows/headboard.
You are a genius.
I just happened upon your blog via pinterest. Great upcycling of the old desk. I would never have thought of turning them into two bedside tables! Loving the damask headboard too. I’ve added your blog to my sidebar for future inspiration. Cheers, Lis.
Spontaneously bursting into song….
“She’s got legs, she knows how to use them”
Just browsing through by referral from Erica who introduced me to this “3rd-cousin-once-removed-wife’s-blog”
Love the nightstands…I’m in a burnt orange/pumpkin-and-turquoise phase myself.
-Erin
That is incredible. I would’ve never though to break the piece up like that. So fun! If you still have the middle part, you could possibly use the scalloped trim piece or the middle draw as a cute wall hanging. The front of the middle drawer would be cute as a piece by the door or on the closet door to hang things off the knobs.
Oh, isn’t it the best to find design solutions right in your house?! And God bless a handy husband–how does a girl live without one?:)
That’s so awesome! I JUST had my hubby do the same thing with an old vanity…and I’m about to paint them gray! Feels good to know I “fit in”!! Well, this once anyway. Thanks for you blog…you amaze me.
you’re so cool. that hutch thingy was super cute and I love the legs too! –Nicole
The night stands look amazing. I love how the tops turned out. And, you can use the left over top for something. Oh, wait, I didn’t need to tell you that, you already find projects with leftover parts. I also think the head board on your bed looks pretty. You ARE an inspiration in more ways than just your crafty ideas.
-Lynnsey
Amazing. You guys are such an inspiration!
Ummm…. awesome! Everything from the now-chopped-up-desk, to the frog PJS, to the retainer – Amy
I just love what you did! 🙂 Shopping the house is sometimes the best way to decorate!!!
Check out those Sweet Pajamas! I look forward to putting my night time possesions in them drawers…