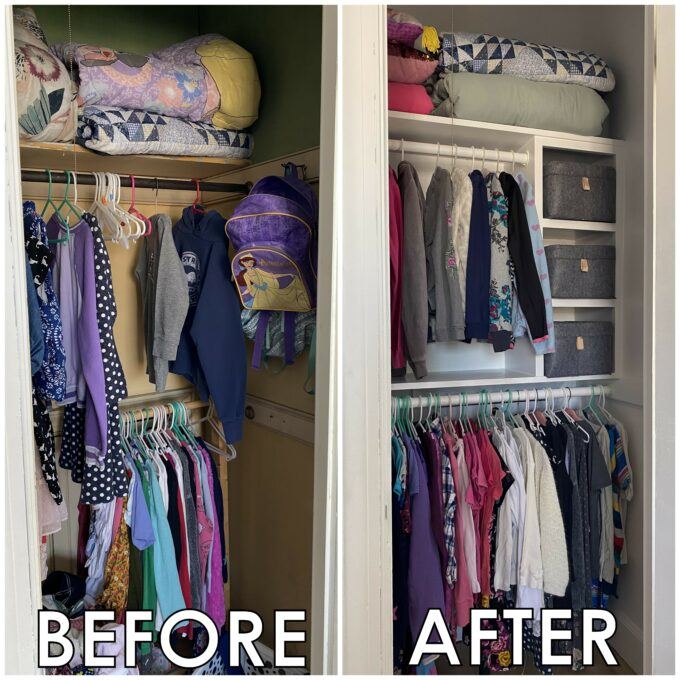
Our daughter has been living with a very small closet that isn’t conducive to her height, or needs, at all. It’s so small, and the clothing bar is too high for her to reach, and there is SO much wasted space. Giving the closet a makeover was so fun, and now it’s more efficient and meets her needs! Why did I wait so long?!
*This post is sponsored by our friends at DAP. Thank you for supporting the fabulous brands that make Reality Daydream possible! This post contains affiliate links.*
I really should have taken a “before picture” of this closet after removing all the clothes. That way you could appreciate the cracked walls and lead-based paint… Green on the top half, and yellow on the bottom. It was a SIGHT.
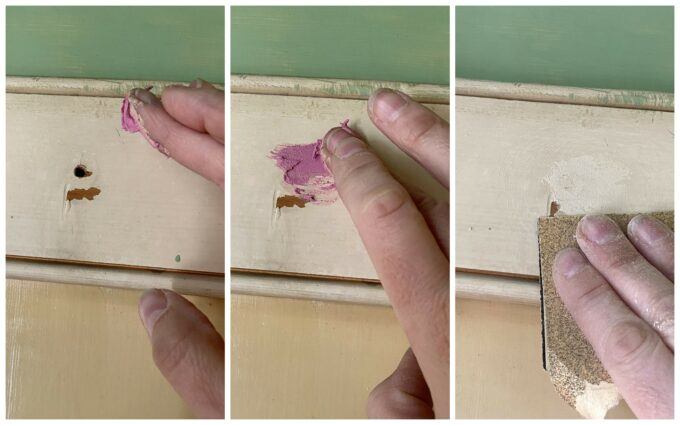
I started out by removing all her clothes, the shelf/clothing bar, and all hooks and old, mysterious hardware bits. Then I filled holes with DAP Plastic Wood wood filler (purchase here). I love that it starts out pink, and when it’s ready to be sanded and painted, it turns tan! it dries pretty quickly, and can be stained too! Like magic!

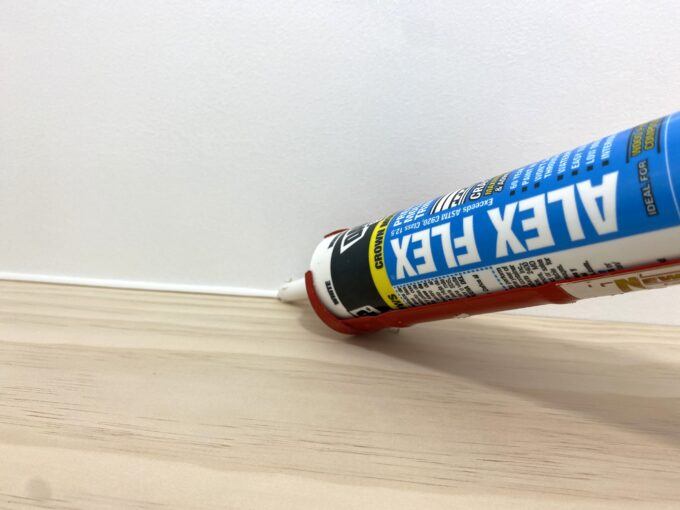
There were some cracks in the plaster in corners and along where the wall meets the ceiling, so I caulked those with Alex Flex Caulk before painting! (can be purchased here) After applying the bead of caulk, smooth it out with your finger (or this tool) and wipe off the excess. You don’t want it to LOOK like it was caulked after painting! Just a perfect, seamless corner.

The whole closet got a fresh coat of white paint. I should say that since this the closet had lead-based paint, I used an encapsulating primer to seal it in and abate the lead before painting with basic latex paint. It’s important!
It took 2 coats of primer and 3 coats of paint to get really good coverage. It looks worse before it looks better!


Like a blank slate! Right?
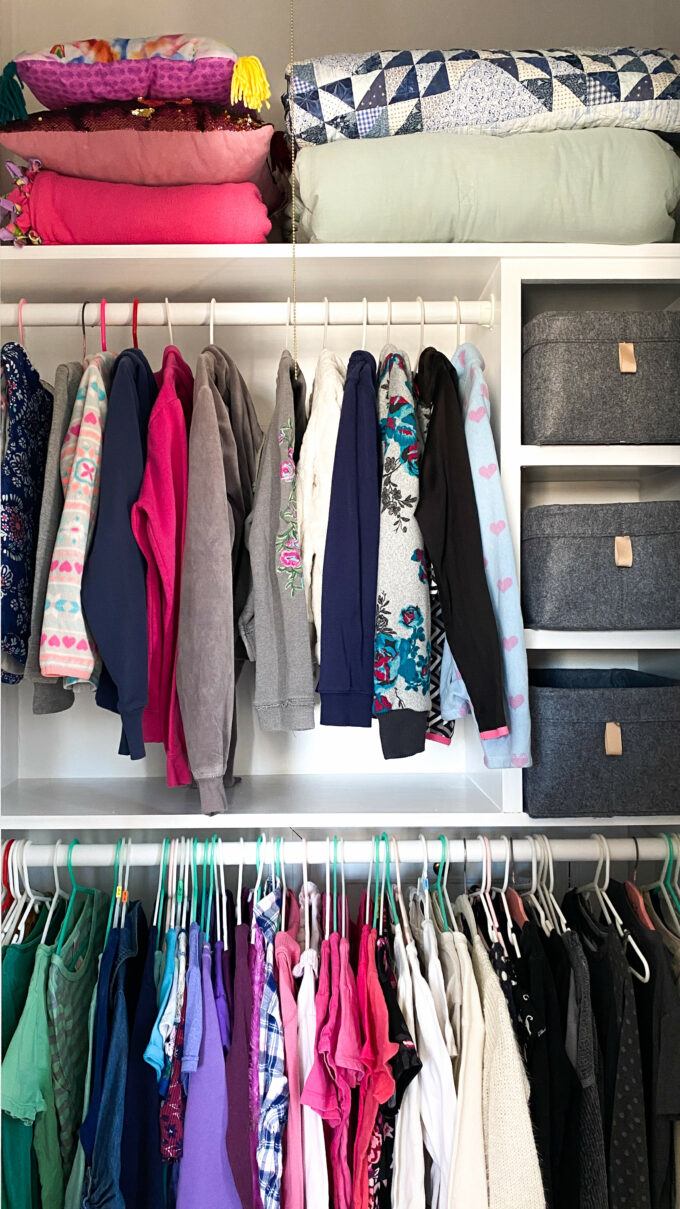
Just having the whole room be WHITE makes such a difference! I decided to add a lower shelf with a clothing bar below it. And I found a 3-cubby shelf at my local hardware store for $17 bucks that made a perfect addition!

Before I painted all the wood white as well, I decided I want all this to be very seamless and “built-in”. It’s SO EASY to achieve this look with the same Caulk! (Purchase it here) Just caulk all the seams where the shelves meet the wall or each other. You want ZERO CRACKS before you paint! And this caulk is amazing, because it’s easy to work with, dries quickly, and is paintable!
When you’re smoothing out the texture, I find that this tool is so easy to use and creates less of a mess than when I use my fingers!

Every singe one of these cracks with a red arrow got caulked! It seems like a lot, but it goes quickly and is SO WORTH IT!


I decided to add another shelf above the cubby, and add a second, shorter clothing bar. Then I just painted all those caulked transitions, and everything that wasn’t already white.

Would you look at this flawless corner?!

It was so fun loading this closet up with all of her brightly colored clothes! I know it would look more put together if she had matching hangers, but I’m just not the type of person that’s going to go out and buy a ton of new hangers for a picture. I’m willing to bet she prefers the colored ones anyway. 😉

Her closet functions so much better for her now! And now that I know how easy it is to modify a closet, it will be so much easier for me to change it up as her needs (and height) change!
Is there a kids closet (or ANY closet) in your home that could use an upgrade? I hope you’re inspired to modify it to work for you!
~Bethany
~~~~~~~~~~~~~~~~~
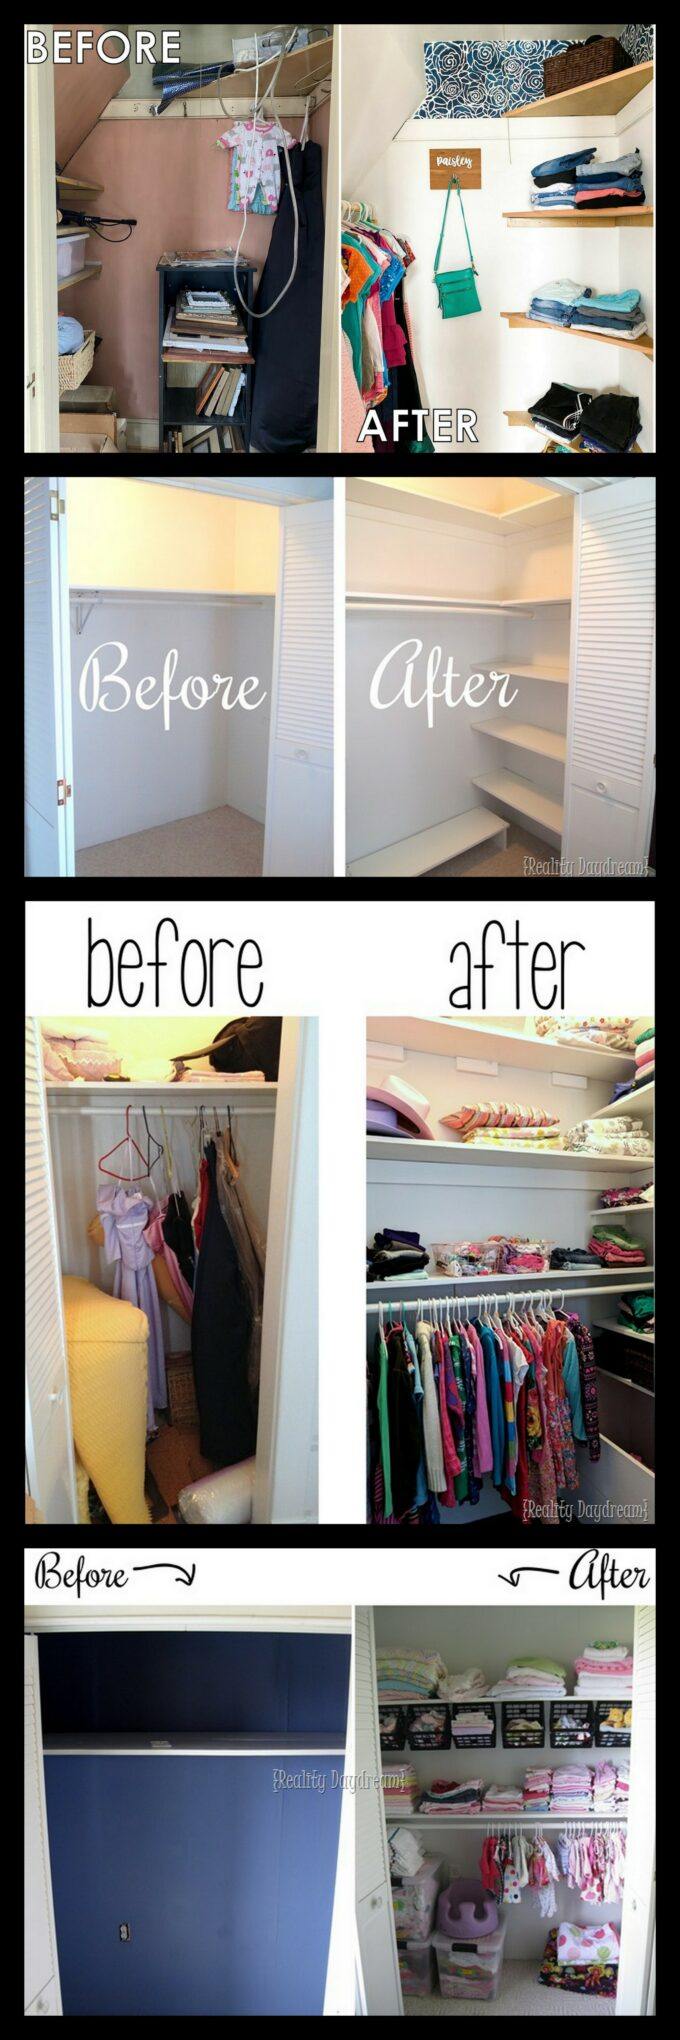
Be sure to check out our other closet-organizing posts!!
Thank you for pinning!

Related:
-

When the twins moved into what used to be the guest bedroom, I knew I…
-

I got a brilliant idea to make my girls a little something for Christmas (totally…
-

For about 6 months now, our youngest (Cypress - 7) has been struggling with overwhelming…
Wow, I absolutely love the transformation of the kids’ tiny closet! The organization tips are amazing, and the fun decor makes it so inviting! I can’t wait to try some of these ideas in my own kids’ spaces. Thank you for sharing such inspiration!