When I was first learning to use my scroll saw, one thing that I always struggled with was figuring out how to get my template (or pattern) onto the wood before I start cutting with the scroll saw. Sometimes when it’s a larger piece, I’ll use an overhead projector, but I really wanted something quicker and easier. So today I’m going to show you what I learned and how to apply a scroll saw template!
*This post is sponsored by DAP. Thanks for supporting the fabulous brands that make Reality Daydream possible! This post contains affiliate links*
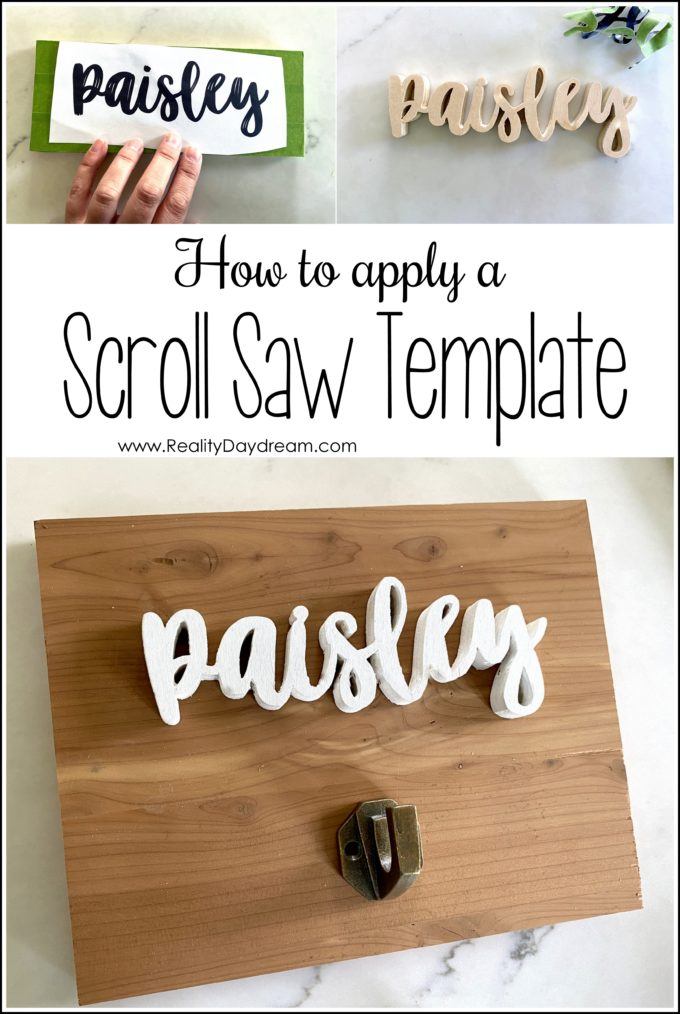
How to apply a Scroll Saw Template or Pattern
Print your template
Start out by printing your template and grabbing the board you want to cut the pattern out of.


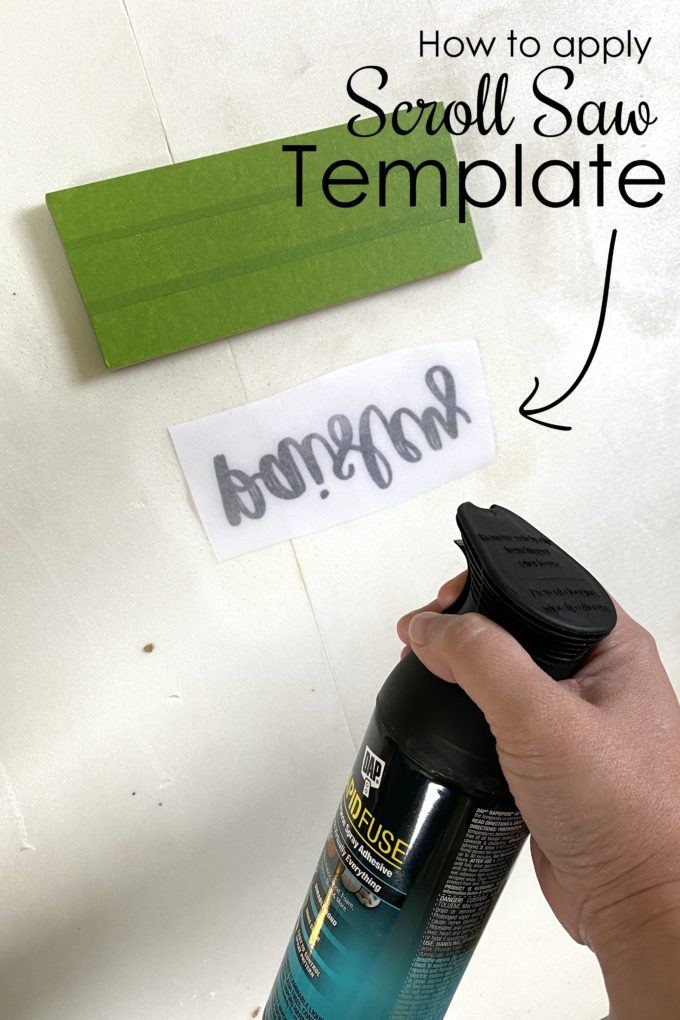
Cover wood surface with painters tape
Cover the top surface of your wood piece with painters tape, overlapping the edges slightly.
Next we’re going to spray on an adhesive to affix the template to the painters tape on your board!
The reason we use painters tape is so that it can easily be peeled off and removed when you’re done cutting out the project with your scroll saw.
Apply Spray Adhesive
We use DAP’s new spray adhesive called Rapid Fuse All-Purpose Spray Adhesive. It bonds virtually everything, and is soooooo handy that it’s in a spray form!

My favorite thing about this product is the perfect mist that comes out when you spray it on. It’s super easy to control, and dries clear.

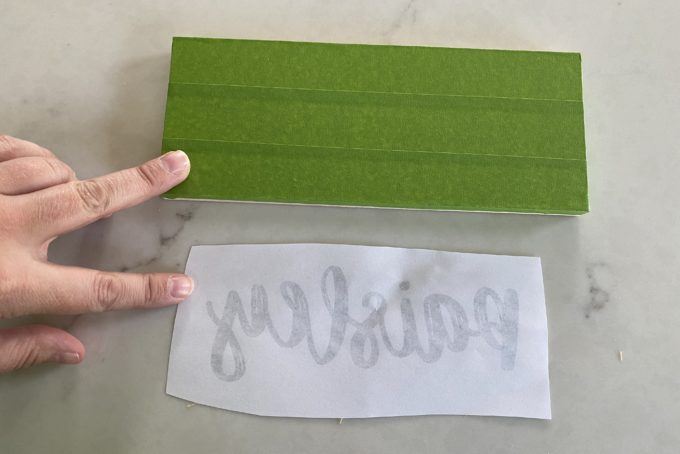
Press the wood and template together
Wait a couple minutes to allow the spray adhesive to become ‘tacky’, and then press the template onto the wood and smooth it out!

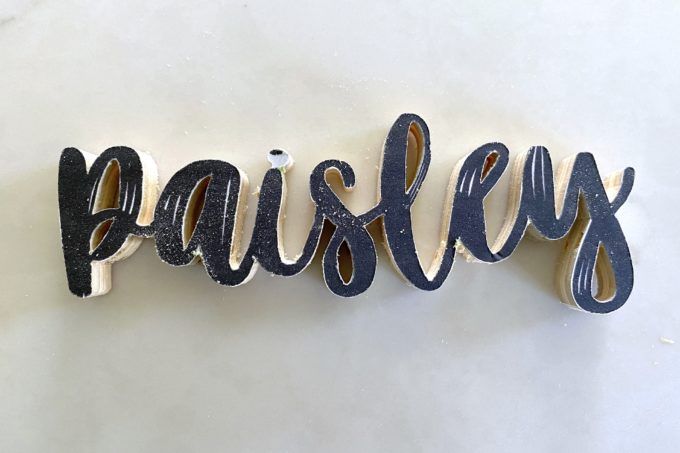
Scroll Away!
Now you’re ready to proceed with scrolling this template pattern out with your scroll saw, as usual! Don’t forget to drill out those openings first!

Peel off the template!
One you have everything cut out, all you have to do is remove your template. It peels off so easily!

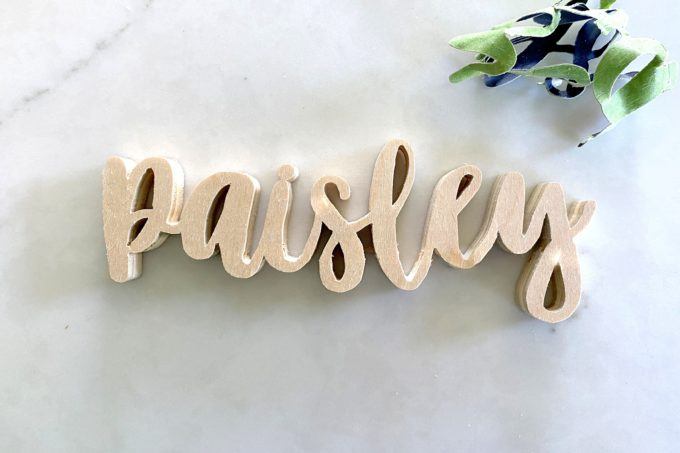
So fun and easy, right?
I cut out each of my 3 girls’ names, painted them white, and affixed them to a cedar board with a hook for them to hang a jacket or backpack. How much do you love this?!


What will your next scroll saw project be?
As always, if you try one of our tutorials, please tag us on social media! We’re @RealityDaydream at both Instagram and Facebook.
~Bethany
PS! Check out allllll our amazing scroll saw tutorials all in one place!

~~~~~~~~~~~~~~~~~~~~~~~~~~~~~
Thank you for Pinning!
Related:
-

If you follow us on the 'gram, you know I've been stripping the finish off…
-

Hello hello friends! Things have been wild as we've been navigating the holiday season, schedules,…
-

We love the original wood of our library, and wanted to find a desk that…
Hi I love scrolling and have two scroll saws. One I leave at my moms and one at home. Typically I trace my pattern onto a poster board or Milo’s folder and cut it out and trace the template into my wood. Then I can keep my templates. However for random things I won’t be scrolling again I would love to use your method. Does the tape and adhesive spray not gum up your blade, or leave residue on your wood?
Thank you and happy scrolling
Julie
That’s a smart way to make reusable templates! With my spray adhesive method, it doesn’t gum up the blade at all! And there is no residue left on the wood because I applied the painters tape to the wood before spraying on the adhesive. Does that make sense??
No sanding was required?
ANOTHER THING TO USE BESIDES PAINTERS TAPE IS CONTACT PAPER ,IT’S CHEAPER AND IN MY OPINION IT LUBRICATES THE BLADE BETTER.
What sort of scroll saw do you use?
This is the one I use! (affiliate) https://amzn.to/2MaEWoW
Oh rats, now I want a skill saw!!!! Just what I don’t need another new obsession.
Thanks for this tip–honestly I think I’ll be able to use it for other projects too (at least until Santa brings me a skill saw ;0 )
That’s YOUR SCROLL SAW??? COOL!!
I’ve always wanted to do woodworking. I had a beautiful space in my finished basement, (that’s where my darkroom was going, too) but I had to get divorced….damn! Oh the places I coukd have gone!! I definitely name my husband for this unfortunate event. He was a charming, funny, nice guy, but not to me!! Live and learn