• Home
  • About
  • Tutorials
  • Recipes
  • Furniture
  • Contact
    • Contact
    • Infertility
    • Disclosure
    • Privacy Policy
  • Shop
    • Facebook
    • Instagram
    • Pinterest

Reality Daydream

The Dream is Free, The Hustle Sold Separately

  • Home
  • About
  • Tutorials
  • Recipes
  • Furniture
  • Contact
    • Contact
    • Infertility
    • Disclosure
    • Privacy Policy
  • Shop

The Dressers from HELL

December 9, 2010 by Bethany Sy

So we bought these two matching dressers (one long skinny and one tall), and I was so excited to get started on them for obvious reasons. They had TONS of detail and character, a glazers dream… or so I thought. Here’s the before picture straight out of craigslist. Sorry there’s no before pic of the tall dresser:

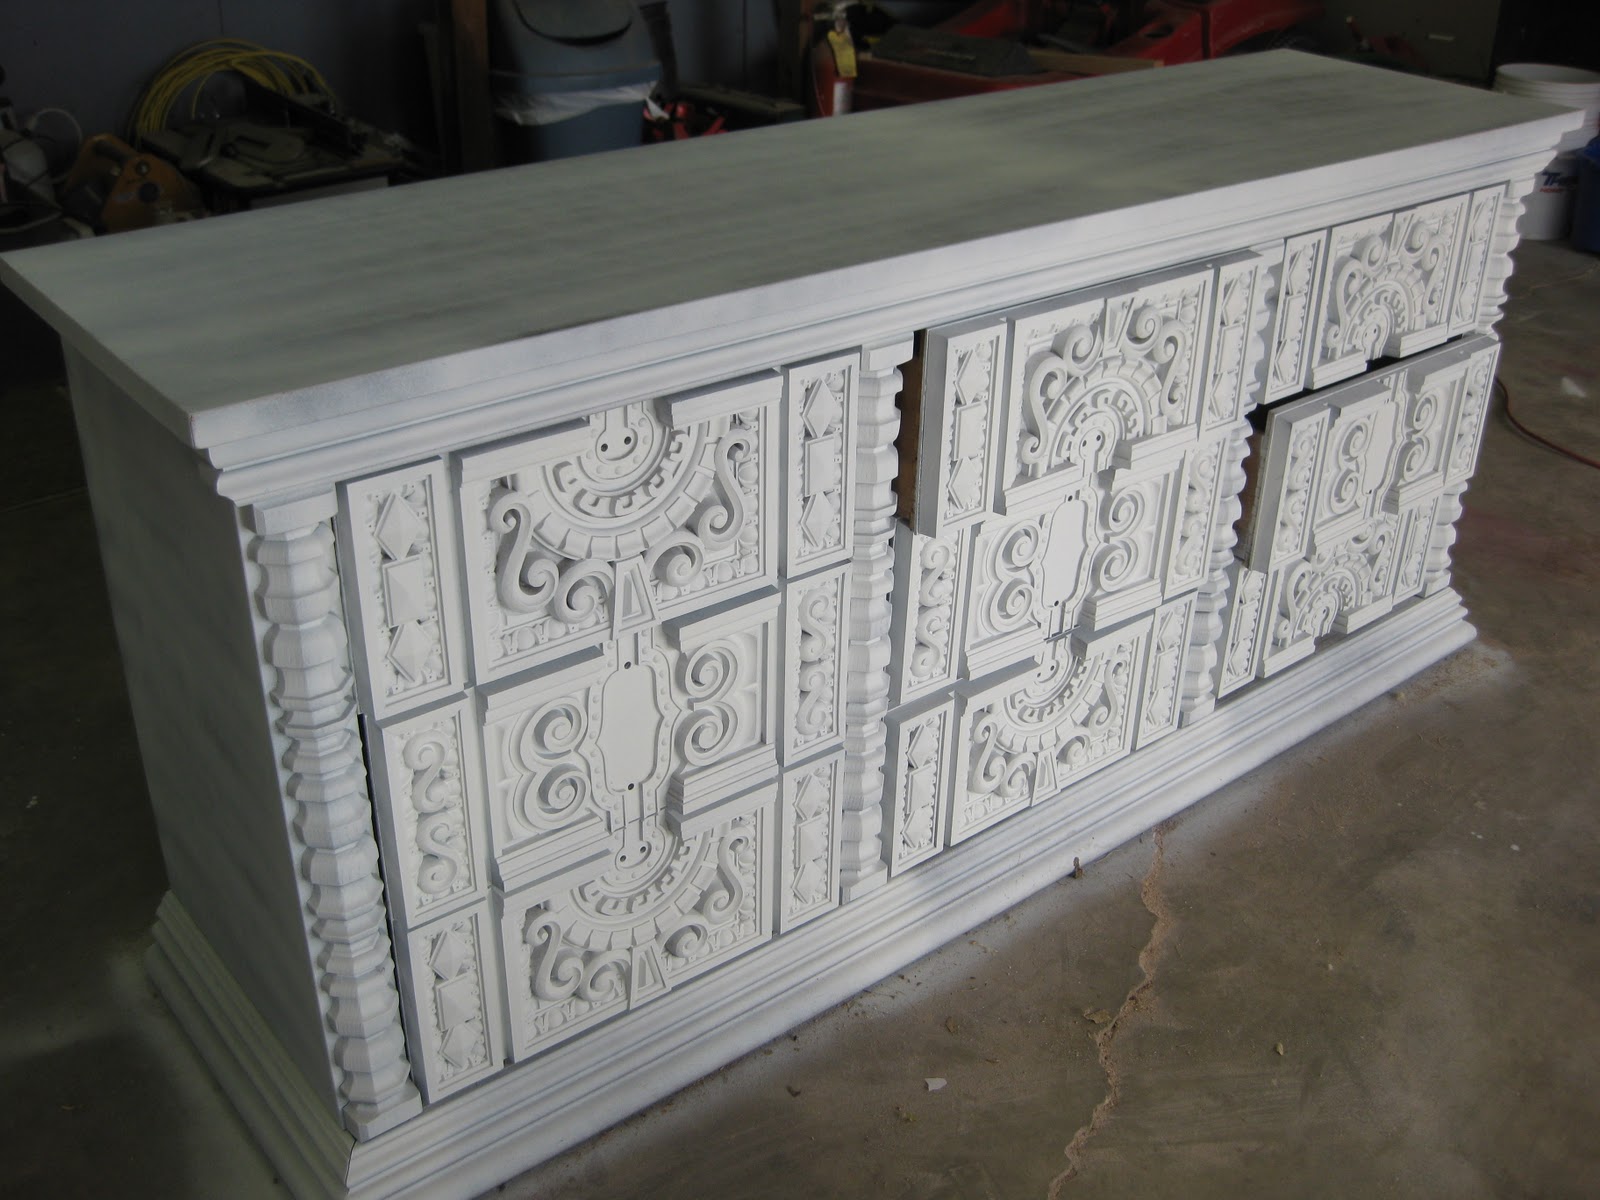
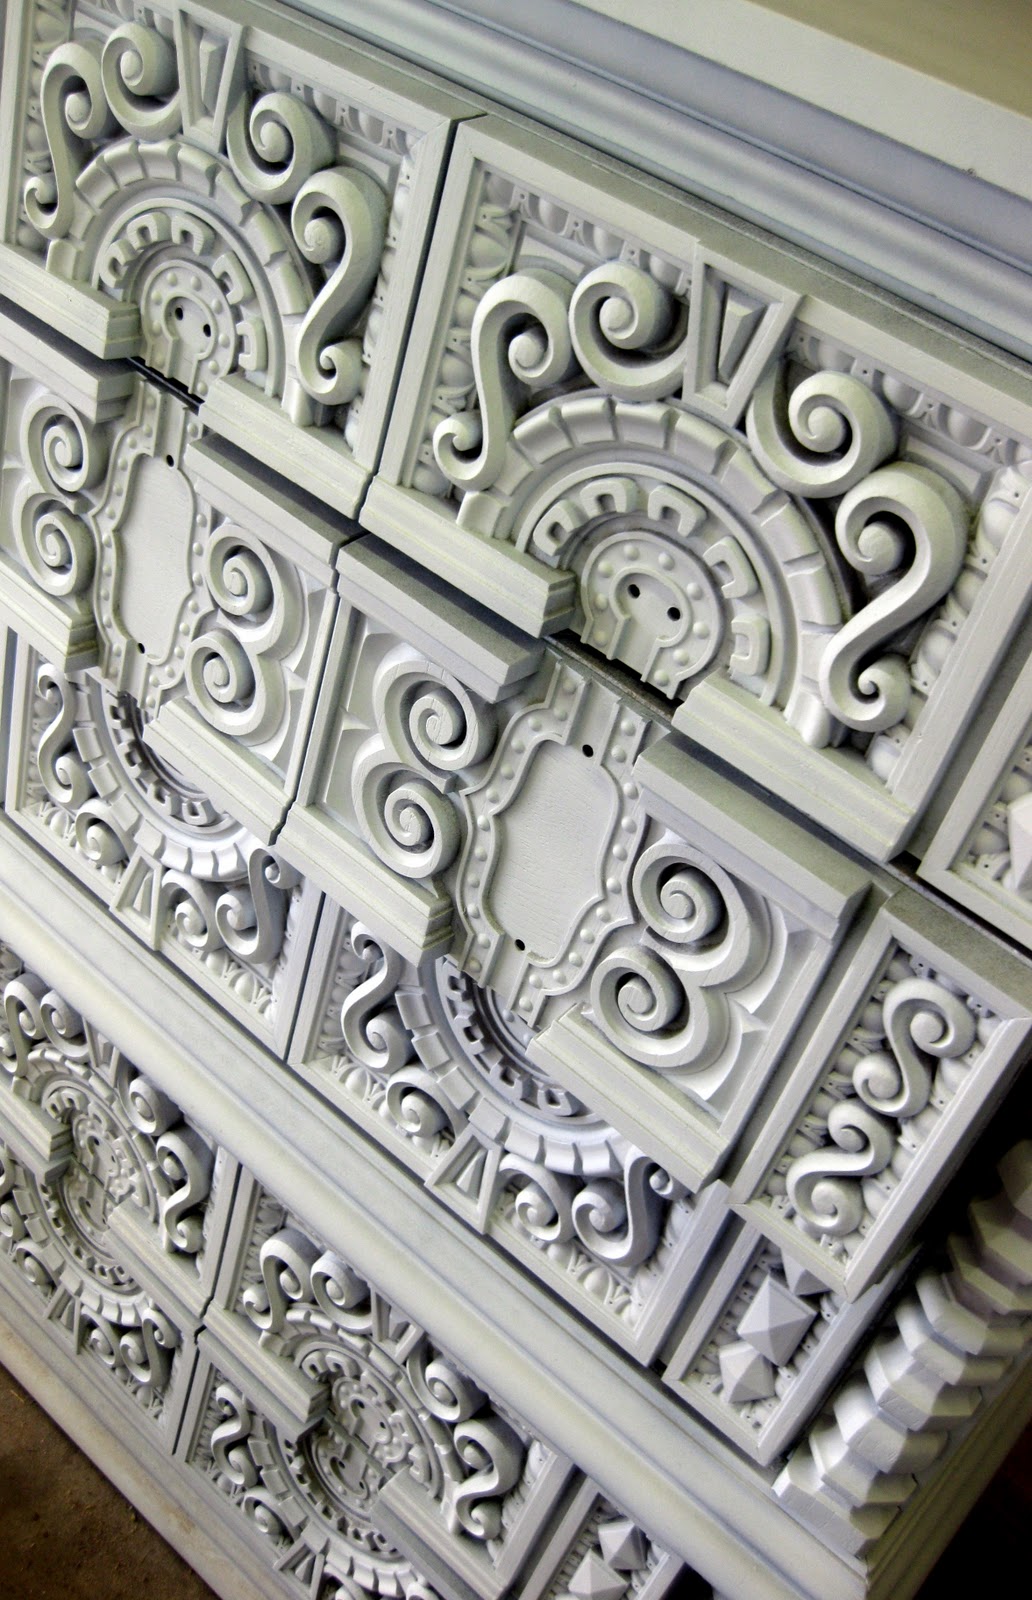
So we got busy priming… kinda looks great white, eh?

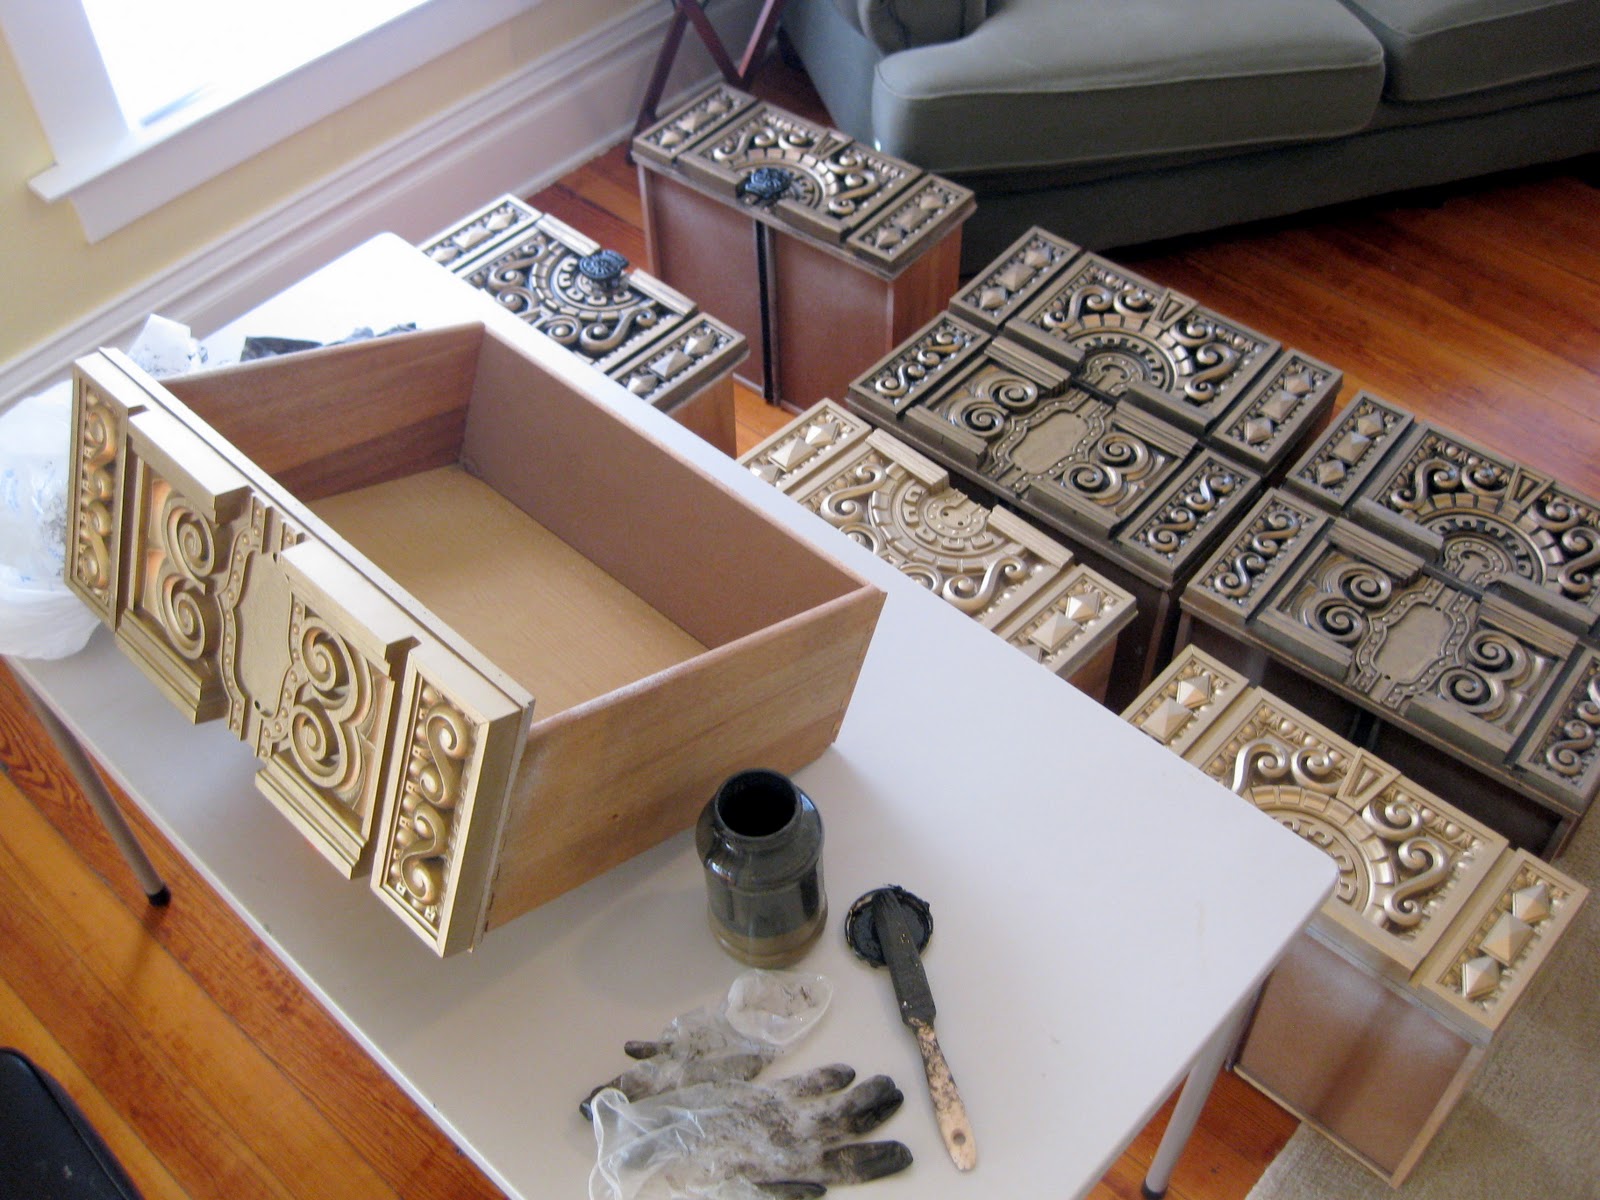
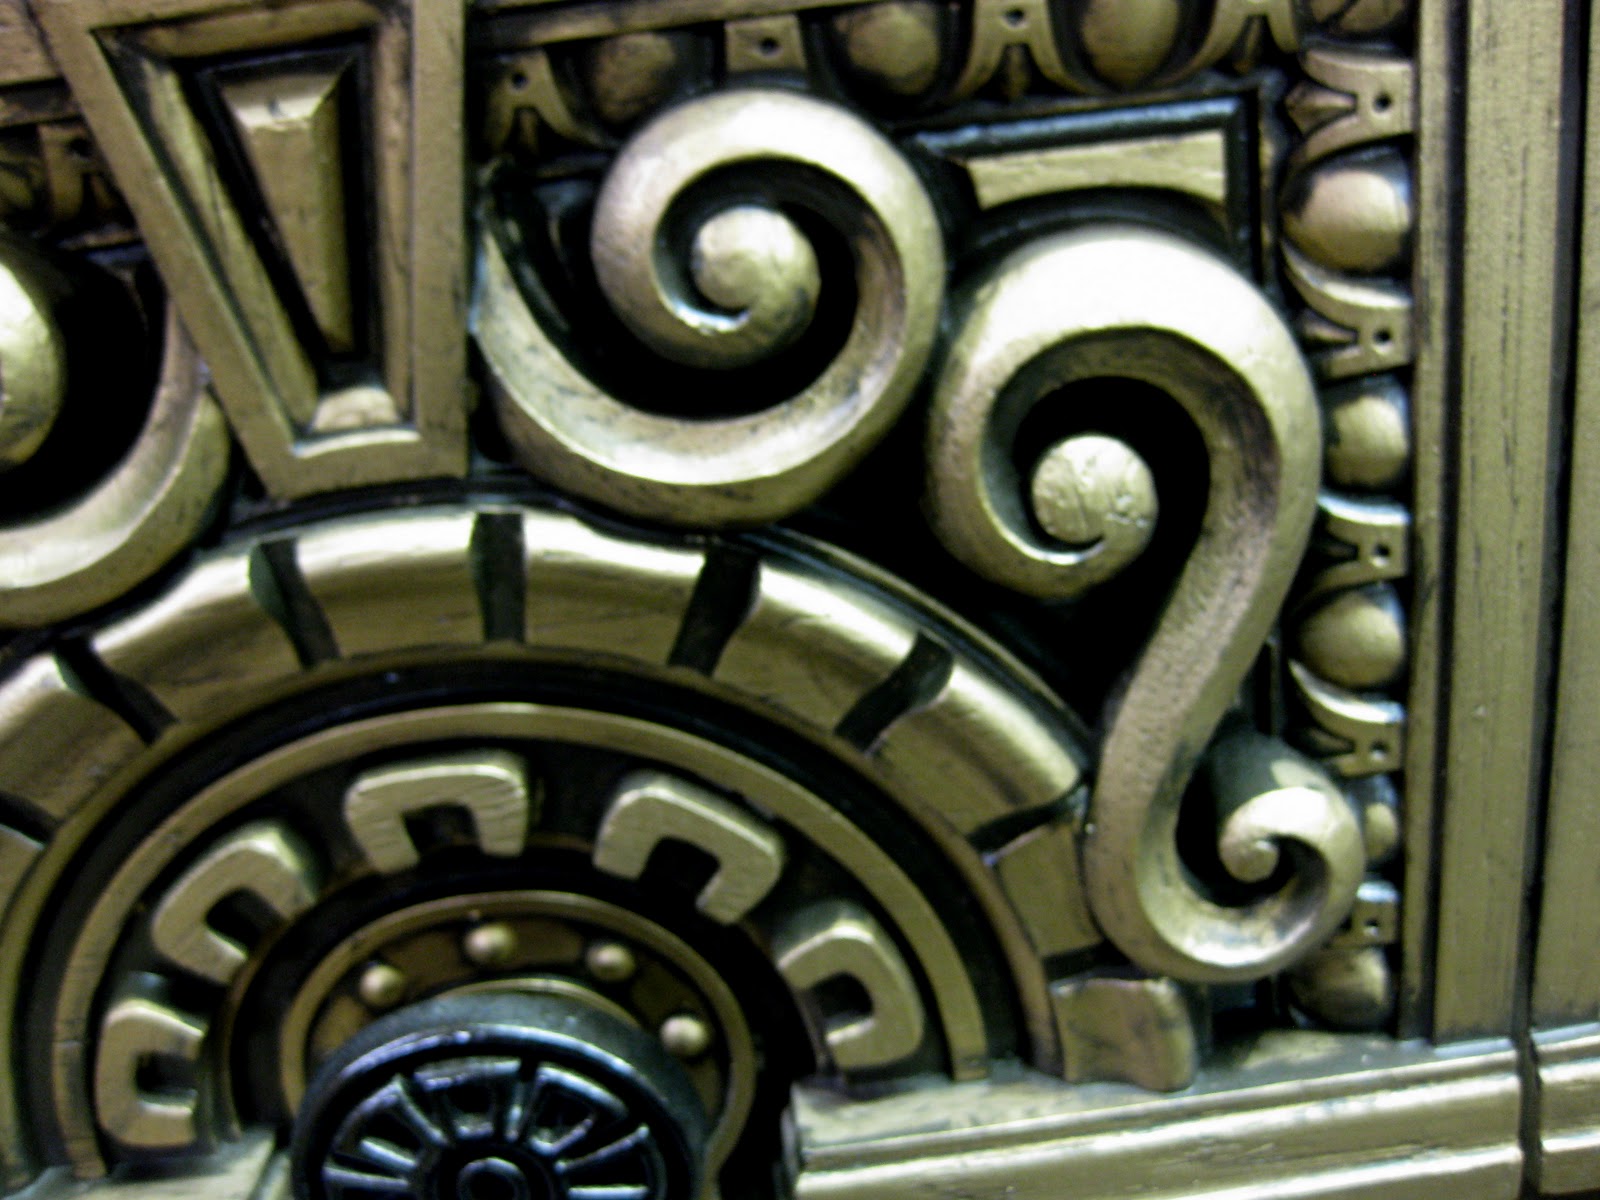
Then we sprayed these babies down with antique gold… which was more like a shinny GOLD gold, but it was ok because we knew we’d be glazing/antiquing anyways (and by we, I mean me).

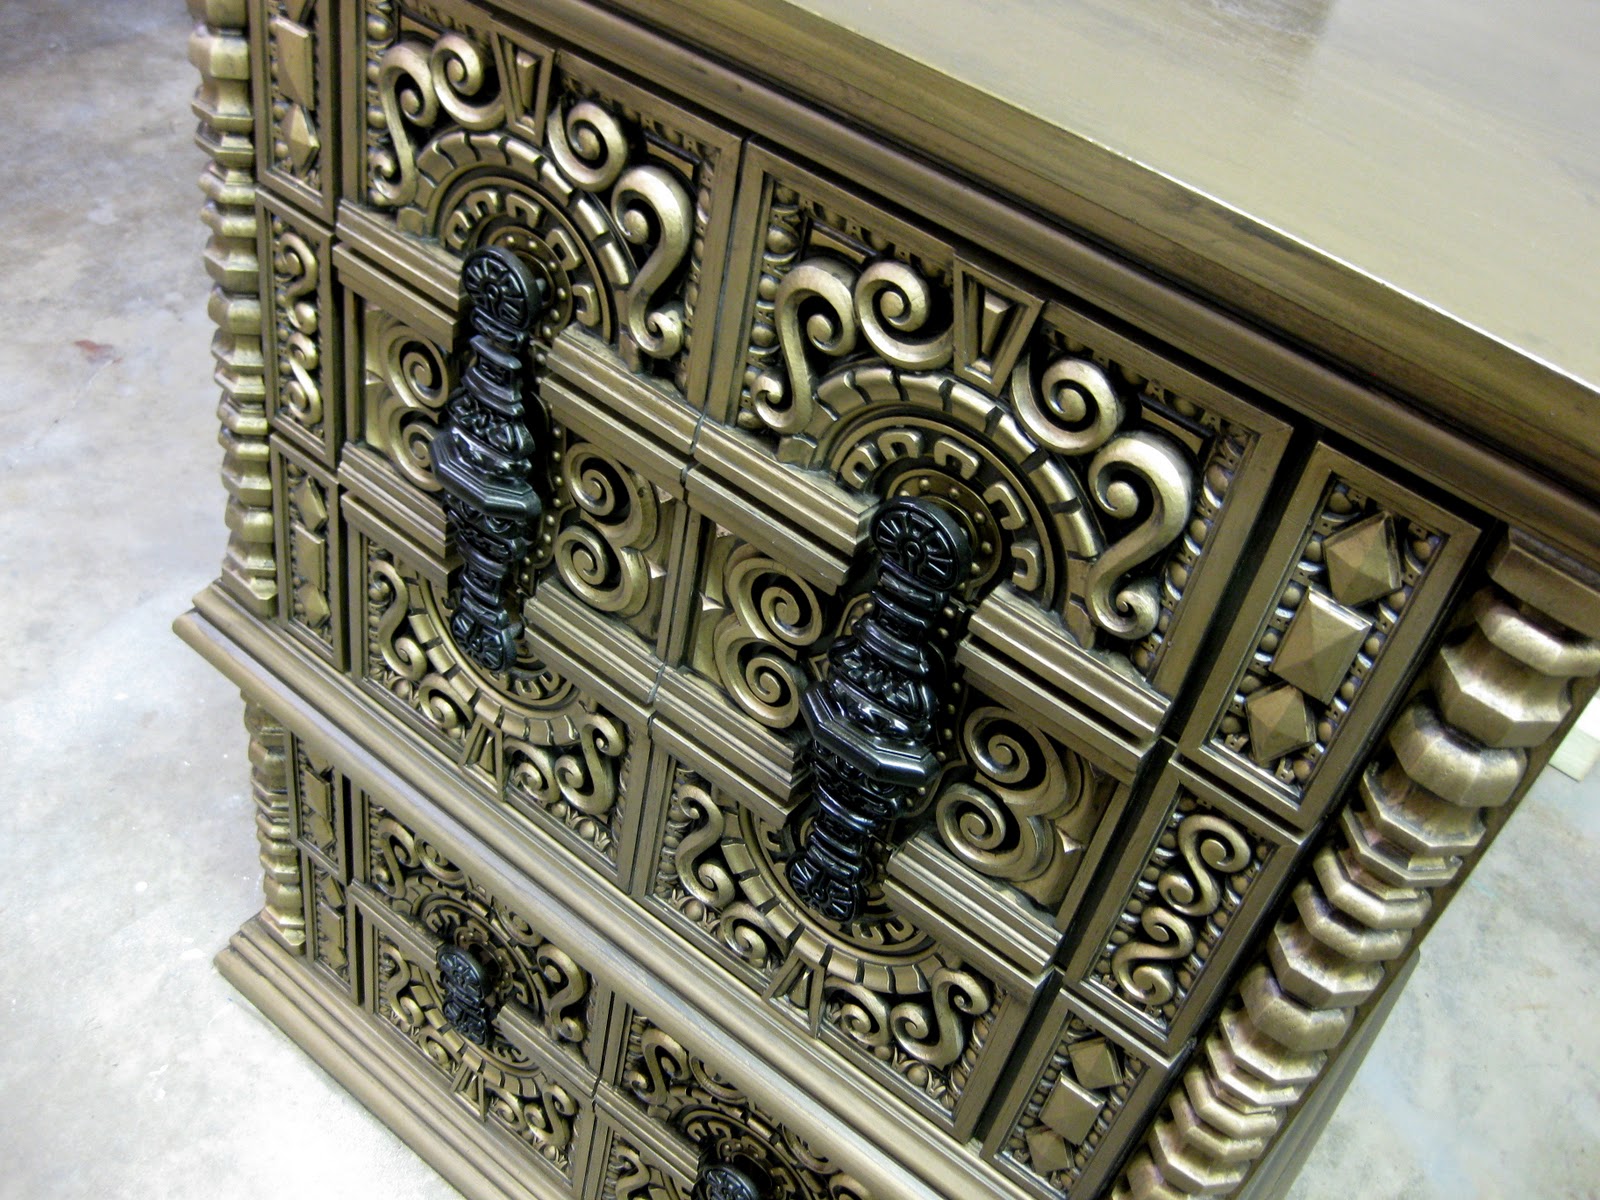
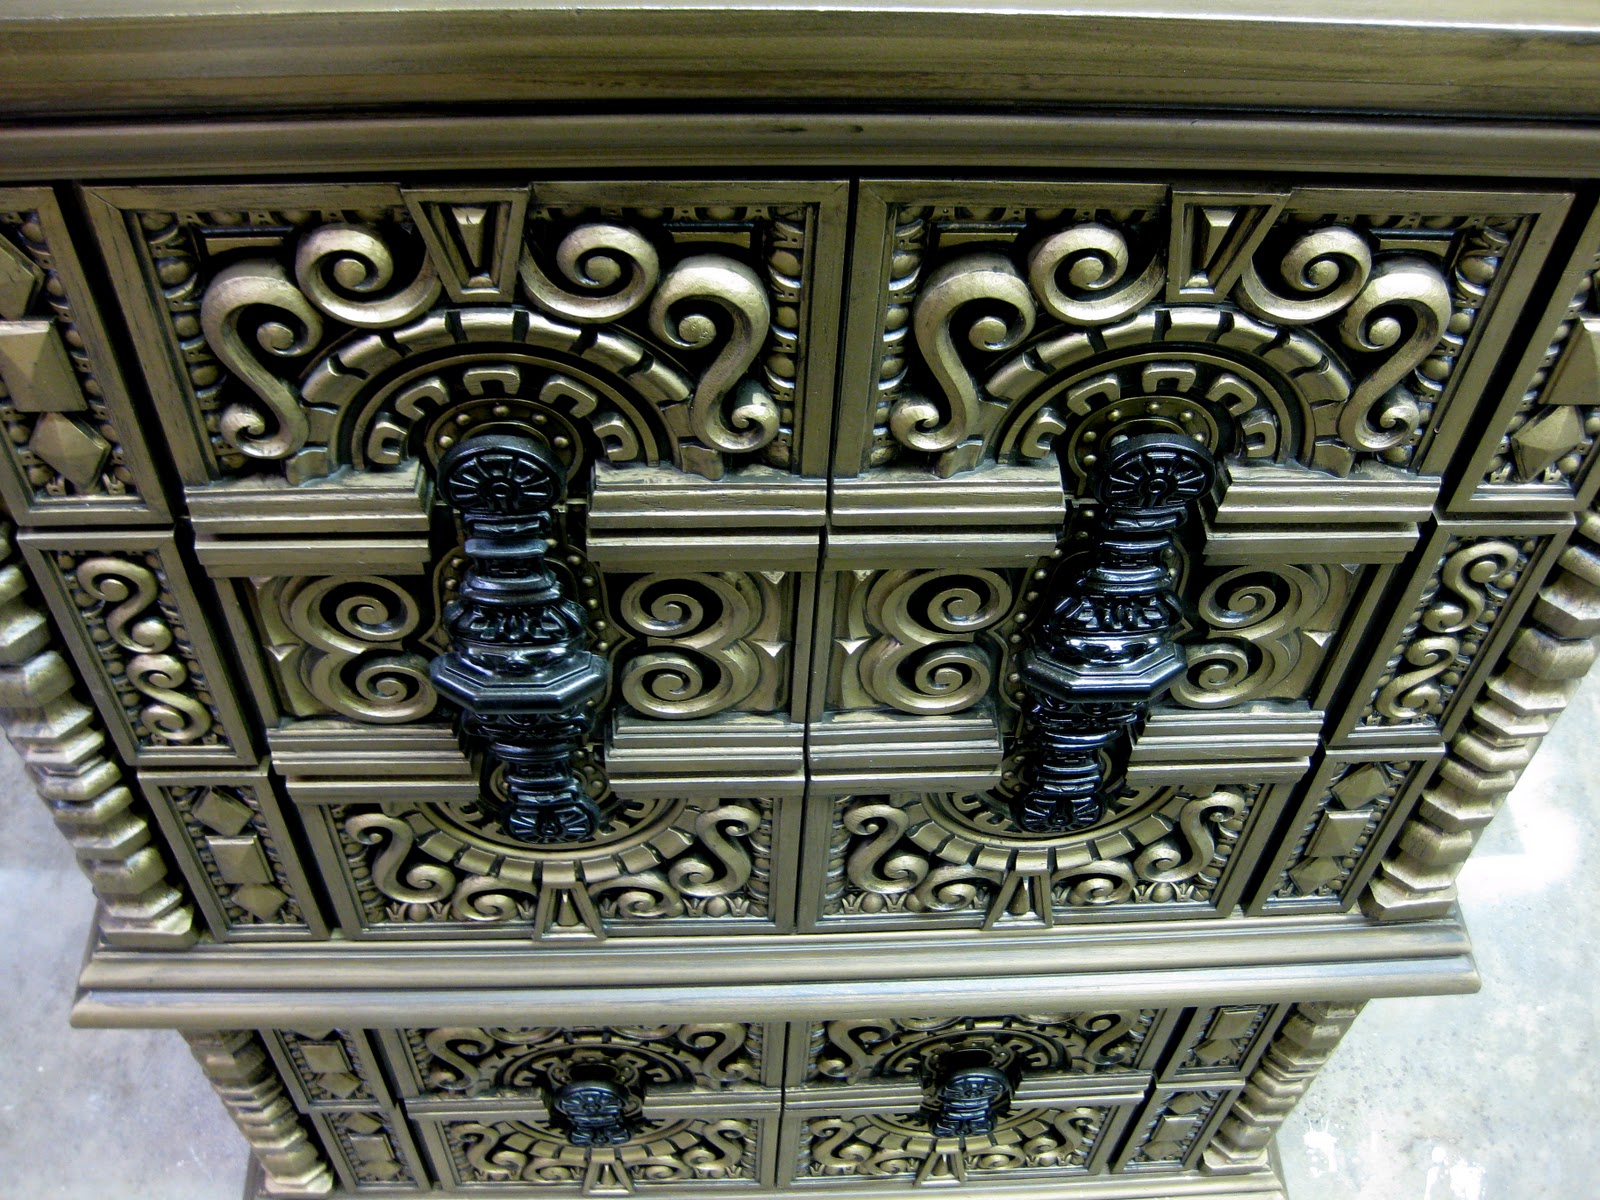
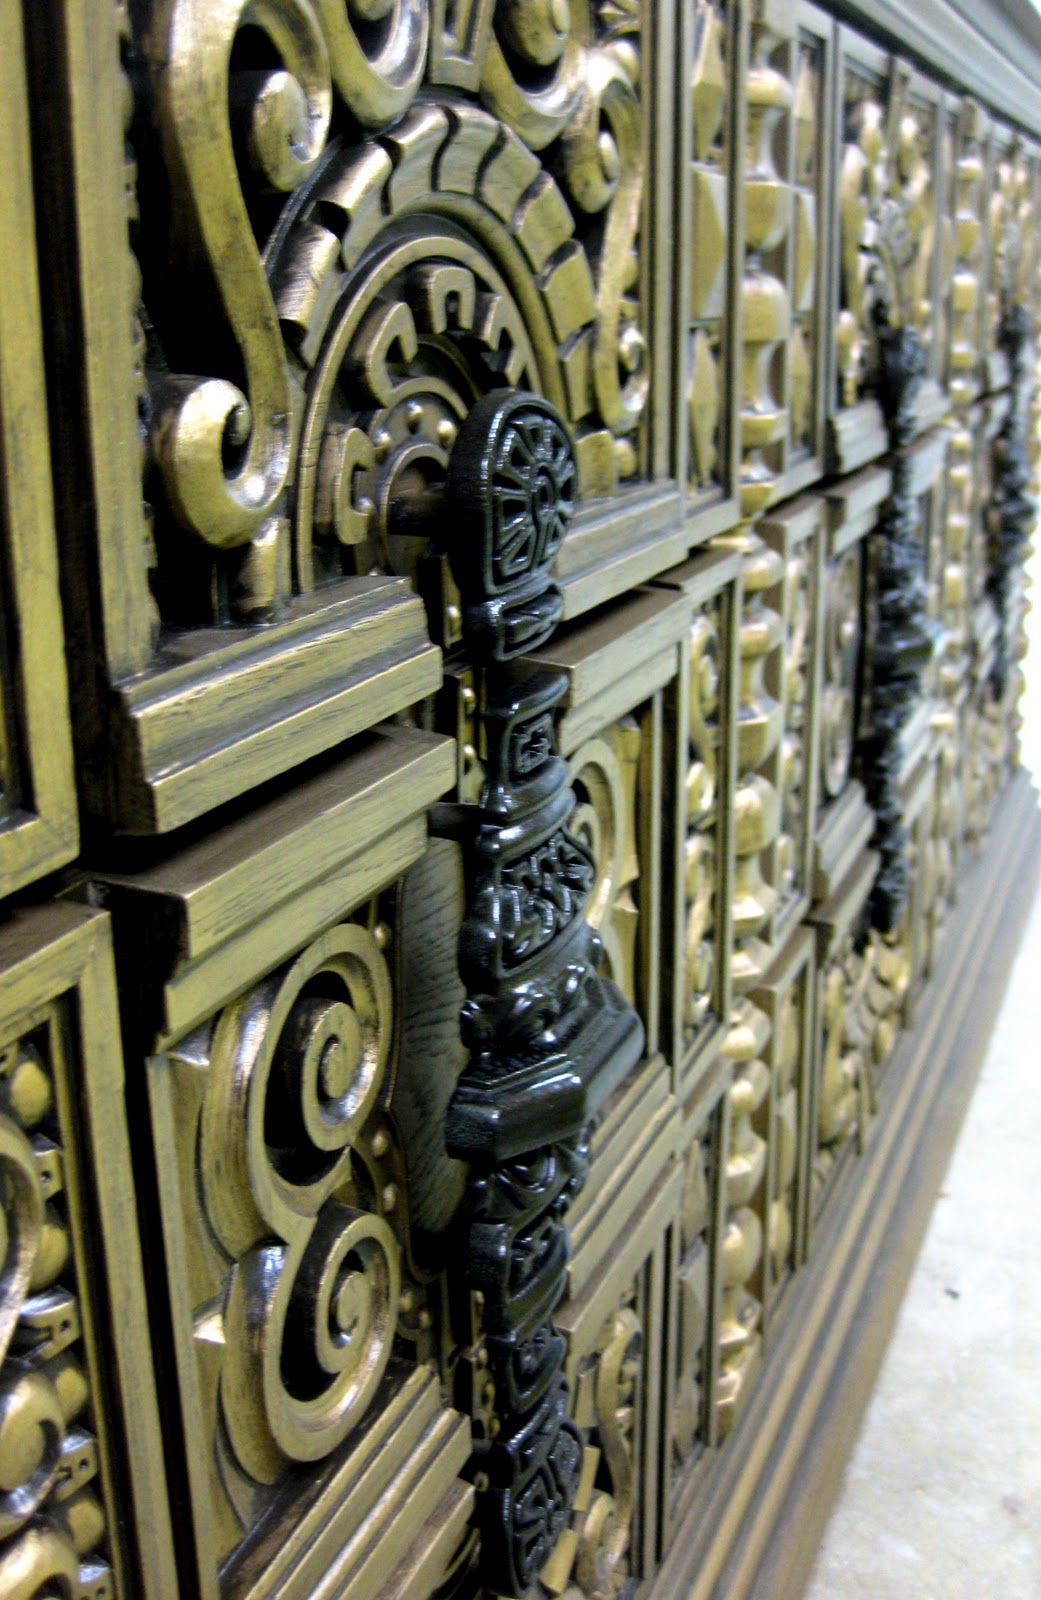
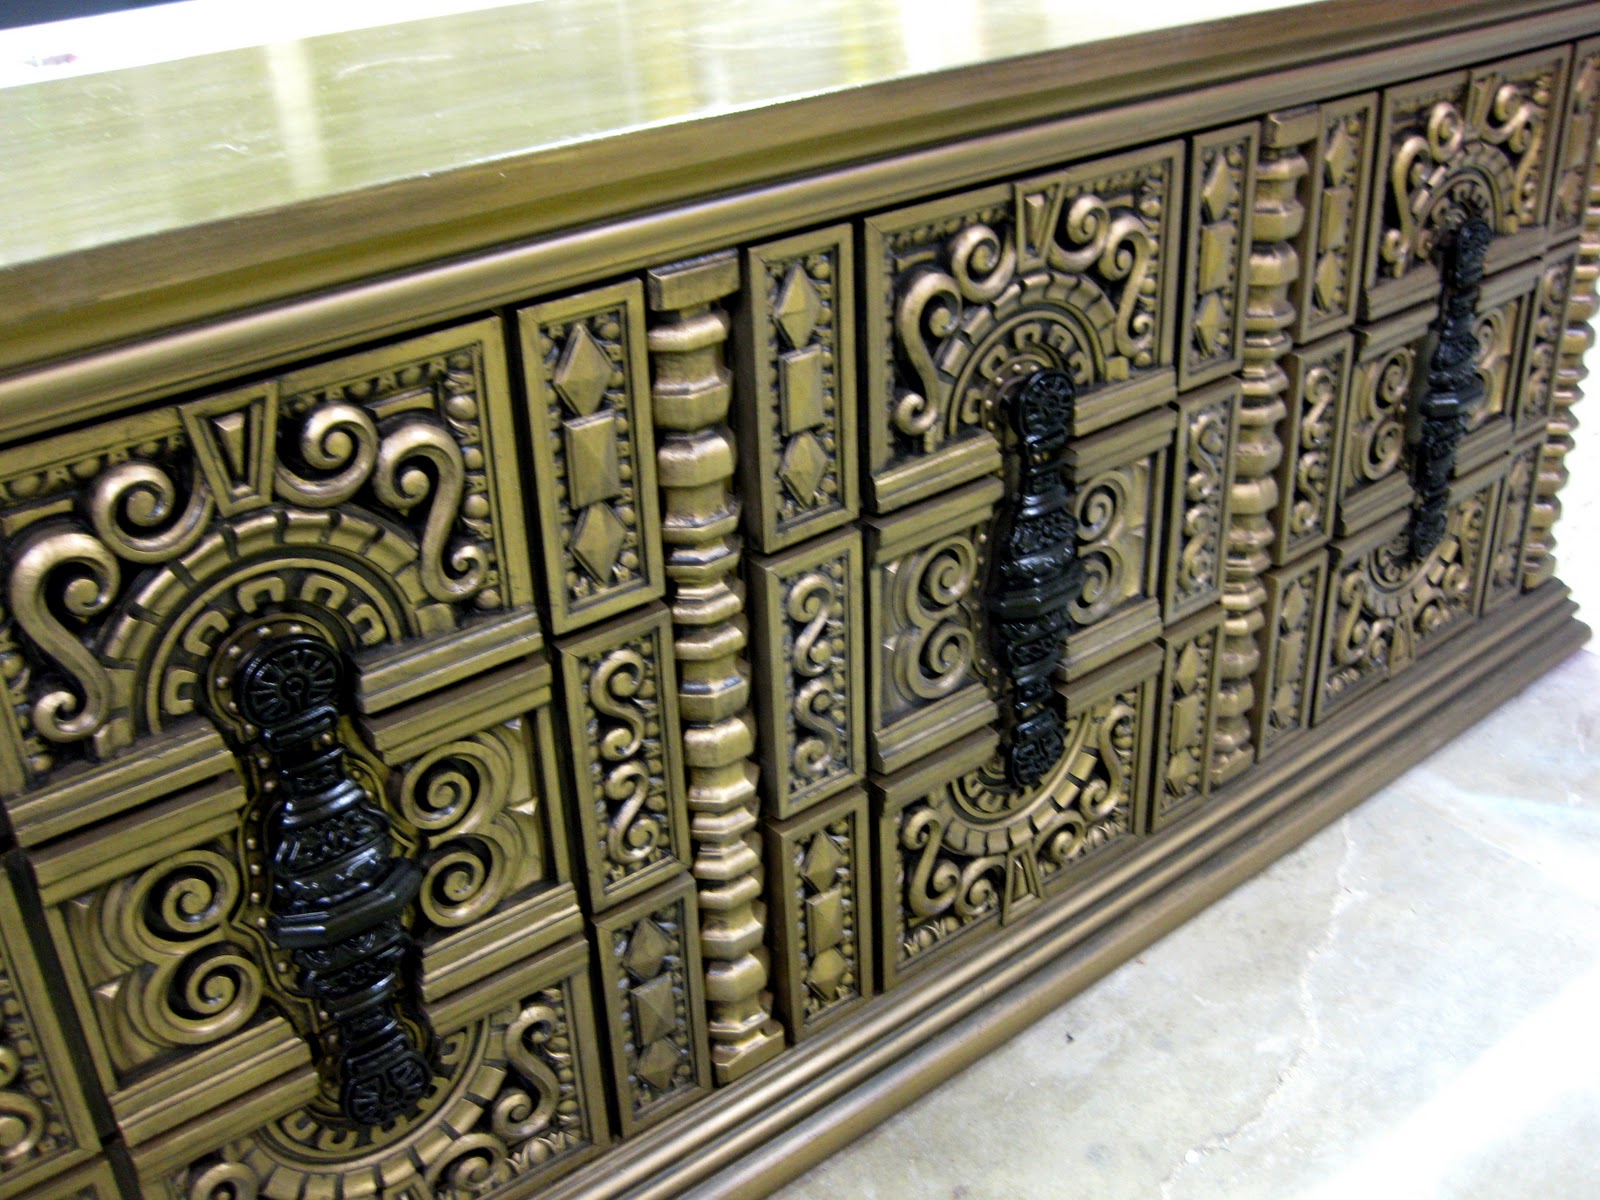
It took me THREE WEEKS to glaze all 14 drawers, and if you’ve ever glazed anything before, you have lots of appreciation for all these cracks and crevices that you have to glob the glaze down into. It goes without saying that this project wore out it’s welcome a long time ago. I’ve been SO ready to move on to some other fun things in our garage. Our warm, insulated/heated garage. 🙂

Here’s the product of all our (my) labor!!! Ok it’s true, it looks pretty darn awesome. And ok… I guess it was worth it all. They look so fancy!

Excuse the photos, we just snapped them in the garage. We weren’t about to haul these suckers inside and make them look pretty just for pictures.

And because I’m a sucker for before/after shots, this one’s for me!

So now you know why we’ve been so delayed on furniture projects. Note to self: ‘glazing awesomeness does not require THIS much detail in a piece of furniture.’

Amen.

   .

Related:

  • Stripping an Old Stained Desk

    We love the original wood of our library, and wanted to find a desk that…

  • Spring Cleaning and Garage Organization

    Is it too early to call this spring cleaning? The truth is, we've been planning…

About Bethany Sy

Nick and Bethany Sy are the creative free-spirits behind DIY/Lifestyle blog, Reality Daydream. They recently purchased a historic mansion and have been documenting the ups and downs of renovation and making this home their own... all while sharing tips and tutorials along the way! When they found themselves in the trenches of infertility, they started a journey that would prove to be their most important DIY project ever, and have 3 beautiful girls to show for it. <3

« Carla’s Backsplash
Pam P’s Backsplash »

Comments

  1. 19

    Jenn says

    February 12, 2023 at 11:08 am

    Hi. I have this exact 9 drawer dresser with 2 mirrors, 2 matching night stands and a head board I inherited from my grandparents. I hate to get rid of it but it’s so old looking. And the tops of the night stands are wore and rough. Never thought of painting it. Do you have any suggestions? I know nothing about glazing. Can I just paint it?

    Reply
    • 20

      Bethany Sy says

      February 12, 2023 at 2:15 pm

      Yes you can absolutely paint without the glazing part! With all these cracks and crevices, I highly recommend using spray paint rather than trying to brush it on. Plys spray paint will give you a more professional finish. It will look so chic when you’re done! Send me pics!

      Reply
  2. 21

    Kelly Bailey says

    April 16, 2016 at 12:06 am

    Hello! What did you seal it with?

    Reply
    • 22

      Beth @ Reality Daydream says

      April 17, 2016 at 12:51 am

      This is the stuff we use to seal our furniture! >> http://amzn.to/23OHMl7 (aff link)

      Reply
      • 23

        Kelly Bailey says

        April 17, 2016 at 1:02 am

        Do you ever use General Finishes seal?

        Reply
        • 24

          Beth @ Reality Daydream says

          April 18, 2016 at 4:36 pm

          I’ve played around with their stains some, but have yet to try their sealers. I’ve heard good things though!

          Reply
  3. 25

    Cindy Shephard says

    April 15, 2016 at 7:06 am

    I like it better “before” and white than glazed. Sorry! But it is very cool.

    Reply
    • 26

      Beth @ Reality Daydream says

      April 15, 2016 at 9:44 pm

      I actually liked it better white too, which makes this story even SADDER! Lol! But since I was doing it for a ‘client’, I had to add the finish they wanted. 🙂

      Reply
  4. 27

    Suzanne Martin says

    December 10, 2012 at 4:25 pm

    O…M…G!!! You are a magician!

    Reply
  5. 28

    Elle says

    June 13, 2011 at 1:33 am

    Wow! I love it 🙂

    Reply
  6. 29

    Anonymous says

    June 12, 2011 at 9:42 am

    Really fantastic. Congrats.

    Reply
  7. 30

    Heidi says

    June 11, 2011 at 6:47 pm

    Wow, this looks like sooo much work! Don’t know I could finish a project like this, ever! Awesome job!

    Reply
  8. 31

    Tammy says

    December 11, 2010 at 4:34 am

    you are the glazing queen! great job.

    Reply
  9. 32

    Nina Patricia @ The Adventures of Nina Patricia says

    December 9, 2010 at 10:07 pm

    This truly a work of art! Amazing

    Reply
  10. 33

    Anna says

    December 9, 2010 at 7:59 pm

    Wow…I tell ya what WOW!!!!

    The word ‘amazing’ just seems far too lacking!!

    You could sell that for a million dollars to the queen of England!!!

    Reply
  11. 34

    Megan says

    December 9, 2010 at 5:23 pm

    Love it! They look so expensive 🙂

    Reply
  12. 35

    Carrie says

    December 9, 2010 at 4:20 pm

    So excited!

    Reply
  13. 36

    angie says

    December 9, 2010 at 3:13 pm

    intense.

    Reply
  14. 37

    Renee' says

    December 9, 2010 at 2:33 pm

    Absolutely stunning! Well worth the time you spent doing them!

    Reply
  15. 38

    Brandi Nell says

    December 9, 2010 at 2:31 pm

    WOW! That’s quite the transformation! LOVE THEM!

    Reply

Leave a Reply to Elle Cancel reply

Your email address will not be published. Required fields are marked *

Recipe Rating


  • Facebook
  • Instagram
  • Pinterest
  • RSS
  • YouTube
We are Nick and Bethany! Welcome to our blog, Reality Daydream where we share our DIY adventures!
Click here for lots of art projects using only wood stain on furniture!!
Please feel free to share or pin my posts! You're welcome to use ONE of my images (no collages or pinnables) with a link back to the corresponding post. Please do not edit or crop that single image in any way. Improper use of my photos, ideas or words is a violation of copyright. Thank you!

Categories

Attention: Almost any do-it-yourself project involves risk of some sort. Your tools, materials, and skills will vary, as will the conditions at your project site. Reality Daydream has made every effort to be complete and accurate in the instructions of the plans on this website. Reality Daydream will not assume any responsibility or liability for damages or losses sustained or incurred in the course of your project or in the use of the item you create. Always follow the manufacturer’s operating instructions in the use of tools, check and follow your local building codes, and observe all commonly accepted safety precautions.


Copyright © 2025 · Modern Blogger Pro On Genesis Framework · Customizations by Sweet Theory Designs · Privacy Policy · Log in