• Home
  • About
  • Tutorials
  • Recipes
  • Furniture
  • Contact
    • Contact
    • Infertility
    • Disclosure
    • Privacy Policy
  • Shop
    • Facebook
    • Instagram
    • Pinterest

Reality Daydream

The Dream is Free, The Hustle Sold Separately

  • Home
  • About
  • Tutorials
  • Recipes
  • Furniture
  • Contact
    • Contact
    • Infertility
    • Disclosure
    • Privacy Policy
  • Shop

Make these Wooden Spools {using a Lathe!}

March 7, 2016 by Bethany Sy

My craft room pretty much always looks like a bomb went off inside. But if you love lace, glitter, fabric, washi tape, and paint… well then it wouldn’t probably hate my beautiful mess. But on occasion, I get a wild hair and decide to organize a little corner.

Today’s victim?

LACE.
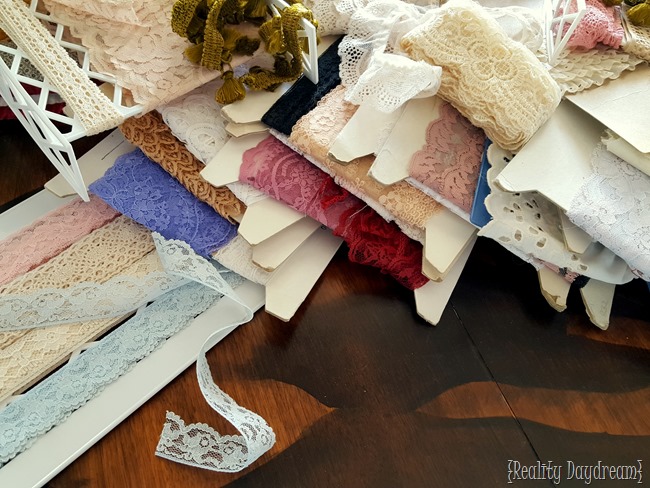
Soooooo much lace! Tutorial for a GORGEOUS way to organize your lace collection {Reality Daydream}

I have a TON of lace. Like… A TON.

I find it all the time at garage sales for pocket change. And my collection has been building up up up! I love using lace for embellishing gift wrap, or putting together scrap books or the girls’ baby books. But mostly I just like looking at my lace. Mmmmmm Kay?

How to organize your lace collection {Reality Daydream}

I never really quite knew how to organize it, so it’s all just been overflowing out of a giant wicker basket in the craft room.

But, ever since Rockler sent me my very own LATHE (this one!), I’ve been so excited to play around with it. And have been brainstorming ideas for what my first project should be. And then I realized it would be perfect to make a bunch of wooden spools for my lace. Not only could I make a variety of sizes, I could also experiment with different techniques and shapes to get comfortable with all the tools and wood types and such.

20160305_152545

So let me show ya how I made these!

I started with a block of wood. This one is about 2” x 2” …and about 8 inches long. (my spools ended up ranged between 2/5” all the way up to 10 inches)

Turning blank for making spools with a lathe {Reality Daydream}

On both ends, use a ruler or a straight piece of wood to draw and X from corner to corner. It’s important to be fairly precise with this part because you’re finding the center.

Find the center by connecting the corners to make an X {Reality Daydream}

Line up the center of your X onto the point of the spindle and press it on so it digs in a bit. Then slide the tail stock over until the point of the dead center is right in the middle of your other X, and lock ‘er down!

Using a lathe (for beginners!) ...making spools {reality Daydream}

Slide your tool rest into place so that it’s close and level with your wood, but won’t touch when the wood is spinning.

Tool Rest on Lathe {Reality Daydream}

Now it’s time to start things turning!

After you turn the lathe on, use the rounded carbide tool, and very slowly move it close enough that it’s barely nicking just the outer edge of the wood. You’re rounding off those sharp corners!

Beginners tutorial for using a lathe {Reality Daydream}

Continue to slowly move your tool back and forth, taking off a new layer with each pass.

Using a lathe to turn spools {Reality Daydream}

The spinning lathe has a way of making you feel like it’s round, and you’re almost done. But it’s ok to stop the lathe every so often and check your work. This was after about 5 minutes.

Tips on using a lathe (for beginners) ...Reality Daydream

And this was after another 5 minutes.

Turning spools with a lathe (tutorial for Beginners) ...Reality Daydream

On some of the spools I made, I left the two outer edges square. But on this one, I spend a couple extra minutes rounding them off.

lace spools-002

Then I used the square carbide tool to smooth everything out, and add a little ridge on either side.

20160305_140129

Once everything looked the way I wanted it, I moved the tool rest out of the way, and took a strip of sandpaper to it. With the lathe spinning the wood, you don’t really have to do any work! Just hold the sandpaper with slight pressure and the spinning does it all for ya!

Using the lathe to sand a spool {Reality Daydream}

After making a few dozen of these, you’ll feel LIKE A BOSS on the lathe. LOVE my wooden spools!

Turn a bunch of spools with your lathe! Perfect for organizing lace and ribbon! {Reality Daydream}

Their not all perfect, but I love them. And it was sooooo fun  loading them up with lace and binge-watching Bloodline.

Use a lathe to make a bunch of spools to store your lace and ribbon! {Reality Daydream}

About halfway through turning all these wooden spools (over the course of a couple weeks), I had a brilliant idea of how to display them. Rather than just throwing all the spools back into that wicker basket… why not put them on this trinket shelf I’ve had collecting dust in the attic?!

Nick’s Dad actually built this for his Mom back in the day, so it has sentimental value!

20160306_080505

As much as I can appreciate the detail of the hearts, once I realized how simple it would be to remove these parts… I took them off. I just wanted clean lines to show off my spools! (Sorry Bob!) And painted it white.
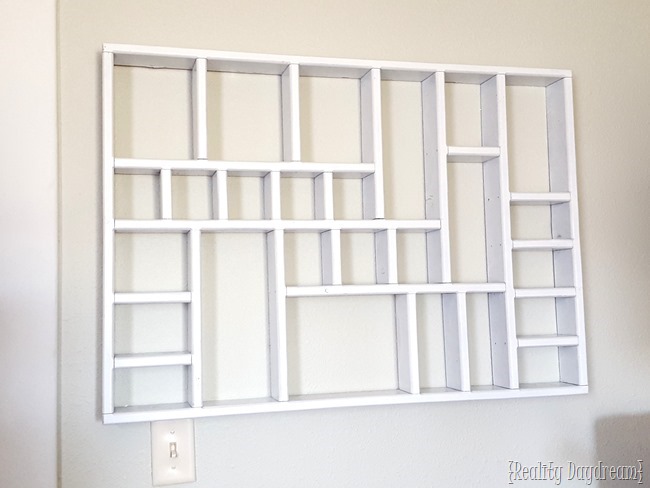
Old trinket shelf used to display lace on spools {Reality Daydream}

Then I loaded it up with my lace-wrapped wooden spools!!

20160307_100021

I have it hanging on the wall just above my sewing table… which is a HUGE MESS. So I’m not gonna show you. Cause it’s mah blog.

So? what do you think? Playing around with a lathe is soooo fun! And it falls under  my list of ‘easy-power-tools-for-a-beginner-to-start-with’. Also… not a bad price for something SO FUN and useful! I’ve got a ton of projects in mind for this bad boy (this is the lathe I have).

Have you been playing around with any new tools lately? Or stepping out of your comfort zone and trying something new in life? I’ve been thinking about trying this ‘avocado toast’ craze, but I JUST CAN’T BRING MYSELF TO TAKE A BITE.

~Bethany

~~~~~~~~~~~~~~~~~~

THANKS for pinning!

Use a lathe to make a variety of different spools for storing lace, ribbon, etc! (Reality Daydream)

*I was provided with product in the form of a lathe from Rockler. I was not paid cash money, or told what to say or even make! this post contains affiliate links.

Related:

  • Wooden Centerpiece Tray Tutorial

    I have a fun and easy building project for you! And while I do end…

  • Wooden Circle & Test Tube Propagation Art

    We're in the dog days of summer, and it seems like my kids are always…

  • Coffee Table / Lego Table

    We've been needing to update our coffee table situation in the living room for awhile…

About Bethany Sy

Nick and Bethany Sy are the creative free-spirits behind DIY/Lifestyle blog, Reality Daydream. They recently purchased a historic mansion and have been documenting the ups and downs of renovation and making this home their own... all while sharing tips and tutorials along the way! When they found themselves in the trenches of infertility, they started a journey that would prove to be their most important DIY project ever, and have 3 beautiful girls to show for it. <3

« Oreo Rice Krispie Treats
Portable Kids Coloring Activity Tablet »

Comments

  1. 7

    SLN says

    March 12, 2016 at 8:11 pm

    Love love love it and what fun! Your display is motivating!!

    Reply
  2. 8

    Jess Rey says

    March 9, 2016 at 1:57 am

    This is COOL! I need that lathe machine! The possibilities are endless!

    Reply
  3. 9

    bethannchiles says

    March 8, 2016 at 12:05 pm

    What a cute idea! I love how you repurposed that piece.

    Reply
  4. 10

    Erin @ DIY On the Cheap says

    March 8, 2016 at 2:27 am

    Such a cute idea! I’ve always wanted to try using a lathe.

    Reply
  5. 11

    Suzanne says

    March 7, 2016 at 10:17 pm

    LOVE it!

    Reply
  6. 12

    Karen Sandlin says

    March 7, 2016 at 7:21 pm

    I have always wanted to use a lathe and Beth you have just reignited that “want” fire! My granddad used a lathe and made 4′ tall candle holders (starting with 4×4) in different shapes that we used for our wedding ceremony. I think there were 10 in total. The entire ceremony was candlelit (no other lights) so they were quite a statement among all the other candles! He also made beautiful pedestal bowls. Get busy, Girl! You have a long way to go! enjoy it for me — Karen

    Reply
  7. 13

    Cassie Bustamante says

    March 7, 2016 at 6:12 pm

    oh i am a sucker for lace and your display is gorgeous!

    Reply

Leave a Reply Cancel reply

Your email address will not be published. Required fields are marked *

  • Facebook
  • Instagram
  • Pinterest
  • RSS
  • YouTube
We are Nick and Bethany! Welcome to our blog, Reality Daydream where we share our DIY adventures!

realitydaydream

Still can’t get over these shelves. 😍 These Still can’t get over these shelves. 😍

These Aksel Radius Floating Shelves by @shelfology are the perfect finishing touch to this wall in our kitchen. 🙌

#gifted #shelfology #radshelfie #floatingshelf #akselradius
I needed an instant-gratification project today fo I needed an instant-gratification project today for my well-being, and this little wooden stand was so fun and fast!

Details and links to everything in this pic in Stories!
If ya just need a slab of wood, grab a cutting boa If ya just need a slab of wood, grab a cutting board when you’re at Target or Walmart! They’re made of hard wood!

I used this cutting board to experiment and make some prototypes for a large-scale piece of art I’m doing for our church. It’s got me EXCITED!

Follow along for that project- happening soooon!

@dapproducts @dremel @jet.woodworking
You’ve all seen the video, but here’s some sti You’ve all seen the video, but here’s some still shots of the kitchen wall in all its glory!! 

The Aksel Radius Floating Shelves by @shelfology were the perfect finishing touch! 

Should I do a house tour of our main floor this week?!?! 🙌🌿

#sponsored #floatingshelf #radshelfie
Load More Follow on Instagram
View of our entryway of our historic mansion that we're slowly renovating and making our own.
Click here for lots of art projects using only wood stain on furniture!!
Please feel free to share or pin my posts! You're welcome to use ONE of my images (no collages or pinnables) with a link back to the corresponding post. Please do not edit or crop that single image in any way. Improper use of my photos, ideas or words is a violation of copyright. Thank you!

Categories

Attention: Almost any do-it-yourself project involves risk of some sort. Your tools, materials, and skills will vary, as will the conditions at your project site. Reality Daydream has made every effort to be complete and accurate in the instructions of the plans on this website. Reality Daydream will not assume any responsibility or liability for damages or losses sustained or incurred in the course of your project or in the use of the item you create. Always follow the manufacturer’s operating instructions in the use of tools, check and follow your local building codes, and observe all commonly accepted safety precautions.


Copyright © 2023 · Modern Blogger Pro On Genesis Framework · Customizations by Sweet Theory Designs · Privacy Policy · Log in