Sometimes I share things so thoroughly on Instagram, I forget to share here on the blog too! Did you know we installed a patio?

*This post contains affiliate links.*
It is SUCH a dream, and we spend so much time out here as a family! And the space is so much more practical than what it was when we first bought out home. Check out this pic!
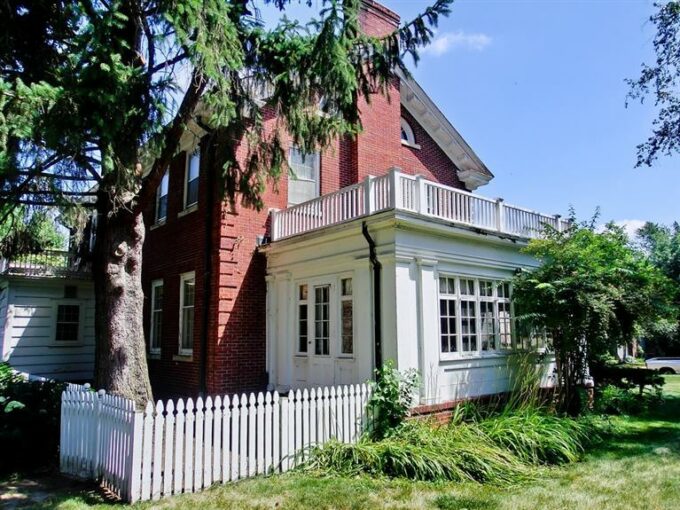
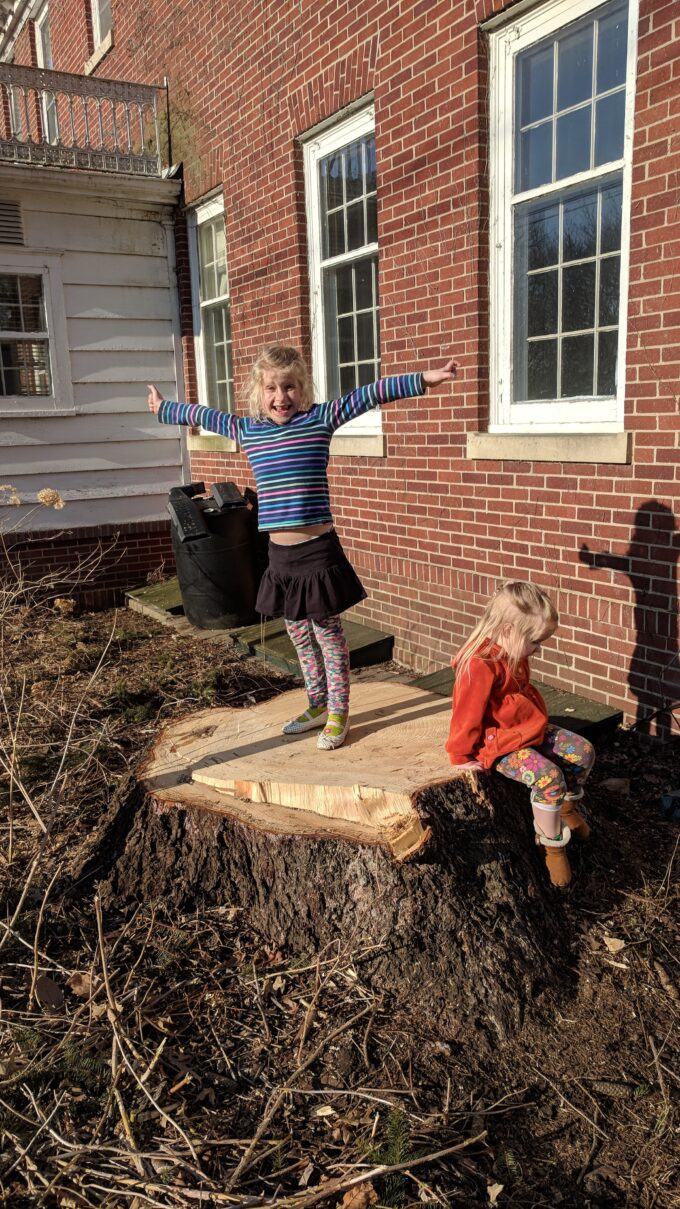
I mean yeah, the fence was charming in it’s own way, but it was rotting away. And that tree had to go. The roots were starting to inhibit the foundation.
But back to the patio! The only thing that this area has been lacking is lighting. When we’re hanging out on a beautiful summer night, and the sun is going down… IT IS DARK.
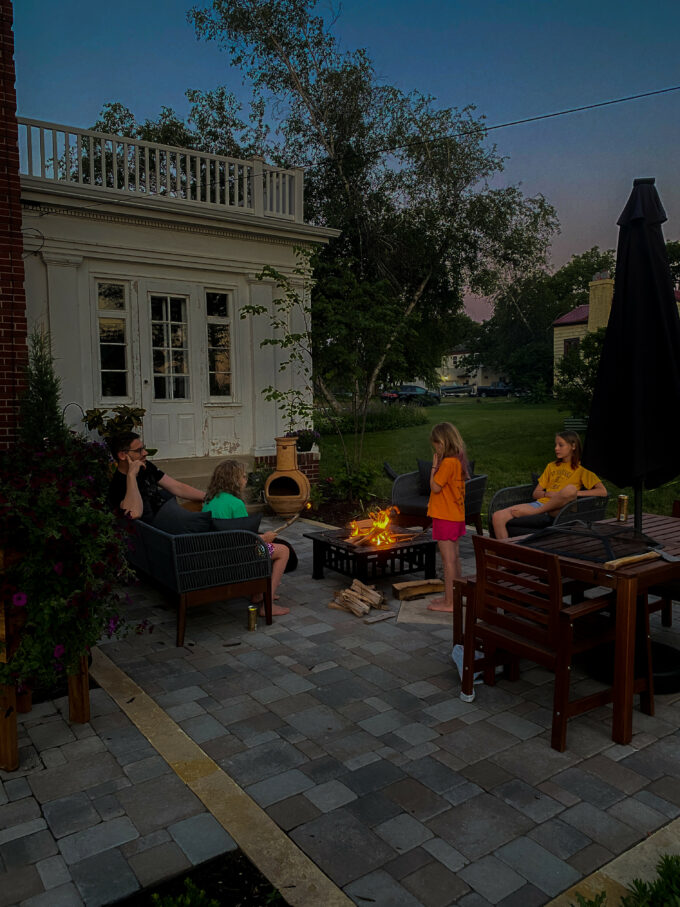
There have been many nights when we have company over, chillin’ on the patio until well after dark. We’re still carrying on lively conversation, and we can’t even see people’s faces anymore. Legit blackness.
We considered adding a pergola to hang some lights from, but we decided against it since it wouldn’t fit with the era of our home. We’re trying to keep everything true to that time period! Although one might argue that there wouldn’t be strings of patio lights in the early 1900s either, but we’re not going to talk about that. SHHHHHH.
We decided to add a pole to string 3 separate strands if lights from and have them fan out to different points on our house. Here are the supplies we used!
Supplies for patio lights and freestanding pole
- Guide wire
- 3 strands of these solar patio lights (these are THE BEST!)
- hitch rings
- Whiskey barrel planter
- 4×4 treated lumber (we got a 12 footer)
- concrete (we used 4 bags)
- 2x4s for bracing
- drill
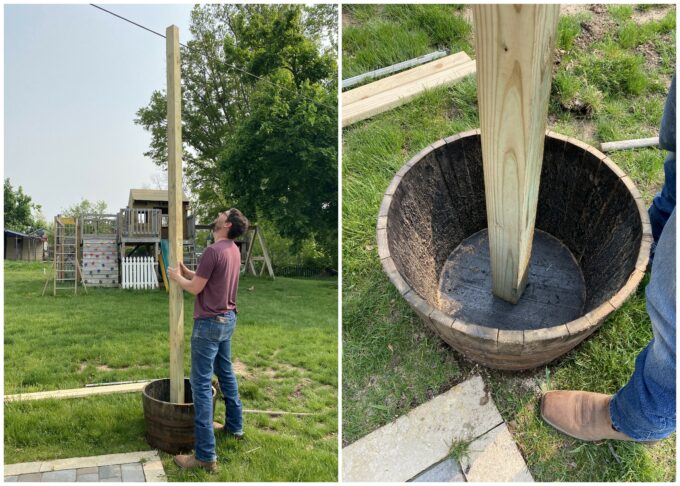
We started out by leveling the ground where the whiskey barrel would go. While one of us held the 4×4 in place, the other screwed on 2x4s to act as braces to hold the 4×4 level during the concrete process.
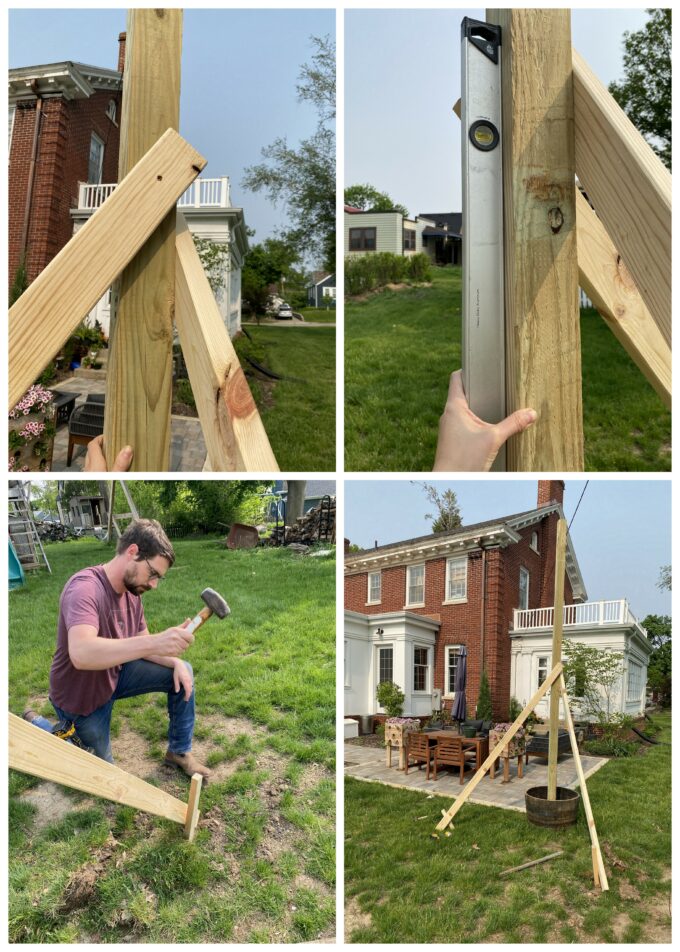
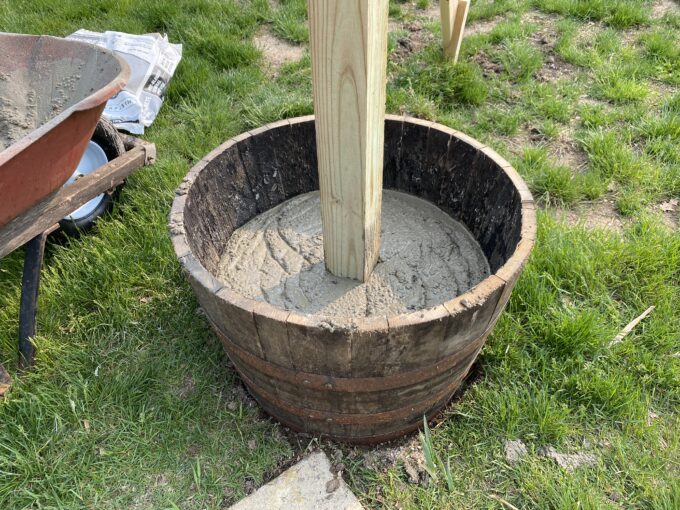
Once the 4×4 pole was level and steady, we started mixing our concrete! We used an old wheelbarrow to mix the concrete and water, using a shovel to stir it.


We mixed and poured one bag at a time until the concrete in the whiskey barrel was about 6 inches deep. Then we left it to dry overnight.
In the meantime, we put up the hitch rings in 3 locations on the house where we wanted out patio lights to go.


Once our concrete was good and solid, I couldn’t wait to plant up some flowers/plants!

First I drilled some drainage holes through the whiskey barrel right at the level of the concrete. Then I added some raised bed soil and potted up some mixed coleus (I love the colorful foliage!) and a climbing Mandevilla. So beautiful!

I wrapped some fishing wire around the 4×4, using pushpins to secure the ends. This allowed me to help the trailing vines of the Mandevilla around the pole, and hold them onto the fishing wire with mini cothespins.

It’s time to put up these lights! We screwed in the solar panels for the patio lights on the top of the 4×4 pole so they could start soaking up some sun.

Then we added the final hitch ring into the 4×4 pole, and started stringing up the guide wire to the 3 locations on the house.

We followed the instructions for affixing the strings of solar lights to the guide wire. It’s a good thing we used guide wire, because our strands of lights weren’t quite long enough to reach the house.
What would we do without these helpers?

I can’t even tell you how excited we were for the sun to go down and our lights to automatically turn on. We passed the time by making so homemade ice cream with Nick’s new ice cream maker we gave him for his birthday!

And when the time came, we were NOT disappointed! Look how beautiul!
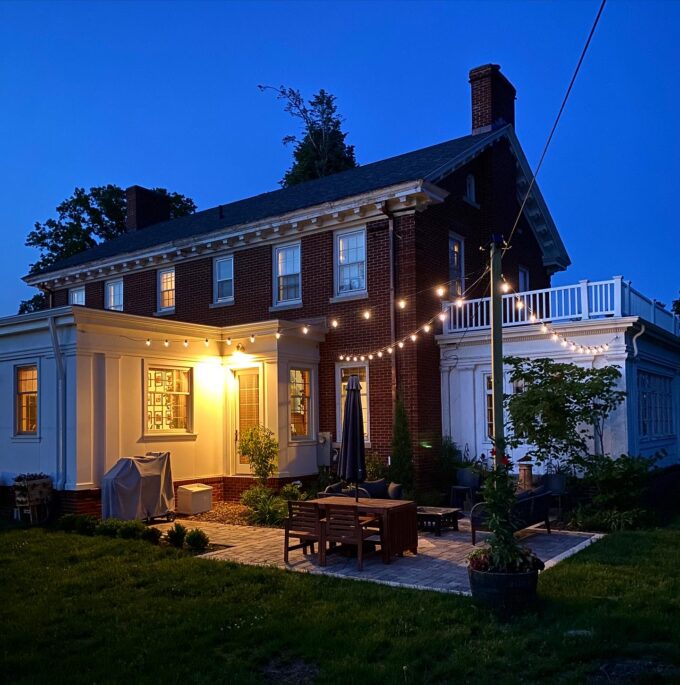

. And I even love how it looks during the day. Such a happy space!

Who knew that adding patio lighting would make such a huge difference to the whole vibe of our patio. Ambiance is everything! And seeing each other’s faces is a bonus. LOL!
If you try this project, let us know how it goes for you in the comments!
Bethany
~~~~~~~~~~~~~~~~~~~
Thanks for pinning!


Related:
-

My kids are getting to the age where they want to tape pictures, cards, notes...…
-

It's been awhile since I've done a sewing project, and as weird as it sounds,…
-

These DIY Planters are perfect for cascading Wave Petunias, and it will be so fun…
Glorious! I LOVE lights!!!
Glad y’all aren’t in the dark anymore. Thanks for the info on how to accomplish such a project. If you’re still wanting to stay true to the home’s era, how about some portable, timeless lanterns to decorate and illuminate? Y’all also could’ve planted a tree where the new pole is, but that method would take a bit more patience, hehe. Lanterns could hang from the lower branches? Enjoy your space. Looks like it’s getting cozier each day. Take care!
I love how your patio looks. It looks so much better than the before picture. Good job !