Although I love what we’ve been doing with our own home lately, I’ve been seriously missing our furniture rehabs for sure. Nick needed a break from it… and I get that. But there comes a point when a girl realizes she’s gotta take matters into her own hands!
Nick’s been super busy working on an exciting super-secret project. And I’ve been as bored as a person can possibly be with two VERY energetic and partially-potty-trained toddlers running around like wild animals.
So… I haven’t been bored I guess. I talked myself out of it.
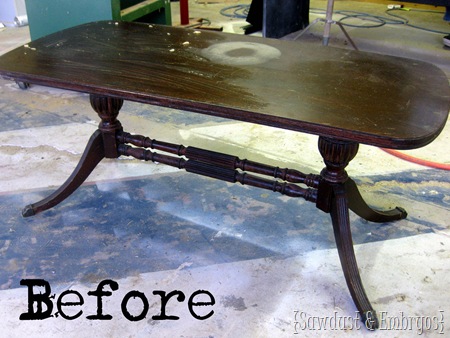
I think what I’m trying to say is that I’ve been dabbling in furniture again. This little gem we bought from the same sweet elderly couple we bought the dental cabinet from (which is exactly 17% stripped so far).
Me-thinks it’s an antique, but what do I know about furniture? I do know that I super-love the claw-feet. I also love that it doesn’t need any structural help, nor anything else that I would require dependency upon Nick’s skillset.
So I stripped it on a whim one night. Just the top surface though.
Here is my Stripping Tutorial… but as a desperate attempt to save you some hassle, I want it to be known that you DO NOT have to strip furniture unless A) there’s lead-based paint, or B) you’re wanting to stain instead of paint.
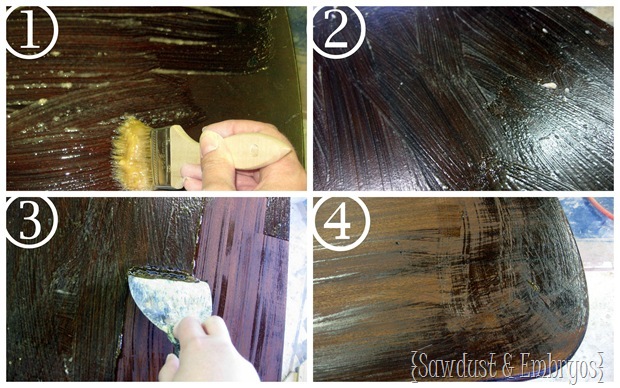
What I did:
- Slather on some stripper! We like Zinsser best.
- Make sure it’s completely covered good and thick, and let it sit for as long as the instructions tell you. For us it was 15 minutes or so.
- Scrape it off with a putty knife or one of these magical tools.
- If there are dark shiny spots when you’re done, you need to do another coat in those areas because the original finish didn’t come completely off.
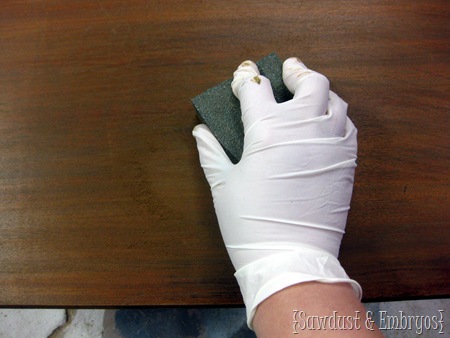
Once you’re done stripping, sand ‘er down nice and smooth.
Finally all the ‘prep work’ is done and I get to have a little creative fun! The technique I chose to use is not an original idea of mine. My friend Ashley at Domestic Imperfection did an AMAZING paisley stencil to her table awhile back, and I’ve been dying to try out her technique using a different pattern.
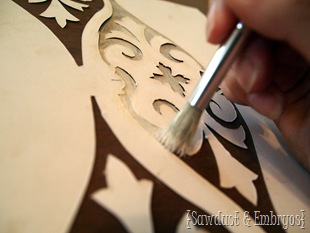
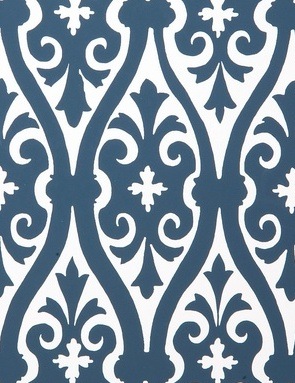
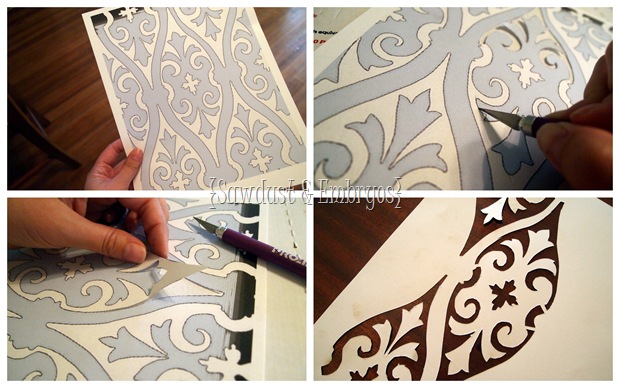
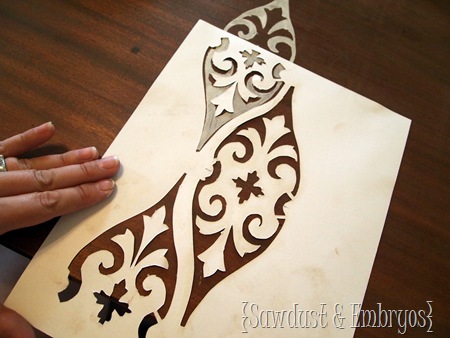
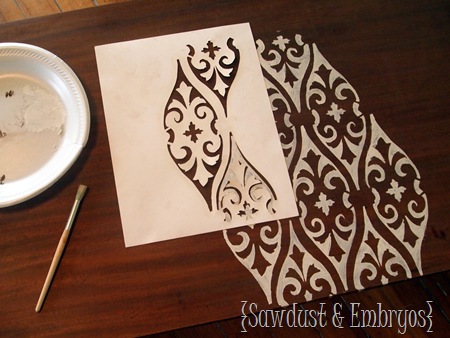
I printed this image out on a piece of cardstock (I used my ‘Make your own Stencil’ tutorial, only using cardstock instead of a transparency because I couldn’t fine one!), and spliced away at the pattern with an exacto knife.
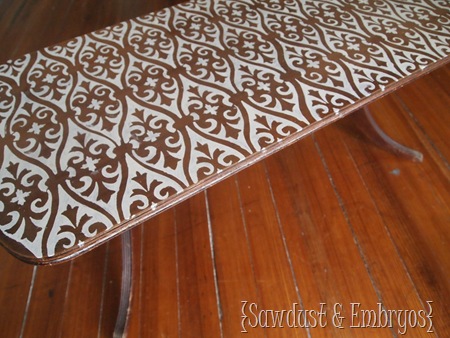
I drew a line in pencil down the center of the table using a yardstick so I could keep my stencil straight (important! I promise!). Then, using some white acrylic paint and a stencil brush, I dabbed away!
 |
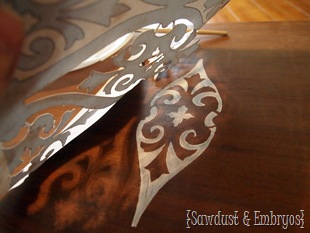 |
I took 4 or 5 breaks to let my stencil dry. You’ll know when it starts getting globby.
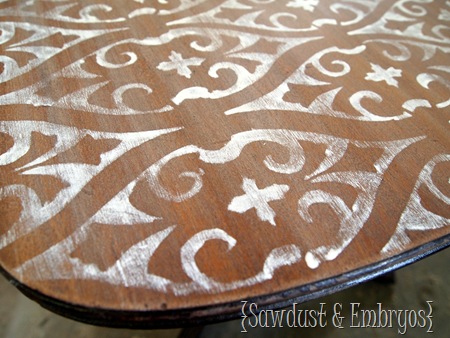
Because of the high contrast of the white and cherry wood grain, you could see some of my brush strokes… but that’s ok. I’ll show you why in a sec.
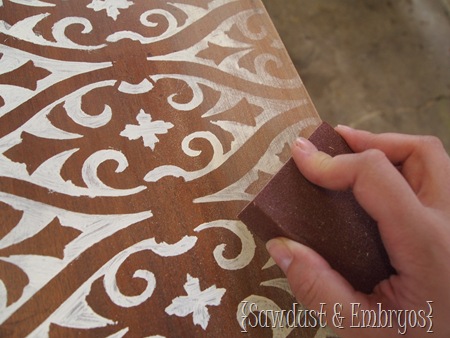
Acrylic paint dries in about 5 minutes, but I let this sit overnight to get good and cured. Then I sanded the whole top surface down, putting extra pressure around the edges where normal wear and tear would happen in real life.
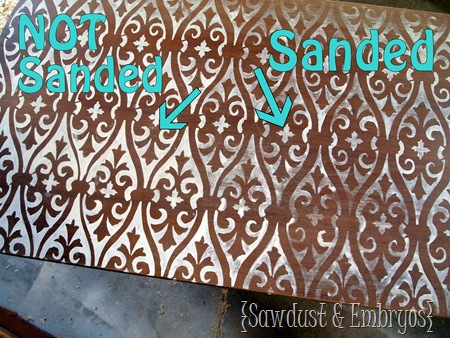
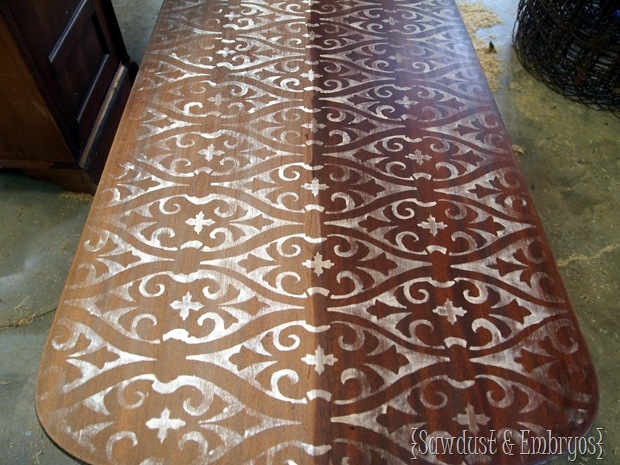
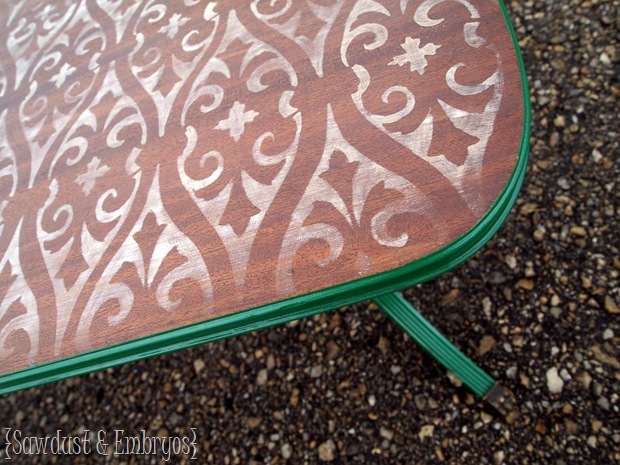
Then, using Rustoleum Dark Walnut (as usual!) I smeared on some stain with a cloth. I looooove how the stain makes the wood grain so rich, and allows the white paint to really stand out too! Check out this side by side shot for comparison.
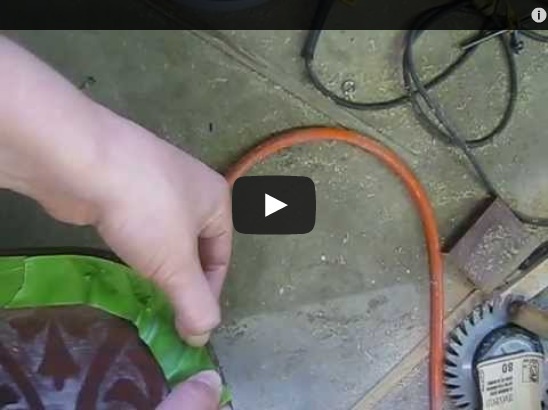
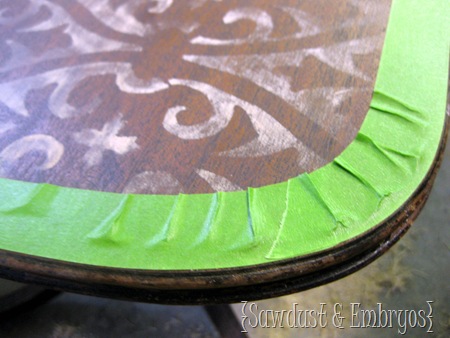
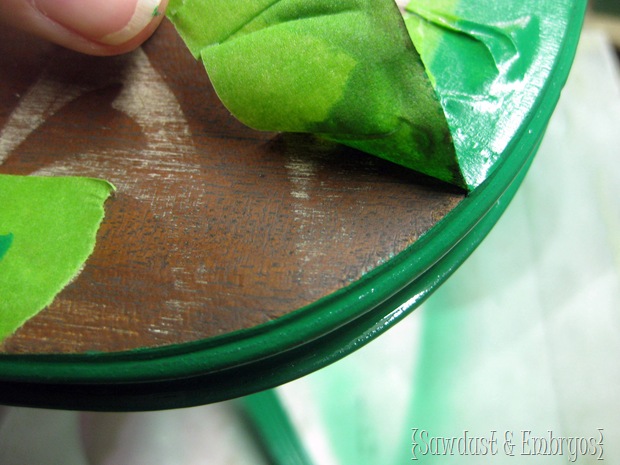
So I decided to paint the body of the coffee table, and just leave the VERY top surface alone. This meant I had to tape off the top… because even if I laid it upside down, it would still get overspray underneath and wouldn’t have a crisp line. So I made sure to use Frog Tape, and manipulated the tape to get a perfect edge! I made a little video for you to demonstrate instead of trying to explain it with still images.
**Please ignore all the junk on the floor in the garage, and the fact that I strapped a camera to my head with a jogging hairband. Also, you can hear the girls through the baby monitor doing their best Mariah Carey impressions.
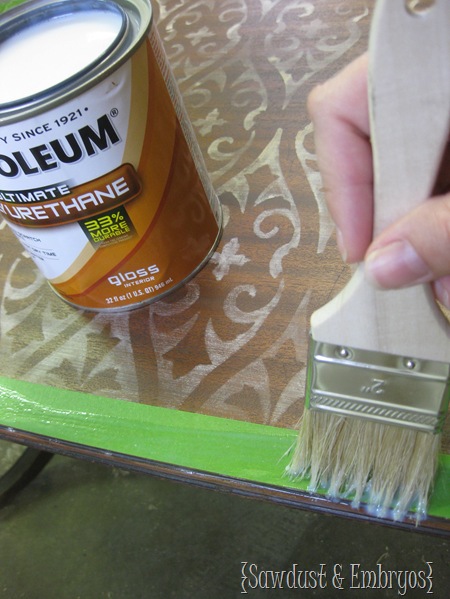
Then I sealed those edges with some poly just to be on the safe side with this stuff.
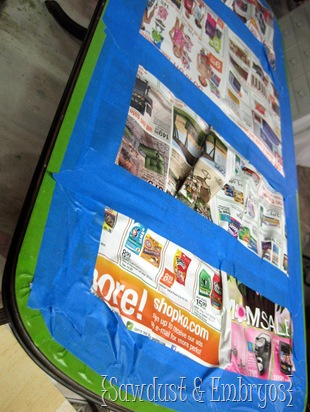
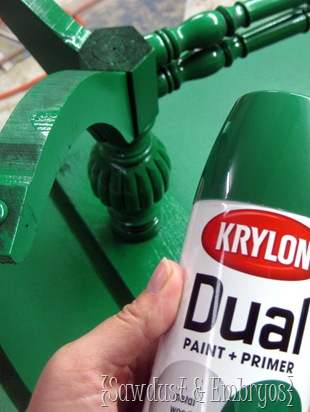
Then I taped/newspapered off the rest of the top, flipped ‘er over, and painted using Krylon Dual (prime and paint in one).
 |
 |
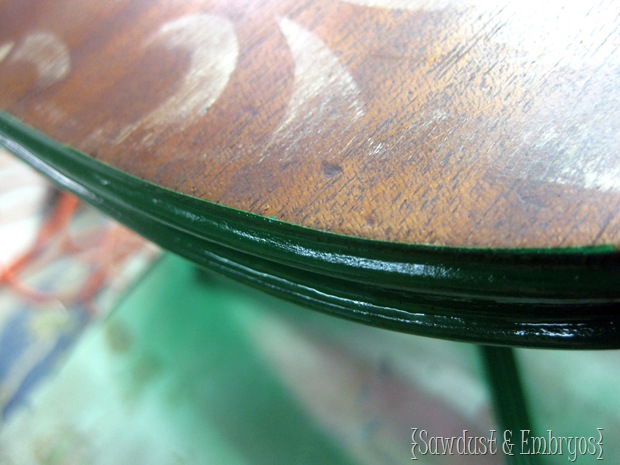
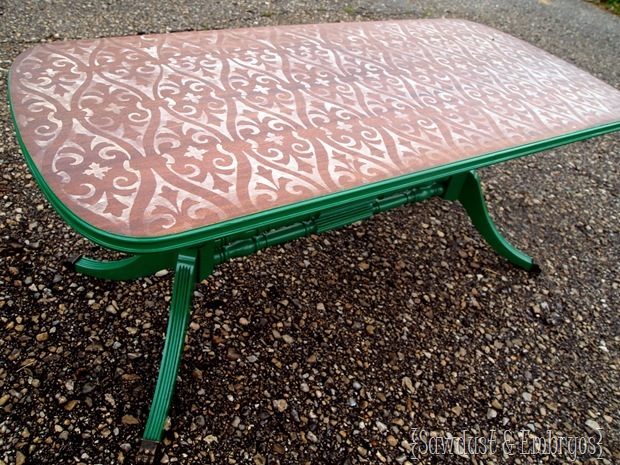
Feast. Your. Eyes. On… THIS.
I mean, come now. Could that line be any more perfect?
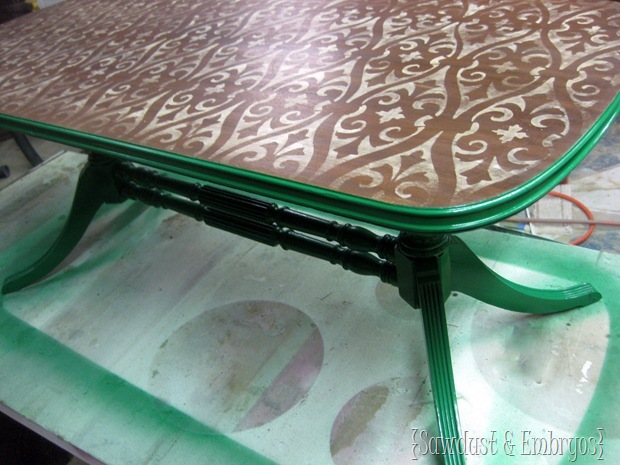
And now for the money shots.
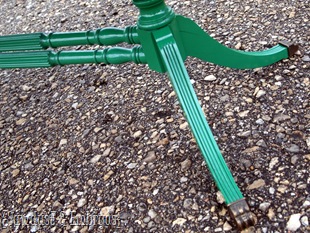 |
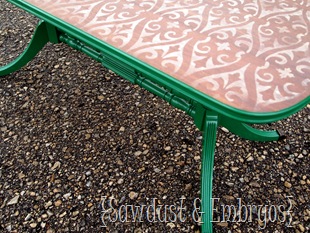 |
Here’s your handy printable recipe:
~~~~~~~~~~~~~~~~~~~~~~~~~~~~~~~~~~~~~~~~~~
Stenciled & Antiqued Coffee Table
Time commitment: 4 hours total
Difficulty level: 3 (out of 10)
- piece of furniture
- piece of cardstock
- Exacto knife
- white acrylic paint
- Wood Stain
- Frog Tape
- Poly
- Spray Paint
~~~~~~~~~~~~~~~~~~~~~~~~~~~~~~~~~~~~~~~~~~
*this post contains affiliate links


After you stencil with white paint, then stain, what keeps the srrain from covering up the white?
Since the stain has an opaque quality, it doesn’t completely cover the white. It just gives it a distressed look!
I had to laugh, I was looking for the correct way to stencil a little table that I am working on and I see your post of the little orange table. it is my exact table. At the time after you payed you’re stencil down you applied Poly to seal the edges then you found it better to lightly sand the Poly so the paint could stick better. (That post was about a year ago) Is that what you are still doing or are you doing a different technique? Your work is absolutely beautiful! TIA for the advise.
Yes, if the poly you use has a glossy sheen, I would lightly sand it with 220 grit sandpaper just to make it a more ‘matte’ finish. This will help the paint to stick to it better. If the poly you’re using is already matte, you can skip sanding! Please send pics when your done! Or you can join our DIY community on Facebook and share your pics there! Here’s the link to request an invite>> https://www.facebook.com/groups/DIYRealityDaydream/
Gorgeous! 🙂
Sorry if this has been asked a thousand times, but where do you find your furniture pieces?
all your pieces are great. i also stenciled 2 pieces by taking inspiration from u.
i wish i can post my pics here.
THanks so much Ayesha! I wish you could leave pics in the comments too. I’d love to see your stuff though, so you could email pics to us directly at sawdustandembryos@gmail.com. Can’t wait to see your work!!
I’m noticing that you use polyurethane over polyacrylic, is there any reason why? I’m refinishing furniture in order to get the looks I want so I’m new to this whole thing. I want to make sure the furniture I refinish is durable. Btw you do AH-MAZING WORK
Kay, I don’t know how I missed your comment… I’m soooo sorry! You can use water-based paint/poly over oil-based paint/poly and vice versa, as long as the coat below it is good and dry. We use polycrylic (water based) when we’re trying to seal white paint (because oil based poly has a yellowish tint to it). Hope this helps! Let us know if you have any other questions!
Explain the sealing the tape with the Poly. I’d love to learn a new trick for those clean edges!
Kristina, after taping just brush on some clear poly and let it dry before painting. This seals down the edges of the tape and gives a PERFECT crisp line! Totally worth it. 🙂
Hi, I was just wondering if you have to be careful while painting the poly on the tape edge, so as not to get any on the part you actually want to paint? Or does the paint still apply normally with a thin layer of poly under it? What a great technique! Thanks!
It won’t matter if you get a thin coat of poly on the part that is to be painted. Especially if you’re using water-based, because it’s a thinner formula. Hope this helps!! 🙂
I absolutely love the stenciled and stained table top, but not so in love with the painted bottom. Being more of a traditionalist, I’m going to use this technique, but strip the whole piece and stain it the same, or possibly stain the lower portion a little darker. I have a rather battered antique dresser that needs a lot of TLC, and I love the look of dresser scarves, but hate the way they slip around and make things wobble. This looks like the perfect solution. I
My Mother and Dad would be pleased as I am, with the updating of their coffee table. It was given to them as a wedding gift in 1939 and they enjoyed it in their living room for many years. Mother gave it to our son and hence the watermark from a plant on the top. I was always going to redo the top, but never got around to it. I am glad that Beth did such a good job of rejuvenating the table. Enjoy!
Nancy Wilson
We love the history and story behind it Nancy! Thanks for entrusting it to us. 🙂
i LOVE this technique!
that stencil, paint, sand, stain technique is amazeing!! it looks awesome!! and i love the two toned table.
WOW!!! Nicely, nicely done…
Thanks for the tips & the how-to. I love the sanding, after stenciling tip…
( & PS. I am no furniture expert by any means, but I think that the table may be a Duncan Phyfe.. a somewhat valuable piece ??? )
Kathy is right, that style of table is called a Duncan Phyfe table. The brass, lion claw, feet are the most recognizable features of the Duncan Phyfe style. Other common features are the double posts with the ridged and curved legs, pineapple finials and harp-shaped post designs are also very common. If this was a table actually made by Duncan Phyfe it would be worth a LOT. It’s likely a reproduction…still pretty and still highly desirable.
What a great find, and a beautiful transformation. Emerald is such a beautiful color and is absolutely PERFECT for this Duncan Phyfe coffee table! Great job Beth 🙂
Pelham @ UrbanDEN
You are just so awesome… what a transformation! Love the stencil top!
It’s awesome! Thanks for sharing the stencil idea with stain over it…will have to try that! 🙂
Have a great week!
Amy
http://www.homesweetthriftyhome.com
Such a beautiful piece! I love everything about this 🙂 The emerald is so rich looking. The distressed stencil/stain is superb. Absolutely stunning! Your vision amazes me. Most people don’t just think up combinations like that and have them actually work, like you do. Your video was cute too 🙂
I love that, I would never have thought to do that! I am new that this and have my first project ready to go but it is raining today, so I have to wait. Do you always recommend stripping if you are going to re-stain? I have seen TV shows where they just sand the wood before they re-stain it. I am going to keep my eyes out for a table that this will work on. I need a new table in my living room!
I always strip before I re-stain, because the stain is meant to soak into the wood… and if there’s a finish of any kind, it’s going to prevent the stain from doing it’s job. I’m sure there are products out there that claim you can stain right over a sealed finish… but I’m skeptical! Seems like painting instead of staining if you’re not staining the actual raw wood. Good question though!
Did you poly the entire table top after you stained it?
Honestly I haven’t sealed it yet. I’m planning to use a wax sealer on the top stained surface because I want it to be a dull finish. I’m going to poly the base nice and glossy though!
Beth, for a dull finish, a great alternative to wax is to hand-rub satin polyurethane. It’ll be more durable. Minwax makes wipe-on poly (which is essentially poly that’s been thinned with a thinning agent) or you can just use the regular thick stuff. Just rub it on and smooth/blend it out thoroughly. Do multiple thin coats and it’ll be perfect. The last piece I did this on, I did 4 coats! Not really as time consuming as it sounds, either.
Pelham @ UrbanDEN
Hmmm, interesting Pelham! And does the thinned-out poly provide a matte finish??
gorgeous!!!!!!!!!
I love it too! I sure wish I had some tools and stuff…
Could I be more in love….nope.
Soooo you had me at stain (because thanks to you I slapped some stain on wood for the FIRST TIME EVER and I think I am addicted)
Throw in stencil, my knees went weak.
But seriously….the green. The color that makes my heart pitter patter. It’s like this table came straight from my dreams!
All I am trying to say is touche. I love it.
THANKS Christina! Ever since Emerald was named color of the year, I’ve been itching to use it on something! I’m glad you’ve been dabbling in stain… FUN RIGHT?