So here’s the thing about DIY… if it’s a little crafty project with minimal supplies on the line, I’m more likely to just jump in all willy-nilly and see what happens. But when we’re talking about a larger-scale building project that will involve many hours of time and closer to a handful of twenties rather than a handful of ones ($$)… well let’s just say I’m going to put more thought into making sure it’s exactly what I want. It has to be beautiful AND functional for our family!
We have an awkward wall in our kitchen that’s been blank ever since we relocated these cabinets to another wall. I don’t regret that move at all, but this wall has been just yearning to be useful. Here’s a pic of the wall
My wheels have been turning over the past few months on how to incorporate a rolling island. I knew I wanted it to have a butcherblock top, and have a place to house the microwave… but other than that, I wasn’t really sure where to go with designing this bae.
Naturally, I took to Pinterest to find some inspiration (be sure to follow me here!) I perused through many-an-awesome kitchen and found lots of inspiration for kitchen islands with so many different ideas and options. I ended up saving these 4 for different reasons, and I’ll explain what I liked about each below the pic:
- I love that this one has lots of storage and could potentially also have a cabinet dedicated to a garbage can. I also like that it has lots of drawers because my kitchen has lots of cabinets, but only a couple of drawers.
- This one is obviously a gorgeous color, and I like the openness of it and how it feels classy with a bit of a modern flare.
- I love the metal detail on this guy and how it feels industrial and isn’t too feminine. And THOSE WHEELS! Heart eyes! (although not practical for our floors)
- This one is by Ana White who is basically my girl crush… so I couldn’t NOT include it in the lineup. I like that it’s a bit chunky and feels ‘substantial’.
After deciding what I loved and didn’t love for my own kitchen, I drew up a little sketch of what would be ideal. I loved the idea of including a wine rack, but that didn’t end up making the cut when we considered the tiny human that crawls around our ‘crib’ wreaking havoc. Wine bottles plus crawling baby equals no bueno.
I took my sketch to my custom furniture maker (LOL), and he stared blankly and me… and then asked me what we were having for supper.
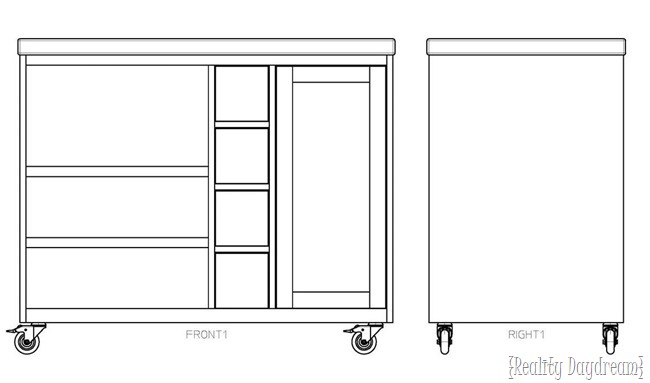
And then he went to the drawing board for me! I love that he’s willing to do all the tedious and mathematical nonsense that goes into actually drafting building plans. although I know that I should really learn to do it myself too. Maybe that will be part of my #goals for 2017.
You can click here to print out all the building plans… but I’ll just walk you through the basics here too.
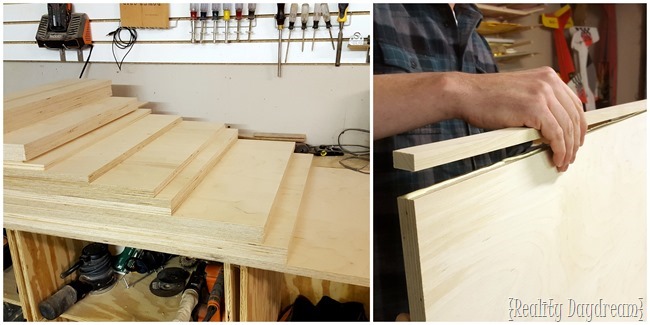
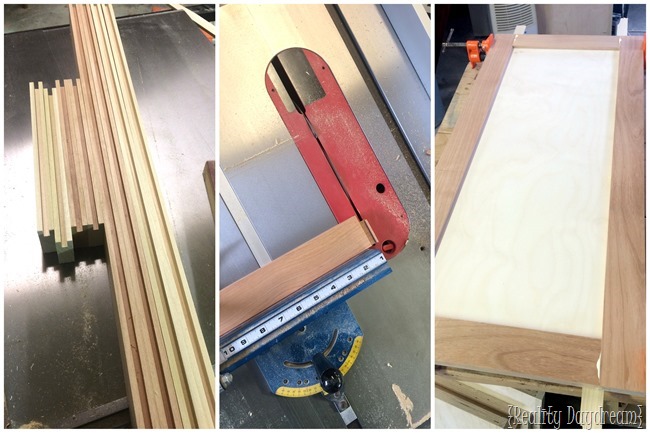
We used 3/4” plywood, and cut everything to size. And then capped off the edges with strips of poplar to give a really clean line and cover the exposed layers of plywood.
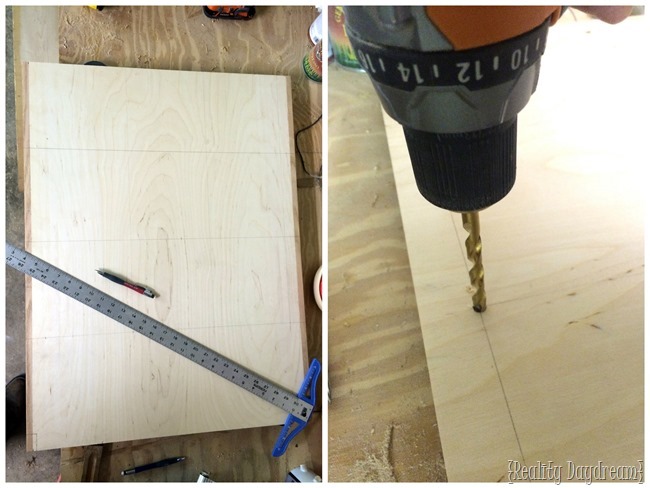
We measured and marked the locations for our screw holes with a T-square and pre-drilled everything with a counterbore bit in advance.
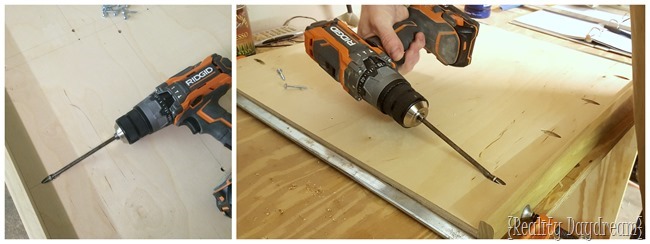
Next up? Drilling pocket holes! We loooooove our Kreg Foreman… sucka makes it so easy to drill many MANY pocket holes.
Glue and screw the fronts to the shelves and the bottom rail to the base. And clean up the edges with the table saw.
Since we’re having our trash can cabinet accessible from both sides of the island, we needed two cabinet doors. We cut our stiles and rails from poplar, and then cut the stub tenons with a precision miter gauge. Then glued and clamped them all together!
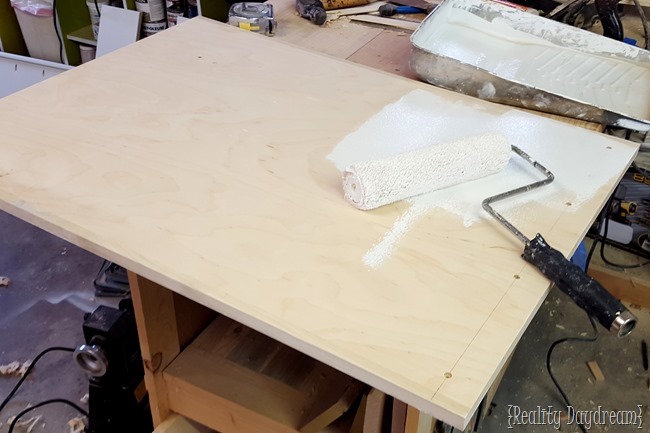
We decided to sand and prime everything before assembly just to make it easier on ourselves later. Paisley loooooves any opportunity she can get to operate the orbital sander, and we’re usually happy to oblige. Also: cuteness overload.
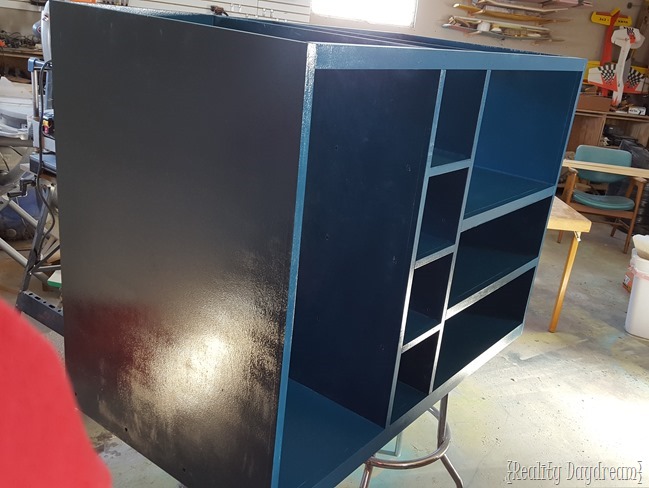
Then it was time to assemble!! I didn’t really take any pics of this process… because we were IN THE ZONE. But everything slapped together smoothly. And I sprayed on a glossy coat of paint (the same exact color I painted our Kitchen Aid Mixer!). It’s ‘Night Tide’ by Rustoleum (here).
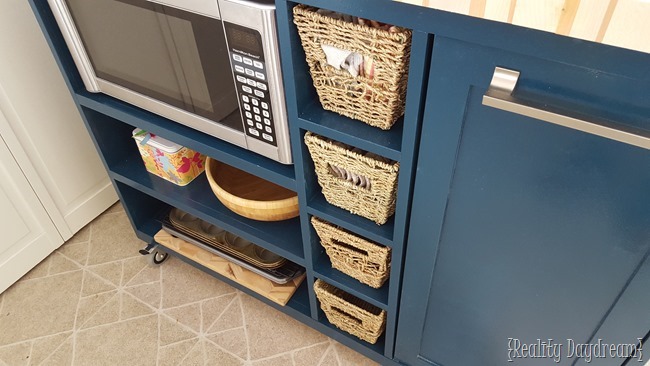
I realize this isn’t really a thorough tutorial (the detailed building plans are on Build Something), but I just wanted you to get a feel for how it went together. At this point, all we had left was to put those wheels on, slide in some PERFECTLY SIZED baskets that I just happened upon at Walmart… and have a blast arranging all.the.things!
You can see we built a butcher block top for it, but that reveal is going to have to wait until another day… still needs some sanding and oil before we can affix it into place and show it off! But I’ll just tell you it’s a really cool pattern (using two different types of wood) that you wouldn’t expect on a butcherblock. OH THE SUSPENSE!
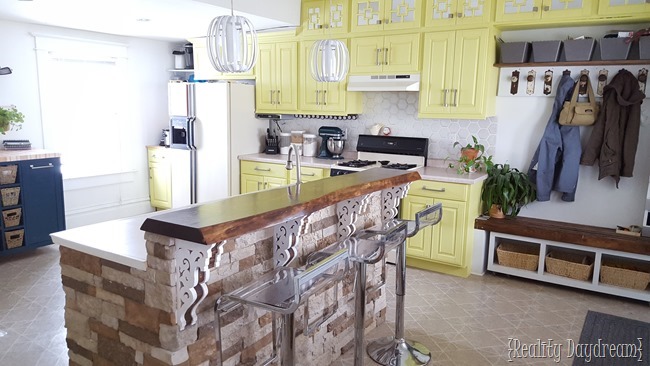
And just to help you get your bearings, here’s a shot with the rest of the kitchen so you can see how it all fits together!
I just cringe and our old cream/black appliances, and just KNOW how much more awesome our kitchen would look with some sleek stainless. But alas.
However!
Check out how much of a difference updating the hardware makes?! I’m loving the sleek modern feel of these pulls. We went with these from Hickory Hardware. It was soooo hard to choose! Who knew such a small tweak could make such an impact! LOVE THEM!
And we were able to use the same hardware for the new island, which brings everything together into a nice little cohesive package.
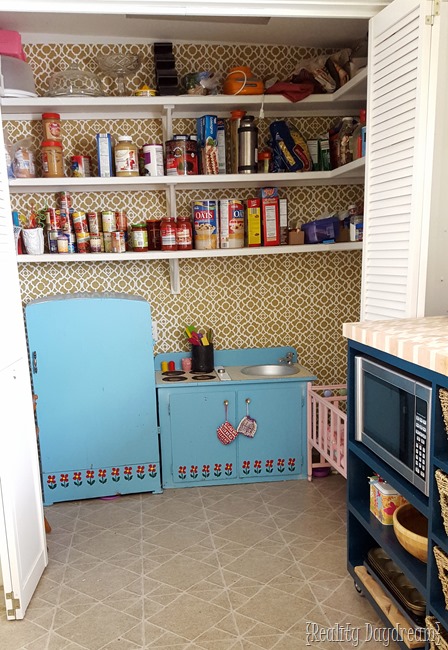
Just to the left of the island is our pantry. Since the we moved the washer and dryer out of her and into the Laundry Suite, we haven’t yet gotten around to adding the rest of the shelving. So this has just ended up being the girls’ little play kitchen area.
It’s wonderful because they love to feel like they have their own area, and often Paisley is ‘cooking’ something delicious while Dell is helping me actually cook something delicious. We’re all working together in our kitchens! (plural)
Except sometimes it looks like this, soooo…
This was my play kitchen when I was a little girl. My grandfather built it for me, and I have so many memories and all the sentimental feels about it. I can’t bring myself to update, paint, or make any modifications to it whatsoever. I think I’ll just leave this post with this terribly awkward photo of me with my play kitchen as a child.
I should also note that my not-yet-one-year-old wore that same blue and white shirt the other day. She is a giant toddler-baby. Maybe I’ll have her wear it for her weekly pics today for fun!
Well, this has been a lonnnnnng post about kitchen islands, cabinet hardware, messy play kitchens, and a little walk down memory lane. In other news, we’re snowed in today, so you can find me watching Super Why marathon and eating cheerios.
~Bethany
PS! Don’t forget! If you’re an email subscriber to my blog (or want to be!), please click here to reconfirm your subscription. We switched email subscription providers and it’s caused a hiccup. We just want to make sure you continue to receive emails if you want to! Thank ya!
Thanks for pinning!
*this post contains affiliate links. After reaching out to Hickory Hardware we were provided with free product in exchange for visibility on our blog. We were not told what to say, and all opinions are 100% our own. Their hardware is amazing and we wouldn’t post about it if we didn’t loooove it!









The concept of a rolling kitchen island is amazing! Thanks for sharing this post!
Hi there! We are planning to build this cart for our new home and are so excited! I was wondering if you could provide the dimensions of your microwave? Between this and the Build Something plants I tried to piece together how big that compartment was, but I couldn’t puzzle it out. We’re deciding if we need to modify the plans or not!
Hey Amanda! I’m so sorry we missed that measurement! The opening for the microwave is 12.5 x 22.5.
Hope this helps!
I love this cart! But, felt I should tell you there is a VERY similar one here:
https://www.walmart.com/ip/Simple-Living-Rolling-Galvin-Microwave-Cart/907492166?wmlspartner=wlpa&selectedSellerId=1812&adid=22222222227312606175&wl0=&wl1=g&wl2=c&wl3=392504497103&wl4=pla-831812658448&wl5=9022129&wl6=&wl7=&wl8=&wl9=pla&wl10=102975322&wl11=online&wl12=907492166&veh=sem&gclid=EAIaIQobChMI_5qT7YW35wIVQtbACh3GyQFXEAQYCSABEgJSzvD_BwE
Did you sell your design? If not, seems like Walmart might owe you some royalties. 🙂
Wowwwwww, that’s such a blatant knockoff of our design. Walmart should be ashamed. Not only is the design exactly the same, even the color and wooden top. What in the world? I appreciate you telling us, but sadly there’s not much little bloggers like us can do when big box stores steal our designs. UGH. 🙁
WoW! If you have space then must go for island design kitchens they are best. You have provided beautiful designs.
Do you think you could install an electric cooktop in this?
I’m debating getting rid of my stove/oven combo and just having a cooktop and trying to come up with an affordable solution.
Hi! I could not see if this was answered previously but I’m having a friend build this for us and was wondering where you got this wicker baskets?!
Em
Sorry for taking so long to respond. The wicker baskets are from Walmart!
Beautiful! What color blue did you paint the island?
It’s RustOleum Spray Paint in the shade of Night Tide. Here’s an affiliate link! >> http://amzn.to/1m84nb0
I love your design! We’re thinking of building – how much did it cost you?
Oh my goodness, this was sooooo long ago I just don’t remember how much we spent on lumber. I’m so sorry!
wow! You really did a beautiful job! I love how bright & fresh everything looks.
The discussion of the development of your plan was really helpful. You have given me some great ideas! Thanks!
I saw a girl that did an awesome makeover of her closet doors like the ones you have on your pantry. they look amazing! it totally gave them a modern look! I love what you have done in your kitchen! so bold!
http://www.wifeinprogressblog.com/2013/05/master-bedroom-closet-face-lift/
Ooooo that’s so pretty and custom! There’s another one on A Beautiful Mess that I loved too! Honestly, I really just want to take those doors off because we never close them and they’re just in the way. And have you ever tried to dust those slats? AHHHHH! Definitely need to figure SOMETHING out. Thanks for the idea!
SWEET!!! Love what your “engineer” drew up from your composite design and created. It is wonderful!! I agree with Katie Reed… paint those appliances! 🙂 TOTAL CUSTOM LOOK!! :)))
~ Christina in FL
I’ve considered it quite a bit, but since we’re planning to pull the trigger on purchasing new appliances soon-ish (within the next year), I’m just gonna hold out. 😉
Great cart! So glad you didn’t buy #1 — we did (a very similar one) and it’s awful! Love the yellow!
OMG, love love love your play kitchen! I wouldn’t dare touch it with a paintbrush. The memories are too precious!
Yes! I’m glad you agree! I love that play kitchen just as it is. And the girls spend sooooo much time in there. 🙂
LOVE it!!!!!
Love this cart, great job! Can’t wait to see the top 😉
Love it!
Love it. It looks amazing. But can I say that I am so surprised you haven’t just painted your stove yet! They make stainless steel look paint, or even that beautiful blue would be a REALLY unique look. 🙂
Ugh I know. Believe me I’ve thought a lot about it. But we’re planning to get new appliances in the next year, so I’m just gonna hold out. 😉