• Home
  • About
  • Tutorials
  • Recipes
  • Furniture
  • Contact
    • Contact
    • Infertility
    • Disclosure
    • Privacy Policy
  • Shop
    • Facebook
    • Instagram
    • Pinterest

Reality Daydream

The Dream is Free, The Hustle Sold Separately

  • Home
  • About
  • Tutorials
  • Recipes
  • Furniture
  • Contact
    • Contact
    • Infertility
    • Disclosure
    • Privacy Policy
  • Shop

Bamboo Patio Set Refresh

July 18, 2014 by Bethany Sy

If you think of our blog more as creative inspiration rather than a ‘Reality TV Show’, you’ve probably been sorely disappointed lately. This little blog has always been a way to document our lives as it happens… but now that it’s mysteriously grown to the point that thousands of you are stopping in everyday to see what we’re up to, there’s a certain pressure to be awesome and interesting.

But we’re neither… sooooooo SORRY!

I’m not sure if it’s first-trimester-fatigue, or the fact that the last two weeks have been some of the busiest in the history of foreva… but I desire only to sleep. ALL.THE.TIME.

For this reason, I get happy when simple-slash-FUN projects just fall into my lap.

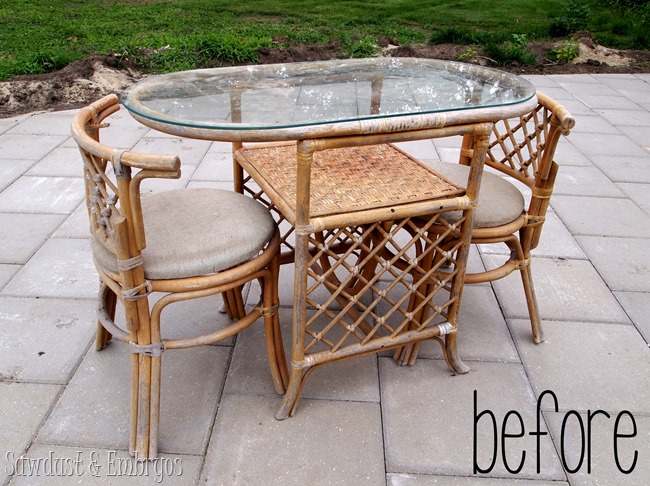
Bamboo Patio Set Transformation BEFORE pic {Sawdust and Embryos}

Is this not the most adorbs little wicker/bamboo patio set thing? A family friend of my parents was cleaning out his garage and was getting rid of it… and thought of ME! One of the many benefits to being a ‘creative-type’ is that people think of YOU when they’re getting rid of stuff. SCORE!

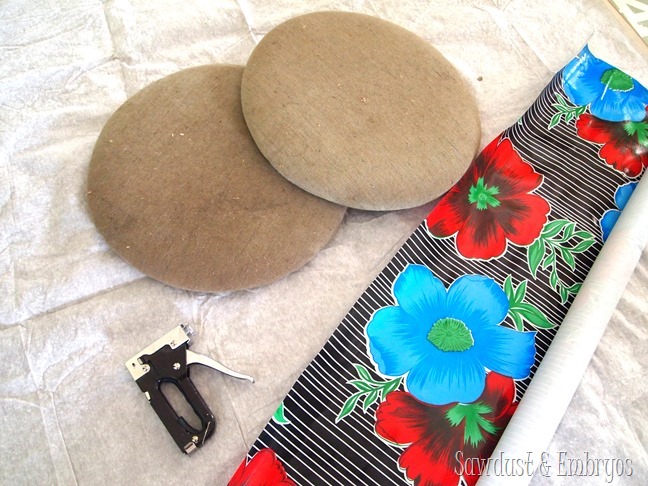
Without any structural problems, I knew I could just jump into this little transformation without needing Nick’s skillz. And the first matter of business were those shawty cushions. Ew! I ordered this amazing oil cloth (here) to recover them.

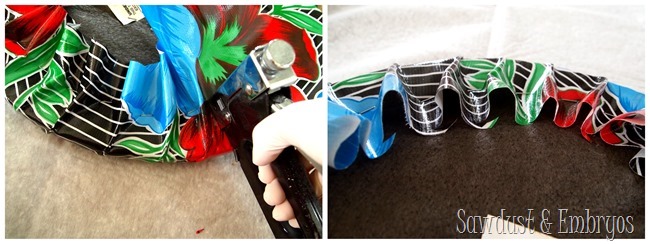
Recovering cushions for an outdoor patio set {Sawdust and Embryos}

I didn’t know this before my research, but oil cloth is kinda like that vinyl tablecloth-y material. Wipeable and durable… and exactly what I needed. OFS has a huge selection here.

I placed my cushion on the fabric and cut a square around it… being sure to leave several inches on all 4 sides. Then I just started stapling the edges, making a little tuck with each new addition (since the cushion is round).

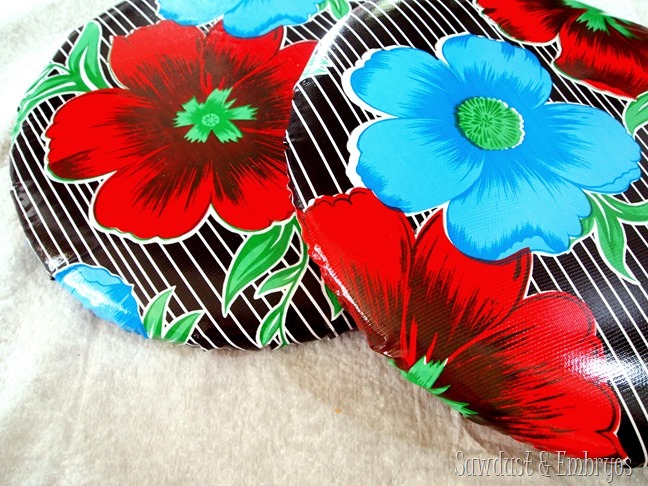
Recovering cushions for an outdoor patio set {Sawdust & Embryos}

Then I could just cut off the excess fabric, and staple down  those pieces that were still standing on end. And ALL DONE!

Recover outdoor cushions with oil cloth {Sawdust and Embryos}

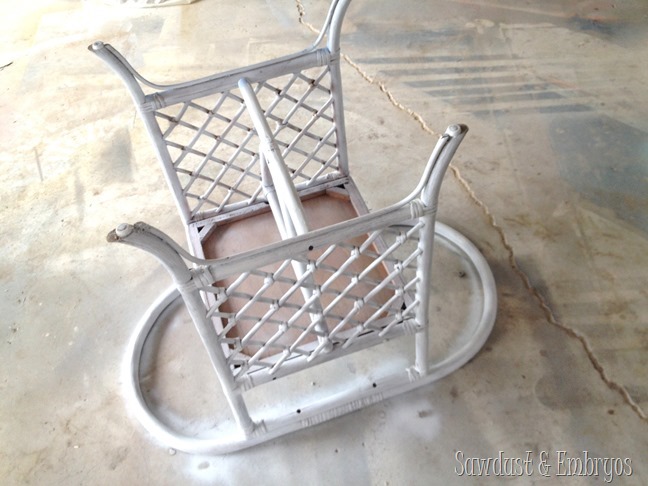
I wanted to keep the chairs their natural bamboo color, but paint the table a bright fun color that coordinates with the seat cushions. But priming comes first! Always!

Priming and Painting a little bamboo patio table {Sawdust and Embryos}

I took my cues from the colors in my fabric, and my inventory of spraypaint… and ended up using this cheerful ‘Peekaboo Blue’ by Krylon.

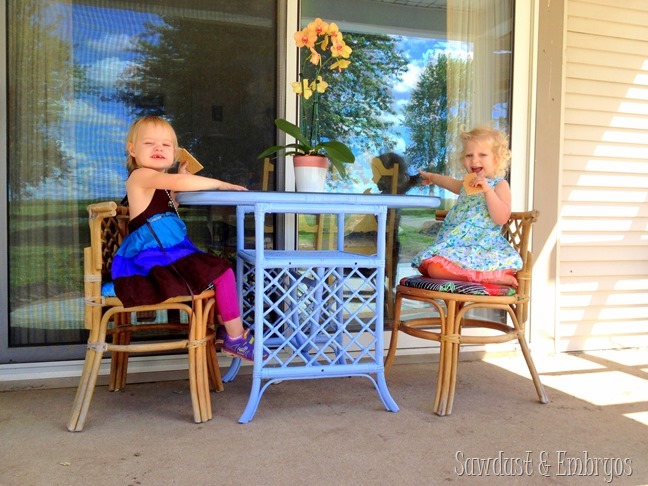
Little Bamboo Patio Set Makeover {Sawdust and Embryos}

The girls are confident that this is THEIR table.

Bamboo Patio Set Transformation {Sawdust & Embryos}.JPG

Such a great little seating area! I just love how this turned out! And since it’s under a covered porch, I foresee it lasting a good long while.

Alrighty! Happy Friday to you! Go forth and be creative this weekend! I’ll live vicariously through you while I’m napping.

Sawdust & Embryos

Oh P.S! I updated our ‘Tutorials Tab’ yesterday with all the recent projects. That page is JAM PACKED with projects and inspiration! Go have a looky-look here!
Related:

  • Stripping an Old Stained Desk

    We love the original wood of our library, and wanted to find a desk that…

  • Plaster-Hardened Fabric Planters

    I've had this idea in the back of my mind for quite awhile... why not…

  • Installing a Sliding Barndoor

    This is a sponsored post written by me on behalf of Masonite Doors. All opinions…

About Bethany Sy

Nick and Bethany Sy are the creative free-spirits behind DIY/Lifestyle blog, Reality Daydream. They recently purchased a historic mansion and have been documenting the ups and downs of renovation and making this home their own... all while sharing tips and tutorials along the way! When they found themselves in the trenches of infertility, they started a journey that would prove to be their most important DIY project ever, and have 3 beautiful girls to show for it. <3

« Annual Fam Camping 2014
Haven Recap ‘n’ Stuff »

Comments

  1. 14

    Kenz, Interiors By Kenz says

    August 4, 2014 at 10:17 pm

    What a perfect little patio set!

    Reply
  2. 15

    dana s says

    July 25, 2014 at 10:24 am

    what about a design on the glass top?? could etch it… or do a colored (I’m liking the red idea) stencil pattern (on the bottom of the glass)

    😉 I even know where you could get the vinyl for that 😉

    Reply
  3. 16

    Joelle says

    July 22, 2014 at 10:30 am

    LOVE LOVE LOVE
    Can’t wait to see you paint some type of carpet under it!

    Reply
  4. 17

    ana says

    July 19, 2014 at 8:23 am

    I say apple green for the chairs and a red centerpiece.

    Reply
  5. 18

    Kathy Epley says

    July 18, 2014 at 9:18 am

    Beth, This set is so cute! I can see that your twins have laid claim on them! =) About the chairs: red would be cute, but what about the apple green in the fabric? I think these shades of blue and green are so….cool……ok….summery! Love ’em!!

    Reply
  6. 19

    Kathy Epley says

    July 18, 2014 at 9:17 am

    Beth, This set is so cute! I can see that your twins have laid claim on them! =) About the chairs: red would be cute, but what about the apple green in the fabric? I think these shades of blue and green are so….cool……ok….summery! Love ’em!!

    Reply
    • 20

      Bethany @ Sawdust and Embryos says

      July 18, 2014 at 10:40 am

      Oooo green apple!

      Reply
  7. 21

    Karen Jerread says

    July 18, 2014 at 8:35 am

    Wow, bringing back memories. My daughter’s first apartment had such a tiny kitchen and this is the exact set we found in a local Ames store (telling my age here). It fit perfectly and was so cute. That was about 24 years ago! Love what you have done with yours.

    Reply
    • 22

      Bethany @ Sawdust and Embryos says

      July 18, 2014 at 8:38 am

      That’s crazy! It’s asuuuuper cute set! 🙂

      Reply
  8. 23

    Beth says

    July 18, 2014 at 8:07 am

    I think you are working on something quite creative and very real, and you should take lots of naps. It’s a bonus if we get a project thrown in every now and then.

    Reply
    • 24

      Bethany @ Sawdust and Embryos says

      July 18, 2014 at 8:39 am

      You’re so sweet! I’m totally going to start thinking of it that way. 🙂

      Reply
  9. 25

    Mary in NY says

    July 18, 2014 at 7:44 am

    I think people understand considering your current status. I love to visit the blog, love your projects, wish I was a DIY kinda gal. Have a great weekend.

    Reply
  10. 26

    Katie @ On the Banks of Squaw Creek says

    July 18, 2014 at 7:43 am

    Cute! I saw a set like that at a garage sale in Ames for $75 a few weeks ago! (didn’t get it, though!)

    I think you should paint the chairs red. 🙂

    Reply
    • 27

      Bethany @ Sawdust and Embryos says

      July 18, 2014 at 8:41 am

      I definitely thought about painting the chairs… But I just can’t decide! Red WOULD be pretty fabulous. 🙂

      Reply

Leave a Reply Cancel reply

Your email address will not be published. Required fields are marked *

Recipe Rating


  • Facebook
  • Instagram
  • Pinterest
  • RSS
  • YouTube
We are Nick and Bethany! Welcome to our blog, Reality Daydream where we share our DIY adventures!
Click here for lots of art projects using only wood stain on furniture!!
Please feel free to share or pin my posts! You're welcome to use ONE of my images (no collages or pinnables) with a link back to the corresponding post. Please do not edit or crop that single image in any way. Improper use of my photos, ideas or words is a violation of copyright. Thank you!

Categories

Attention: Almost any do-it-yourself project involves risk of some sort. Your tools, materials, and skills will vary, as will the conditions at your project site. Reality Daydream has made every effort to be complete and accurate in the instructions of the plans on this website. Reality Daydream will not assume any responsibility or liability for damages or losses sustained or incurred in the course of your project or in the use of the item you create. Always follow the manufacturer’s operating instructions in the use of tools, check and follow your local building codes, and observe all commonly accepted safety precautions.


Copyright © 2025 · Modern Blogger Pro On Genesis Framework · Customizations by Sweet Theory Designs · Privacy Policy · Log in