• Home
  • About
  • Tutorials
  • Recipes
  • Furniture
  • Contact
    • Contact
    • Infertility
    • Disclosure
    • Privacy Policy
  • Shop
    • Facebook
    • Instagram
    • Pinterest

Reality Daydream

The Dream is Free, The Hustle Sold Separately

  • Home
  • About
  • Tutorials
  • Recipes
  • Furniture
  • Contact
    • Contact
    • Infertility
    • Disclosure
    • Privacy Policy
  • Shop

TUTORIAL~ Paint an old chandy the RIGHT WAY!

November 8, 2012 by Bethany Sy

OK, there are painted chandeliers everywhere these days. And y’all have to admit that a bright pop of color can bring an old brassy ‘typical’ chandelier into the 21st century, and seriously brighten up any space! So when Molly asked us to brighten up a couple chandy’s for her new photography studio, we thought this would be a great opportunity to throw down a tutorial!

The right way to PAINT OVER BRASS!

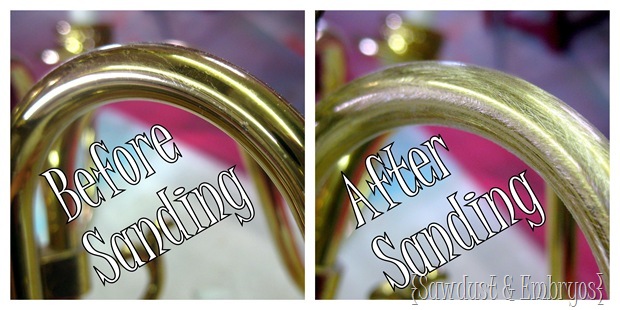
When you’re planning to paint brassy-ANYTHING, it’s important to sand lightly to remove the glossy factor and allow the prime to have something to ‘grip’ to. See the difference? You’ll just know.

Sanding Brass to prep for paint!

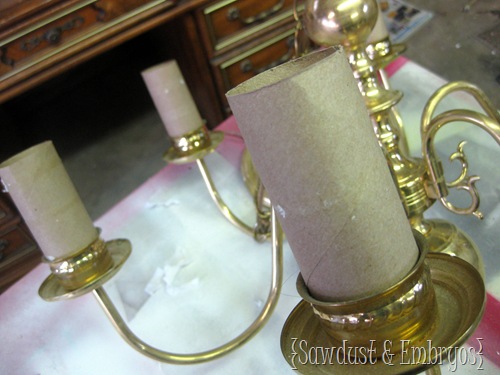
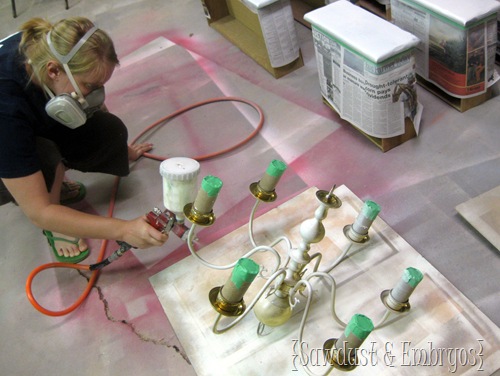
Next, I gathered some empty toilet paper rolls that I had been setting aside, and to my pure delight… they were a PERFECT fit to protect the candlesticks. Hallelujah! Every once in awhile it pays to be a hoarder!

IMG_0706

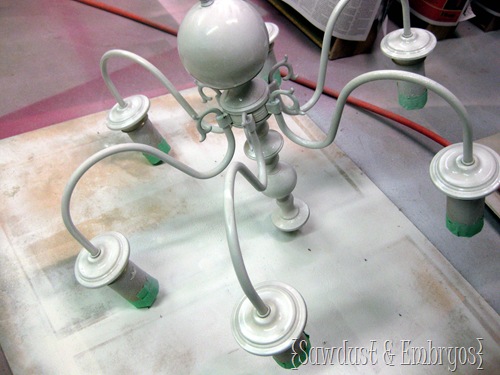
Next we just ever-so-slightly ‘misted’ on oil based primer using our paint gun… (for info and instructions on paint guns and air compressors, click HERE)! You could also use Kilz Spray Primer. Paint the top side of your chandelier FIRST (right side up), and after it’s dry to the touch, flip it upside down and paint the under side. This is important! You want the underside to be flawless because that’s the part people will see when it’s hanging on your ceiling.

IMG_0720

IMG_0729

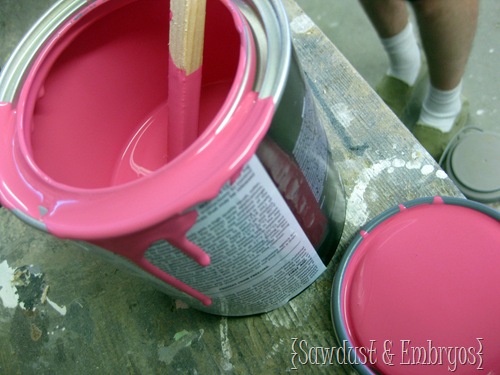
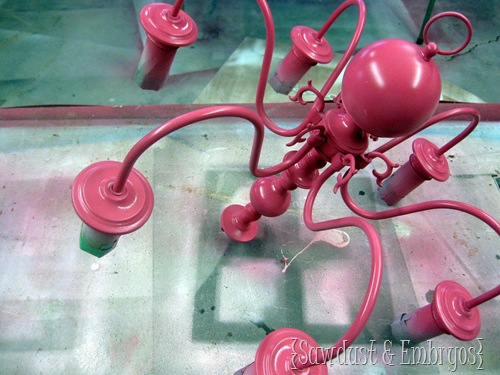
After letting this dry overnight, we whipped out the hot pink (!!) latex paint that Molly picked out for her sweet studio! You can use oil OR water based. It doesn’t matter.

IMG_0754

Using the same techniques as we did with the primer, we painted! Top first, then bottom. We misted it so lightly with paint that it took several coats… but it was worth this extra time, because drips are a huge no bueno!

IMG_0764

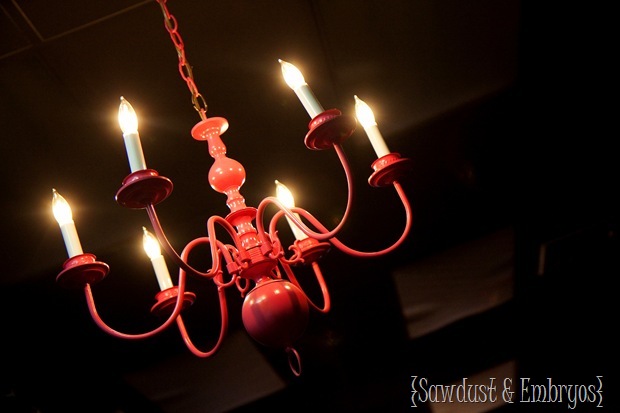
Molly was awesome enough to snap some photos of them all installed in her studio!

Painted Chandy DIY

Painted Chandy-001

That’s all! Simple, no? And such a fun way to bring a pop of color to a space without it being overwhelming. And these outdated brass chandy’s are ALL OVER CRAIGSLIST. Molly found hers for 25 bucks a pop!

The right way to PAINT OVER BRASS!

If you wanna see some other pieces we’ve done for Molly’s Photography studio, check out these links!

Desk/Vanity for dressing room

Monogramed Coffee Table

And for fun, here’s a little reminder how how tiny the twins were when Molly Photographed them as newborns. Seems like so long ago, and just like yesterday at the same time. Mostly I just like to find sneaky ways to show of my best DIY project ever.

twins1

blank-001

*this post contains affiliate links
Related:

  • Centerpiece Tray Tutorial
    Wooden Centerpiece Tray Tutorial

    I have a fun and easy building project for you! And while I do end…

  • DIY fabric-wrapped bulletin boards
    DIY Fabric-Covered Bulletin Tutorial

    My kids are getting to the age where they want to tape pictures, cards, notes...…

  • Make this propagation station with test tubes!
    Test Tube Propagation Station Tutorial

    I've been needing to figure out a solution for my overwhelming plant propagation situation for…

About Bethany Sy

Nick and Bethany Sy are the creative free-spirits behind DIY/Lifestyle blog, Reality Daydream. They recently purchased a historic mansion and have been documenting the ups and downs of renovation and making this home their own... all while sharing tips and tutorials along the way! When they found themselves in the trenches of infertility, they started a journey that would prove to be their most important DIY project ever, and have 3 beautiful girls to show for it. <3

« Better Than Pumpkin Pie Cake
Giveaway Winner and a New Nephew! »

Comments

  1. 8

    Karen Robertson says

    March 12, 2016 at 5:37 pm

    I want to do this only I want to put it outside. Do you know what makes it so it can be outside? I know that you can buy ones that go outside and they are expensive and not very attractive.

    Reply
    • 9

      Beth @ Reality Daydream says

      March 13, 2016 at 2:58 am

      Karen, if you use a good oil-based primer like Kilz, and an oil-based paint, I think you should be fine! Be sure to seal it with polyurethane! I don’t think you’ll have any chipping issues at all. Hope this helps! Send pics! 😉

      Reply
  2. 10

    Jamie Lynn says

    June 5, 2014 at 1:09 pm

    Hi there! This is fantastic! I have a brass “frame” around my fireplace that I’ve been wanting to paint. I’m assuming it’s the same principles here. My biggest concern: I don’t have a paint sprayer. Is it ok to use a brush? Also, it HAS to be an oil based primer, right? Just making sure I get it right before I dive in!! Thanks for everything!!

    Reply
    • 11

      Bethany @ Sawdust and Embryos says

      June 5, 2014 at 3:42 pm

      Hi Jamie Lynn! Yep same concept. Brushing it on is fine, you just may need to do more coats to get rid of the brush strokes. And yes, I would use an oil based primer. Good luck! 🙂

      Reply
  3. 12

    brittany kuhn says

    November 12, 2012 at 8:04 pm

    Hi!
    I am a new follower..I found you from a link on a blog post on Young House Love. Looking forward to following your blog (:
    Britt

    Reply
  4. 13

    Anonymous says

    November 9, 2012 at 3:23 pm

    Hi Beth,

    I love your blog! Both you and Nick are so creative and talented. And your girls are PRECIOUS! I love all the updates on them. Just saw your feature on YHL, I love the technique you used on that piece!

    Have a good day,
    Sandy

    Reply
  5. 14

    Melissa says

    November 8, 2012 at 11:53 pm

    I have a $20.00 CL find in my garage right now waiting for spring to get an orange make over.

    Reply
    • 15

      Beth @ Sawdust and Embryos says

      November 10, 2012 at 7:16 pm

      YAY!!! ORANGE!!!

      Reply
  6. 16

    Kenzer @ Interiors By Kenz says

    November 8, 2012 at 11:18 pm

    We have almost the exact same chandelier in our dining room. We painted it red. It’s going to be getting makerover #2 sometime in the near future. Red no longer matches our kitchen/dining room. It sticks out BAD! I call it Rudolph these days.

    Reply

Leave a Reply Cancel reply

Your email address will not be published. Required fields are marked *

Recipe Rating


  • Facebook
  • Instagram
  • Pinterest
  • RSS
  • YouTube
We are Nick and Bethany! Welcome to our blog, Reality Daydream where we share our DIY adventures!
Click here for lots of art projects using only wood stain on furniture!!
Please feel free to share or pin my posts! You're welcome to use ONE of my images (no collages or pinnables) with a link back to the corresponding post. Please do not edit or crop that single image in any way. Improper use of my photos, ideas or words is a violation of copyright. Thank you!

Categories

Attention: Almost any do-it-yourself project involves risk of some sort. Your tools, materials, and skills will vary, as will the conditions at your project site. Reality Daydream has made every effort to be complete and accurate in the instructions of the plans on this website. Reality Daydream will not assume any responsibility or liability for damages or losses sustained or incurred in the course of your project or in the use of the item you create. Always follow the manufacturer’s operating instructions in the use of tools, check and follow your local building codes, and observe all commonly accepted safety precautions.


Copyright © 2025 · Modern Blogger Pro On Genesis Framework · Customizations by Sweet Theory Designs · Privacy Policy · Log in