Today, I awoke refreshed and excited for the start of a new week! It didn’t hurt that the girls let me get a good 9 hours of sleep, and I was able to jolt myself back to life with a strong cup of black coffee. And I’m excited to show you one of several little projects we have going right now!
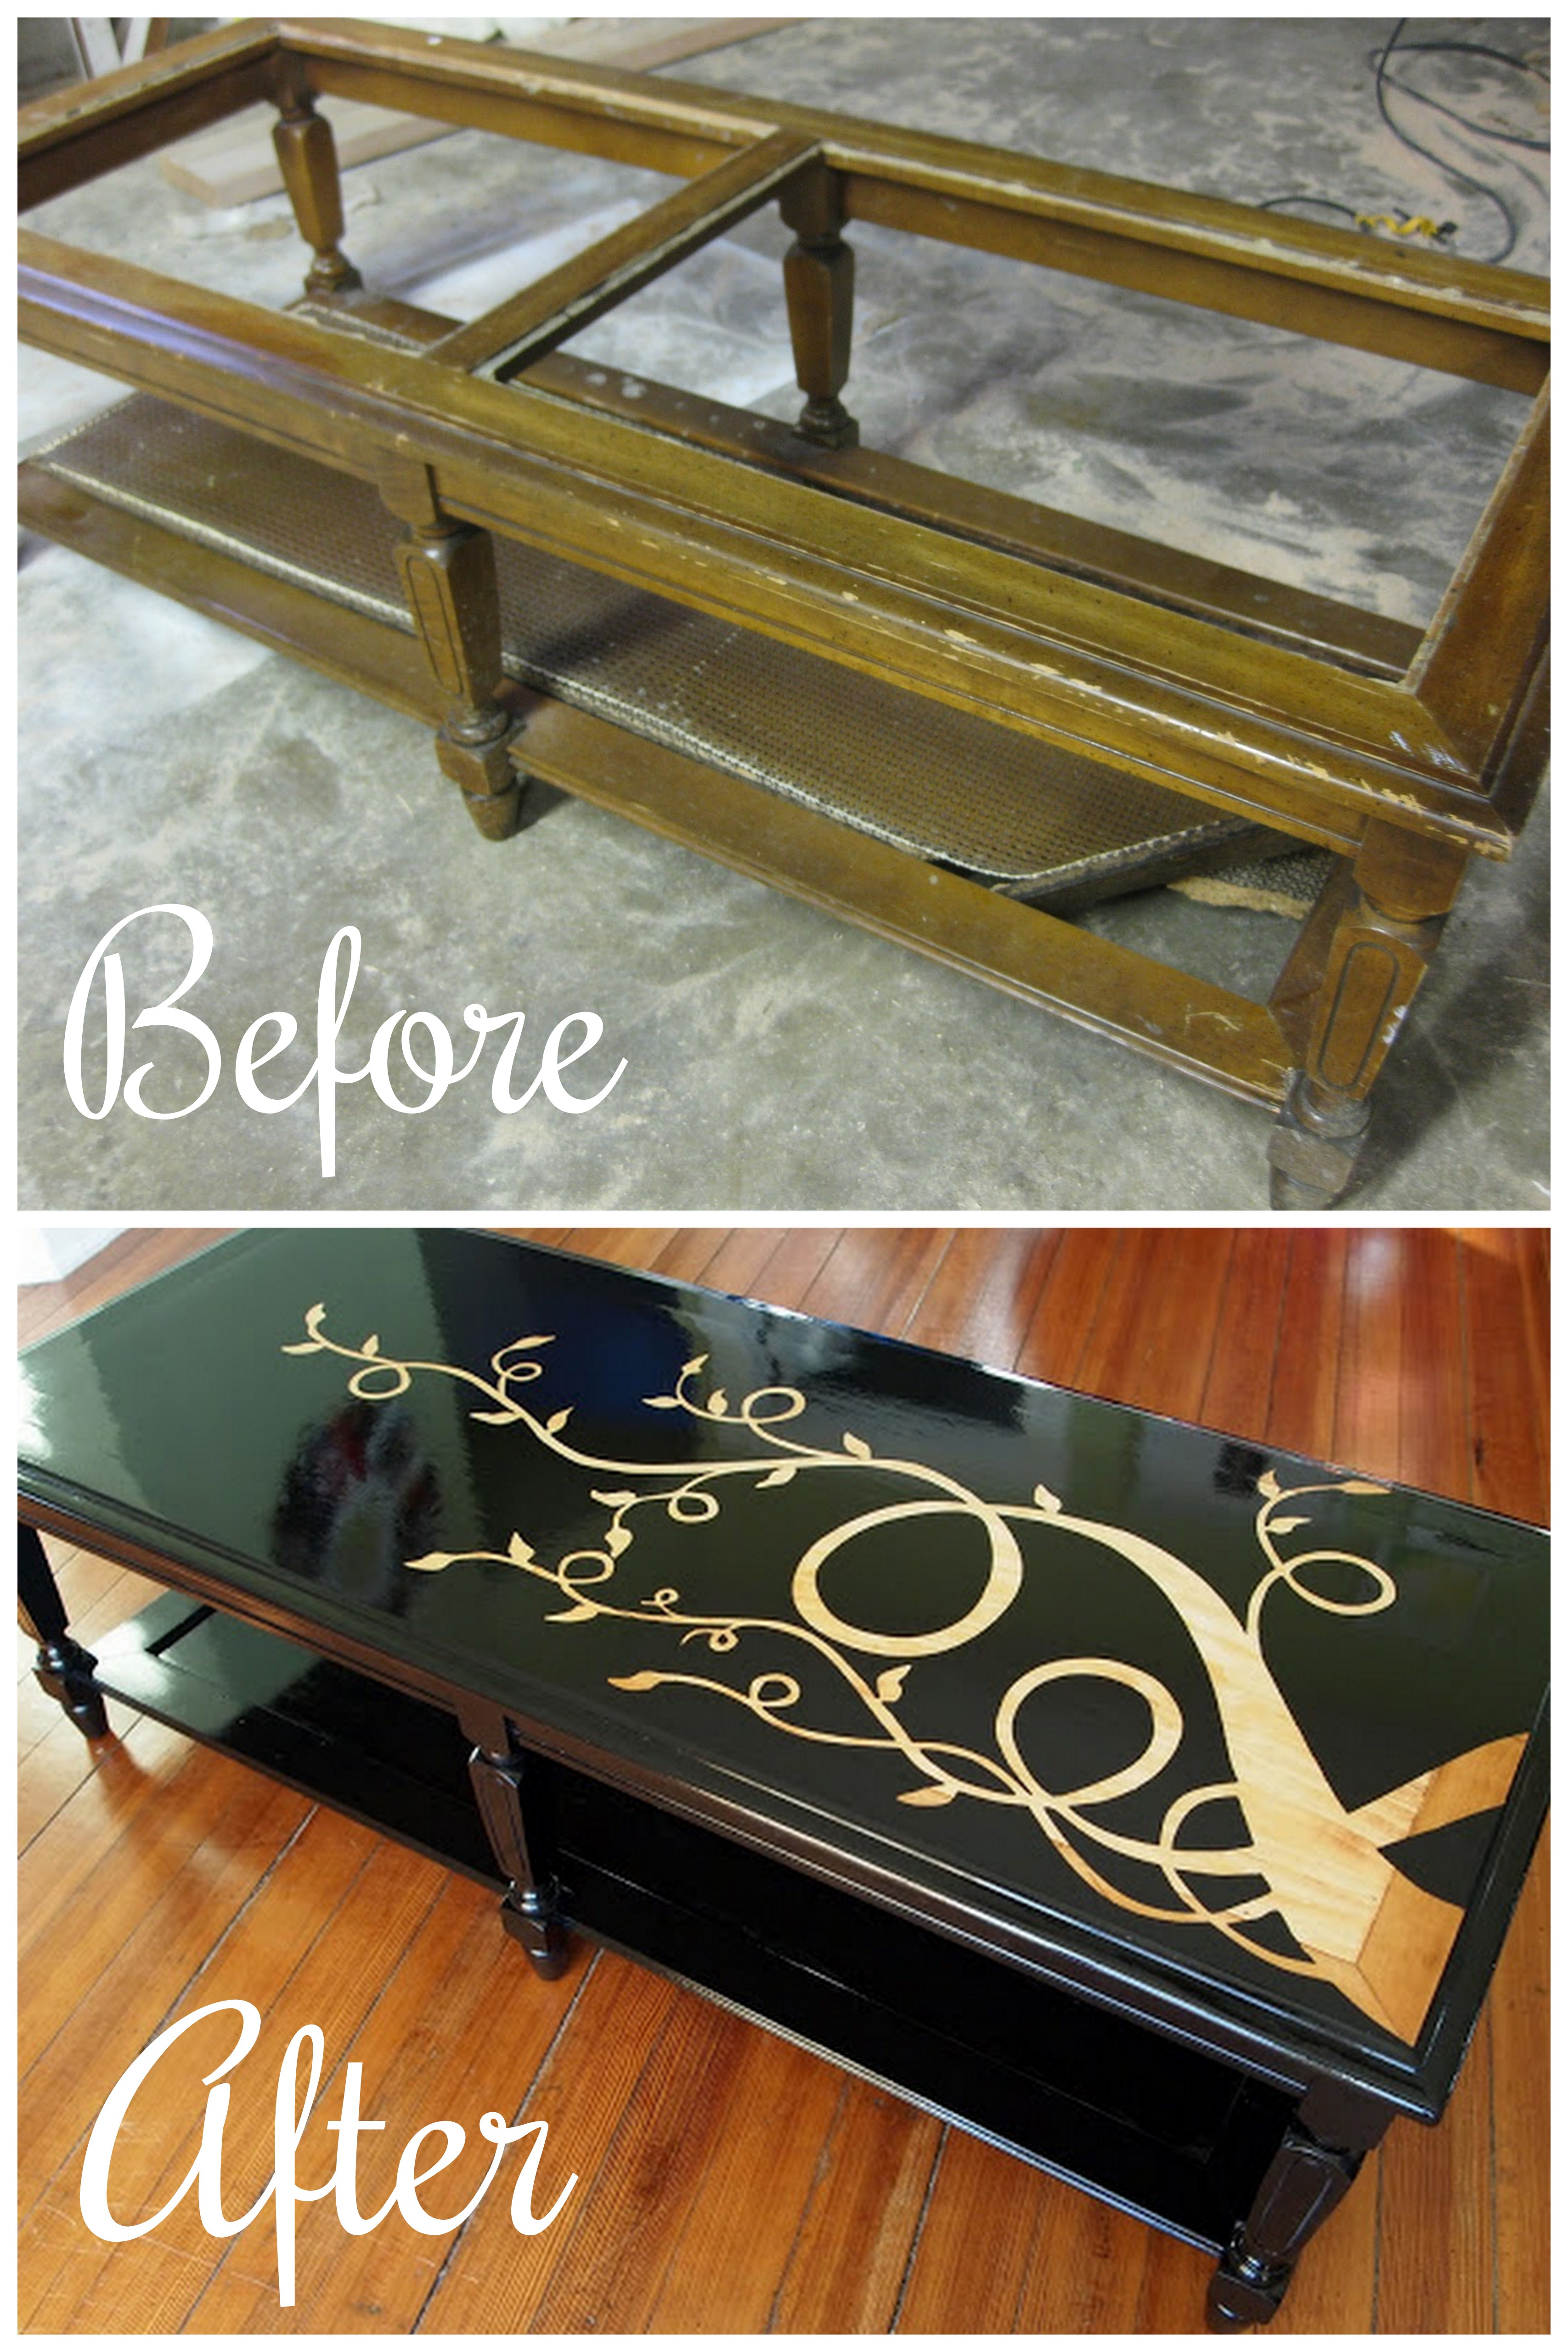
We’ve been clearing out the garage, one thing at a time. And so this involves fixing up some smaller little pieces that have been collecting dust and overspray over the last year or so. This unfortunate coffee table has obviously seen better days.

The wicker on the bottom is all broken, and the open panels on the top presumably used to have glass in them. If you saw this little gem on the side of the road, would you slam on the breaks and load it up to be your very own personal coffee table?

OK, so let’s talk about what we did. We originally thought about turning it into a bench with an upholstered top. But the price of foam is so obnoxious, we decided it wouldn’t be worth it, and started brainstorming how we could make the biggest transformation with the smallest dollar sign. First we ripped out the nasty wicker from the bottom, and put a panel of pine in it’s place. The top surface also got a nice new sheet of pine, and everything got sanded down real good. And got a stain job using Minwax Pecan, and sealed things off with a coat of poly. (this post contains affiliate links)
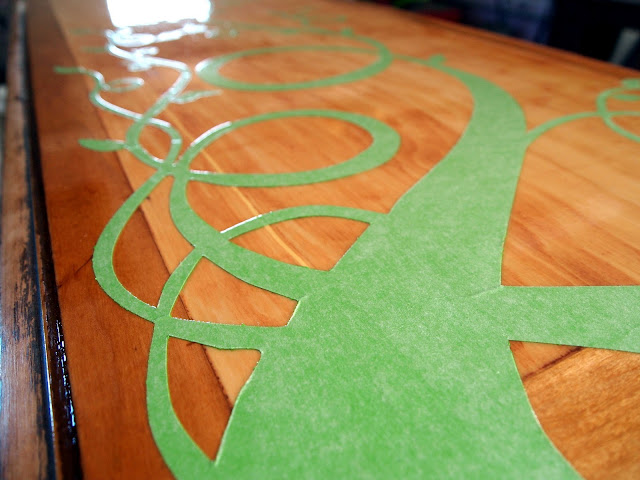
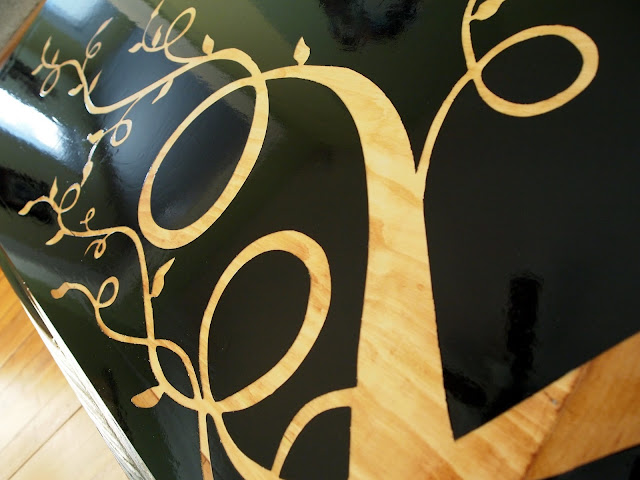
Of course there’s no pictures of this. So let’s jump straight to the VINYL! You know we’re going through a little phase of loving the woodgrain peeking through paint. A nod to all you wood purist out there. And our vinyl “dealer” Dana totally rocks. She whipped up this amazing leafy swirly vinyl for us, and we slapped her onto the coffee table. BAM.

Using similar techniques from our Profile Plaque project, we polyed over the vinyl.
Then primed (with this stuff).
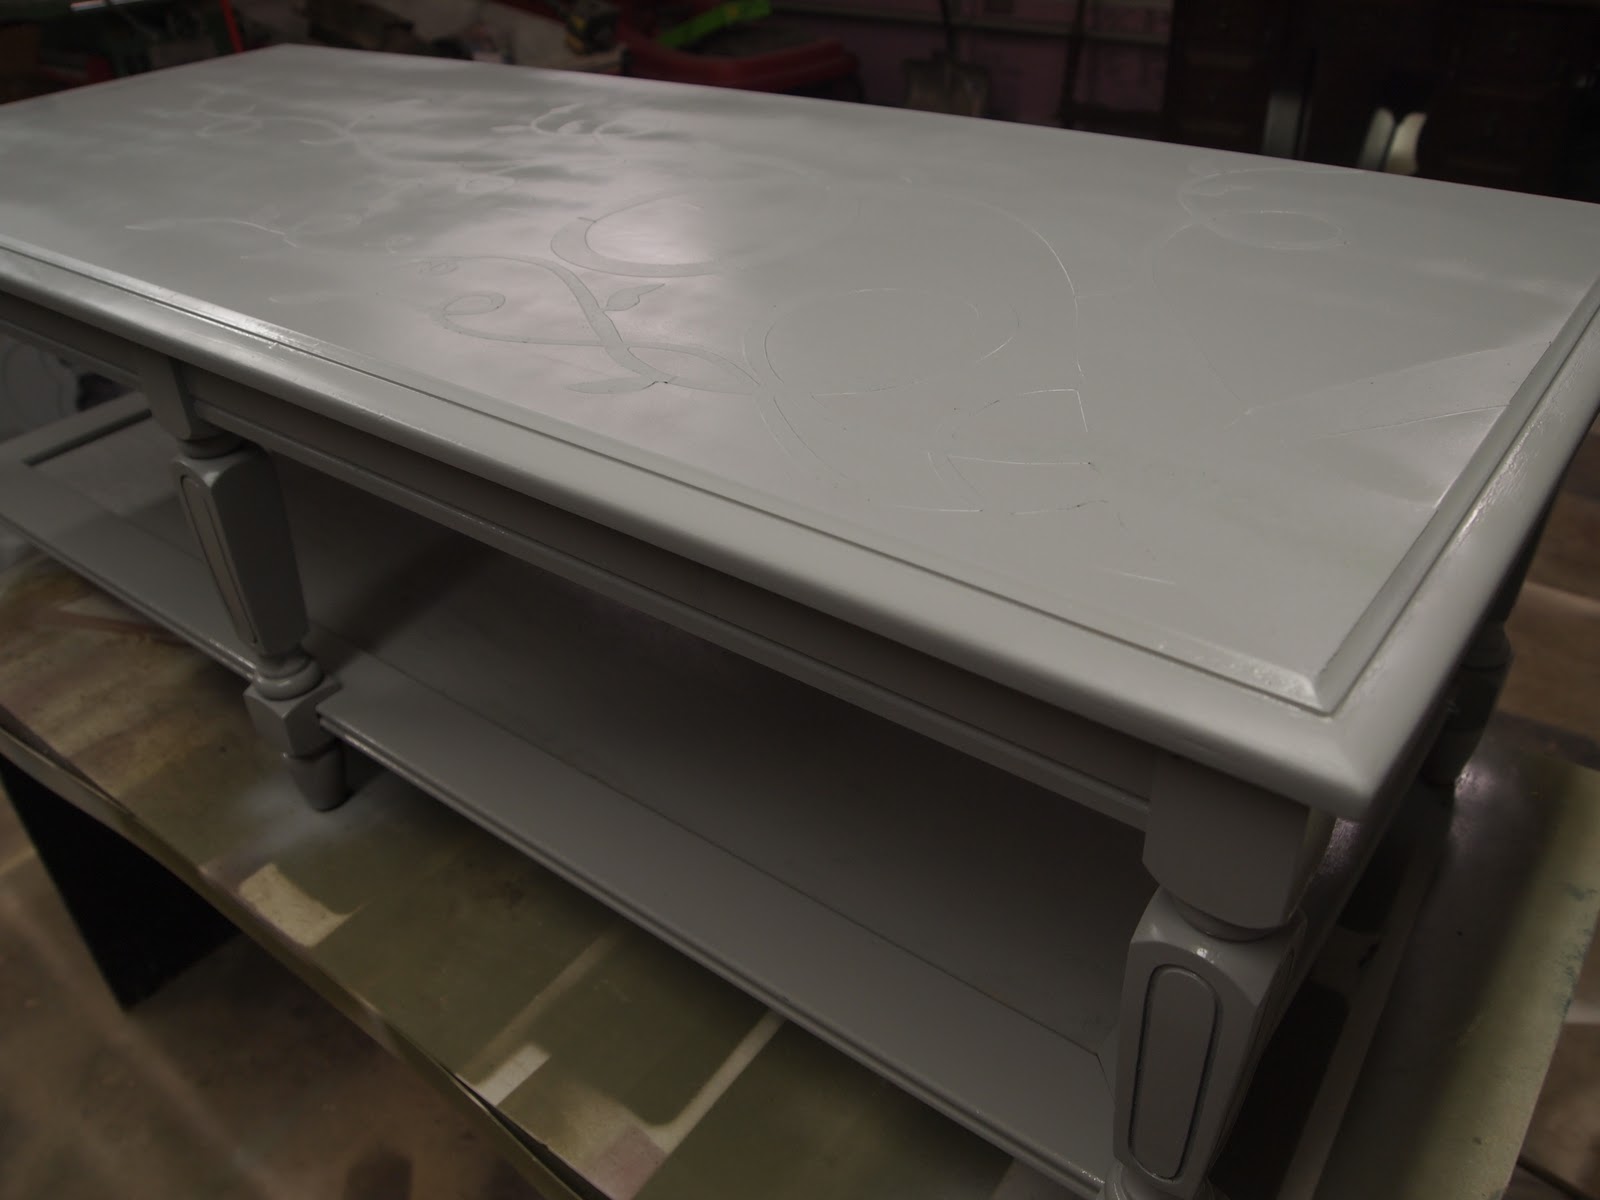
Then painted a chic glossy black.

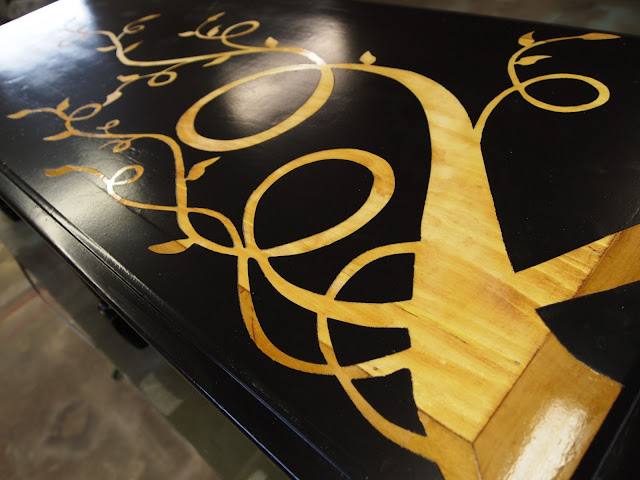
Then we slowly and carefully peeled off the vinyl, to reveal our beautiful pecan woodgrain!
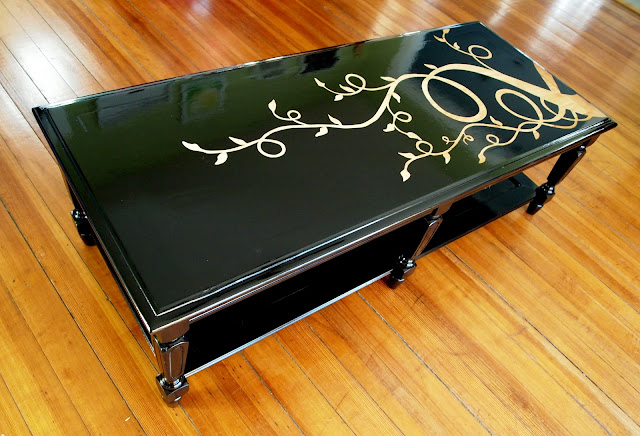
And to make things feel seriously GLAM, we put several coats of poly on this baby, for a legit lacquer surface that’s overthetop glossy and very durable! (this is our favorite Polyurethane!)

We love that this coffee table is one-of-a-kind!
And we love introducing exposed woodgrain to paint, and setting them up on a date. So far, we’re a pretty good matchmaker! Successful relationships have been cultivated every time!

Be sure to check out all of our other unique furniture transformations by clicking the image below!
![]()

Thanks for pinning!
Related:
-

We've been needing to update our coffee table situation in the living room for awhile…
-

We love the original wood of our library, and wanted to find a desk that…
That is amazingly beautiful! Thanks for sharing!!!!
I also would like more information on the vinyl. Where to get it, cost, etc. Would appreciate any info you can give me. Love this look and would like to use it on an even smaller table.
HI Ramona! I didn’t realize that there wasn’t a link to Dana’s Vinyl shop! This is a very old blog post. Hehe! Here’s the link! >> https://www.etsy.com/listing/167728115/branch-with-leaves-vinyl?ref=shop_home_active_18
Hi,
I was wondering who you would suggest I could go to get the vinyl sticker cut out? Love the table!!
Gorgeous!!
Can u go over in greater detail what you did to the table top to cover up the two square cut outs? I have a table similar, but my wife and I can’t figure out how to cover up the rectangular cut outs where the glass goes.
Mike,
We filled them with a 1/2 in sheet for birch plywood. I think they went into place without having to modify them of the table. If we did we would have used a rabbet router bit on the backside of the plywood to get them flush.
Thanks,
Ahh. Using the rabbet router bit is brilliant. Thanks.
OMG, it’s beautiful and creative. I still searching on how to spray paint the table that covered with wood grain sticker. I don’t know if it works or not.
This is just awesome.
thank u so much for sharing ur techniques. I recently reupholstered my chairs thx to ur blog (I will send pictures when complete). I would like to try this, however I am confused. Do u have painter’s tape over ur vinyl? also do u poly the whole thing before prime and paint or just the part where the design will show? does the primer and paint stick ok to the poly surface? if furniture has stain/poly/paint on it already do u just sand it do r there special strippers?
Nope, no painters tape over the vinyl… the vinyl was just green on this particular project. We poly the whole top surface, because otherwise you’ll be able to see the ‘seam’ where you stopped polying (speaking from experience!). We’ve never had a problem with the primer/paint sticking to the poly surface, but if you’re worried you could go over it with 220 grit sandpaper. Just be really gentle right around the edges of the vinyl, because you don’t want to break that seal that the poly is providing.
Love this table and realize this is an older post, but I have a question. For the sheet of pine on the top, did you remove the existing middle piece of wood to get it to lay flush? Asking because I picked up piece similar and trying to figure out the best way to fix it. Thanks and again fabulous job!
Heather, we left the middle piece for stability, and just cut square sheets of plywood to perfectly fit into the openings. There was a lot of wood putty and sanding involved to make it flush, but it worked! Hope this helps. Send pics when you’re done!
Thanks and will do! I am turning mine into a bench hopefully:)
Someone asked about staining, I used your idea and did it with several shades of stain in a paisley design. It worked beautifully! I sealed the vinyl with water based polyacrylic, then used gel stains over top. I’m waiting for it to cure before a gentle sanding and 3 coats of poly. If. I can figure out how, ill send u a pic!
Exciting Suzanne! Yes please DO send pics when you’re done!
I am just wondering if Suzanne Christie ever did send pictures? I am the one who asked about the stain application, and i didn’t know you could put gel stain over poly. I’m so intrigued to see her result!!
We haven’t heard from Suzanne one way or another, and we’re not familiar with gel stain at all. So sorry! Have you tried googling?
I love, love love this!! I am totally inspired I have a very similar looking coffee table that needs a makeover.
I am really new to this and have questions. What kind of vinyl, where do you get it and how do you stick it on the table?
Deborah, you can get custom (ANY design you want) vinyls from my friend Dana. She does them as a hobby, and is incredibly talented and creative. If you’re not sure what you want, she’ll help you! Her emails is dashoop@hotmail.com …tell her I sent you! 🙂
Talk about timing, I spotted a coffee table very similar to this, that had been set out for trash pickup. I went back this morning, and praise be, it was still there, so into the back hatch of the VW Rabbit it went. Mine has to drawers built in under the lower shelve, so with child resistant latches, I should be able to keep current projects and the tools for them close at hand and still watch a movie at the same time. My fourteen year old son wants to help design the top. I’d love it if he’d help with the stripping and sanding too.
my name is dorothy i would love to no where to get the vinaql for black table and the orange table i think it is beautiful
Hi Dorothy, my friend Dana does all our vinyl for us. She’s very talented and affordable! Her email is dashoop@hotmail.com
I have that exact table in my basement, only in a better shape, i don’t know what to do with it yet. It doesn’t work for me as it is.
better late than never…I have an unfinished toybox and i want to do something like this. you have totally convinced me to do it. this is gorgeous. i’m planning to go over the piece with a dark stain though, instead of paint, which will leave the light contrast underneath the stencil. with this technique, i obviously can’t poly over the stencil. have you ever done this? now i’m worried that the stain will bleed under the stencil since i can’t seal it. Any tips? thanks for sharing such a great idea!!
Unfortunately, because you won’t be able to seal the vinyl down before staining, you will almost definitely have bleed-through. But that doesn’t mean it won’t still be gorgeous! I’ve often thought about trying this staining/vinyl thing as well, but just haven’t gotten around to it. I do hope you’ll share your results with us. Good luck!
Oil based paint will be your most durable option, especially for a dining table that gets lots of wear and tear.
Also, what type of paint and primer were used? Were they latex or enamel? Thanks for the info! I’m going to do something very similar to my dining room table this weekend.
Oh, probably $20 on wood, and another $10 on paint.
You did an outstanding job on this table. I would like to do something similar to my dining room table. How much did this table cost you to refurbish?
We DO always prime too. Let the prime dry for a good hour before painting. And then as soon as you’re finished painting, start removing the vinyl! Good Luck! Send us pics when you’re done!
Bethany,
You’ve mentioned recently that you remove the decal right after painting (before it dries) so have nice clear lines. But what do you do when you prime and THEN paint?
Is it harder to get those nice crisp lines?
You could use painters tape, especially if you want to use straight lines for your design. Our vinyl ‘dealer’ Dana is amazing and can cut anything for you, if you’d like. She just rolls the final sheet up in a tube and pops it in the mail to you. Her email is dashoop (at) hotmail.com. Her prices are excellent too! Tell her I sent you!
if we do not have access to vinyl, would it be possible to use painters tape to create our own “decal”?
Your table is beautiful! When I looked at this before, I seem to remember a link to the vinyl design that you used. Is this still available?
Any vinyl should do, as long as you don’t skip the polying step before priming.
You mentioned a vinyl dealer; will any vinyl decals do or do you need something special/
Thanks and I will! 🙂 I’m so excited and my husband even likes the idea of a new coffee table, so I’m all stoked. Now, if I could just clone me, so the clone could go to work and I could stay home and play!
We just used Minwax Polyurethane! We did about 3 coats, lightly sanding between each coat for a SUPER smooth finish. Good luck! Send us pics when you’re done!
What brand of poly did you put over the black to get that gorgeous deep shine? I’m trying this on a buffet to make a kitchen island, and I want to make sure the buffet is not only protected, but shiny as all get out. I probably won’t do the vinyl decal on the buffet (I have a coffee table I’m saving that for…) but I still want the deep shine.
Thanks!
ok, so the poly that you put on BEFORE the vinyl… let that coat dry for at least 24 hours. After you apply the vinyl, poly it and let it dry for 1 hour. Then prime and let it dry for 1 hour. Then paint! And start peeling up the vinyl immediately!
The table is SO beautiful!!! I am using your wonderful tutorial to try something similar. How long did you let the poly/ paint dry in between coats? You said to peel the decal off while it is still wet, but I am confused about how long to let the poly/ primer/ first coat of paint dry before doing the final coat and removing the decal. Thanks for your blog! So inspiring!
thanks julie! we almost always use brush-on poly, unless we’re polying something like the girls’ crib or pieces of hardware that are hard to brush on without getting an uneven coat or drippage issues.
Completely Awesome!!!!! You have an amazing eye and totally love your creativeness! This piece is inspiring…makes me want to do something of my own…not sure what yet tho lol. Quick question….when using the poly, do you prefer to brush it on or spray it?
What absolutely stunning work – just beautiful. Congratulations on the sale. I don’t know whether I would’ve had the heart to part with it though, lol! Best wishes, Shirley.
That is sooo Coool!! Dee
Ok, I want your thoughts as to whether or not this could be done on kitchen cabinets. And what if I used cream instead of black? Gah, I’m terrified to try this out because it looks so hard, but I LOVE it!
you could absolutely do this application to your kitchen cabinets! what a great idea! if you’re using a cream color paint, you might want to go with a slightly darker stain on the wood so you still have the contrast between the paint and the woodgrain. does that make sense? send pics when you’re done! can’t wait to see it!
Holy GORGEOUS!!!! LOVE it… I’m planning on building my own kitchen table sometime this year and was planning on a wood top, but you might have just won me over with this… IN LOVE!
Holy Toledo Batman! That is GORGEOUS!!! I even like it in the shot with the vinyl still on, all painted black. It gives it a subtle texture for those that might not like the woodgrain peeking through. But seriously, who wouldn’t love that? Absolutely beautiful. You guys are amazing!
This is beautiful! I want one!!! So creative!
I think this is my favorite so far. Absolutely stunning.
Stunning – you guys are so creative!
Hello, I found your wonderful paint/design ideas via a friend on pinterest and not knowing the etiquette of the site yet just thought I would let you know and I certainly hope to translate your highly skilled ideas into something I can do in my home. Thank you.
LOVE IT!!!!! TURNED OUT FABULOUS!@!!!!
Gorgeous!!! I love it!! I hope I get to see it in person before you sell it. So you peel off after you do all the painting and stuff? Do you do it before or after the paint dries?
THAT, is way classy my dear. I love it.
Deborah
When I saw this, it literally took my breath away. IT IS AMAZING! I don’t know how you do it, let alone find the time. You two are a very talented couple! I am soooo jealous!
GAHHH!!! I love this. we have a grey/black/white and ‘leaf’ motif on accident going on in our living room. Where do you find these vinyl appliques? or do you make them?? teach meeeee!!
beautiful,nice job, how do you find time? Mary
That’s unbelievably gorgeous! I’m loving it!
WOW that is STUNNING!!! I love it! Beautiful.
yes Jenni! we ARE selling this piece! in fact, thank you for reminding me… i should mention that in the post. if you’re interested, shoot us an email! sawdustandembryos@gmail.com
OMG! Amazing! Do you sell any of the pieces you guys do?
Not joking… that’s totally my favorite rehab yet! Great job!
Simply sexy… no other words describe it!