Over the years, I’ve picked up cute vintage hankies at thrift stores, yard sales, and antique stores (when they’re cheap). I didn’t ever consider myself a ‘collector’ of vintage hankies, but I’ve accumulated quite a few over the years. So it seemed like a great time to make a hankie garland!

I always knew I would make something with them eventually, because it’s beautiful fabric! And the colors and patterns are just so vintage and charming.
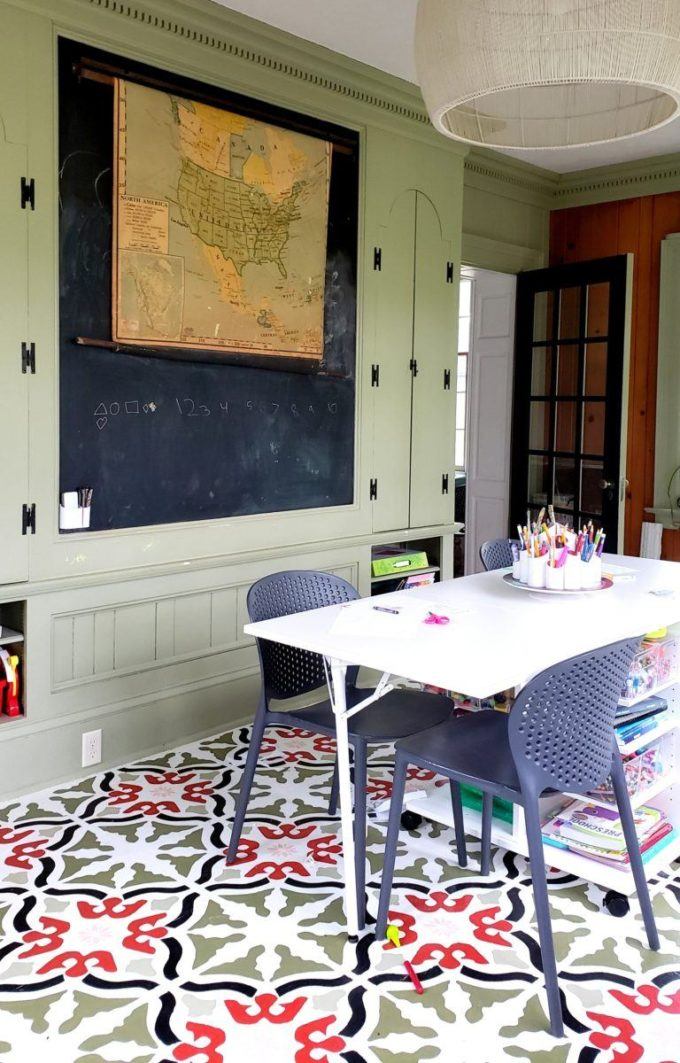
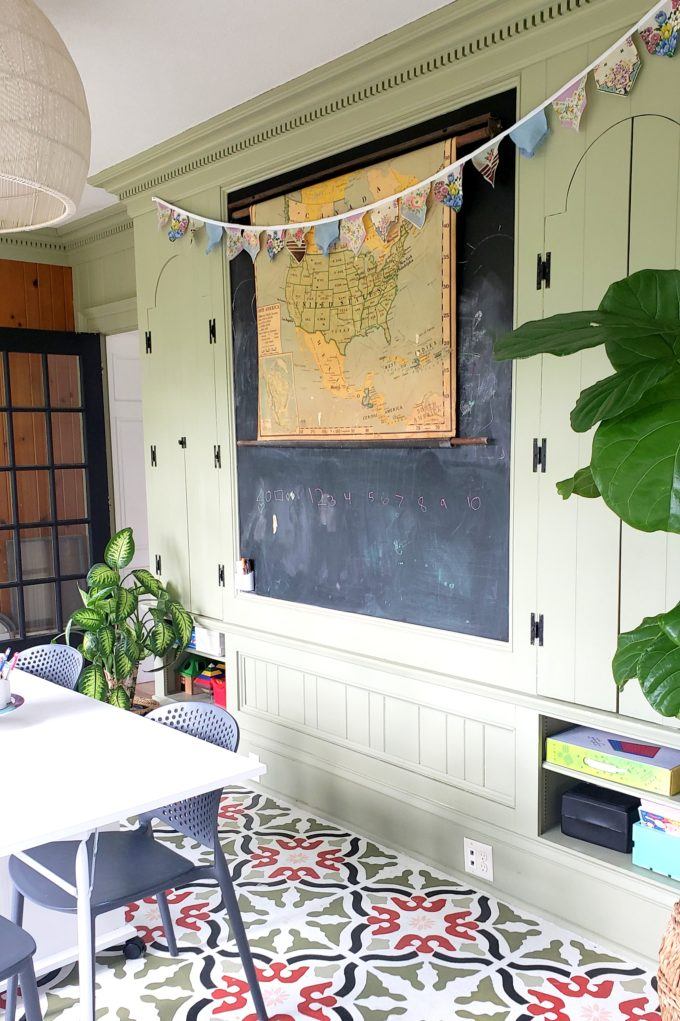
I decided to make some garland for the chalkboard wall in our Solarium (which is our homeschool/craft room). It seems like such a focal point in the room, and I wanted to ’embellish’ it a bit, if you will. A Hankie Garland will be soooo perfect!
After choosing a handful of vintage hankies from my stash that fit the color scheme I was going for, I ironed them all. Then I cut a shape out of cardstock to use as a template when tracing and cutting the hankies.
You could use any shape/size for your template. It doesn’t have to be just like mine!


Most of the hankies were big enough that I was able to get 4 shapes to fit, but there were a couple that I only got two from. My girls were actively crafting with the extra scraps, so I didn’t feel too bad donating to their cause. (yes that’s tape)
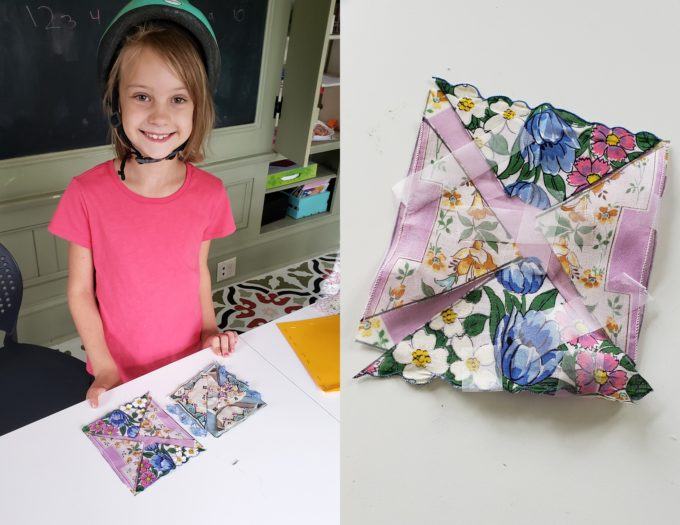
I traced my template onto all of the hankies first, and then cut them all out using fabric scissors. Are you starting to see the vision for this hankie garland?!

I needed to hem the sides to keep the fabric from unraveling. No need to do the top though… you’ll see why!

After hemming, I ironed again to make the edges super crisp. I’m no seamstress, so these aren’t perfect. But nothing I do is perfect, and I love it that way. 😉 (PLUS these will be up high and nobody but me will notice the imperfections!)

Time to string these babies together! I thought about using some lace for this, but since the hankies themselves are already so dainty and delicate-looking, I wanted a stronger line to contrast. So I decided to go with some white bias tape! If you’ve never used this stuff before, it’s a pre-folded strip of fabric that makes it super easy to make a border on any fabric item.

Simply tuck the top of each vintage hankie ‘bunting’ into the crease of the bias, and sew along the edge! I did one at a time instead of pinning them all in place beforehand. You do you!


I decided to leave about 3/4″ between each one, but you could butt them right up next to each other if you wanted. Or leave even more space. It’s totally up to you!
Look at this glorious pile of hankie garland behind my sewing machine!

Adding the bias went pretty fast, and was soooo satisfying! BOOYA.


I popped this hankie garland up in the Solarium SO FAST. Just a tiny nail on each end, and she’s done.
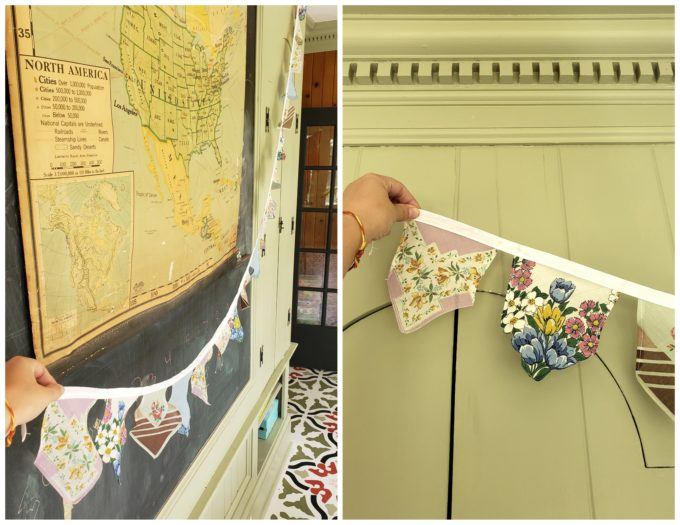
I love the extra character that it brings to this space, and a little ‘DIY touch’ that every room needs!

Now if I could just pull off some beautiful chalkboard art like I did on the Chalkboard Wall in our old kitchen. Although that would be silly because it would just need to be erased when we’re doing school. Or when the kids feel like doodling on a wall. 😉

AS ALWAYS, if you try one of our tutorials, please tag us so we can see your version! We’re @RealityDaydream on Instagram!!
Bethany
~~~~~~~~~~~~~~~~~~
THANK YOU for pinning this hankie garland tutorial!

Related:
-

It's been awhile since I've done a sewing project, and as weird as it sounds,…
-

I've had this idea in the back of my mind for quite awhile... why not…
-

We love the original wood of our library, and wanted to find a desk that…
Buntings and fabric garlands are some of my favorite things to see using up cycled textiles that will never be used for their original purpose again. If the hankie has a collectible value as so many of the signed artist hankies do, then those I have sold to those collectors over the years. I made a valance above our bathtub using two rows of hankies and trimmed with the fringe from an old bedspread. Wonderful in my shabby chic bathroom.
These obviously aren’t hankies to blow your nose with. They would have had a small piece of lambswool or powderpuff tacked into the middle, to powder your nose, & then keep to the puff clean, wrap it up in the hankie.
The thing I find a bit ironic about this post is the awareness you have of Heritage & History, but seem quite happy to chop it up.
( I recall watching an antique costume buyer from the US, buy a 1930’s lame, ( lah-may), & velvet dress, & procede to cut it up into its component partsPainful!)
I, too, have a stash of old hankies, and have been contemplating a kitchen curtain or valance for them. I love your idea! I may have to see if I can incorporate the two ideas together! Also, the green paint in the solarium is beautiful!
So, cute.. ❤️ Love, your colors in that room & the floor is just beautiful …
You purchased them and they are your’s to do with as you please. As another poster said, use them while you can – before they’re full of holes or falling apart. They were made to be used to begin with.
After cleaning out older relatives’ homes, these beautiful items that were saved and rarely used either smelled of mold, had creases that couldn’t be ironed out or were moth eaten. It makes more sense to me to enjoy them now.
I love the garland.
I feel the same way about saving a “library” of children’s books for future generations. In the 20 years they are sitting in boxes 2-3 generations of children could read and enjoy them. Save a few special ones, but spread the joy with the rest once your family no longer uses them.
We got books from older cousins that I was able to pass down to teachers for their classroom libraries when we didn’t have anyone else to “pass them down to” in the family.
Super cute use of the hankies! I love how it turned out!
And yay for girls who use up scraps! My girly loves to tape everything too!
Thanks for sharing!
Wow, I use too many exclamation points!
There’s no such thing as too many exclamation points!!!
How in the world did you think of using your hankie stash to make this adorable bunting? Genius!!! By the way, I loved the instagram story about how Nick had planned to hang the lights above the windows in the kitchen. You thought he knew and he thought you wanted…this will be a story you share forever.
This is beautiful! I love your craftiness ?