• Home
  • About
  • Tutorials
  • Recipes
  • Furniture
  • Contact
    • Contact
    • Infertility
    • Disclosure
    • Privacy Policy
  • Shop
    • Facebook
    • Instagram
    • Pinterest

Reality Daydream

The Dream is Free, The Hustle Sold Separately

  • Home
  • About
  • Tutorials
  • Recipes
  • Furniture
  • Contact
    • Contact
    • Infertility
    • Disclosure
    • Privacy Policy
  • Shop

Tutorial: Mudding Drywall {Part 3}

January 17, 2013 by Bethany Sy

Nick, here with another GREAT tutorial…!
Ok, so does anyone other than me procrastinate things to the last minute and then feel really rushed to get them done? *insert Beth laughing because it is so true*  …I am a crazy planner but oh how I procrastinate.

I got home last night and was planning to edit my video and then write the post for this morning… yeah, that didn’t happen.   I have a new respect for the time and energy that goes into a blog post! Three cheers for Beth?

So I find myself here this afternoon… editing and publishing this great tutorial for your viewing pleasure.

Let’s GO!

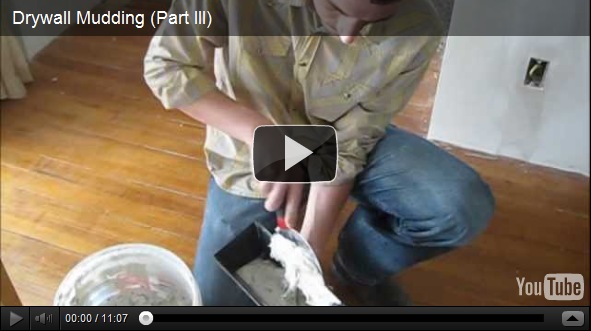
Mudding Drywall Tutorial {Part 3} by Sawdust and Embryos

Without further adieu!

Let’s recap shall we?

1st coat: rough coat;
six inch knife, filling in all the nooks and cranny’s, covering the tape, blending is not a primary concern here, but lets not get carried away kids.

Quick Sand to knock off any high spots.

2nd Coat: Blending Coat;
10 inch knife, blending the rough coat (optional 3rd coat with 12 inch knife for those stubborn areas). Don’t let small imperfections and drag marks slow you down,  we’ll get them later.

Sand, Sand, SAND!!! this will make your house very dirty. And if I was to do this all over, I would try to contain this dust better. Happy Wife, Happy Life.  The name of this game is BLENDING Baby.  This is where your skills will be perfected. Don’t be afraid to touch, feel, smell; whatever you have to do to get your blend on.

Bonus Tip: to reduce the number of imperfections you have and aide in th blending process, you can skim coat your seams using your 10” or 12” knife with a thinned mud mixture. This is actually really beneficial and doesn’t take long. Requires very little sanding

Detection and blending:
You can use either a light or a sponge or both to detect the most minor imperfections.  Using a sponge will aid in blending to previous textured surfaces and minor imperfections.  You can use a household sponge or you can buy one “designed” for drywall for a couple dollars at any home improvement store.

Finishing:
Now that your wall looks like a 2 year old drew all over it, use your mudding knife and thinned mud,  skim the area’s indicated by the previous step.  Sand to finish blending.

~~~~~~~~~~~~~~~~~~~~~~~

Just like that, you have a finished wall ready for prime!  Now go out there and show off your mad blending skills, you Master blender you…

Do you have any questions? Any upcoming projects? Projects that did not go so well? Projects you’d like to get done but can’t because like me you thrive on plans but love to procrastinate?  Don’t look at ME! I don’t know anything about that!blank - Copy (3)

Previous Video’s in this series:

Part 1

Part 2

Mudding Drywall (Part 1) Drywall Mudding Tutorial ~ Part II {Sawdust and Embryos}

Related:

  • Centerpiece Tray Tutorial
    Wooden Centerpiece Tray Tutorial

    I have a fun and easy building project for you! And while I do end…

  • DIY fabric-wrapped bulletin boards
    DIY Fabric-Covered Bulletin Tutorial

    My kids are getting to the age where they want to tape pictures, cards, notes...…

  • Make this propagation station with test tubes!
    Test Tube Propagation Station Tutorial

    I've been needing to figure out a solution for my overwhelming plant propagation situation for…

About Bethany Sy

Nick and Bethany Sy are the creative free-spirits behind DIY/Lifestyle blog, Reality Daydream. They recently purchased a historic mansion and have been documenting the ups and downs of renovation and making this home their own... all while sharing tips and tutorials along the way! When they found themselves in the trenches of infertility, they started a journey that would prove to be their most important DIY project ever, and have 3 beautiful girls to show for it. <3

« Tweaking the attic… and a new addition to the LR
GIVEAWAY! Upholstered DIY Headboard Kit! »

Comments

  1. 6

    Jacque n Matt Knowlton says

    July 27, 2013 at 12:40 am

    Nick,
    I’m prepping for a drywall project for the weekend and am glad to have found your drywall series! Watching through your tutorials was a great refresher, plus, I’m taking away some new tips that I’m looking forward to trying! Great job! -Matt

    Reply
  2. 7

    Wallpapers says

    March 11, 2013 at 4:38 am

    I have to say this post was certainly informative and contains useful content for enthusiastic visitors. I will definitely bookmark this blog for future reference and further viewing. Thanks a bunch for sharing this with us!

    Reply
  3. 8

    Anonymous says

    January 19, 2013 at 12:33 am

    Gonna show my hubby these videos when he gets home. As a drywall contractor for 30 years, I’m sure he will get a kick out of ‘release your inner mud!” I will have to ask him if he’s ever heard that term in all his years of working with drywall, joint compound and acoustic!

    Reply
  4. 9

    Jen Wilson says

    January 18, 2013 at 11:05 pm

    Ha ha, this is a PERFECT tutorial for me and couldn’t have come at a better time…after an unfortunate DIY accident last night (and OF COURSE, I took pictures of my stupidity!)

    Reply
  5. 10

    Anonymous says

    January 18, 2013 at 1:16 am

    You two are so funny! This pic and “release your inner mud” pic should totally be in your cover/ title pics! lol

    Reply
  6. 11

    Kenz @ Interiors by Kenz says

    January 17, 2013 at 10:44 pm

    Bahaha! That first picture cracked me up.

    Reply

Leave a Reply Cancel reply

Your email address will not be published. Required fields are marked *

Recipe Rating


  • Facebook
  • Instagram
  • Pinterest
  • RSS
  • YouTube
We are Nick and Bethany! Welcome to our blog, Reality Daydream where we share our DIY adventures!
Click here for lots of art projects using only wood stain on furniture!!
Please feel free to share or pin my posts! You're welcome to use ONE of my images (no collages or pinnables) with a link back to the corresponding post. Please do not edit or crop that single image in any way. Improper use of my photos, ideas or words is a violation of copyright. Thank you!

Categories

Attention: Almost any do-it-yourself project involves risk of some sort. Your tools, materials, and skills will vary, as will the conditions at your project site. Reality Daydream has made every effort to be complete and accurate in the instructions of the plans on this website. Reality Daydream will not assume any responsibility or liability for damages or losses sustained or incurred in the course of your project or in the use of the item you create. Always follow the manufacturer’s operating instructions in the use of tools, check and follow your local building codes, and observe all commonly accepted safety precautions.


Copyright © 2025 · Modern Blogger Pro On Genesis Framework · Customizations by Sweet Theory Designs · Privacy Policy · Log in