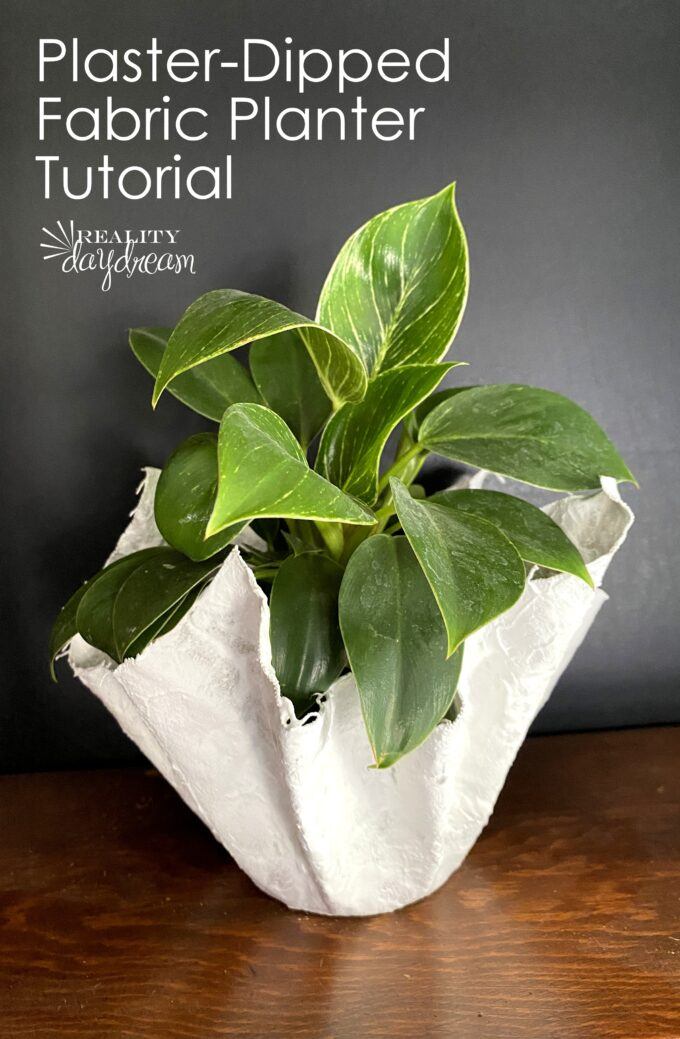
I’ve had this idea in the back of my mind for quite awhile… why not dip fabric in Plaster of Paris to make plaster-hardened fabric planters?!
I hadn’t ever used Plaster of Paris for something like this, so I played around with it a bit, and it’s so fun! I’m going to share the process with you today so you can make yourself some of these plaster-hardened fabric planters!
*This post is sponsored by our friends at DAP! Thank you for supporting the fabulous brands that make Reality Daydream possible. This post contains affiliate links.*
Plaster-Hardened Fabric Planters
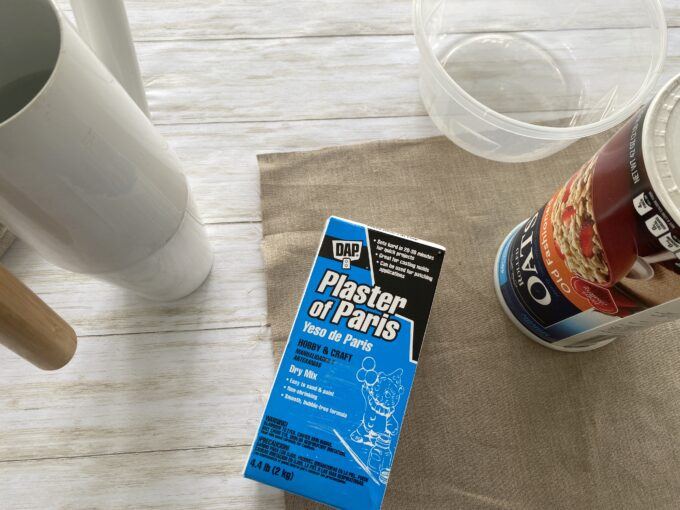
Supplies:
- Plaster of Paris
- Scraps of fabric (I used a linen-type material, but you could use just about anything!)
- Bowl for mixing (I used a disposable plastic bowl so I wouldn’t have to mess with cleaning it out)
- Empty Oatmeal container or other cylindrical container
- Plastic Spoons (one for scooping and one for stirring)
- Garbage bag or tarp to protect your surface
- Water
Gather your supplies, and let’s do this!
Start out by cutting your fabric to size. I did a few different size planters, and my fabric squares ranged from 14″x14″ to 24″x24″. If it’s wrinkly fabric, iron it!
Time to pour water into your bowl! You want to use only enough to submerge your piece of fabric fully. If you’re doing more than one of these planters at a time, you can make more.

Mix the plaster
Shovel in 4 or 5 overflowing spoonfuls of Plaster of Paris with one spoon, and stir with the other spoon. You want the consistency to be like buttermilk. Keep adding Plaster of Paris until it’s perfect!

This stuff is so fun to play around with. My head is spinning with more ideas for using Plaster of Paris! And I love that it’s so easy to clean up afterward.
Dip your fabric
Dip your cloth into the plaster mixture, fully submerging it. Pull it out and plunge it back in a few times until every inch of the cloth is saturated.

Pull your cloth out and squeeze gently, but don’t wring it out completely. You still want it to be a little drippy. Then drape it over your oatmeal container (or whatever cylinder-shaped object you’re using).
Drape it over your cylinder
I used an oatmeal container, but you could use anything! For smaller planters, you could use tin cans.

Adjust the ruffles
You can adjust the ruffles however you like! It will dry to harden however you leave it.

Let it dry
Let it dry for 3-4 hours (or overnight) and then remove the cylinder! It wont be rock hard and rigid, but hold it’s form and be dry to the touch. Gently pop a plant in there, and put it out for display!

Enjoy your plaster-hardened fabric planter!
Isn’t that so fun! I ended up doing 3 different sizes so I could have a little ‘trio’ of plants on my piano. I love it so much!

I hope you loved this tutorial, and try making one of these plaster-hardened fabric planters!
And as always, if you try out one of our project, please tag us on social media! We’re @RealityDaydream on Instagram! AND be sure to follow DAP for lots of DIY and project inspiration!
~Bethany
~~~~~~~~~~~~~~~~~~~~~~
Thanks for pinning!!

Related:
-

My kids are getting to the age where they want to tape pictures, cards, notes...…
-

These DIY Planters are perfect for cascading Wave Petunias, and it will be so fun…
-

I titled this post 'How to Propagate Pothos Plants' ...but the truth is, this method…
Love how great yours turned out. You springboarded me into thinking of other things to do. Maybe even adding colorant to the water.
This looks SO FUN!!!! A couple questions… When you water the plants does the water seep out? Do you put rocks or anything in the bottom for drainage?
Thanks for sharing!
Hi Mary! I always leave my plants in nursery pots because I like to rearrange them into different planters from time to time. So I just put one of those little plastic trays in the bottom of the plaster pot, and pop the plant in right in its nursery pot!