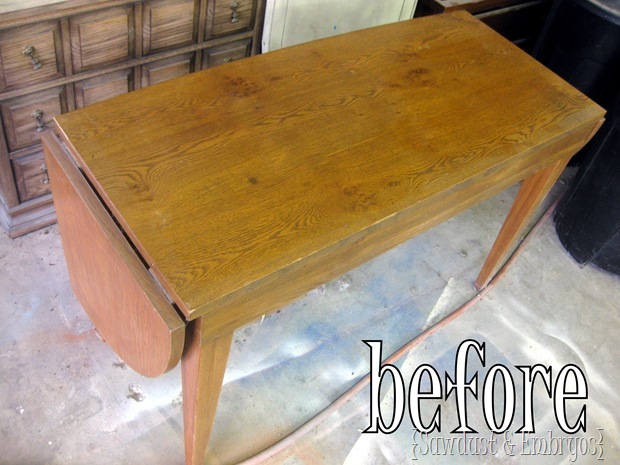
This is kinda old news, but remember how we did this little end table for Leah a few weeks ago? Well I almost forgot to post about it, but we did a drop-leaf desk for her as well! Here’s the before pic:
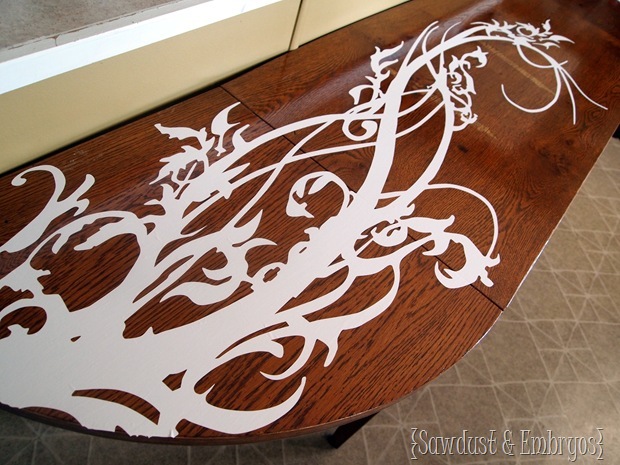
She loved this mural we painted for her friend Brenda, and wanted the same design on her desk… only with woodgrain! So we started by sanding everything down, and putting a thick coat of poly on the desk. Dana cut us a vinyl (her Etsy shop is here if you want to order a vinyl decal for this technique!), and after the poly had a good 24 hours of dry-time… we slapped that vinyl on! Looks kinda sweet just like that, eh?
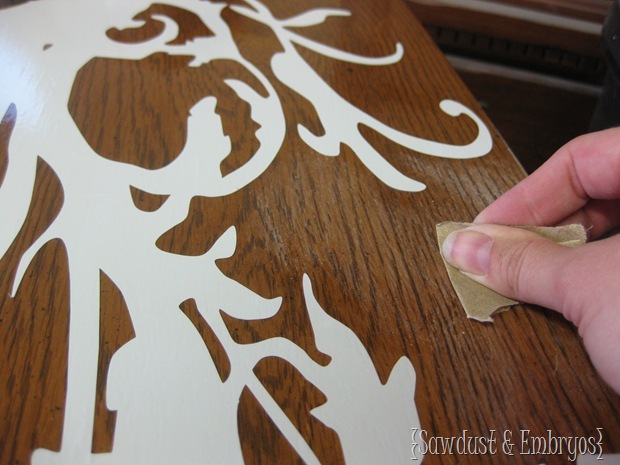
We polyed over the vinyl to seal it real good (using this stuff). And after letting that dry for about 4 hours, I took 220 grit sandpaper and sanded very lightly around the vinyl so that the paint would have something to really ‘grip’ onto. I didn’t sand BEFORE putting the vinyl on, because it would have been really hard to pull the vinyl off. And we wanted that glossy beautiful polyed woodgrain effect where the vinyl is.
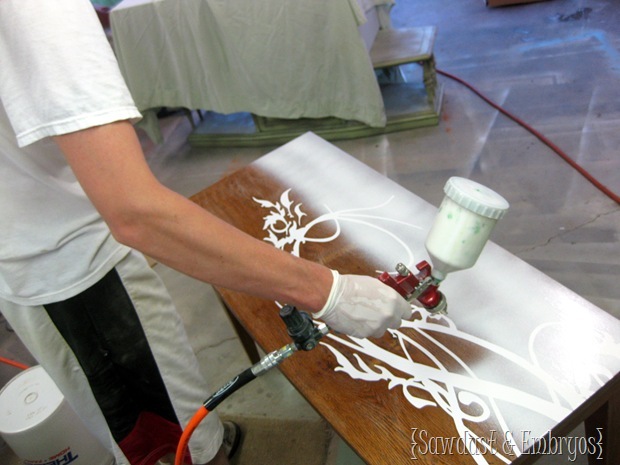
Then, we started priming over it! We using Kilz with our paint gun… but you could use spray Kilz for the same exact results.
After letting the primer dry for 1 hour, we painted with white latex paint. Can you see the raised areas where the vinyl is?
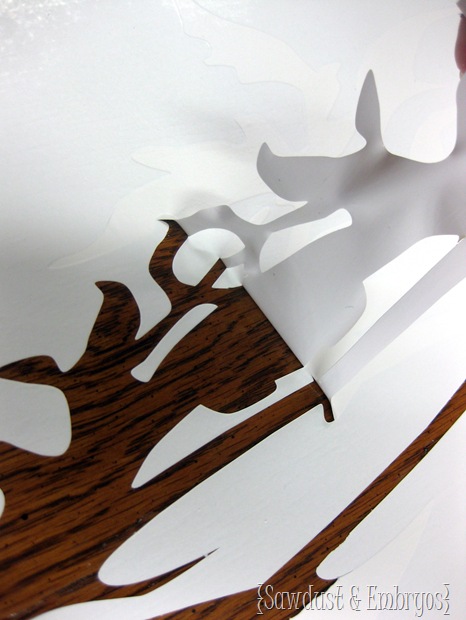
After painting, we waited about 15 minutes and started pulling off the vinyl. If you wait to let the paint dry too much, you’ll pull of paint that you don’t really want to! I use a needle to get my corners pulled up. Dana uses a special vinyl for this application. It’s less ‘sticky’ than traditional vinyl that you put on the wall, and acts more as a ‘window cling’ making it easier to pull off!
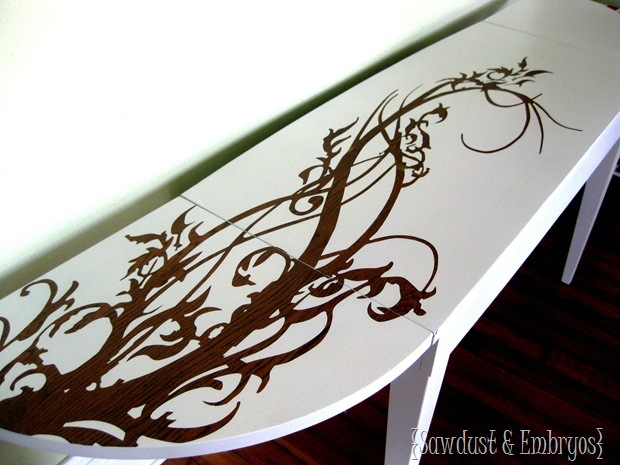
And finally, we polyed the whole thing with Minwax Polycrylic (the water-based version of polyurethane… which is clear instead of yellowish) since the table is white. Now it’s all kinds of shiny and durable!
Ain’t she purrrrty? I mean look at this killer woodgrain! And the detail is so crisp!
If you decide to give this a whirl for yourself, it’s important that you properly prepare your wood surface and don’t skip any of the following steps!
- Prepare your wood the way you want it (stain)
- Apply OIL-based Minwax Poly (and let it dry for a minimum of 24 hours)
- Slap your vinyl on, being careful to avoid any bubbles
- Apply poly AGAIN over-top the vinyl and the whole surface (this seals down the edges so paint won’t seep under) and let dry for about 4 hours
- Lightly sand the whole surface except where the vinyl is
- Prime (let dry for 1 hour)
- Paint
- Immediately start removing vinyl
- after about 24 hours, lightly sand the edges of your woodgrain design. Sometimes the paint is slightly raised there from the vinyl being pulled away
- Poly (with water-base for white furniture, or oil-base for any other color)
Let me know if you have any questions. And be sure to email me pics when you’re done! I love seeing what people come up with!
~Bethany
*this post contains affiliate links




Would you be able to do the first image of the vinyl decal over the wood piece and keep the vinyl – not peel it? Would you be able to polyurethane it, apply vinyl decal and than polycryclic over top and it remain that way? Also, if something is already polyurethaned can you paint over top of it – would an oil based paint work or would you have to sand, prime, and than paint? Thanks for your insight.
That’s a lot of questions! We don’t recommend leaving the vinyl decal and polying over it. Because of the raised edge, things could catch on it and damage the surface. Unless it was a piece of artwork that would hang on the wall.
You CAN paint over a polyed surface, but if it’s glossy I would recommend sanding it down first to cut down the sheen. If it’s a piece of furniture that’s going to get a lot of wear and tear (ie a dining table), I would sand and prime before painting.
Does this answer your questions?
Yes thank you very much for your insight!
Hi,
I love your blog, I’m learning so many tips. So thank you !
My questions are for the first steps :
– did you sand it to the bare wood, or just to make the poly stick to it?
– can you just sand it a bit, apply the vinyl and the primer, without putting the poly ?
– can you use a polycrylic, or you have to use an oil-based poly ?
Thank you !
Anne Sophie, we didn’t sand to the bare wood… just lightly sanded to rough up the existing poly so the next coat of poly would stick better. I highly recommend putting poly over the primer, because it seals down the edges of the vinyl so that you’ll have a more crisp line after you paint and pull off the vinyl. You CAN use PolyAcrylic instead of oil-based. I would just make sure it has a semi-gloss sheen to it.
Love it!
Hi,
Love your website! What type of poly do you use? brush, spray? Where do you find vinyl?
Thanks
Hi Beverly! For this piece (because it’s white) we used Minwax PolyCrylic which is water based and therefore dries completely clear… unlike Polyurethane which is oil based and dries with a yellowish tint. We used our paint sprayer to apply the poly, but you could buy the kind in a spray can if you don’t have a paint sprayer. We don’t recommend using a paint brush because it leaves brush strokes and drips. Good luck!
This is awesome! where did you get the design?
I had the design saved in a folder long before Pinterest was invented, so unfortunately I have no idea what the source is, or else I would totally be giving credit!
Thanks Beth – you are awesome!!
I love all your projects, you are such an inspiration. I have one question. Why do you poly before you put the on the vinyl? Is it so the vinyl will come off easier? Thanks 🙂
Think of the vinyl as a window cling, and the poly as the glass! Having poly there allows for a good seal between vinyl and furniture, and also makes it a lot easier when removing.
Hope this helps
Nine Red, we didn’t strip this piece first because it had a nice finish already. We did sand it lightly and poly it just to give it an extra glossy shine before we started in with the vinyl though.
Our vinyl lady’s name is Dana, and her email is dashoop@hotmail.com
WHOAH! That vinyl is AWESOME! Do you sell the vinyl decals? Also, did you strip the furniture first or just sand it? This looks great!
PRETTY!
This is awesome! Nice work!