This is a sponsored post written by me on behalf of Masonite Doors. All opinions are 100% mine.
Who’s ready for a little problem-solving today?! My brother, Josh, and his wife, Emily, have this situation going on in their master bathroom. When the door is open, they can’t open the drawer! And it’s just an awkward situation all around. Of course this is a first world problem, but if you could easily fix this by replacing the swinging door with a beautiful sliding barn door, you would RIGHT?! 😉


We gave this space a serious upgrade with Masonite’s Barn Door Kits! It comes with everything you need to install it right away! The DIY installation is quick and easy. It took us EXACTLY 90 minutes, and we’re going to walk you through the whole process!
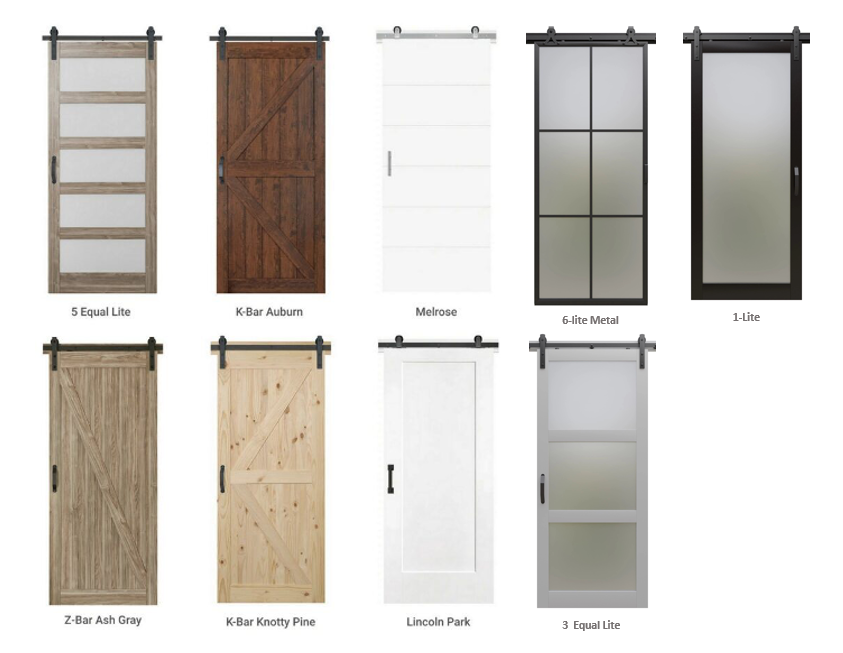
Josh and Emily chose the K-Bar Auburn Barn Door Kit, but look at all these other beautiful choices! Which one would you pick?
We started out by unpackaging and laying out all your hardware pieces.

Install the rollers onto the door with the conveniently pre-drilled holes and tighten the bolts.

Then install the anti-jump blocks. These little guys keep the door from falling off the track.

Because we are hanging this door from drywall, we will need to install a backer board. We centered the track with the backer board and marked where the track’s predrilled mounting holes are.

We then located where the backer board and track are going to mount to the wall. The centerline of the track needs to be 1 3/4″ from the height of the barn door. You may need to take off your top trim board, but ours fit fine above the trim.

You also want to find where the edge of your backer board is going to be. We went 3 inches from the edge of the door, but because the track is offset from the edge of the backer board, I would have preferred to go 4 -5 inches from the edge. This would have given us more adjustment on our slide stoppers.

Where my studs at?

No Josh, not that kind of stud.
Therrrrre you go. 🙂

We transferred the stud locations to the backer board, ensuring that none of them interfered with the track bolting locations. We predrilled where these stud screws were to go (2 per stud with a total of 10 screws), then mounted the backer board making sure it was level.


Now it’s time to drill the holes for the track that we marked earlier with a 1/4″ drill bit. We used an impact driver to mount the track and spacer, but left the lag screws loose so that we could make sure the track was level and finished tightening the lag screws with a wrench.

And for that aha moment… we put the door on the track! If you mounted your anti-jump blocks too close to the center board, you may need to remove them and reattach once the door is hung.

Lastly we installed the handle and the door track.

Tada! We’re so happy with how this turned out! And it was so easy and FUN to install!


Can you believe how gorgeous this barn door is? It’s almost like anew piece of art in their home!

Here’s a view of what it looks like from inside the bathroom.

No only did this Masonite Barn door solve a problem, it also elevates the space so much! I love the character and warmth it brings to this room.

We hope you enjoyed this transformation!
~Bethany
Related:
-

I've had this idea in the back of my mind for quite awhile... why not…
-

We love the original wood of our library, and wanted to find a desk that…
-

I have a fun and easy building project for you! And while I do end…
Wait! How do you lock it so no one accidentally opens the door while your…cough, cough…in there?
Love it!!
I love it! 90 minutes?—amazing! It adds so much to the room. And yes, you can tell you and Josh are related! 😂