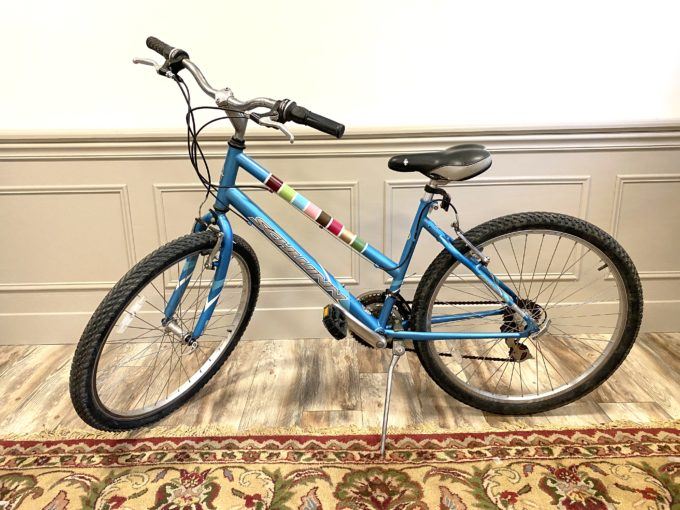
This year, for whatever reason, bikes were hard to come by. 2020, right? So when we found this used bike that was just Della’s size, we knew we needed up snatch it up… even though the color isn’t her typical girly style.

*This post contains affiliate links.*
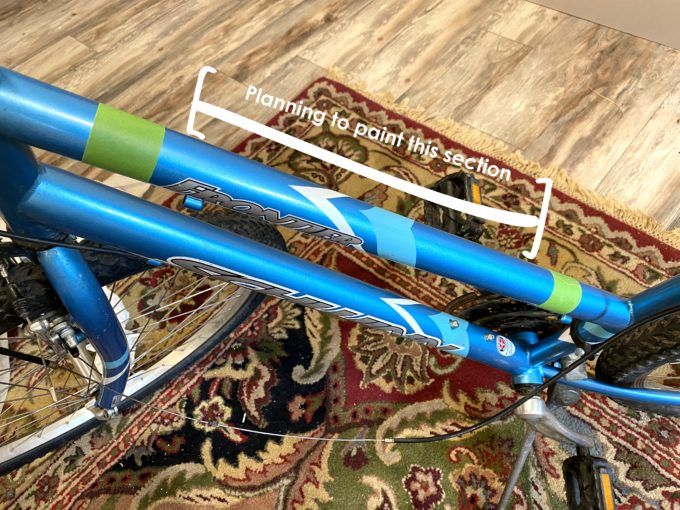
But since this was a birthday present, I wanted her eyes to really light up when she saw it. So I set my mind to customizing this bike to be just right for my girl.
I decided that she would love the teal color more if there were some other bright/happy colors involved.
STEP 1
Start out by taping off the area to be painted. See the green painters tape?
STEP 2
Sand down the area to be painted with 220 grit sandpaper.
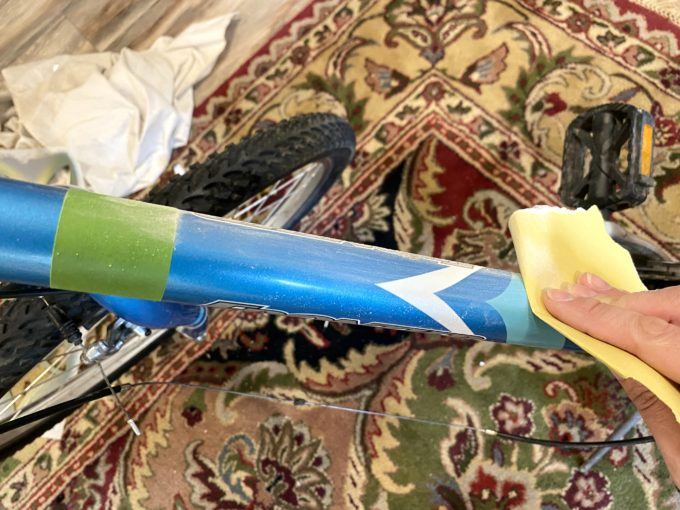
The reason we do this is because paint will not stick well to a glossy surface. By sanding it down to be more of a ‘flat’ finish, it gives it some tooth for the paint to stick and be very durable over time.
STEP 3
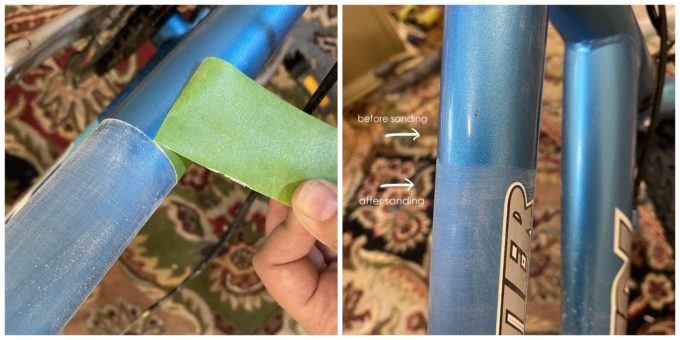
Remove the tape now. See how dull the finish is compared to the un-sanded portion??
STEP 4
Reapply painters tape! The reason we’re putting fresh painters tape on in the exact same spot is because when we sand right up to the edge of tape, it compromises the crisp edge of the tape. We want to have perfect, professional lines here!

STEP 5
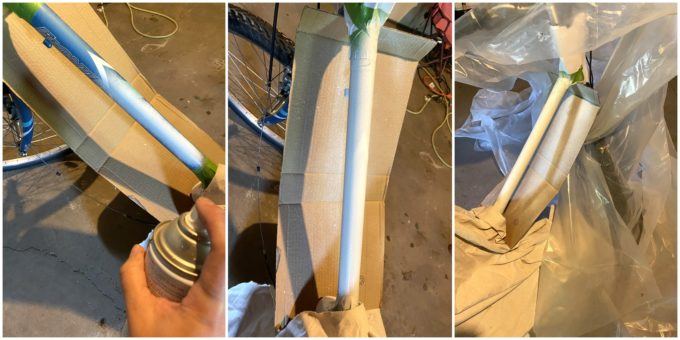
It’s time to PAIIIIINT!!! Ok technically priming is first. hehe!
I used Paint + Primer-in-one to paint this whole section white.
STEP 6
At this point, you can pretty much do whatever you want with paint! Go wild with color and pattern!
I used some 1/4″ painters tape to tape off even increments across this white section.

I just chose a mish-mash of colors (this brand) that I thought looked together.

STEP 7
Time for the fun part… LET’S PAINT! Quick and light coats are the way to go with spray paint. You want to avoid drips at all cost, so keep your can moving while you’re spraying. Multiple light coats are wayyy better than one thick coat.
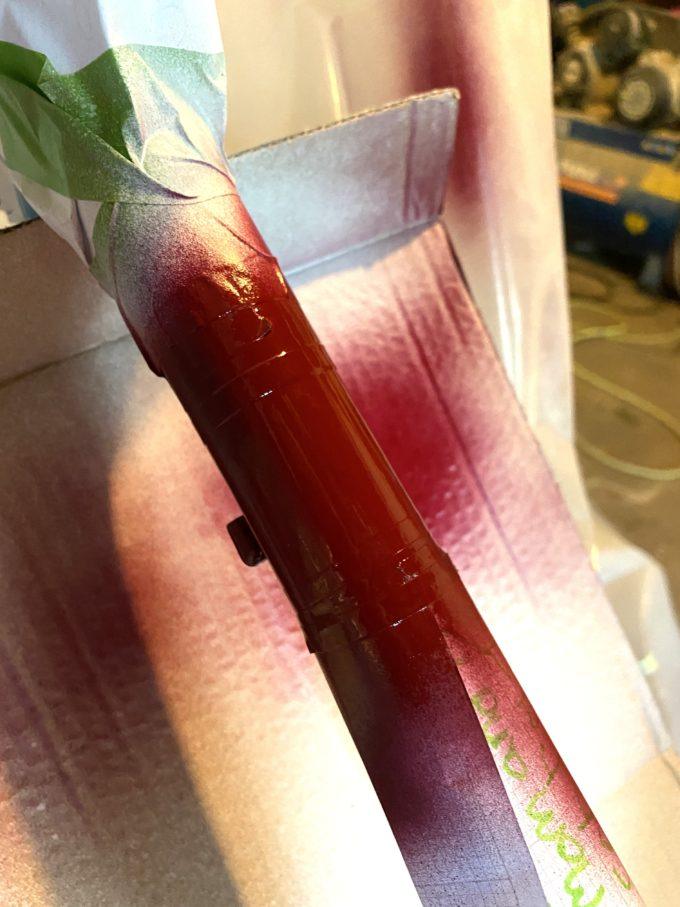
Actually, this step takes a lot of patience, because you can’t exactly just go on to the next color stripe since the previous color will still be wet for quite some time (especially if it’s a glossy finish paint).
NOTE: that reminds me, the finish doesn’t matter! It can be glossy, satin, eggshell, flat/matte. The only thing to consider is that the glossier the paint, the longer it will take to dry.
If you trust yourself to be really careful, you can tape off and paint another section that’s a few sections away from the previous one you painted.

Continue until each section is painted!!
STEP 8
Let’s take of this tape, shall we?
IS THERE ANYTHING MORE SATISFYING?!

Since spray paint is an oil-based paint, it is very durable when applied according to the instructions on the can. If you want to go the extra mile, you could mist on a clean coat of poly.
Keep in mind that oil-based polyurethane dries with a yellowish tint, so if there’s any white paint that you’res sealing, it will really compromise that crisp white. If I were going to seal Della’s bike, I would use a water-based Polycrylic spray. (don’t purchase from that link… it’s WAYYYY cheaper in the home improvement store. I just wanted to show you what the can looks like)
Contrary to popular belief, oil-based finishes and water-based finishes can be mixed on the same project, so long as the previous coat is COMPLETELY DRY.

You guys, this turned out so fun! And it gives this girls’ bike a little extra pizzazz. Don’t you think?
I hope you enjoyed this tutorial! As always, if you try one of our projects, please tag us on social media! (we’re @RealityDaydream on both Instagram and Facebook!
~Bethany
Pssssst! Click HERE to see what we made for her twin!
~~~~~~~~~~~~~~~~~~~~
Thank you for pinning!

Related:
-

Got a hole in your wall that you wish wasn't there? We do! When we…
-

Raspberry Scones Recipe
-

I've had this idea in the back of my mind for quite awhile... why not…
Thanks for this helpful information. My bike’s exterior paint is starting to peel off and I want to repaint it. So what paint should I use?
Spray paint!
Very cute. Also, I have never been able to stick to the rule of many small layers. I have no patience.